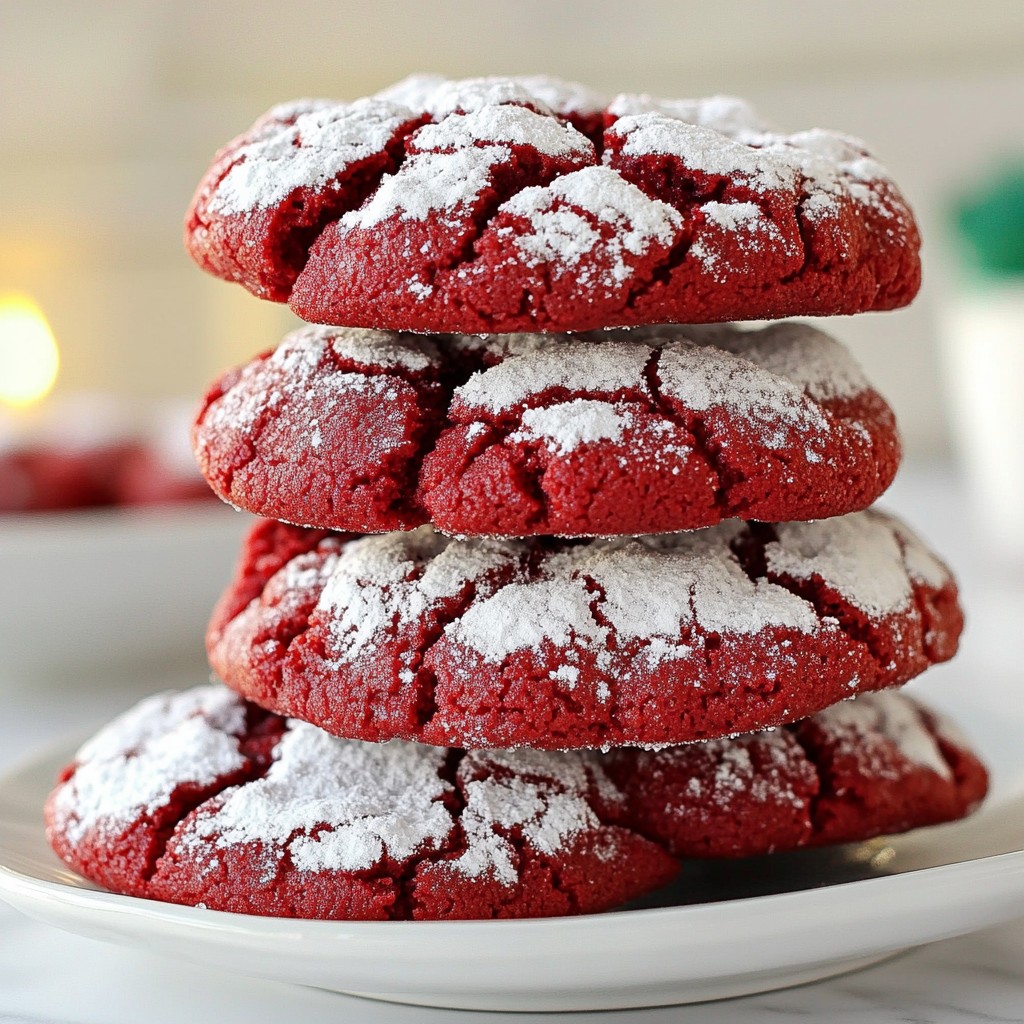
Looking to impress with a festive treat? Red velvet crinkle cookies are your answer! These easy and delicious cookies bring the rich flavor and striking color of red velvet cake right to your dessert table. With simple ingredients and step-by-step instructions, you'll create a mouthwatering delight that's perfect for any occasion. Let’s dive into this fun baking adventure and transform your kitchen into a cookie paradise!
Why I Love This Recipe
- Irresistible Flavor: The combination of rich cocoa and sweet vanilla creates a delightful and unique taste that will have everyone coming back for more.
- Beautiful Presentation: The striking red color and white powdered sugar coating make these cookies a stunning addition to any dessert platter.
- Easy to Make: This recipe is straightforward and requires minimal ingredients, making it perfect for bakers of all skill levels.
- Perfect for Any Occasion: Whether it’s a holiday gathering, birthday party, or just a treat for yourself, these cookies are always a hit!
Ingredients
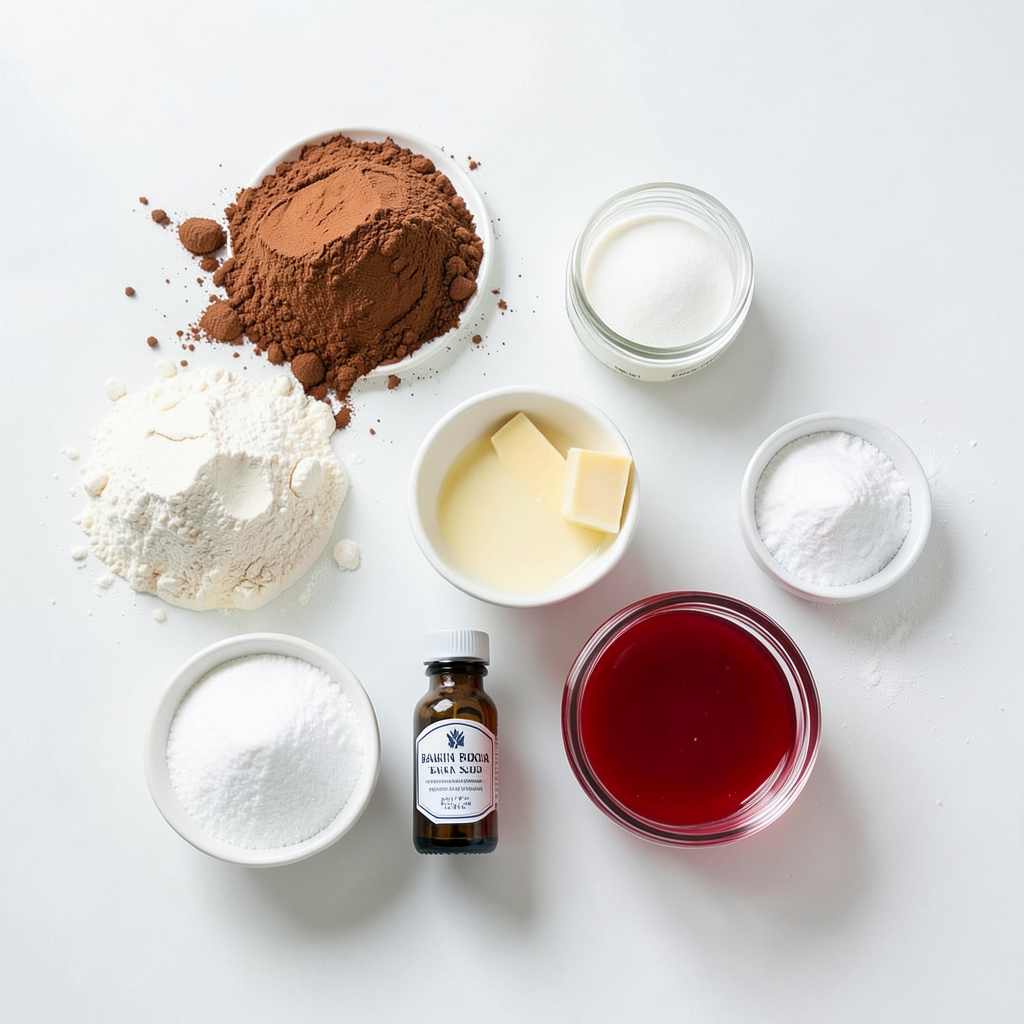
List of Ingredients
- 2 cups all-purpose flour
- 1 tablespoon unsweetened cocoa powder
- 1 teaspoon baking powder
- 1/2 teaspoon baking soda
- 1/2 teaspoon fine sea salt
- 1/2 cup unsalted butter, softened
- 1 cup granulated sugar
- 1 large egg
- 1 tablespoon red food coloring
- 1 teaspoon pure vanilla extract
- 1/2 cup powdered sugar (for coating)
Measurement and Substitutes
You can easily make these cookies gluten-free. Use a blend of gluten-free flour. For organic options, choose organic sugar and cocoa powder. These choices enhance taste and health. Organic ingredients often have richer flavors. They also support sustainable farming.
Step-by-Step Instructions
Preheat and Prepare
Start by preheating your oven to 350°F (175°C). This step helps the cookies bake evenly. While the oven heats up, line two baking sheets with parchment paper. This keeps the cookies from sticking and makes cleanup easy.
Mixing Dry Ingredients
In a medium bowl, combine 2 cups of all-purpose flour, 1 tablespoon of unsweetened cocoa powder, 1 teaspoon of baking powder, 1/2 teaspoon of baking soda, and 1/2 teaspoon of fine sea salt. Use a whisk to mix these dry ingredients together well. Set this bowl aside for later.
Creaming Wet Ingredients
In a large bowl, blend 1/2 cup of softened unsalted butter with 1 cup of granulated sugar. Use an electric mixer on medium speed for about 2-3 minutes. The mix should become light and fluffy. Next, add 1 large egg, 1 tablespoon of red food coloring, and 1 teaspoon of pure vanilla extract. Beat until everything is smooth and well mixed.
Combining Ingredients
Slowly add the dry mix to the wet mixture. Do this on low speed to keep the texture nice. Mix just until combined. Don’t overmix, as this can make your cookies tough instead of soft.
Chilling the Dough
Cover the dough and refrigerate it for at least 30 minutes. Chilling helps the dough firm up. This makes it easier to scoop and shape. Plus, it helps the cookies hold their shape while baking.
Forming and Baking Cookies
After chilling, scoop out portions of the dough with a tablespoon. Roll each piece into a ball with your hands. Next, coat each ball in 1/2 cup of powdered sugar. This gives the cookies their lovely crinkle look once baked. Place the dough balls on the lined baking sheets, spacing them about 2 inches apart.
Bake the cookies in your preheated oven for 10-12 minutes. You’ll want the edges to be set, while the centers should still look a bit soft. They will firm up as they cool. Let them rest for about 5 minutes on the baking sheet before moving them to wire racks to cool completely.
Tips & Tricks
Perfecting Texture and Flavor
To get the best texture, avoid overmixing the dough. Mix just until combined. Overmixing can make cookies tough. Use accurate measurements for each ingredient. This ensures your cookies turn out perfectly every time.
Achieving Perfect Crinkles
Rolling the dough in powdered sugar is key. Make sure to coat each ball evenly. This creates those beautiful crinkles. When baking, keep a close eye on the time. Bake just until the edges set. The centers should still be soft for the best texture.
Presentation Tips
Arrange your cookies on a lovely platter. A colorful plate can make your cookies pop. For a fun touch, dust some powdered sugar on top. Add sprinkles to make them festive and eye-catching. This adds a nice flair for any occasion.
Pro Tips
- Chill the Dough: Refrigerating the cookie dough for at least 30 minutes not only helps with the texture but also makes it easier to handle, preventing the cookies from spreading too much while baking.
- Use Quality Food Coloring: Opt for gel food coloring for a more vibrant red hue. Liquid food coloring can change the consistency of the dough and may not yield the same bright color.
- Don’t Overbake: Keep a close eye on the cookies while they bake. They should be set on the edges but still slightly soft in the center. They will firm up as they cool.
- Perfect Coating: For an even coating of powdered sugar, roll the dough balls twice in the sugar. This ensures that the crinkle effect is pronounced and visually appealing after baking.
Variations
Flavor Add-ins
You can make your red velvet crinkle cookies even more exciting with some add-ins. Chocolate chips bring a rich taste. Nuts add a nice crunch. Try mixing in a half cup of either for a yummy twist. Cream cheese swirls can also enhance the flavor. Just mix softened cream cheese with a bit of sugar and swirl it into the dough before baking.
Dietary Adjustments
If you want a vegan version, swap the egg for flaxseed meal or applesauce. Use a vegan butter substitute to keep the texture right. For those watching their sugar, use a low-sugar sweetener instead of granulated sugar. This keeps the cookies sweet without the extra calories.
Holiday-themed Variations
You can create fun holiday-themed cookies too! Add seasonal colors or sprinkles to the dough. For example, use green and red for Christmas. You can also infuse flavors for special occasions. Try peppermint for winter holidays or lemon zest for springtime. These small changes make a big difference in fun and flavor!
Storage Info
Storing Cookies
To keep your Red Velvet Crinkle Cookies fresh, store them in an airtight container. You can keep them at room temperature for up to a week. Make sure the container is cool and dry to prevent any moisture. If you have extra cookies, you can refrigerate them. Place them in a sealed bag or container. For longer storage, consider freezing the cookies. Wrap them tightly in plastic wrap, then place them in a freezer-safe bag. This method helps keep them fresh for up to three months.
Shelf Life
These cookies last about one week at room temperature. In the fridge, they can stay fresh for two weeks. When frozen, they can last three months. Signs of spoilage include a hard texture or a strange smell. If the cookies become dry or crumbly, it’s best to discard them. Always check for any unusual changes before enjoying your treats.
Reheating & Refreshing
To revive your cookies, preheat your oven to 300°F (150°C). Place the cookies on a baking sheet and heat for about 5 minutes. This method helps soften them up again. For a quick fix, you can microwave a cookie for about 10 seconds. Be careful not to overheat, as they can get tough. To keep them soft, store them with a slice of bread in the container. The bread adds moisture and helps keep the cookies fresh longer.
FAQs
What can I substitute for eggs in this recipe?
You can use several egg replacements for baking. Common options include:
- Flaxseed meal: Mix 1 tablespoon of flaxseed meal with 2.5 tablespoons of water. Let it sit for 5 minutes to thicken.
- Applesauce: Use 1/4 cup of unsweetened applesauce for one egg.
- Mashed banana: Replace one egg with 1/4 cup of mashed banana.
- Silken tofu: Blend 1/4 cup of silken tofu until smooth to replace one egg.
These substitutes work well in cookies, giving them moisture and binding power.
Can I use cake flour instead of all-purpose flour?
Yes, you can use cake flour instead of all-purpose flour. However, this change affects the texture and flavor of your cookies. Cake flour has less protein, making cookies softer and more tender. If you want a chewier cookie, stick with all-purpose flour. If you prefer a lighter texture, cake flour is a good choice.
How do I know when the cookies are done baking?
To check if your cookies are done, look for these signs:
- The edges should be set and slightly golden.
- The centers may still look soft and puffy.
- A toothpick inserted into the center should come out with a few moist crumbs.
Keep an eye on them as they bake. They continue to firm up while cooling.
Can I make the dough ahead of time?
Yes, you can make the dough ahead of time. Here are best practices for preparing in advance:
- Chill the dough: After mixing, cover and refrigerate the dough for up to 3 days.
- Freeze the dough: For longer storage, freeze the dough balls. Roll them in powdered sugar, then place them in a freezer bag. They last up to 3 months.
- Baking from frozen: If you freeze the dough, bake them directly from the freezer. Just add a couple of extra minutes to the baking time.
Making the dough ahead saves time for busy days!
This blog post covered everything you need to make delicious cookies. We talked about the ingredients and their substitutes, step-by-step instructions, and tips to improve texture and flavor. We also explored fun variations and how to store your cookies.
By following these guidelines, you can achieve great results every time. Enjoy sharing these cookies with family and friends, or even try new flavors. Happy baking!