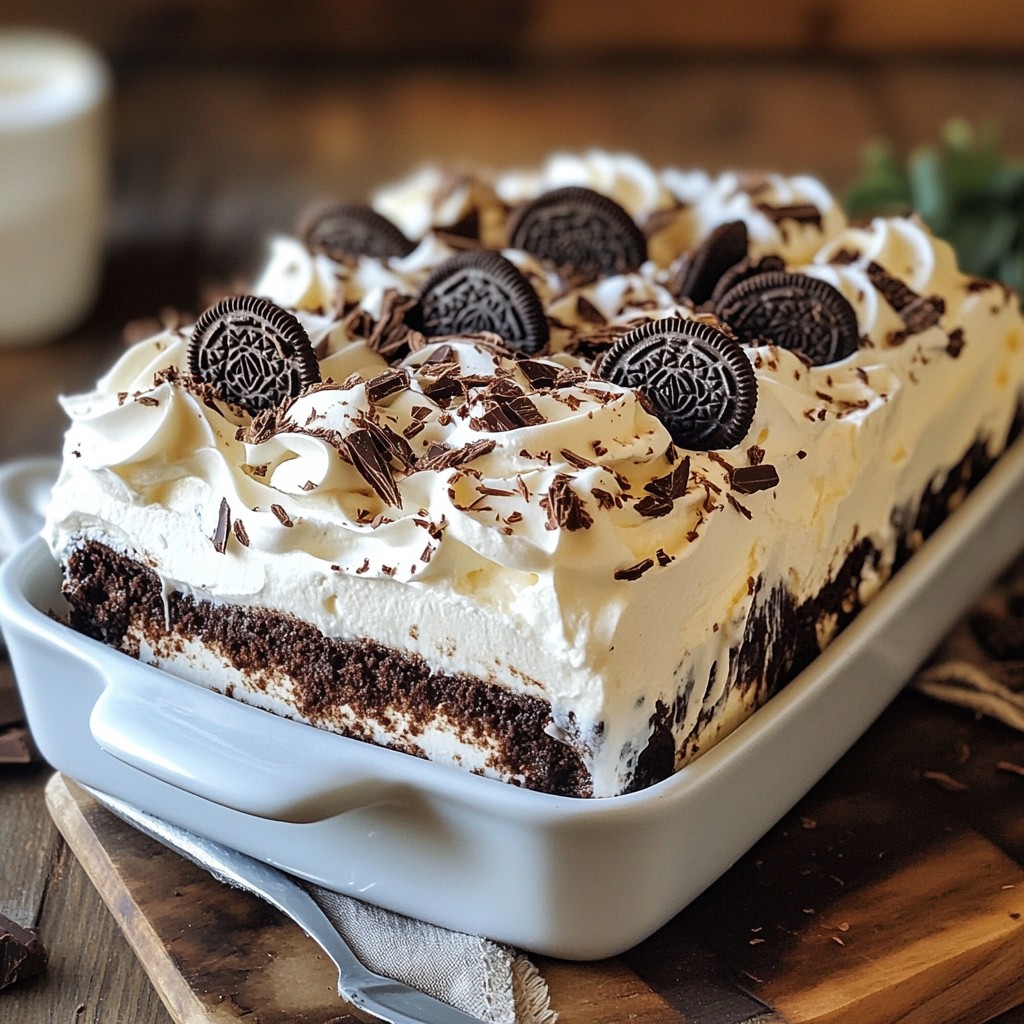
Are you ready for a dessert that’s both simple and delicious? This Mocha Oreo Icebox Cake will be your new favorite no-bake treat. With rich coffee and creamy layers of Oreos, it’s a delight for coffee lovers. No baking skills are required! Just follow my easy steps, and you’ll impress everyone at your next gathering. Let’s dive into the ingredients and get started on this delightful dessert!
Why I Love This Recipe
- Decadent Flavor: This icebox cake combines rich mocha and creamy whipped layers, making every bite a delightful indulgence.
- No-Bake Convenience: Perfect for warm days or busy schedules, this dessert requires no baking, allowing you to whip it up quickly.
- Layered Texture: The combination of crunchy Oreo cookies with smooth whipped cream creates an irresistible contrast that's hard to resist.
- Make-Ahead Delight: With a few hours of chilling time, this cake is ideal for gatherings, letting you prepare in advance and impress your guests.
Ingredients
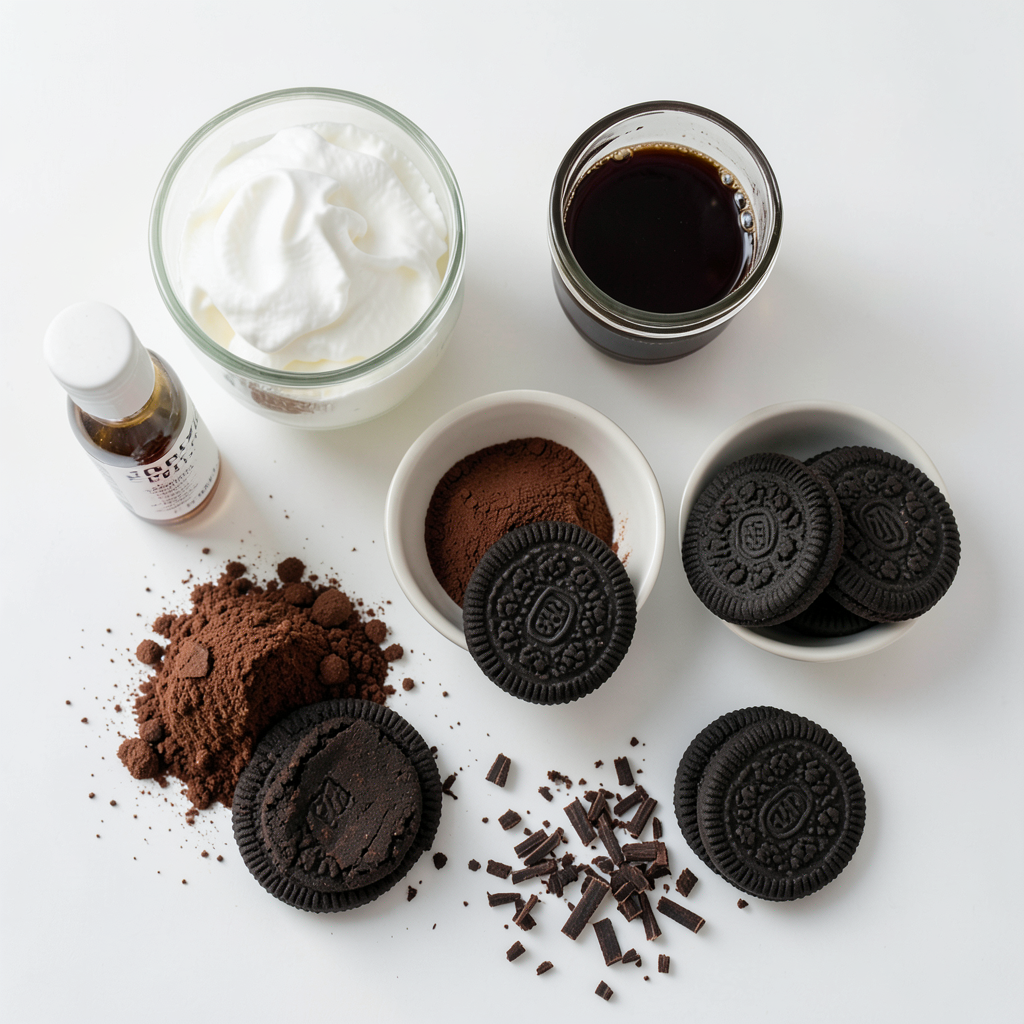
List of Ingredients
- 2 cups heavy whipping cream
- 1/2 cup powdered sugar
- 1 teaspoon vanilla extract
- 1 cup strong brewed coffee, cooled
- 1 tablespoon cocoa powder
- 24 Oreo cookies, crushed
- 10 whole Oreo cookies for layering
- Chocolate shavings or cocoa powder for garnish
Using the right ingredients makes this dessert shine. I always use heavy whipping cream for that rich taste. The powdered sugar gives just the right sweetness. Vanilla extract adds warmth and depth to the flavor. Strong brewed coffee is key; it brings out the mocha taste. Cocoa powder gives a nice chocolatey kick.
I love using Oreo cookies. They add a crunchy texture and chocolatey goodness. You need both crushed and whole Oreos for layering. The crushed cookies create a delightful crunch in every bite. Whole cookies are perfect for making layers in the cake.
To finish, I like to garnish with chocolate shavings or a light dusting of cocoa powder. This not only looks nice but also adds extra flavor. These ingredients come together to create a delicious and creamy dessert that everyone will love.
Step-by-Step Instructions
Preparing the Whipped Cream
To start, you need heavy whipping cream. Pour it into a big bowl. Use an electric mixer to whip it. Beat the cream until it thickens. Look for stiff peaks. This means the cream stands tall.
Next, add powdered sugar and vanilla extract. Mix these in slowly. Keep whipping until it's smooth and fluffy.
Coffee and Cocoa Mixture
In another bowl, combine brewed coffee and cocoa powder. Stir them together well. You want the cocoa to fully dissolve. This mix adds deep flavor to your cake.
Layering the Cake
Now, we build the cake! Dip each whole Oreo cookie in the coffee mix. Just one second should do it. We want them soaked but not falling apart.
Start with a layer of soaked Oreo cookies. Place half of them at the bottom of your dish. This is the base.
Next, gently spread half of the whipped cream on top. Use a spatula for a smooth finish.
Sprinkle half of the crushed Oreos over the cream. This adds a nice crunch.
Repeat this process with the rest of the cookies. Layer the remaining whipped cream on top. Then, finish with more crushed Oreos for texture.
Finally, add a thick layer of whipped cream on the very top. Smooth it out nicely.
For a special touch, garnish with chocolate shavings or cocoa powder. Cover the dish with plastic wrap. Chill it in the fridge for at least six hours. Overnight is even better. This helps the flavors meld and the cookies soften.
Tips & Tricks
Achieving Perfect Whipped Cream
To get great whipped cream, keep your tools cold. Place your mixing bowl and beaters in the fridge for a bit. Cold tools help the cream whip better. When you whip the cream, watch for stiff peaks. This means the cream stands tall and does not fall. If it looks fluffy and holds its shape, you did it right!
Soaking Oreo Cookies
Soak Oreo cookies quickly to avoid sogginess. Dip each cookie into the coffee mixture for just one second. This gives them the right amount of flavor without falling apart. If you want to try something new, use flavored Oreos like mint or peanut butter. They add extra taste to your cake!
Presentation Suggestions
For a pretty cake, think about how you serve it. Cut the cake into neat squares. You can add a whole Oreo cookie on top of each piece. This makes it look special. Chocolate shavings or a dusting of cocoa powder also add flair. These touches make your cake not just tasty, but also beautiful!
Pro Tips
- Use Fresh Ingredients: Always use fresh heavy cream and brewed coffee for the best flavor and texture in your icebox cake.
- Layer Wisely: Make sure to alternate between the whipped cream and crushed cookies to maintain the structural integrity of the cake.
- Chill Thoroughly: Allow the icebox cake to chill overnight if possible; this enhances the melding of flavors and ensures the cookies soften perfectly.
- Experiment with Flavors: Feel free to add a splash of flavored liqueur or different extracts to the whipped cream for a unique twist on this classic dessert.
Variations
Flavor Enhancements
You can boost the flavor of your Mocha Oreo Icebox Cake in fun ways. Try adding a splash of coffee liqueur for a rich kick. A flavored syrup, like hazelnut or caramel, can also add depth. These additions make each bite exciting.
Experimenting with different Oreo flavors is another great idea. You can use mint, peanut butter, or even birthday cake Oreos. Each flavor changes the cake's taste and makes it unique. Your friends will love trying your new creations.
Healthier Substitutes
If you're looking for lighter options, you can swap heavy cream for a lighter version. Whipped coconut cream works well too. It adds a nice twist while keeping it creamy.
You can also use sugar alternatives like honey or agave syrup. These substitutes keep the sweetness without the extra calories. For a dairy-free option, use almond cream or cashew cream for the whipped layer.
Serving Variations
When serving your cake, think about how to impress your guests. You can cut the cake into small squares for easy sharing. This way, everyone gets a taste without taking too much.
Pairing the cake with ice cream adds a fun touch. Vanilla or coffee ice cream complements the flavors well. You can also top it with fresh fruit like strawberries or raspberries. The fruity taste contrasts with the rich chocolate and coffee, creating a balanced dessert experience.
Storage Info
How to Store the Cake
To keep your Mocha Oreo Icebox Cake fresh, cover it tightly. Use plastic wrap or a lid. This keeps out air and moisture. Store it in the fridge for up to three days. After three days, the texture may change. The cookies can get too soft, which can affect the flavor.
Freezing Options
If you want to save some cake for later, you can freeze it. First, cut the cake into slices. Wrap each slice in plastic wrap. Then, place them in a freezer bag. This helps keep the cake fresh for up to three months. When you are ready to eat it, move a slice to the fridge to thaw overnight. The texture might change a bit after freezing, but it will still taste good.
Leftover Storage
You might have some ingredients left after making this cake. You can use crushed Oreos in yogurt or ice cream. They add a nice crunch and flavor. If you have some whipped cream left, use it on fruit or pancakes. You can even mix it into coffee for a sweet treat. These ideas help you enjoy every part of your Mocha Oreo Icebox Cake!
FAQs
Can I make this cake ahead of time?
Yes, you can make this cake ahead of time. This dessert tastes better when it sits. I suggest making it the day before you plan to serve it. Cover it tightly with plastic wrap for best results. This keeps it fresh and moist. The flavors blend well, making each bite even tastier.
What kind of coffee should I use?
For this cake, use strong brewed coffee. A dark roast works great. You want a bold flavor to stand up to the sweetness of the cookies and cream. Brew it fresh and let it cool before using. This helps the cocoa powder mix in smoothly.
How long does the cake need to set?
The cake needs to chill for at least six hours. For the best taste, let it sit overnight. This gives the cookies time to soften and absorb the flavors. The longer it chills, the better it gets. You will love the creamy texture!
Can I use low-fat ingredients?
Yes, you can use low-fat options. Try low-fat cream or reduced sugar. The cake will still taste great. Just remember, the texture might change a bit. It's a good way to enjoy dessert with fewer calories.
This blog post covers how to make a delicious Oreo cake with whipped cream and coffee. You learned about the key ingredients, step-by-step instructions, and useful tips. I shared various flavor enhancements and healthier substitutes too. Remember to store your cake properly to keep it fresh. With these easy steps and ideas, you can make a tasty treat for any occasion. Enjoy your baking and impress your friends and family with this delightful dessert!