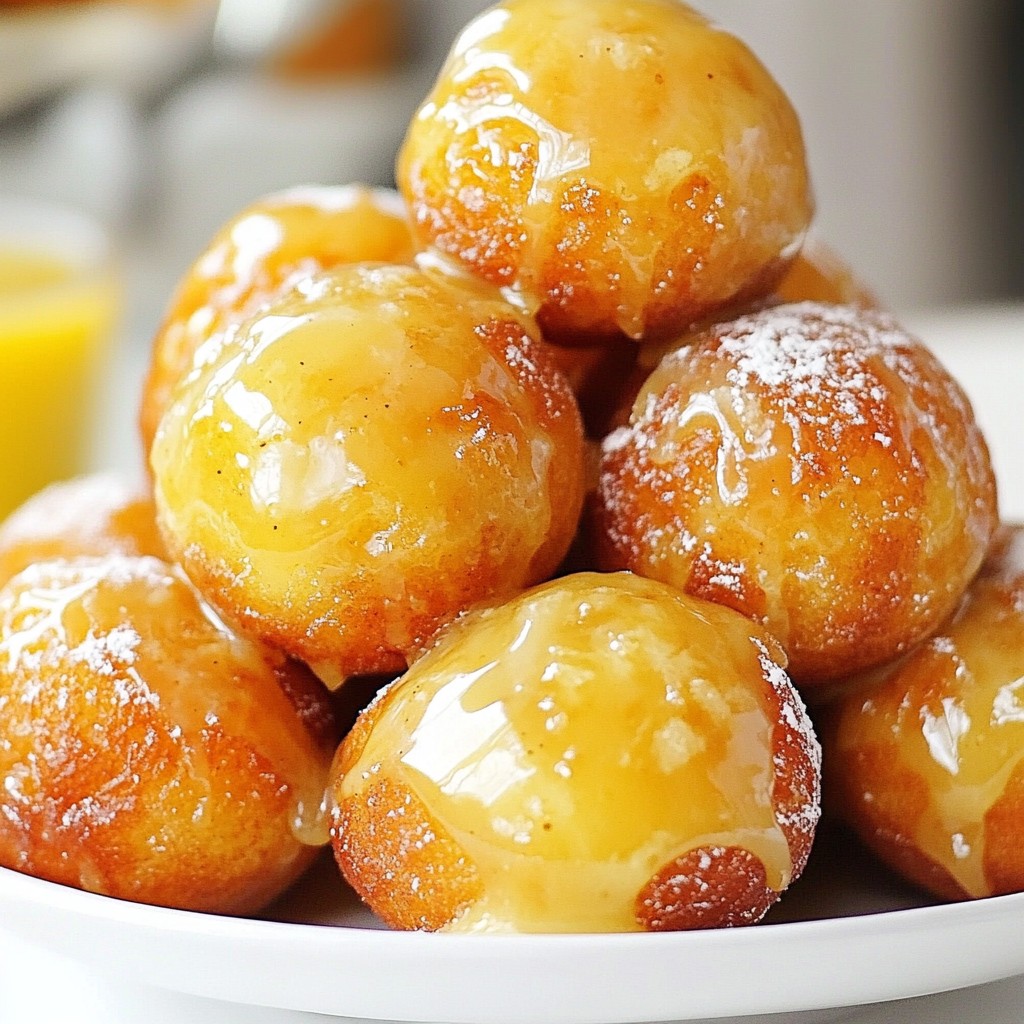
Craving a sweet treat that’s both simple and delicious? Look no further! These Maple Glazed Donut Holes are easy to make and pack a flavor punch. With a few basic ingredients, you can whip up these fluffy bites in no time. Join me as we explore the steps to donut perfection, from mixing the dough to frying these delightful treats. Your taste buds will thank you for this scrumptious recipe!
Why I Love This Recipe
- Deliciously Sweet: The maple glaze adds a rich sweetness that perfectly complements the warm, spiced donut holes.
- Easy to Make: This recipe requires simple ingredients and quick preparation, making it perfect for any skill level in the kitchen.
- Perfect for Any Occasion: Whether it’s a cozy brunch or a festive gathering, these donut holes are sure to impress your guests.
- Customizable: You can easily adjust the spices or add toppings to personalize these donut holes to your taste!
Ingredients
List of Ingredients for Maple Glazed Donut Holes
To make these tasty donut holes, gather these ingredients:
- 1 cup all-purpose flour
- 1/4 cup granulated sugar
- 1 tablespoon baking powder
- 1/4 teaspoon salt
- 1/2 teaspoon ground cinnamon
- 1/4 teaspoon ground nutmeg
- 1/4 cup milk (whole or 2%)
- 1 large egg
- 2 tablespoons unsalted butter, melted and slightly cooled
- 1 teaspoon pure vanilla extract
- Vegetable oil, for frying
Ingredients for Maple Glaze
For the sweet maple glaze, you will need:
- 1 cup powdered sugar
- 2-3 tablespoons pure maple syrup
- 1 tablespoon milk (add more if needed for desired thickness)
Kitchen Tools and Equipment Needed
You will need a few tools for this recipe:
- Large mixing bowl
- Whisk
- Slotted spoon
- Deep frying pan or heavy-bottomed pot
- Cooking thermometer
- Cookie scoop or tablespoon
- Paper towels for draining
- Cooling rack or plate for setting glazed donut holes
These ingredients and tools are key to making your maple glazed donut holes. Each item plays an important role in creating a sweet and fluffy treat.

Step-by-Step Instructions
Preparing the Dry Ingredients
First, gather your dry ingredients. In a large bowl, mix together:
- 1 cup all-purpose flour
- 1/4 cup granulated sugar
- 1 tablespoon baking powder
- 1/4 teaspoon salt
- 1/2 teaspoon ground cinnamon
- 1/4 teaspoon ground nutmeg
Whisk these together until they are fluffy and well combined. This step helps to aerate the flour and ensures an even texture in your donut holes. Make sure no lumps remain.
Mixing the Wet Ingredients
Now, let’s move to the wet ingredients. In a separate bowl, combine:
- 1/4 cup milk (whole or 2%)
- 1 large egg
- 2 tablespoons unsalted butter, melted and slightly cooled
- 1 teaspoon pure vanilla extract
Whisk these together until the mixture is smooth and uniform. It’s important that the melted butter is not too hot, or it could cook the egg.
Combining Wet and Dry Mixtures
Carefully pour the wet mixture into the dry ingredients. Use a spatula or wooden spoon to stir gently. Mix until just combined; don’t over-mix, as this can make the donut holes tough. You want a thick batter that holds together but still has some lumps. This ensures your donut holes will be light and fluffy.
Frying the Donut Holes
Preparing the Oil for Frying
Start by choosing a heavy pot or deep frying pan. Pour in enough vegetable oil to fill it about 2-3 inches deep. Heat the oil on medium until it reaches 350°F (175°C). Use a thermometer for the best results. This step is crucial, as oil that is too cool will make soggy donut holes. If it's too hot, your treats may burn.
Frying Techniques for Perfect Donut Holes
Once the oil is ready, use a small cookie scoop or tablespoon. Carefully drop rounded tablespoonfuls of batter into the hot oil. Fry only 4-5 donut holes at a time. This way, they have enough space to float and cook evenly. Fry them for 3-4 minutes, turning occasionally. You want them to be golden brown all around. Keep an eye on them to prevent burning.
Draining the Oil Properly
After frying, it’s time to remove the donut holes. Use a slotted spoon to scoop them out. Place them on a plate lined with paper towels. The towels will soak up the extra oil. This step is important to keep your donut holes light and fluffy. Let them cool for a few minutes before glazing them. Enjoy the delightful smell of freshly fried treats!
Pro Tips
- Use a Candy Thermometer: Ensure the oil temperature stays at 350°F (175°C) for perfectly cooked donut holes. If the temperature is too low, they will absorb excess oil; too high, and they will burn quickly.
- Don’t Overmix the Batter: Stir the batter until just combined to keep your donut holes light and fluffy. Overmixing can lead to a denser texture.
- Let the Glaze Set: After glazing, allow the donuts to sit for a few minutes before serving. This helps the glaze firm up and makes for a neater presentation.
- Experiment with Flavors: Feel free to add different spices like cardamom or lemon zest to the batter for a unique twist. You can also try flavored extracts in the glaze for added complexity.
Tips & Tricks
Best Practices for Achieving Fluffy Donut Holes
To make your donut holes light and fluffy, follow these tips:
- Do not over-mix the batter. Stir just until combined.
- Use fresh ingredients, especially baking powder. Old baking powder may not rise well.
- Allow the batter to rest for about 10 minutes. This helps the gluten relax.
How to Perfect the Maple Glaze Consistency
The glaze should be smooth and easy to drizzle. Here’s how:
- Start with 1 cup of powdered sugar.
- Add 2-3 tablespoons of maple syrup.
- Mix in 1 tablespoon of milk and adjust as needed.
- If it’s too thick, add more milk, one drop at a time. If it’s too thin, add more powdered sugar.
Presentation Tips for Serving Donut Holes
Make your donut holes look as good as they taste:
- Use a pretty serving plate to showcase the donut holes.
- Drizzle extra maple glaze on top for a special touch.
- Sprinkle with chopped nuts or powdered sugar for a nice finish.
- Arrange them in a pyramid shape for added visual appeal.
Variations
Alternative Glazes and Toppings
You can switch up the glaze for fun. Try chocolate or vanilla icing instead. A simple powdered sugar glaze works well too. You can also sprinkle crushed nuts on top for crunch. Coconut flakes add a nice touch. For a fruity twist, use a raspberry or lemon glaze. These options let you explore different tastes and textures.
Flavor Variations Using Spices and Add-ins
Add more flavor to your donut holes with spices. Try a pinch of cardamom for warmth. You can also mix in mini chocolate chips for sweetness. If you love fruit, add some finely chopped apples or pears. This will keep the donut holes moist and tasty. Also, adding a dash of ginger can give a nice kick.
Baking Option for Healthier Donut Holes
If frying isn’t your thing, you can bake these donut holes. Preheat your oven to 350°F (175°C) and line a muffin tin with paper cups. Fill each cup with the batter about halfway. Bake for 12-15 minutes until they are golden. This method gives you a lighter treat while still being delicious. You can glaze them just like the fried version. Enjoy the same great taste with fewer calories.
FAQs
How do you store leftover donut holes?
Store leftover donut holes in an airtight container. Keep them at room temperature for up to two days. If you want to keep them longer, store them in the fridge for up to a week. They may lose some softness when cold but still taste great.
Can I make the donut holes ahead of time?
Yes, you can make the donut holes ahead of time. Fry them and let them cool completely. After that, store them in an airtight container. You can also freeze them for up to three months. Just remember to glaze them after you reheat.
What is the best way to reheat donut holes?
To reheat donut holes, place them on a microwave-safe plate. Heat them for about 10-15 seconds. If you prefer a crispy outer layer, heat them in the oven at 350°F for about five minutes. This way, they will taste fresh again!
You learned how to make delicious maple glazed donut holes. We covered the key ingredients, step-by-step instructions, and helpful tips for frying your treats. I highlighted variations to suit different tastes and answered common questions to make this easier.
As you try this recipe, remember that practice makes perfect. Enjoy your baking journey and share these delightful bites with friends and family!