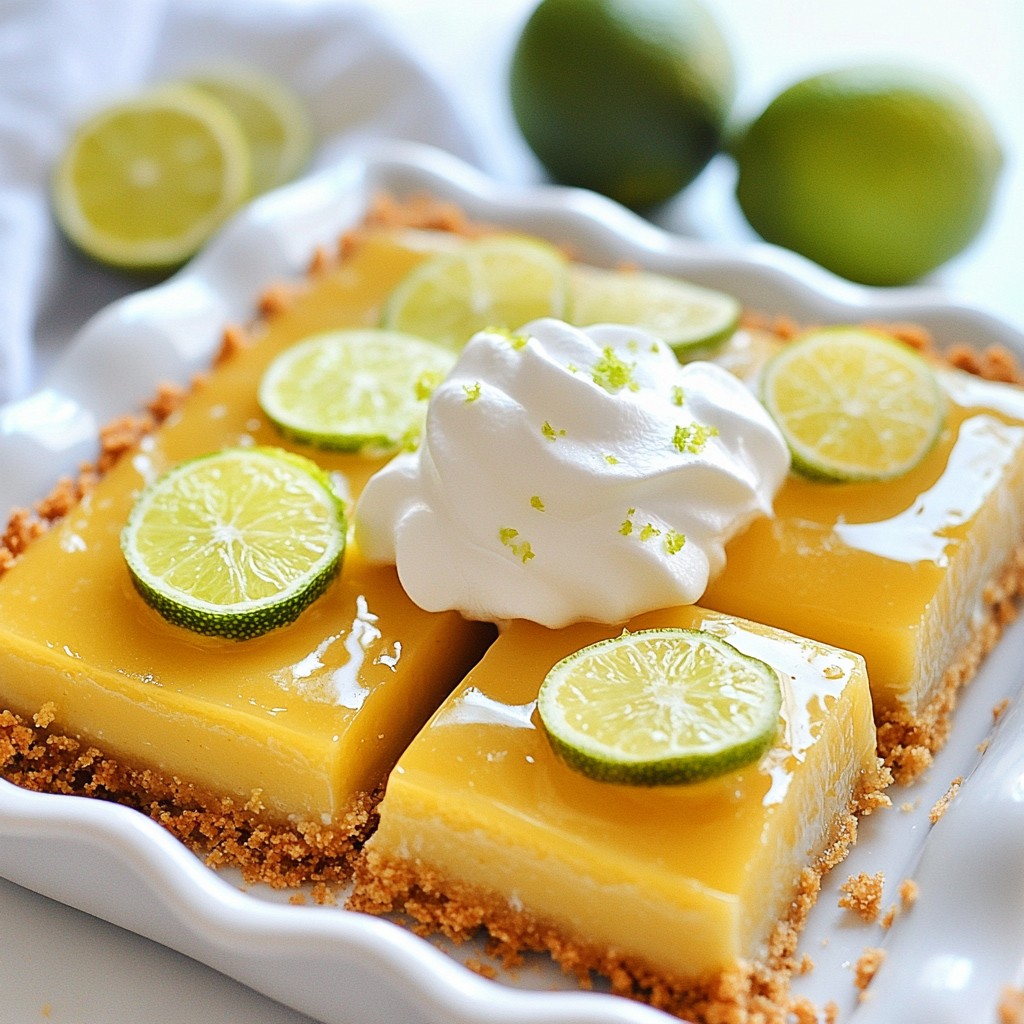
Looking for a simple yet delicious treat? These Key Lime Pie Bars are your answer! Tart, sweet, and oh-so-refreshing, they make the perfect dessert for any occasion. I’ll guide you through every step, from choosing fresh ingredients to serving tips that will impress your guests. Let’s dive into this easy recipe that brings the taste of summer right to your kitchen!
Why I Love This Recipe
- Refreshing Flavor: The zesty key lime filling offers a perfect balance of tartness and sweetness, making each bite a delightful experience.
- Easy to Make: With simple ingredients and straightforward steps, these bars can be whipped up quickly, perfect for both beginners and seasoned bakers.
- Perfect for Any Occasion: Whether it's a summer gathering or a holiday celebration, these key lime pie bars are always a hit and add a touch of sunshine to any dessert table.
- Make-Ahead Treat: These bars can be made in advance and stored in the fridge, making them an ideal dessert for busy hosts or meal preppers.
Ingredients
Detailed List of Ingredients
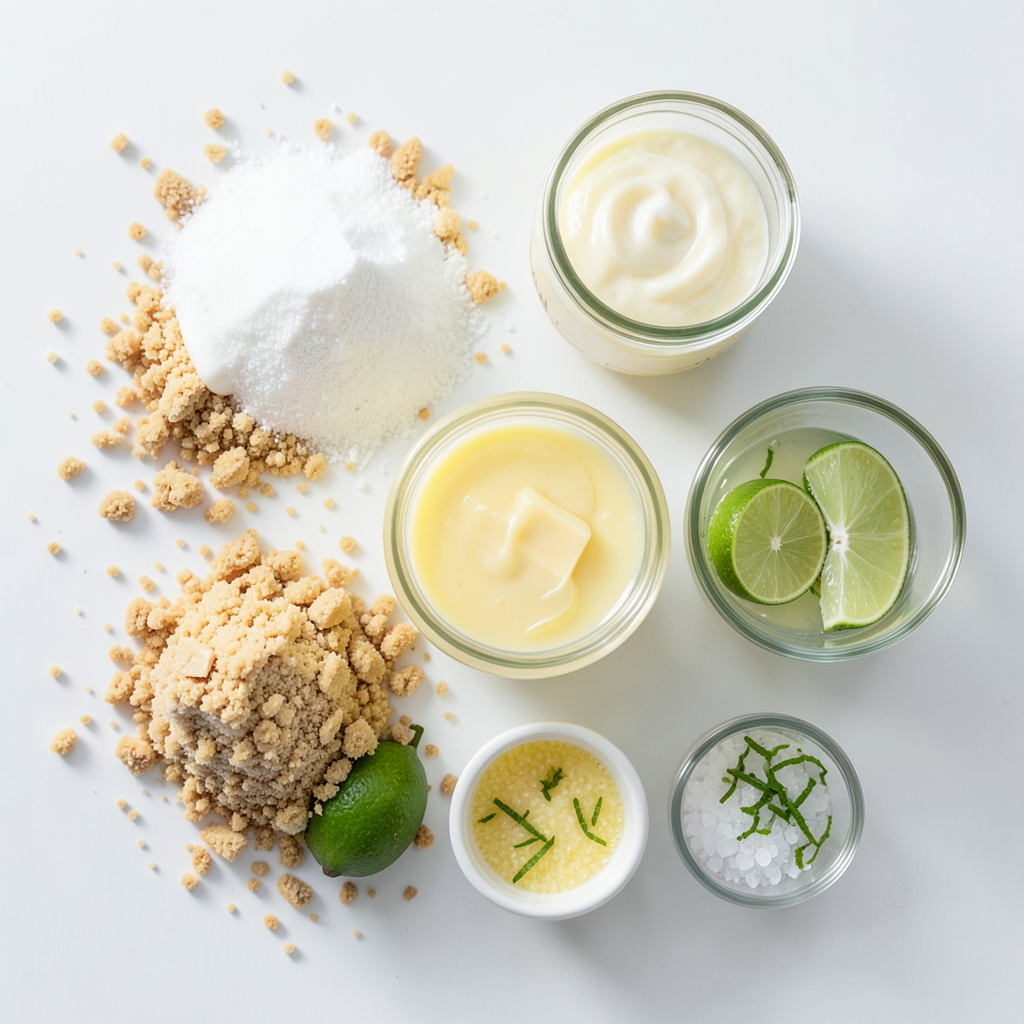
To make the best key lime pie bars, gather these simple ingredients:
- 1 ½ cups graham cracker crumbs
- ½ cup unsalted butter, melted
- ⅓ cup granulated sugar
- 1 can (14 oz) sweetened condensed milk
- ½ cup freshly squeezed key lime juice (or regular lime juice)
- 3 large egg yolks
- Zest of 2 limes
- A pinch of sea salt
- Whipped cream, for serving (optional)
- Thin lime slices, for garnish (optional)
Ingredient Substitutes
You can swap some ingredients if needed:
- Use crushed digestive biscuits instead of graham crackers for a different flavor.
- Coconut oil can replace unsalted butter for a dairy-free option.
- For the sweetened condensed milk, try coconut milk for a lighter taste.
- If you do not have fresh key limes, regular limes work well too.
- You can omit the egg yolks and use a vegan egg substitute if desired.
Importance of Fresh Ingredients
Fresh ingredients make a big difference in flavor.
- Freshly squeezed key lime juice gives a bright, tart taste.
- Lime zest adds a burst of citrus aroma that enhances the bars.
- Using fresh ingredients ensures your dessert tastes its very best.
When you choose quality, your key lime pie bars will shine.
Step-by-Step Instructions
Preparation of the Baking Dish
Start by preheating your oven to 350°F (175°C). Grab an 8x8 inch baking dish. Line it with parchment paper. Make sure the paper hangs over the sides. This helps you lift out the bars later.
How to Make the Crust
In a medium bowl, mix together the graham cracker crumbs, melted butter, and granulated sugar. Stir until it feels crumbly and well combined. Press this mixture firmly into the bottom of the lined baking dish. Make sure it’s even for a solid crust.
Baking Instructions for the Crust
Put the crust in the preheated oven. Bake it for about 10 minutes. Look for a light golden color. Once done, take it out and let it cool for a few minutes.
Preparing the Lime Filling
In a large mixing bowl, whisk the sweetened condensed milk with fresh key lime juice. Add the egg yolks, lime zest, and a pinch of sea salt. Mix until the filling is smooth and creamy. This adds a zesty punch to your bars.
Combining and Baking the Bars
Pour the lime filling over your cooled crust. Spread it out evenly with a spatula. Place the dish back in the oven. Bake for another 15 to 20 minutes. The filling should be set but still have a slight jiggle in the center.
Cooling and Chilling Process
After baking, take the dish out of the oven. Let it cool on the counter for about 30 minutes. Once cooled, put it in the fridge. Chill for at least 2 hours. This helps the bars firm up and makes them easier to cut.
Serving Suggestions
When ready to serve, lift the bars out using the parchment paper. Cut them into squares. You can top each square with whipped cream. Adding thin lime slices makes a lovely garnish. Enjoy your zesty treat!
Tips & Tricks
Best Practices for Achieving Perfect Consistency
To get the right texture, use fresh key lime juice. Fresh juice gives a bright taste and smooth filling. Mix the sweetened condensed milk and egg yolks well. This helps avoid lumps. When you bake the filling, a slight jiggle in the center means it's done. Cool it at room temperature before chilling. This step helps it set perfectly.
How to Avoid Cracks in the Filling
Cracks can form if the filling bakes too long. Keep an eye on it during baking. Remove it when the center still jiggles slightly. Also, avoid over-mixing the filling. Too much air can cause cracks as it cools. Let the bars cool slowly at room temperature. This helps prevent sudden temperature changes that lead to cracks.
Recommendations for Serving and Pairing
Serve your bars chilled for the best flavor. Top with a dollop of whipped cream for creaminess. Thin lime slices add a nice touch for garnish. Pair these bars with a glass of iced tea or lemonade. The tartness of the dessert goes well with these drinks. Enjoy them at summer parties or family gatherings.
Pro Tips
- Use Fresh Key Limes: For the best flavor, use fresh key limes instead of bottled juice. Fresh juice gives the bars a vibrant and authentic taste.
- Chill Thoroughly: Allow the bars to chill for at least 2 hours. This step is crucial for achieving the perfect texture and making them easier to cut.
- Perfecting the Crust: Ensure the graham cracker crust is pressed firmly into the baking dish. This will help it hold its shape when cutting the bars.
- Garnish for Presentation: When serving, add a dollop of whipped cream and a slice of lime on top for a beautiful and appetizing presentation.
Variations
Flavor Variations (e.g., Raspberry Key Lime Bars)
You can switch up the flavor of your key lime pie bars. One fun idea is to add raspberries. Just mash fresh raspberries and mix them with the lime filling. This gives a sweet and tart taste. You can also try strawberries or blueberries for a new twist. Each berry adds its own unique flavor. These variations make every bite exciting.
Gluten-Free Option for the Crust
If you need a gluten-free option, use almond flour instead of graham cracker crumbs. Mix the almond flour with melted butter and a bit of sugar. Press this mixture into your baking dish just like the original crust. This substitution keeps the bars tasty and friendly for those avoiding gluten.
Alternate Toppings and Garnishes
Toppings can change the look and taste of your bars. You can use whipped cream for a rich touch. Thin lime slices make a bright garnish. For a fun twist, try adding toasted coconut or crushed nuts on top. These toppings add texture and flavor, making your key lime pie bars even more delightful.
Storage Info
Proper Storage Techniques
Store your Key Lime Pie Bars in an airtight container. This keeps them fresh and tasty. You can place parchment paper between layers to prevent sticking. If you want to take them somewhere, use a sturdy container with a lid.
How Long Do Key Lime Pie Bars Last?
When stored properly, these bars last about 5 to 7 days in the fridge. The filling stays tangy and delicious for a week. Just remember to cover them well to avoid drying out.
Freezing Instructions
You can freeze Key Lime Pie Bars for up to three months. First, cut them into squares. Wrap each square tightly in plastic wrap. Then, place them in a freezer-safe bag or container. When you want to enjoy them, thaw them in the fridge overnight. Enjoy the same great taste even after freezing!
FAQs
What is the best way to juice key limes?
To juice key limes, roll them on a hard surface. This helps to break down the membranes inside. Then, cut them in half and use a juicer or your hands to squeeze out the juice. Fresh juice gives the best flavor and tartness. If you can’t find key limes, regular limes work too.
Can I make Key Lime Pie Bars ahead of time?
Yes, you can make these bars ahead of time. Just prepare them and chill in the fridge. They taste great when made a day in advance. This allows the flavors to meld together nicely. Just cut and serve when you are ready.
Is there a difference between key lime juice and regular lime juice?
Yes, there is a difference. Key lime juice is more tart and has a unique flavor. Regular lime juice is milder and sweeter. Key limes are smaller and have a thinner skin. Using key lime juice gives your bars that true key lime taste.
How do I know when the filling is done baking?
The filling is done when it is set but still has a slight jiggle in the center. It should not look runny. When you take it out, let it cool before chilling. This helps to firm up the filling fully.
Can I use a different type of crust?
Absolutely! You can use a cookie crust or even a nut-based crust. If you want a gluten-free option, almond flour works well. Just make sure the crust is firm to hold the filling. Each type of crust adds its own flavor and texture.
In this post, we explored key lime pie bars from start to finish. We covered the right ingredients and their substitutes. We shared step-by-step baking tips and tricks to get perfect results. Fresh ingredients make a big difference in taste. You can also tweak flavors or go gluten-free. Remember to store your bars properly for the best enjoyment. With this guide, you can create a delightful treat everyone will love. Enjoy your baking journey and savor every bite of your delicious key lime pie bars!