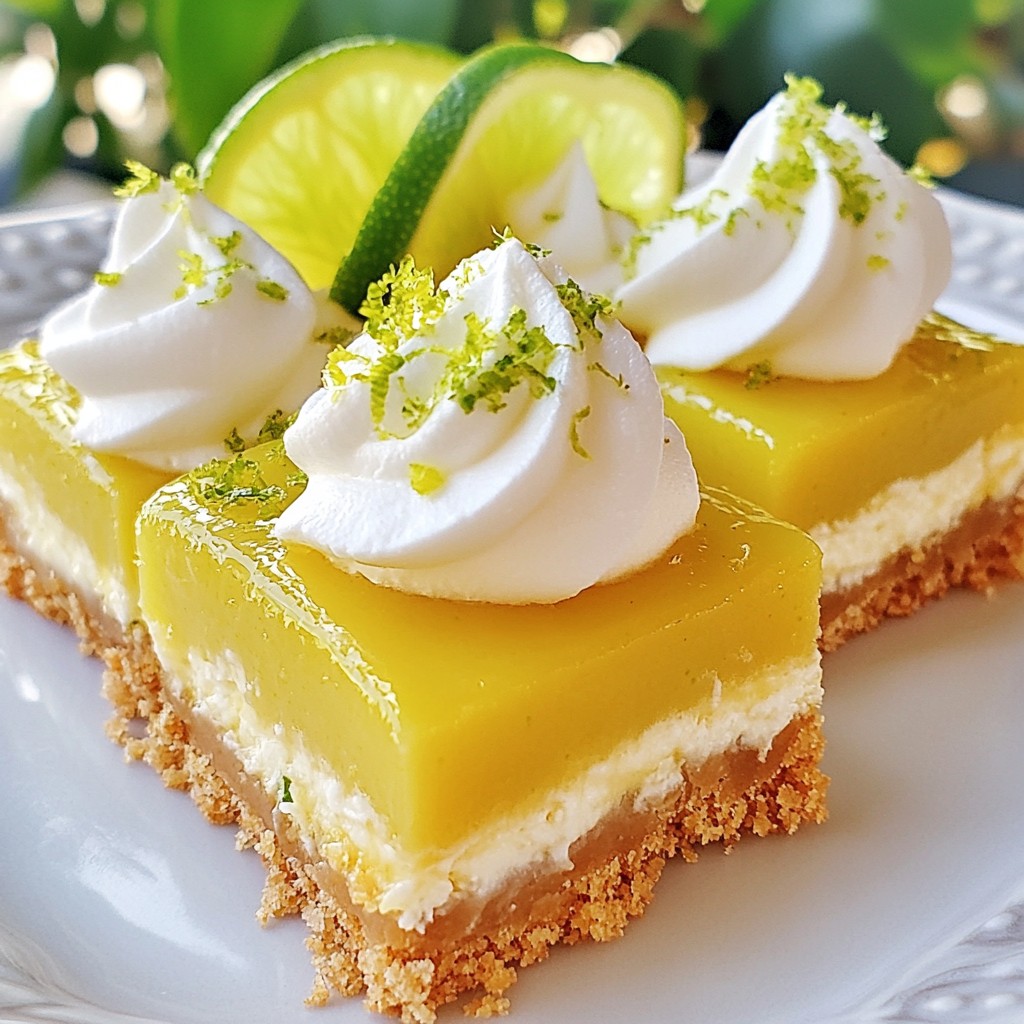
If you crave a sweet and tangy treat, Key Lime Pie Bars are the perfect solution! These easy-to-make bars combine a buttery crust with a creamy lime filling. Whether you need a refreshing dessert for a gathering or a simple after-meal delight, I'll guide you through every step. Let’s whip up these delicious bars and enjoy a taste of sunshine in every bite!
Why I Love This Recipe
- Bright and Refreshing Flavor: The combination of key lime juice and zest creates a tangy, refreshing taste that is perfect for warm weather or any time you need a citrus pick-me-up.
- Easy to Prepare: With simple ingredients and straightforward steps, these bars are quick to make, making them a great choice for both novice and experienced bakers.
- Perfect for Sharing: Cut them into squares and serve at parties, barbecues, or family gatherings—everyone will love these delightful treats!
Ingredients
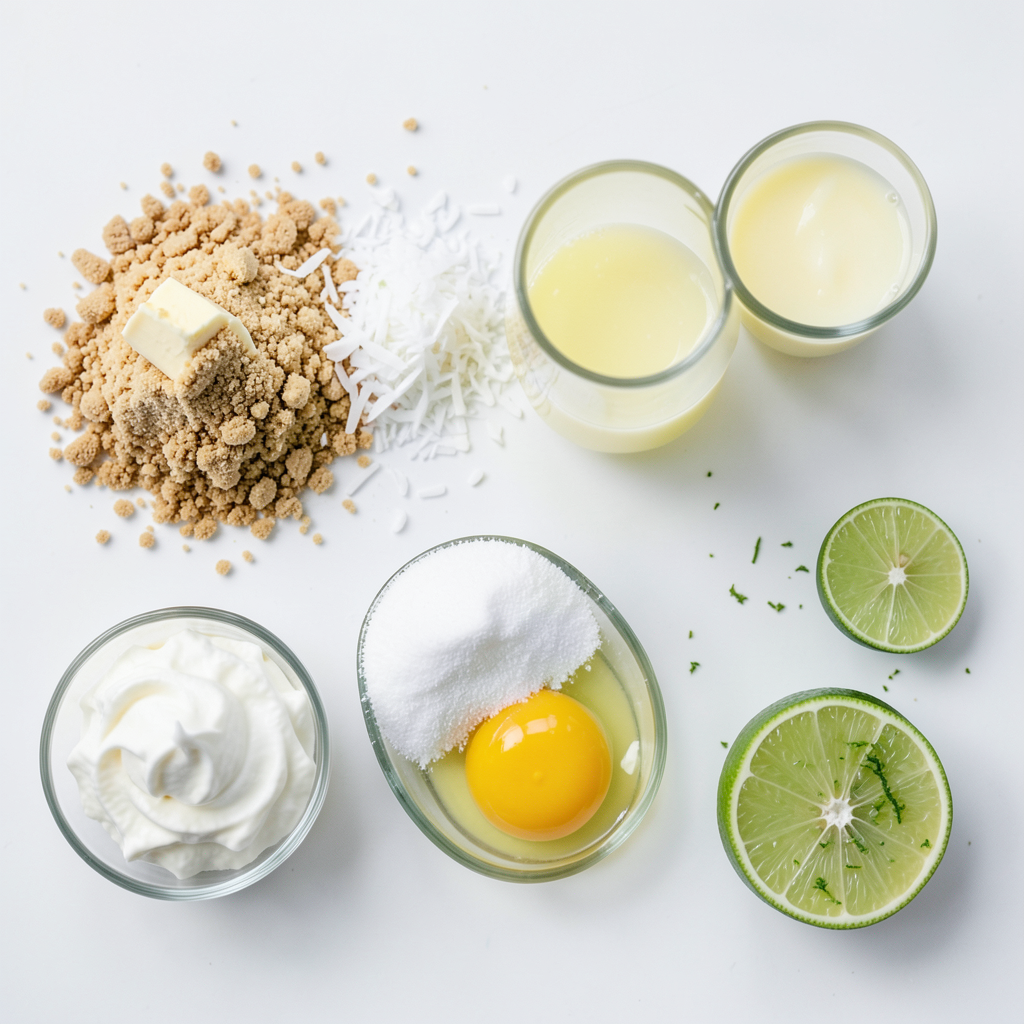
Detailed Ingredient List
- 1 ½ cups graham cracker crumbs: This is the base for our crust. It gives a sweet, crunchy texture.
- ½ cup unsweetened coconut flakes: This adds a hint of tropical flavor and a chewy texture.
- ½ cup unsalted butter, melted: It binds the crust together and gives a rich taste.
- ⅓ cup granulated sugar: This sweetens the crust and balances the tart filling.
- 2 (14-ounce) cans sweetened condensed milk: This creates a creamy filling that is sweet and rich.
- ¾ cup key lime juice: Freshly squeezed key lime juice is key. It gives the bars their zesty flavor.
- 3 large egg yolks: They help set the filling and add richness.
- Zest of 2 limes: The zest adds a punch of flavor and bright aroma.
- ½ teaspoon pure vanilla extract: This enhances the overall taste of the filling.
- Whipped cream: This optional topping adds a light and creamy touch.
- Lime slices and additional lime zest: These garnishes make the bars look beautiful and add freshness.
Using fresh key lime juice is crucial. It makes a big difference in flavor. Bottled juice lacks the bright and tangy taste you want in key lime pie bars. For a lovely finish, don’t forget to top with whipped cream and a slice of lime. These touches add visual appeal and extra flavor. Enjoy making these bars; they offer a delightful twist on a classic dessert!
Step-by-Step Instructions
Preheat and Prepare the Baking Pan
- Set the oven to 350°F (175°C).
- Grease the baking pan (9x9-inch).
Preheating the oven is key to getting a nice crust. Greasing the pan helps the bars come out easy.
Making the Crust
- Combine graham cracker crumbs, coconut, butter, and sugar.
- Press the mixture into the baking pan and bake.
Mix the graham cracker crumbs with coconut, melted butter, and sugar. Stir until well blended. Press this mix firmly into the pan. Bake it for about 10 minutes. You want the crust to be lightly golden.
Preparing the Filling
- Mix sweetened condensed milk, key lime juice, and egg yolks.
- Blend in lime zest and vanilla extract.
In a bowl, whisk sweetened condensed milk, key lime juice, and egg yolks. Then add lime zest and vanilla extract. This mix becomes your creamy filling.
Pouring and Baking the Bars
- Spread the filling over the cooled crust.
- Bake until set.
Once the crust cools, pour the filling on top. Spread it out evenly. Bake for 15-20 minutes. It’s ready when the filling is firm to the touch.
Cooling and Serving
- Cool at room temperature before refrigerating.
- Cut into bars and serve with toppings.
Let the bars cool for about 30 minutes at room temperature. Then, refrigerate for at least 2 hours. When ready, cut into squares. Top with whipped cream and lime slices for a fun finish.
Tips & Tricks
Perfecting the Crust
To make the best crust, use graham cracker crumbs. They give a sweet, crunchy base. Mix the crumbs with unsweetened coconut and melted butter. This combo adds flavor and helps the crust hold together. Press it firmly into the pan. This step is key to a solid base. After baking, let the crust cool completely. Chilling it helps the filling set better.
Ensuring Optimal Flavor
Always choose fresh lime juice over bottled. Fresh juice packs a punch that bottled juice lacks. Use about ¾ cup of fresh key lime juice for the best taste. Balance is important, too. If your filling is too sweet, add a bit more lime juice. This makes the flavors pop. You want a mix of sweetness and tartness that sings on your palate.
Serving Suggestions
For a great presentation, slice the bars into squares. Serve them on a colorful platter. Add lime slices around the edges for a bright look. Pair these bars with iced tea or sparkling water. These drinks complement the tangy flavor. Your guests will love this refreshing treat!
Pro Tips
- Use Fresh Key Limes: For the best flavor, always opt for freshly squeezed key lime juice. It enhances the tartness and freshness of your bars.
- Chill for Perfection: Allow the pie bars to chill in the refrigerator for at least 2 hours after baking. This ensures they set properly and are easier to cut.
- Customize Your Crust: Experiment with different crusts by adding crushed nuts or using chocolate graham crackers for a unique twist.
- Garnish Creatively: Elevate your presentation by adding edible flowers or mint leaves alongside the lime slices for a vibrant and fresh look.
Variations
Gluten-Free Key Lime Pie Bars
You can easily make these bars gluten-free. Use gluten-free graham cracker crumbs instead of regular ones. Brands like Schär or Kinnikinnick offer great options. You can also use almond flour or crushed nuts for the crust. These swaps keep the taste rich and the texture smooth.
Vegan Key Lime Pie Bars
If you want a vegan version, swap out the egg yolks. Use silken tofu or a mixture of cornstarch and water. Instead of sweetened condensed milk, use coconut cream or a vegan sweetened condensed milk. These substitutes maintain the creamy texture and sweet taste.
Flavor Twists
Get creative with flavors! Try adding zest from oranges or lemons for a twist. This will give the bars a whole new taste. You can also mix in coconut cream for a richer, creamier filling. This adds a delightful tropical flair that pairs well with the lime.
Storage Info
Best Practices for Storing Key Lime Pie Bars
To keep your Key Lime Pie Bars fresh, store them in the fridge. Place the bars in an airtight container. This will help protect them from moisture and smells. They stay good for about 3 to 5 days in the fridge. If you want to keep them longer, you can freeze them.
For long-term storage, wrap each bar in plastic wrap. Then, place them in a freezer-safe bag. This will help keep the flavor and texture intact. They can last up to three months in the freezer. Just remember to label the bag with the date so you know when to use them.
Freezing Key Lime Pie Bars
To freeze your Key Lime Pie Bars, first let them cool completely. Once cooled, cut them into squares. Wrap each square tightly in plastic wrap. After that, place them in a freezer-safe bag. Make sure to squeeze out any air before sealing.
When you want to enjoy them again, take them out of the freezer. Place them in the fridge overnight to thaw. This slow thawing helps keep the texture smooth. If you're in a hurry, you can let them sit at room temperature for about 30 minutes to an hour. Avoid using the microwave, as it can change the texture.
FAQs
What can I use instead of key lime juice?
You can use regular lime juice if you can't find key limes. This will change the flavor slightly. Regular limes are less tangy and more bitter than key limes. You can also mix lemon juice with lime juice for a different taste.
Can I make these bars ahead of time?
Yes, you can! Make the bars a day or two before you serve them. Just store them in the fridge. Cover them well to keep them fresh. This way, the flavors will blend nicely.
How long do Key Lime Pie Bars last in the fridge?
These bars can last about 4 to 5 days in the fridge. To keep them fresh, store in an airtight container. If they start to look or smell off, it’s best to toss them. Enjoy them while they’re still tasty!
In this article, I guided you through making Key Lime Pie Bars. We covered essential ingredients, step-by-step instructions, and useful tips. You learned how to create the perfect crust and filling, along with variations for dietary preferences. Remember to store your treats properly for the best flavor and texture. Enjoy your Key Lime Pie Bars at parties or as a sweet treat at home. With a few simple steps, you can impress friends and family with this delightful dessert. Get ready to share your delicious creation!