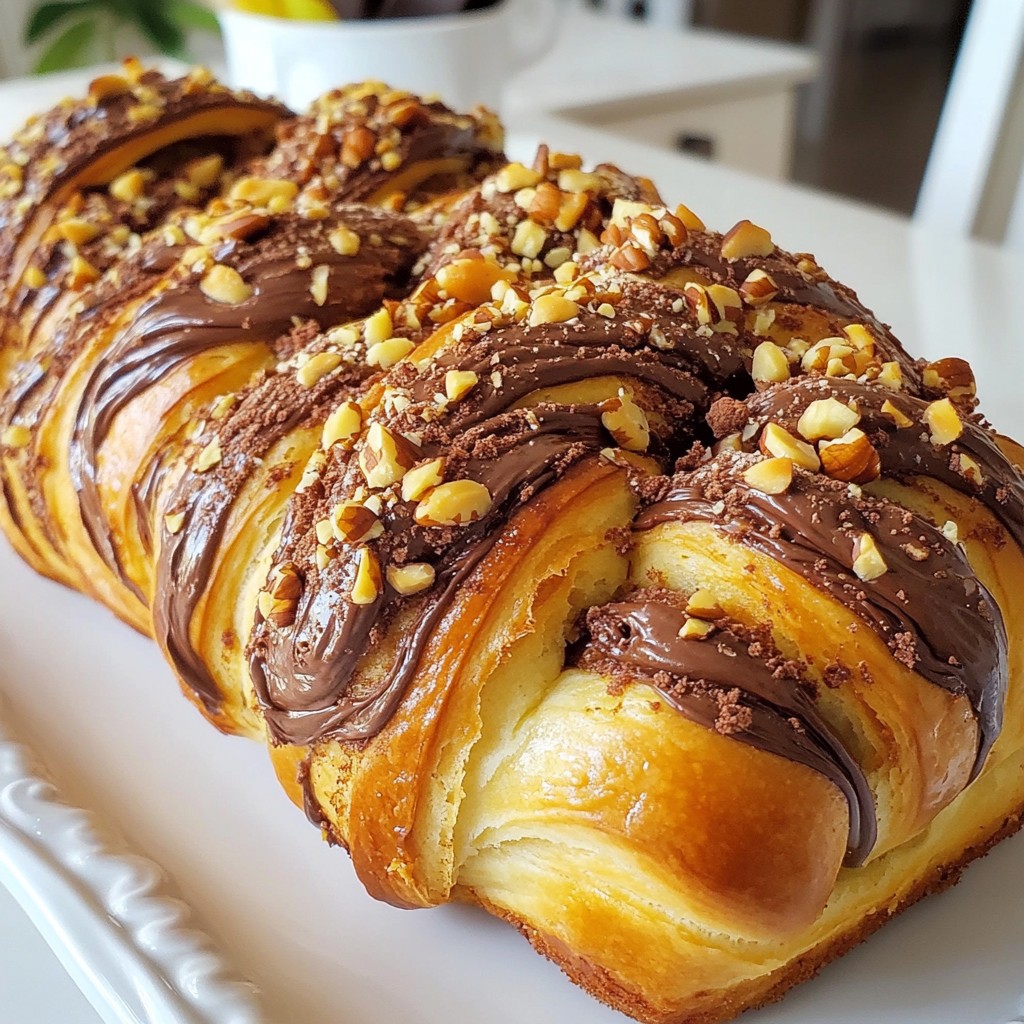
Are you ready to indulge in a rich, chocolatey treat? This Chocolate Hazelnut Babka recipe is simple and delightful. Imagine a soft, sweet dough woven with luscious hazelnut spread and a hint of cocoa. Whether you're a baking pro or just starting out, I'll guide you through each step. Let’s make this delicious twist on a classic that everyone will love!
Why I Love This Recipe
- Irresistible Flavor: This babka combines the rich taste of chocolate with the nutty crunch of hazelnuts, creating an extraordinary taste experience.
- Beautiful Presentation: The braided design of the babka not only looks stunning but also showcases the delicious filling, making it a showstopper for any gathering.
- Memorable Texture: The soft and fluffy dough paired with the gooey chocolate hazelnut spread ensures every bite is a delightful treat.
- Perfect for Sharing: This recipe yields 12 slices, making it ideal for family gatherings, brunches, or just indulging with friends over coffee.
Ingredients
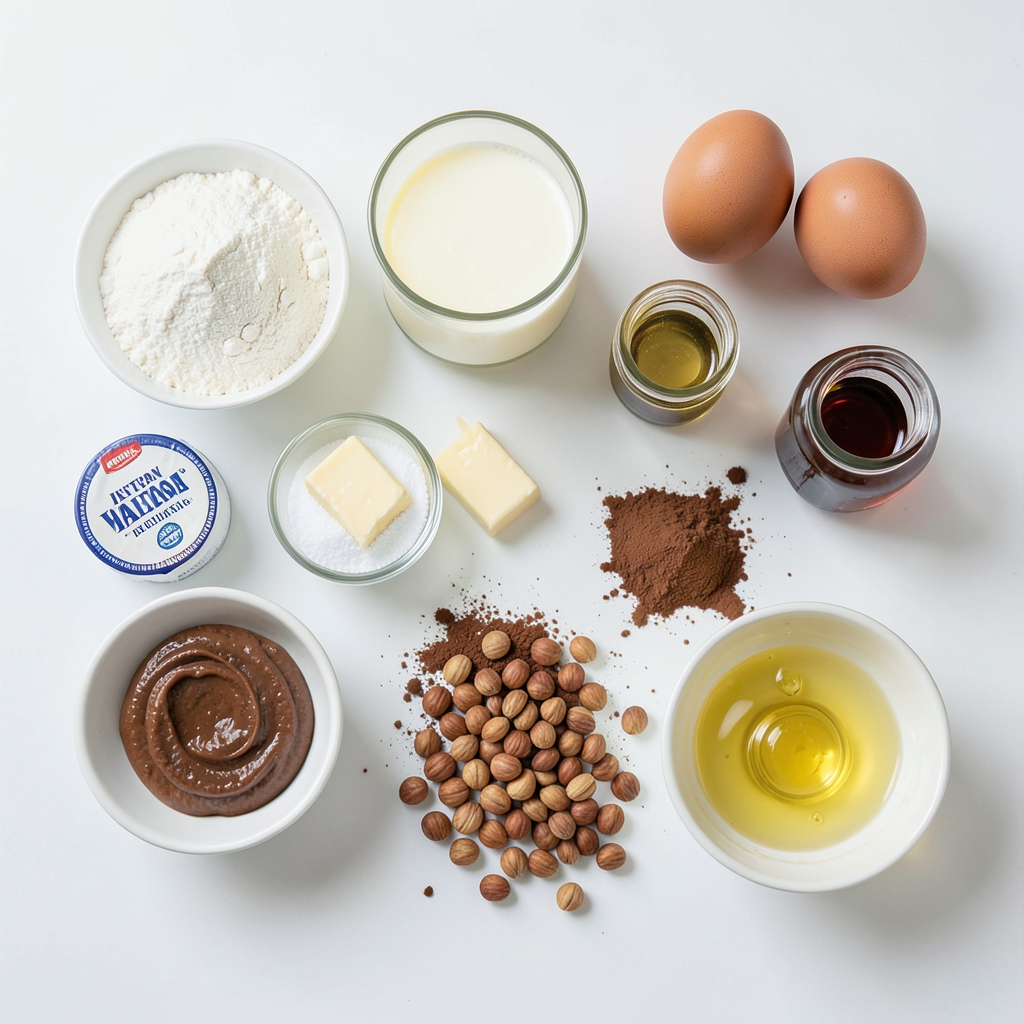
Main Ingredients for Chocolate Hazelnut Babka
- 4 cups all-purpose flour
- 1/4 cup granulated sugar
- 2 1/4 teaspoons instant yeast (about 1 packet)
- 1 teaspoon salt
- 1/2 cup milk, warmed (around 100°F / 37°C)
- 1/2 cup unsalted butter, melted and slightly cooled
- 3 large eggs, at room temperature
- 1/2 cup chocolate hazelnut spread (like Nutella)
- 1/2 cup finely chopped hazelnuts
- 1/4 cup unsweetened cocoa powder
- 1 tablespoon vanilla extract
- Egg wash: 1 egg beaten with 1 tablespoon water
These ingredients create the rich, soft, and tasty chocolate hazelnut babka you will love. Each item plays a key role. The all-purpose flour gives the bread structure. The sugar adds sweetness and helps it rise. Instant yeast makes the dough fluffy. Salt enhances the flavors. Warm milk helps activate the yeast. Unsalted butter adds richness. Eggs bind the dough and give it a nice texture.
The star of this recipe is the chocolate hazelnut spread. It adds a creamy, sweet layer of flavor. Finely chopped hazelnuts bring a crunchy texture and nutty taste. Cocoa powder deepens the chocolate flavor. Finally, vanilla extract rounds out the taste. The egg wash gives the babka a beautiful golden color when baked.
Gather these items before you start. This will make the process smooth and fun. Each ingredient works together to create a delightful treat.
Step-by-Step Instructions
Preparing the Dough
1. Start by mixing the dry ingredients. In a large bowl, combine 4 cups of all-purpose flour, 1/4 cup of granulated sugar, 2 1/4 teaspoons of instant yeast, and 1 teaspoon of salt. Whisk them together well.
2. Next, mix the wet ingredients. In another bowl, whisk together 1/2 cup of warmed milk, 1/2 cup of melted butter, 3 large eggs, and 1 tablespoon of vanilla extract until smooth.
3. Gradually add the wet mixture to the dry ingredients. Stir continuously until a dough forms.
4. Lightly flour your work surface. Knead the dough for 8 to 10 minutes until it is smooth and elastic. Make sure no flour bits remain.
5. Grease a large bowl lightly. Place the kneaded dough inside and cover it with a damp cloth. Set it in a warm place to rise for 1 to 2 hours, or until it doubles in size.
Shaping the Babka
1. Once the dough has risen, gently punch it down to release the air. Roll it out on a floured surface into a rectangle about 12 inches by 18 inches.
2. Spread 1/2 cup of chocolate hazelnut spread evenly over the rolled dough. Leave a small border around the edges to prevent spillage.
3. Sprinkle 1/4 cup of cocoa powder and 1/2 cup of finely chopped hazelnuts over the spread.
4. Starting from one long edge, tightly roll the dough into a log shape. Pinch the ends to seal the filling.
5. With a sharp knife, slice the log in half lengthwise to show the layers. Twist the two halves together carefully to form a braid.
Baking the Babka
1. Transfer the braided dough to a greased loaf pan. Cover it loosely with plastic wrap. Let it rise again for 30 to 45 minutes until puffed.
2. Preheat your oven to 350°F (175°C).
3. Brush the top of the braided babka with the egg wash (1 egg beaten with 1 tablespoon of water). This gives it a golden finish.
4. Bake in the preheated oven for 30 to 35 minutes. The babka should be golden brown and a skewer inserted into the center should come out clean.
5. Let the babka cool in the pan for a few minutes, then transfer it to a wire rack to cool completely.
Tips & Tricks
Perfecting the Dough
To make great babka, kneading is key. Knead your dough for about 8-10 minutes. This time helps develop gluten, giving your dough that nice elasticity. You want the dough to feel smooth and soft. If it sticks to your hands, add a bit of flour. But be careful not to add too much.
The right dough consistency is vital. It should be soft but not too sticky when you finish kneading. If it feels too dry, add a little warm milk. This will make it easier to work with. Let it rise in a warm place until it doubles in size. This step is crucial for a fluffy texture.
Filling Techniques
Spreading chocolate hazelnut spread evenly is a must. Start at the center and work your way out. Leave a small border around the edge. This helps prevent any filling from spilling out during baking. Use a spatula or a butter knife for a smooth spread.
When adding other fillings, manage your amounts. Too much filling can make it hard to roll and shape. Stick to a thin layer of chocolate hazelnut spread. Sprinkle cocoa powder and chopped hazelnuts evenly on top. This way, every slice will have a balanced flavor.
Baking Essentials
Checking for doneness is simple. Your babka should be golden brown on top. Insert a skewer into the center; it should come out clean. If the top browns too fast, cover it with foil. This keeps it from burning while it finishes baking.
Cooling is just as important. After baking, let your babka cool for a few minutes in the pan. Then, move it to a wire rack. This helps it cool evenly, keeping the texture just right. Enjoy the process; each step adds to your delicious babka!
Pro Tips
- Check Your Yeast: Always ensure your yeast is fresh and active by proofing it in warm milk with a pinch of sugar before adding it to the mixture. This guarantees a good rise.
- Room Temperature Ingredients: Using eggs and butter at room temperature helps the dough come together more smoothly and rise better, resulting in a lighter texture.
- Seal the Edges: When rolling the dough, pinch the edges to seal the filling inside. This prevents it from leaking out during baking, ensuring a perfect babka.
- Cool Before Slicing: Let the babka cool completely before slicing. This allows the interior to set, making it easier to cut and enhancing the presentation.
Variations
Flavor and Ingredient Variations
You can change the flavor of your babka with spices. Adding cinnamon gives a warm touch. Just mix a teaspoon into the cocoa powder. You can also try other spreads. Almond butter works well too. It adds a nutty flavor that pairs nicely with hazelnuts. You can even mix chocolate hazelnut spread with almond butter for a unique twist.
Dietary Adjustments
For a vegan version, swap the eggs with flax eggs. Mix one tablespoon of ground flaxseed with three tablespoons of water. Let it sit until it thickens. Use plant-based milk instead of regular milk. You can replace butter with coconut oil or vegan butter. For gluten-free options, use a gluten-free flour blend. Make sure it has xanthan gum for texture.
Unique Twists
Try a marbleized babka for a fun look. Instead of rolling the dough into a log, create swirls. After spreading the filling, roll the dough into a log and twist it in a spiral shape. You can also add toppings. Chopped fruits like cherries or berries add color and flavor. For extra crunch, sprinkle nuts on top before baking.
Storage Info
Short-term Storage
To keep your chocolate hazelnut babka fresh, store it in an airtight container. This helps lock in moisture and flavor. You can also wrap it tightly in plastic wrap. Keep the babka at room temperature for up to three days. Avoid placing it in the fridge, as this can dry it out. If you want to serve it later, slice it before storage. This makes it easy to grab a piece when you want one.
Long-term Storage
For long-term storage, freezing is a great option. You can freeze the babka for up to three months. Wrap it tightly in plastic wrap, then place it in a freezer-safe bag. This prevents freezer burn. To thaw, move the babka from the freezer to the fridge overnight. For quick results, leave it at room temperature for a few hours.
Reheating Guidelines
To enjoy your babka warm, reheating is key. The best method is to wrap it in foil and place it in a preheated oven at 350°F (175°C) for about 10-15 minutes. This keeps the outside crust nice and crisp. Alternatively, you can slice a piece and microwave it for 20-30 seconds. This method is quick but may soften the crust.
FAQs
Common Questions about Chocolate Hazelnut Babka
What can I use if I don’t have instant yeast? You can use active dry yeast instead. Just use about 2 1/4 teaspoons. Mix it with warm milk and sugar first. Let it sit for about 5-10 minutes. This helps it activate. After that, you can mix it into your dough as normal.
How can I tell if my babka is done baking? Check for a golden-brown color on top. You can also insert a toothpick into the center. If it comes out clean, your babka is done. The bread should also feel firm and sound hollow when tapped.
Can I make babka ahead of time? Yes! You can prepare the dough a day before. After the first rise, wrap it well and put it in the fridge. When ready, let it come to room temperature before rolling and shaping. This makes it easier to work with.
What's the best way to serve Chocolate Hazelnut Babka? Serve it warm or at room temperature. Slice it into thick pieces. You can add a sprinkle of powdered sugar for a nice touch. Fresh strawberries or whipped cream on the side make it even better. Enjoy the rich flavors!
You now have all you need for a perfect Chocolate Hazelnut Babka. We covered key ingredients, step-by-step instructions, and useful tips. Don’t forget about fun variations and storage methods to keep it fresh. Baking this treat can be easy and exciting. Enjoy the rich flavors and share with family or friends. Keep experimenting to make this delightful bread your own! Happy baking, and have fun with it!