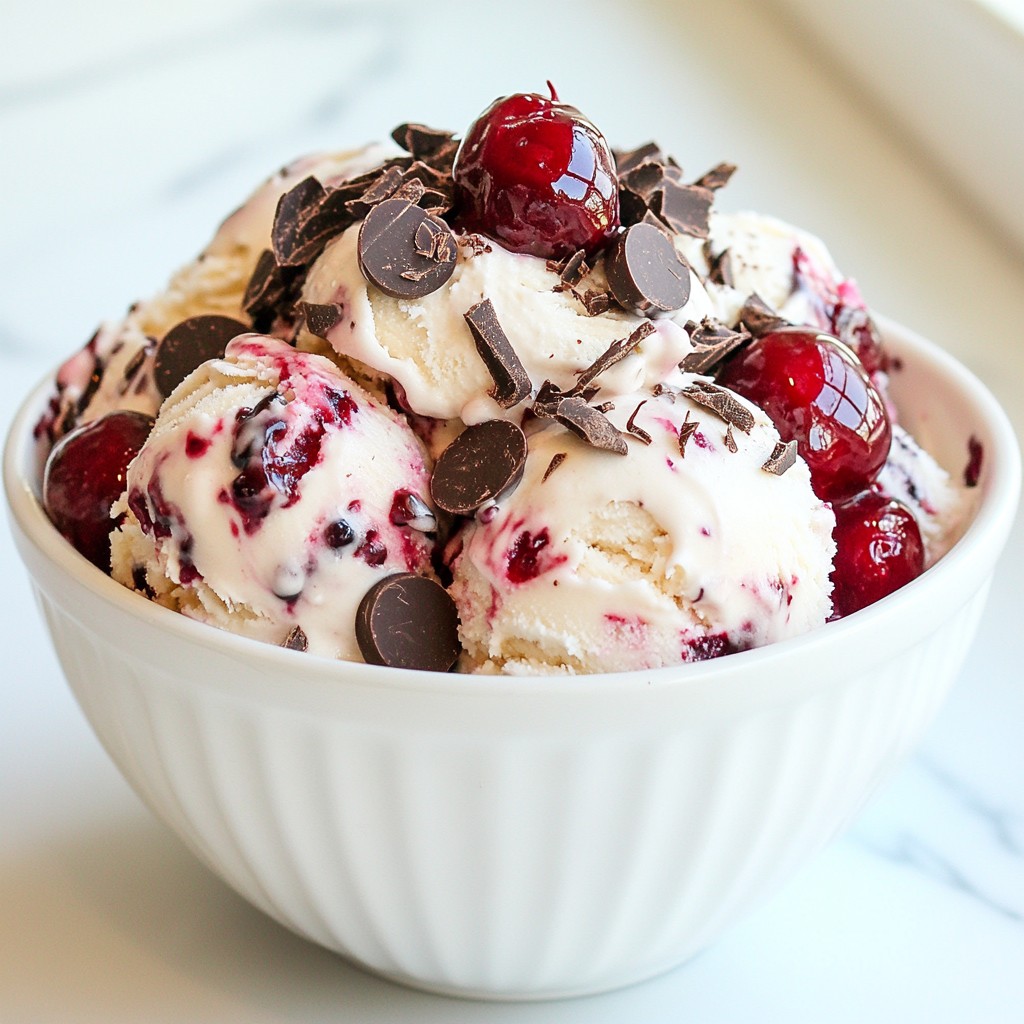
Are you ready to treat yourself to a scoop of Cherry Garcia ice cream? This delightful recipe combines creamy vanilla, chunks of rich chocolate, and real cherries for a flavor that’s hard to beat. You won’t need fancy tools or hard-to-find ingredients. I’ll guide you step-by-step to make it easy and fun. Let’s dive in and create a sweet, creamy treat you’ll love to share!
Why I Love This Recipe
- Homemade Goodness: This Cherry Garcia Ice Cream is made from scratch, ensuring that every bite is fresh and full of flavor.
- Perfect Balance: The combination of sweet cherries and rich dark chocolate creates a delightful contrast that’s hard to resist.
- Simple Ingredients: With just a few basic ingredients, you can whip up this delicious treat without any hassle.
- Customizable: Feel free to experiment with different mix-ins or toppings to make this ice cream your own!
Ingredients
List of Ingredients with Measurements
- 2 cups heavy cream
- 1 cup whole milk
- 3/4 cup granulated sugar
- 1 teaspoon vanilla extract
- 1 cup fresh cherries, pitted and halved
- 1/2 cup dark chocolate chips (or finely grated dark chocolate)
- A pinch of salt
Each ingredient plays a key role in making your Cherry Garcia ice cream rich and tasty. The heavy cream gives it a smooth texture. Whole milk adds creaminess. Sugar sweetens the mix, while vanilla brings out the flavors. Cherries add a fruity burst, and chocolate gives a nice crunch.
Optional Ingredients for Extra Flavor
- A splash of almond extract
- Fresh mint leaves for garnish
- Extra cherries for topping
Adding a splash of almond extract can enhance the cherry flavor. Mint leaves can freshen up each scoop. Extra cherries on top make it look pretty and add more fruit.
Ingredient Substitutions
- Coconut cream for heavy cream
- Almond milk for whole milk
- Honey or maple syrup for sugar
If you want a dairy-free treat, use coconut cream and almond milk. For a healthier sweetener, try honey or maple syrup instead of sugar. These swaps keep the ice cream tasty while fitting your diet.

Step-by-Step Instructions
Preparation of Ice Cream Base
To start, grab a large mixing bowl. Combine 2 cups of heavy cream, 1 cup of whole milk, and 3/4 cup of granulated sugar. Add 1 teaspoon of vanilla extract and a pinch of salt. Use a whisk to mix it well. Make sure the sugar dissolves fully. You want a smooth and creamy base.
Churning the Ice Cream
Next, pour your ice cream base into the ice cream maker. Follow the instructions for your machine. Typically, it takes about 20 to 25 minutes. You want the ice cream to reach a soft-serve consistency. Keep an eye on it.
Incorporating Cherries and Chocolate
While the ice cream churns, wash your cherries well. Remove the pits and slice them in half. You can mash some of them lightly to release their juices. When the ice cream is ready, gently fold in the halved cherries and 1/2 cup of dark chocolate chips. Use a spatula for this step. Mix well to spread the cherries and chocolate evenly throughout the ice cream.
Once mixed, transfer the ice cream to an airtight container. Smooth the top with your spatula. Seal it and place it in the freezer for at least 4 hours. This will help it firm up nicely. When ready to serve, let it sit at room temperature for 5 to 10 minutes. This will make scooping easy and fun!
Tips & Tricks
Ensuring Creamy Texture
To make your Cherry Garcia ice cream creamy, use heavy cream and whole milk. They add rich texture. Whisk the cream, milk, and sugar until smooth. This step ensures the sugar dissolves well. The air that gets mixed in while churning also helps. If you want it extra creamy, chill your base overnight. Cold ingredients churn better and create a smoother ice cream.
Perfecting the Scoop
Scoop your ice cream easily by letting it sit out first. Leave it at room temp for 5-10 minutes. This softens it just enough for perfect scoops. You can also dip your scoop in warm water. A warm scoop glides through the ice cream with ease. For best results, use a sturdy ice cream scoop. It helps you make nice, round servings.
Serving Suggestions
Serve your Cherry Garcia ice cream in colorful bowls. Add extra cherry halves on top for flair. A sprinkle of chocolate shavings makes it even better. You can also drizzle chocolate sauce over the top. For a fun twist, serve it with a slice of pie or a warm brownie. This adds a great contrast to the cold ice cream. Enjoy sharing this treat with friends and family!
Pro Tips
- Chill Your Equipment: Before making your ice cream, chill the bowl and the ice cream maker's container in the freezer for at least 30 minutes. This helps the ice cream to freeze faster and results in a creamier texture.
- Use Quality Chocolate: Opt for high-quality dark chocolate for the best flavor. The richer the chocolate, the more delicious your ice cream will be!
- Experiment with Cherries: If fresh cherries are not in season, you can use frozen cherries. Just make sure to thaw and drain them before adding to the ice cream mixture.
- Storage Tips: To keep your ice cream fresh and prevent ice crystals from forming, press a piece of plastic wrap directly onto the surface of the ice cream before sealing the container.
Variations of Cherry Garcia Ice Cream
Dairy-Free Alternatives
If you want a dairy-free version, use coconut cream instead of heavy cream. It gives a rich texture. For the milk, try almond milk or oat milk. These options keep the flavor bright and smooth. You can still enjoy cherries and chocolate with these swaps.
Different Chocolate Options
You can switch chocolate types for fun. Use milk chocolate chips for a sweeter taste. Or, try white chocolate for a creamier mix. Dark chocolate brings a rich, bold flavor. Mix different chocolates for a new twist. Each choice can change the taste of your ice cream.
Unique Add-ins
Add unique ingredients to make your ice cream special. Try chopped nuts for crunch. Walnuts or almonds add a nice texture. You could mix in some crushed cookies for a fun surprise. Use a splash of almond extract for a nutty twist. Get creative with your add-ins to make it your own!
Storage Information
Best Practices for Freezing
To keep your Cherry Garcia ice cream fresh, use an airtight container. This helps prevent ice crystals from forming. Make sure to smooth the top before sealing. The less air in the container, the better. Always freeze it at a stable, low temperature to maintain its creamy texture.
How to Store Leftovers
If you have leftover ice cream, scoop it into your container gently. Avoid packing it too tightly; this can make it hard. You can layer plastic wrap on top of the ice cream before sealing the lid. This extra layer helps keep air out and keeps your ice cream fresh.
Shelf Life and Quality Tips
Your Cherry Garcia ice cream will last about 2-3 weeks in the freezer. After that, it may lose flavor and texture. To check quality, look for ice crystals or freezer burn. If you see these signs, it's time to toss the ice cream. Always trust your taste buds; if it doesn't taste right, don't eat it!
FAQs
How can I make Cherry Garcia Ice Cream without an ice cream maker?
You can make Cherry Garcia ice cream without an ice cream maker by using a freezer method. Start by mixing the heavy cream, whole milk, sugar, vanilla, and salt in a bowl. Whisk until smooth and sugar dissolves. Pour the mixture into a shallow dish. Place it in the freezer. Every 30 minutes, stir it with a fork for about 3 hours. This helps break up ice crystals and makes it creamy. When it’s thick and scoopable, fold in the cherries and chocolate. Enjoy your homemade treat!
What is the nutritional information for Cherry Garcia Ice Cream?
Cherry Garcia ice cream is rich and tasty. Each serving (1/2 cup) contains about 250-300 calories. It has roughly 20 grams of fat, 25 grams of sugar, and 3 grams of protein. The cherries add vitamins, while dark chocolate offers antioxidants. Keep in mind, these numbers can change based on your ingredients. Using low-fat milk or less sugar will lower calories and fat content.
Where can I buy Cherry Garcia Ice Cream?
You can find Cherry Garcia ice cream in many grocery stores. Look for it in the ice cream aisle. Brands like Ben & Jerry's make a popular version. You can also buy it online through various grocery delivery services. If you want a vegan option, check specialty stores or local ice cream shops for homemade versions.
You learned how to create Cherry Garcia ice cream from scratch. We covered the best ingredients and how to tweak them. You can add fun flavors and substitute where needed. I shared tips for a creamy texture and perfect scoops. Don't forget the variations and storage tips for leftovers.
Making this treat is fun and rewarding. With these steps, you can impress anyone with your ice cream skills! Enjoy each scoop of your homemade Cherry Garcia.