FREE DINNER EBOOK! Get your copy!
  • Cookie Policy
  • GDPR Policy
  • Disclaimer
  • Terms Of Use
  • Visit my other site: Fun Cookie Recipes
snack joy kitchen
  • Home
  • Dinner
  • Desserts
  • Drinks
  • Appetizers
  • Contact
  • About
  • Privacy Policy
  • Home
  • Dinner
  • Desserts
  • Drinks
  • Appetizers
  • Contact
  • About
  • Privacy Policy
  • Cookie Policy
  • GDPR Policy
  • Disclaimer
  • Terms Of Use
Visit my other site: Fun Cookie Recipes

HOME / CATEGORIES /

Latest

- 1 pound chicken breasts, cut into even strips - 1/2 cup all-purpose flour - 1 teaspoon garlic powder - 1 teaspoon onion powder - 1/2 teaspoon smoked paprika - Salt and freshly ground black pepper to taste - 1 cup shredded coconut (sweetened or unsweetened) - 1 cup panko breadcrumbs - 2 large eggs, beaten - Oil for frying (coconut oil or vegetable oil) When I make crispy coconut chicken strips, I focus on quality ingredients. The chicken breast gives a great base. It is lean and cooks well. The all-purpose flour helps the coating stick. This is key for a crispy finish. For flavor, I add garlic powder, onion powder, smoked paprika, salt, and pepper to the flour. Each spice adds depth. Garlic gives warmth, onion adds sweetness, and smoked paprika offers a hint of smokiness. The coating is where the magic happens. I love using shredded coconut. You can choose sweetened or unsweetened based on your taste. Panko breadcrumbs create extra crunch. They are light and airy, which is perfect for frying. Beating the eggs brings everything together. They help the flour and coating stick to the chicken. Finally, the oil is essential for frying. Coconut oil adds flavor, but vegetable oil works too. It’s all about balancing taste and texture in every bite. {{ingredient_image_2}} To start, you need to set up your dredging station. Grab three shallow bowls. In the first bowl, mix 1/2 cup of all-purpose flour with salt, black pepper, 1 teaspoon of garlic powder, and 1 teaspoon of onion powder. This will give your chicken a nice flavor. In the second bowl, beat 2 large eggs until smooth. This helps the coating stick. In the third bowl, combine 1 cup of shredded coconut and 1 cup of panko breadcrumbs. Mix them well for that crunchy coating. Now, take each chicken strip—1 pound of chicken breasts cut into even strips—and coat it in the flour mixture. Shake off any extra flour. Next, dip the chicken strip into the egg mixture. Make sure all sides are covered. Finally, roll the chicken in the coconut-panko mix. Press down gently to help it stick. Repeat this for all your chicken strips until they are fully coated and ready for cooking. For cooking, heat oil in a large skillet over medium heat. You want about 1/4 inch of oil in the pan. To check if the oil is hot enough, drop a little of the coconut-panko mix in it. If it sizzles, you’re good to go! Carefully place a few chicken strips in the hot oil. Don’t overcrowd the pan. Fry each strip for about 3-4 minutes on each side. They should be golden brown and fully cooked through. The internal temperature should reach 165°F (74°C). Once done, remove the strips and place them on a plate lined with paper towels. This helps absorb any extra oil. To ensure even coverage, follow these steps. First, prepare your dredging station with three bowls. One bowl holds the flour mixed with salt, pepper, garlic, and onion powder. The second bowl has beaten eggs. The last bowl contains the coconut and panko mix. When coating the chicken, start by dredging each strip in the seasoned flour. Shake off any extra flour. This step helps the egg mixture stick better. Next, dip the strip in the beaten eggs, making sure it is fully covered. Finally, roll it in the coconut-panko mix. Press gently to help it stick. Repeat for all strips. An even coat gives you that perfect crunch. If you prefer a lighter option, try baking or air-frying the chicken strips. For baking, preheat your oven to 400°F (200°C). Place the coated strips on a lined baking sheet. Spray them lightly with cooking oil to help them crisp up. Bake for about 20-25 minutes, flipping halfway through. For air-frying, set your air fryer to 375°F (190°C). Cook the chicken strips in a single layer for about 10-12 minutes. Shake the basket halfway through for even cooking. Both methods provide a tasty, healthier alternative to frying. Dipping sauces can truly elevate your crispy coconut chicken strips. Here are a few tasty suggestions: - Sweet Chili Sauce: This sauce adds a nice sweet and spicy kick. - Yogurt Dip: A cool yogurt dip with herbs balances the flavors well. - Honey Mustard: This classic sauce combines sweetness and tang. - Sriracha Aioli: For a spicy touch, mix sriracha with mayonnaise. Feel free to experiment with different sauces to find your favorite! Pro Tips Choose the Right Coconut: For a sweeter flavor, use sweetened shredded coconut. Unsweetened coconut provides a more savory taste, allowing the chicken flavor to shine through. Maintain Oil Temperature: Keep an eye on the oil temperature while frying. If it’s too hot, the coating may burn before the chicken cooks through. Use a thermometer for best results. Double-Dip for Extra Crunch: For an even crunchier texture, consider double-dipping the chicken strips in the egg and coconut-panko mixture. Let It Rest: After frying, allow the chicken strips to rest for a few minutes on paper towels. This helps maintain their crispiness by preventing steam buildup. {{image_4}} If you want to make this dish gluten-free, you can swap the all-purpose flour. Use a gluten-free flour blend instead. It works well for coating. For the breadcrumbs, look for gluten-free panko or crushed rice cereal. Both options provide that crunchy texture you love. To jazz up your coconut chicken strips, try adding some extra spices. A pinch of cayenne pepper gives it a nice kick. You can also sprinkle in some dried herbs like thyme or oregano for added depth. Mix in curry powder for a unique twist. These enhancements make each bite more exciting. If chicken is not your thing, there are great swaps. Try shrimp or fish fillets for a lighter option. For a plant-based choice, use tofu or tempeh. Coat and cook them the same way as chicken. They will absorb the flavors and still be crunchy and delicious. To keep your crispy coconut chicken strips fresh, place them in an airtight container. You can store them in the fridge for up to three days. Ensure they cool down before sealing. This helps the strips stay crunchy. To reheat your chicken strips, use an oven or air fryer. Preheat your oven to 375°F (190°C). Place the strips on a baking sheet and heat for 10-15 minutes. This method helps keep them crispy. If using an air fryer, set it to 350°F (175°C) and heat for about 5-7 minutes. If you want to freeze your chicken strips, do so before cooking. Lay them on a baking sheet in a single layer. Freeze for a few hours until solid. Then transfer them to a freezer bag. This way, they will not stick together. Use within three months for the best taste. You can bake or air-fry the chicken strips. To bake, preheat your oven to 400°F (200°C). Place the coated strips on a lined baking sheet. Spray them lightly with oil for a crispy finish. Bake for 15-20 minutes, flipping halfway through. For air-frying, set the air fryer to 375°F (190°C). Cook the strips in a single layer for about 10-12 minutes. Both methods give you a tasty and healthier version. Yes, you can prepare the chicken strips ahead of time. Coat them and place them in the fridge for up to 24 hours before cooking. This allows the flavors to meld and makes cooking easier. Just remember to let them sit at room temperature for about 15 minutes before cooking to ensure even cooking. Many dips work well with these strips. Sweet chili sauce adds a nice kick. You can also try a tangy yogurt dip for a cool contrast. Other great options include honey mustard, barbecue sauce, or even a spicy mango salsa. Feel free to get creative and mix flavors to find your favorite! This blog post covered all you need for crispy coconut chicken strips. We explored essential ingredients, step-by-step cooking tips, and fun variations for everyone. You can enjoy classic frying or choose healthier options like baking or air-frying. Don’t forget about tasty dips to boost your meal. I hope this recipe excites you in the kitchen and brings joy to your table. Happy cooking!

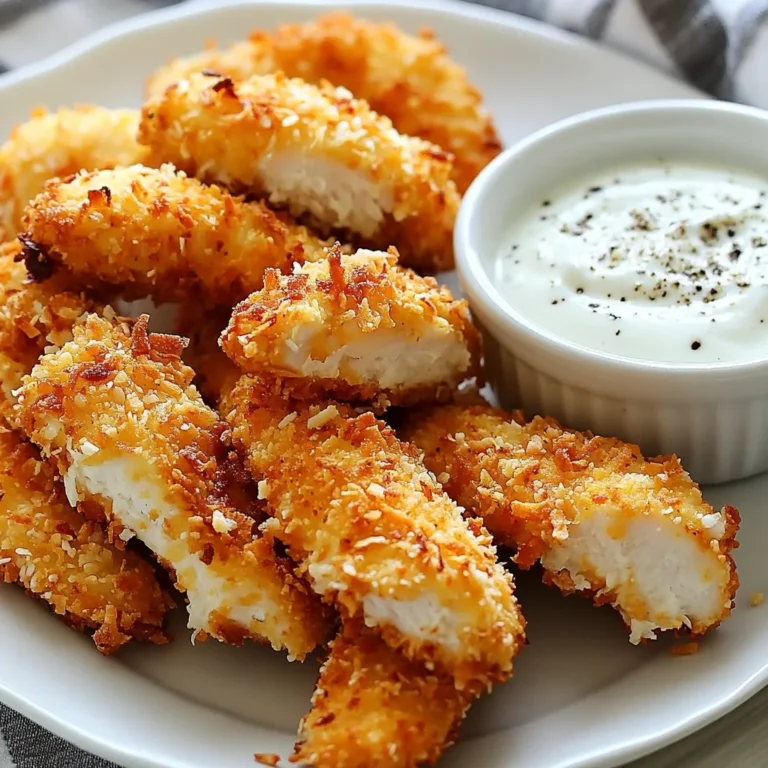
Crispy Coconut Chicken Strips Delightful and Easy Dish

To make blue cheese stuffed pears, you'll need: - 4 ripe pears, halved and cored - 100g blue cheese, crumbled - 50g cream cheese, softened - 1 tablespoon honey (preferably local) - 1 tablespoon chopped walnuts (toasted) - optional - Fresh arugula leaves for garnish - Balsamic glaze for drizzling - Salt and freshly cracked black pepper to taste You can easily swap some ingredients if needed. Try these options: - Use goat cheese instead of blue cheese for a milder taste. - Substitute cream cheese with ricotta for a lighter feel. - Maple syrup can replace honey for a different sweetness. - If you don't have walnuts, try pecans or almonds for crunch. - Spinach can stand in for arugula if you want a different green. Using high-quality ingredients makes a big difference in taste. Here’s why: - Fresh Pears: Choose ripe pears for the best flavor and texture. They should feel slightly soft when pressed. - Blue Cheese: A good blue cheese should be creamy and flavorful. It adds depth to the dish. - Local Honey: Local honey offers unique flavors that enhance your dish. - Fresh Herbs: Fresh arugula adds a nice peppery flavor and a bright look. These choices will ensure that your blue cheese stuffed pears shine at any gathering! {{ingredient_image_2}} First, gather all your ingredients. This makes cooking smooth and easy. You need four ripe pears, blue cheese, cream cheese, honey, walnuts, arugula, balsamic glaze, salt, and black pepper. Make sure your oven is ready by preheating it to 375°F (190°C). This step is key for even cooking. Next, cut the pears in half. Use a melon baller or spoon to remove the core. This creates space for the tasty filling. In a medium bowl, mix the blue cheese, cream cheese, and honey. Stir until smooth and creamy. Taste the mixture and add a pinch of salt and some black pepper. Adjust the seasoning to your liking. Now, fill each pear half with the cheese mixture. Pack it in well for a great bite. Place the stuffed pears on a baking sheet lined with parchment paper. This prevents sticking and makes cleanup easier. Put the baking sheet in the oven. Bake for about 15 to 20 minutes. You want the pears to be tender and the cheese to bubble and turn golden. When done, carefully take the pears out and let them cool for about five minutes. To serve, place the warm pears on a nice platter. Add fresh arugula leaves for color and crunch. Drizzle balsamic glaze over the stuffed pears just before serving. This adds a sweet and tangy flavor that complements the dish perfectly. Enjoy this simple yet elegant recipe with friends or family! To make great blue cheese stuffed pears, pick ripe pears. Look for pears that yield slightly to gentle pressure. This shows they are soft enough inside. Good choices include Bartlett or Anjou pears. They are sweet and pair well with the salty cheese. Avoid pears that feel hard or have bruises. If you have leftover cheese mixture, store it in an airtight container. Keep it in the fridge for up to five days. When ready to use, stir the mixture well. You can stuff more pears or spread it on crackers. This mix also tastes great in salads. Season your cheese mixture to boost flavor. Start with a pinch of salt and freshly cracked black pepper. Taste after mixing and adjust as you like. For a sweet twist, add a bit more honey. For a nutty flavor, try mixing in some chopped walnuts. These small changes can make your dish shine even more. Pro Tips Choose the Right Pears: Select ripe pears that yield slightly to pressure for the best flavor and texture. Mix Cheese to Preference: Feel free to adjust the ratio of blue cheese to cream cheese based on your taste; more blue cheese will enhance the bold flavor. Experiment with Nuts: Adding toasted walnuts not only adds crunch but also complements the creaminess of the cheeses beautifully. Serve Warm: For the best experience, serve the stuffed pears warm, allowing the cheese filling to be creamy and delicious. {{image_4}} If you want a twist on the classic flavor, try different cheeses. Goat cheese adds a tangy taste. Feta cheese offers a salty bite. Cream cheese alone gives a smooth, mild filling. Each cheese choice changes the dish’s flavor. Experiment to find your favorite. While pears shine in this recipe, other fruits work well too. Apples add a crisp texture and sweetness. Peaches bring a juicy, summery flavor. You can even use figs for a rich touch. Choose fruits that are ripe and sweet for the best results. Adding toppings makes this dish even better. Toasted walnuts give a nice crunch. Drizzle honey for extra sweetness. A sprinkle of fresh herbs adds color and flavor. Consider a sprinkle of crushed red pepper for some heat. These small changes take your dish to the next level. Store your blue cheese stuffed pears in an airtight container. This keeps them fresh longer. Place a piece of parchment paper between layers to avoid sticking. They will stay good for about three days in the fridge. Keep them away from strong-smelling foods. The pears can absorb flavors and odors. To reheat your stuffed pears, preheat your oven to 350°F (175°C). Place the pears on a baking sheet. Cover them loosely with foil to prevent drying out. Heat for about 10 to 15 minutes. Check that they are warm throughout. You can also microwave them, but this may make the pears mushy. You can freeze stuffed pears for later use. To do this, prepare the pears but do not bake them. Place them in a single layer on a baking sheet. Freeze for about 1 to 2 hours until firm. Then, transfer them to a freezer-safe container. They will last up to three months in the freezer. When ready to eat, thaw in the fridge overnight and then bake as directed. Yes, you can use different blue cheeses. Each type has a unique flavor. Some may be milder or stronger than others. For a creamy taste, choose Gorgonzola. Roquefort offers a sharper bite. Experiment to find which suits your taste best. Stuffed pears can last about 3 to 4 days in the fridge. Make sure to store them in an airtight container. If you want to keep them longer, consider freezing them. However, the texture may change when thawed. Baked blue cheese stuffed pears pair well with sweet and savory items. Try serving them with a light salad of arugula. A drizzle of balsamic glaze adds a sweet touch. You can also enjoy them with nuts or crusty bread. This mix enhances the flavors and makes for a delightful dish. This article covered how to make delicious blue cheese stuffed pears. We discussed important ingredients, their quality, and easy substitutions. I provided step-by-step instructions for preparation and serving. You learned tips for choosing pears and storing leftovers. We explored variations to customize your dish and shared storage info for keeping it fresh. In closing, enjoy experimenting with flavors and ingredients. Your stuffed pears can impress anyone. Happy baking!

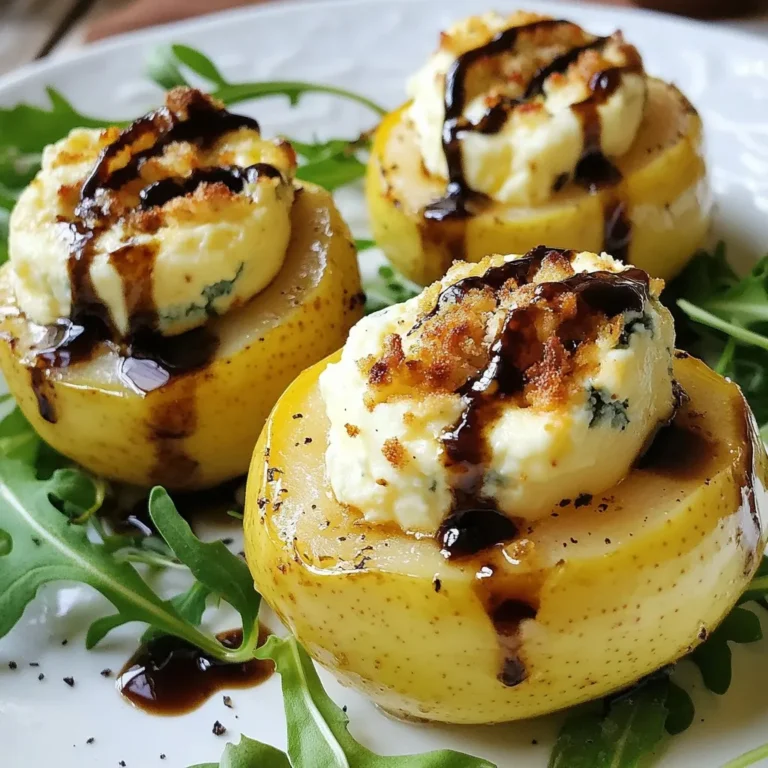
Blue Cheese Stuffed Pears Flavorful and Simple Recipe

- 8 oz fettuccine pasta - 1 lb ground beef - 1 tablespoon olive oil - 1 small onion, finely diced - 2 cloves fresh garlic, minced These main ingredients form the base of our dish. The fettuccine pasta gives a nice, thick texture. Ground beef adds a savory flavor that pairs well with the creamy sauce. Olive oil helps to cook the beef and adds richness. Onion and garlic bring a wonderful aroma and depth. - 1 cup heavy cream - 1 cup sharp cheddar cheese, shredded - ½ cup freshly grated Parmesan cheese - ¼ cup cream cheese, softened - 1 teaspoon Italian seasoning - Salt and freshly ground black pepper to taste The dairy ingredients provide the creaminess we crave. Heavy cream makes the sauce rich. Cheddar and Parmesan add a cheesy flavor that is hard to resist. Cream cheese helps to thicken the sauce. Italian seasoning, salt, and pepper complete the taste. - ½ cup cherry tomatoes, halved - ½ cucumber, diced - 2 green onions, finely chopped - Fresh parsley, chopped, for garnish Fresh ingredients add color and crunch. Cherry tomatoes burst with sweetness. Cucumber gives a refreshing crunch that contrasts the creaminess. Green onions offer a mild onion taste. Parsley adds a pop of green and freshness on top. {{ingredient_image_2}} - Bring salted water to a boil in a large pot. - Add 8 oz of fettuccine. Cook until it is al dente, about 8-10 minutes. - Be sure to drain the pasta. Reserve 1 cup of the starchy pasta water for later. - Heat a large skillet over medium heat. Add 1 tablespoon of olive oil. - Add 1 lb of ground beef to the skillet. Break it apart with a wooden spoon. - Cook for 5-7 minutes until the beef is nicely browned and cooked through. - Push the beef to one side. Add 1 small diced onion and 2 cloves of minced garlic. - Sauté for 3-4 minutes until the onion is soft and fragrant. - Lower the heat to a gentle simmer. Add 1 cup of heavy cream to the skillet. - Mix in ¼ cup of softened cream cheese, 1 cup of shredded cheddar, and ½ cup of grated Parmesan. - Stir continuously until all the cheese melts and the sauce is smooth. - Season the sauce with 1 teaspoon of Italian seasoning, salt, and freshly ground black pepper. - Add the drained fettuccine directly into the skillet with the Alfredo sauce. - Toss the pasta gently until it is fully coated in the rich sauce. - If the sauce is too thick, stir in the reserved pasta water a little at a time until it reaches your desired creaminess. - Fold in ½ cup of halved cherry tomatoes, ½ diced cucumber, and 2 finely chopped green onions. - Heat everything through for about a minute. This keeps the fresh ingredients crisp and vibrant. - Serve the Loaded Cheeseburger Alfredo in deep, wide bowls for a great look. - Top each bowl with a sprinkle of fresh parsley and extra cheese. - For a fun twist, add a lime wedge on the side for a zesty kick. To make the best Alfredo, start with the right cheeses. I recommend using sharp cheddar and Parmesan. They melt well and provide a rich flavor. A touch of cream cheese adds smoothness to the sauce. Use heavy cream for a creamy base. Stir gently. This keeps the sauce velvety and helps it thicken. When cooking pasta, aim for al dente texture. This means the pasta should be firm but not hard. If you overcook it, the pasta can become mushy. To avoid this, check the pasta a minute before the time on the package. Taste your sauce as you cook. Adjust the seasoning by adding salt and pepper. You can also add more Italian seasoning if you want extra flavor. Serve your Loaded Cheeseburger Alfredo hot. This dish tastes best right after cooking. Use deep, wide bowls for a nice presentation. Top each serving with fresh parsley and extra cheese for flair. Pair this dish with a light salad or garlic bread. These sides balance the rich flavors. For drinks, a crisp soda or iced tea works great. Enjoy your meal! Pro Tips Perfect Pasta: Always cook your pasta just until al dente, as it will continue to cook slightly when mixed with the sauce. Ground Beef Tip: For a richer flavor, consider using a mix of ground beef and ground pork or turkey. Cheese Melting: To achieve a smooth sauce, add the cheese gradually and stir continuously to prevent clumping. Freshness Matters: Add the fresh vegetables towards the end of cooking to maintain their crisp texture and vibrant color. {{image_4}} You can switch up the protein in Loaded Cheeseburger Alfredo. Ground turkey or chicken work well. They give the dish a lighter feel. If you want a vegetarian option, use lentils or mushrooms. They add a hearty texture without meat. Cheese lovers can have fun with different cheese types. Try pepper jack for a spicy kick. Mozzarella melts beautifully and adds a creamy texture. You can also mix in some blue cheese for a bold flavor. Adding garlic powder or smoked paprika can enhance the taste. Fresh vegetables can brighten up this dish. Consider mixing in bell peppers or spinach. These add color and nutrients. When using seasonal veggies, cook them until they are just tender. That keeps them crisp and fresh. To store your Loaded Cheeseburger Alfredo leftovers, let it cool first. Place it in an airtight container. This keeps it fresh and tasty. In the fridge, it lasts about 3 to 4 days. Always check for any signs of spoilage before eating. You can freeze Loaded Cheeseburger Alfredo for later. Let it cool completely before packing it. Use a freezer-safe container or a heavy-duty freezer bag. It can stay in the freezer for up to 3 months. When you’re ready to eat, thaw it in the fridge overnight. To reheat, warm it gently in a pot over low heat, adding a splash of cream or milk if it seems dry. For easy meals, cook this dish ahead of time. You can portion it into individual servings. Store each portion in its own container. This makes it easy to grab and go. You can also freeze portions for later use. Just remember to label them with the date, so you know how long they have been stored. Yes, you can use other pasta types. Options like penne, rotini, or even macaroni work well. Each pasta adds a unique texture. Just make sure to adjust the cooking time based on the type you choose. Absolutely! Loaded Cheeseburger Alfredo is great for meal prep. You can make a big batch and store it in the fridge. Just divide it into portions for easy lunches or dinners. It keeps well for up to four days. You can make this dish healthier by using whole wheat pasta or swapping ground beef for lean turkey. Add more veggies like spinach or bell peppers for extra nutrients. You can also reduce the amount of cheese for a lighter sauce. Yes, you can adjust the spiciness easily. If you like it spicy, add some red pepper flakes or a dash of hot sauce. For milder flavor, simply skip the spicy additions. Taste as you go to find your perfect balance. You can serve this dish with a simple side salad for freshness. Garlic bread is a great choice for dipping. You might also enjoy pairing it with steamed vegetables for a colorful plate. You explored the ingredients, steps, and tips for making Loaded Cheeseburger Alfredo. This dish combines fettuccine, ground beef, and creamy sauce with fresh veggies for a delightful meal. Perfecting this recipe can impress family and friends. Remember, you can always customize it with different proteins or veggies. Storing and reheating is easy, making it great for meal prep. Enjoy cooking and experimenting with this fun, satisfying dish. Happy cooking!

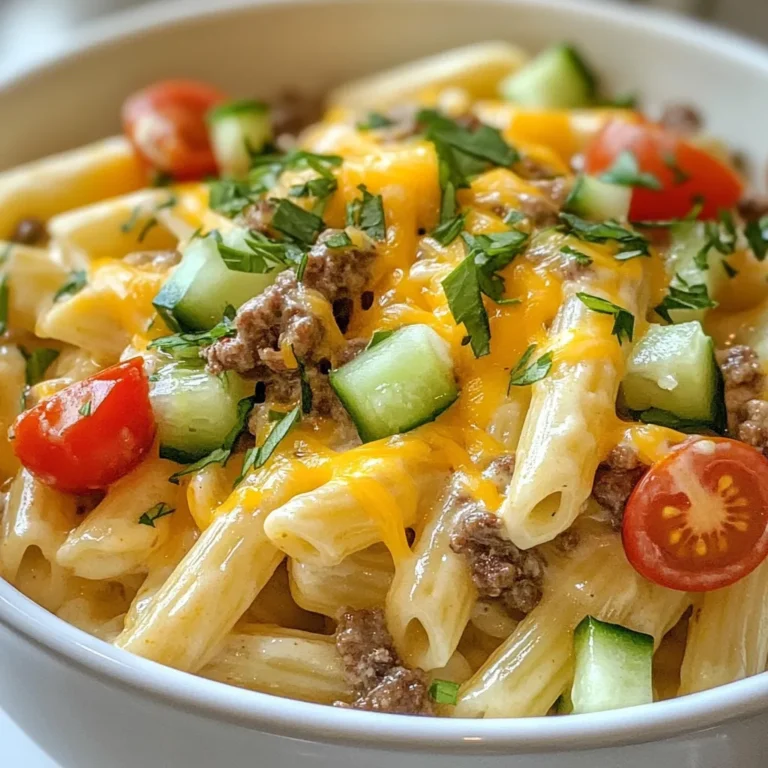
Loaded Cheeseburger Alfredo Creamy and Flavorful Dish

- 1 cup unsalted butter, melted - 2 cups granulated sugar - 4 large eggs - 1 teaspoon vanilla extract - 1 cup all-purpose flour - 1 cup cocoa powder - 1/2 teaspoon baking powder - 1/4 teaspoon salt - 1 cup fresh strawberries, hulled and sliced - 8 oz dark chocolate, chopped for coating - 1 tablespoon coconut oil for chocolate coating These ingredients create a rich and tasty treat. Each part plays a key role in flavor and texture. The unsalted butter adds moisture. The granulated sugar gives sweetness. Eggs bind the mix and create a soft texture. Vanilla extract gives a warm, inviting aroma. Flour and cocoa powder are the base for the brownies. They provide structure and a deep chocolate taste. Baking powder helps them rise while salt balances the sweetness. Fresh strawberries give a burst of flavor and color. Dark chocolate, mixed with coconut oil, forms a smooth, shiny coating. The coconut oil helps the chocolate set nicely. Gather these ingredients, and you are ready to make a delight that everyone will love. If you have any questions, feel free to explore more about chocolate or strawberries. {{ingredient_image_2}} - Preheat your oven to 350°F (175°C). This step warms your oven for baking. - Prepare a 9x13 inch baking pan. Lightly grease it and line with parchment paper. Leave some paper hanging over the edges for easy removal. - In a large bowl, whisk together 1 cup of melted unsalted butter and 2 cups of granulated sugar. Mix until the mixture is smooth and shiny. - Add 4 large eggs, one at a time. Whisk well after each egg. This helps the batter become light and fluffy. Then, mix in 1 teaspoon of vanilla extract. - In a separate bowl, sift together 1 cup of all-purpose flour, 1 cup of cocoa powder, 1/2 teaspoon of baking powder, and 1/4 teaspoon of salt. Sifting breaks up clumps and mixes the dry ingredients well. - Gradually fold the dry mix into the wet mixture. Use a spatula and mix until just combined. Be careful not to overmix, as you want a fudgy brownie. - Now, gently fold in 1 cup of sliced fresh strawberries. Distribute them evenly without breaking them apart too much. - Pour the brownie batter into your prepared baking pan. Use a spatula to smooth the top. - Bake in the preheated oven for 25-30 minutes. Check for doneness by sticking a toothpick into the center. If it comes out with a few moist crumbs, your brownies are ready. To make fudgy brownies, do not overmix the batter. Overmixing adds air, making them cake-like, not fudgy. Mix just until the dry ingredients disappear. To test for doneness, insert a toothpick into the center. If it comes out with a few moist crumbs, your brownies are ready. If it’s clean, they may be overbaked. When melting chocolate, use a heatproof bowl. Combine dark chocolate and coconut oil for a smooth mix. Melt in the microwave in 30-second bursts. Stir after each burst for even melting. Avoid water in the bowl as it can seize the chocolate. For dipping brownies, wait until they cool completely. Dip each brownie halfway into the melted chocolate. Let excess chocolate drip back into the bowl. This keeps the coating neat and even. Arrange the brownies on a nice platter for a great look. Drizzle any leftover melted chocolate over the top for flair. Add whole strawberries around the brownies for an eye-catching finish. This makes your dessert even more appealing and fun to share. Pro Tips Use Room Temperature Ingredients: Ensure your eggs and butter are at room temperature for better incorporation into the batter, leading to a smoother texture. Don’t Overmix: Gently fold the dry ingredients into the wet mixture to keep the brownies fudgy and avoid a cakey texture. Chocolate Coating Tips: To achieve a glossy chocolate finish, make sure to use high-quality chocolate and a bit of coconut oil for a smooth dip. Storage Suggestions: Store the brownies in an airtight container at room temperature for up to 3 days, or refrigerate for longer freshness. {{image_4}} You can easily switch up the flavors in these brownies. Using white chocolate or milk chocolate for the coating adds a new twist. Each type of chocolate offers a unique taste. White chocolate gives a sweet, creamy touch, while milk chocolate adds a rich flavor. You can also add nuts or chips to the brownie batter. Walnuts or pecans can add crunch and depth to the texture. Chocolate chips can enhance the chocolate flavor. Mix them in when you fold in the strawberries for an extra layer of taste. If you need gluten-free brownies, you can replace all-purpose flour with a gluten-free blend. Almond flour or coconut flour works well. These options keep the brownies moist and tasty. For vegan brownies, use egg substitutes like flaxseed or applesauce. You can also choose dairy-free chocolate for the coating. These changes allow everyone to enjoy this treat, no matter their diet. To keep your chocolate covered strawberry brownies fresh, store them at room temperature. Place them in an airtight container. This way, they stay soft and delicious. They will last about 3-4 days this way. If you want them to last longer, you can refrigerate them. In the fridge, they will stay good for about a week. Just remember to cover them well to avoid drying out. Freezing these brownies is a great option if you have extra. First, let them cool completely. Then, cut the brownies into squares. Wrap each square in plastic wrap. Place the wrapped brownies in a freezer-safe bag or container. They can last up to three months in the freezer. When you want to enjoy them, take out how many you need. Let them thaw in the fridge overnight. You can also thaw them at room temperature for a few hours. To keep their texture and flavor, do not refreeze them. Enjoy your tasty treats straight from the freezer or after thawing! Yes, you can use frozen strawberries. They offer some benefits and drawbacks. Pros: - Frozen strawberries are often cheaper and available year-round. - They save time, as they come pre-cleaned and sliced. Cons: - Frozen berries can be mushy after thawing, affecting texture. - They may release more water, which can alter your brownie batter. If you use frozen strawberries, let them thaw and drain excess water. This helps keep the brownies fudgy. You can easily adjust the sweetness of your brownies. Here are some tips: - To make them less sweet: Reduce sugar by 1/4 cup. Taste the batter before baking. - To make them sweeter: Add 2 tablespoons of sugar at a time until you reach your desired taste. Remember, sugar balances flavors, so small changes can make a big difference. Leftover melted chocolate is a wonderful treat! Here are some ideas: - Drizzle it over fruits like bananas or apples for a sweet snack. - Use it to coat pretzels or nuts for a crunchy treat. - Pour it into molds to make chocolate candies. These options help you avoid waste and enjoy your chocolate in new ways! This blog post covered how to make delicious chocolate-covered strawberry brownies. We went over the needed ingredients, step-by-step instructions, and tips for the perfect texture. I also shared ways to adapt the recipe for different diets and some storage tips. Remember, perfect brownies need care and attention. Enjoy your baking adventure, and let your creativity shine!

Chocolate Covered Strawberry Brownies Irresistible Treat

To make this delicious broccoli cheddar soup, gather these ingredients: - 1 large head of broccoli, chopped into small florets - 1 medium onion, diced - 2 cloves garlic, minced - 4 cups vegetable broth - 2 cups shredded sharp cheddar cheese - 1 cup heavy cream - 2 tablespoons olive oil - 1 teaspoon thyme (fresh or dried) - Salt and pepper to taste - Optional: Crispy croutons for embellishment When measuring your ingredients, keep these tips in mind: - Use a kitchen scale for broccoli; this helps with even cooking. - When chopping the onion, try to keep the pieces small for quick cooking. - Mince garlic finely to release all its flavor. - Measure liquids in a clear measuring cup for accuracy. - Shred cheese fresh from the block for best melting. You can add more flavor with these options: - A pinch of red pepper flakes for heat. - Fresh herbs like parsley or chives for garnish. - A squeeze of lemon juice to brighten the taste. - Cooked bacon bits for a salty crunch. These ingredients can take your soup to the next level! {{ingredient_image_2}} 1. First, heat the olive oil in a large pot over medium heat. 2. Add the diced onion and sauté for about 5 minutes. Cook until the onion is soft and clear. 3. Next, add the minced garlic and thyme. Cook for 1 to 2 minutes. This helps the flavors come out. 4. Add the chopped broccoli and vegetable broth. Bring the mix to a boil. 5. When boiling, lower the heat and let it simmer for 15 to 20 minutes. The broccoli should be fork-tender. 6. Use an immersion blender to puree the soup until smooth. If you like it thicker, use a countertop blender instead. 7. Return the blended soup to low heat. Stir in the heavy cream and cheese. Mix until everything melts together. 8. Taste the soup and add salt and pepper as needed. 9. If it’s too thick, add a little vegetable broth or water. 10. Let it simmer for 5 more minutes to warm everything through. - Always keep the blender submerged in the soup to avoid splatters. - Move the blender around slowly for an even texture. - If you don’t have an immersion blender, use a countertop one. Just blend in small batches. - For a thicker soup, blend less or add more veggies. - To make it thinner, add more broth or water. - Check the soup’s thickness as you stir. Adjust it to what you like best. To make the best broccoli cheddar soup, focus on fresh ingredients. Use a large head of broccoli, chopped into small florets. This ensures even cooking. Sauté the onion until soft and clear. This step builds a strong base. Don't rush when adding garlic and thyme. Let them cook until fragrant. It really brings out the flavors. When blending, make sure to puree the soup until smooth. This gives it that creamy texture we all love. Adjust the thickness by adding more broth, if needed. You can easily boost the nutrition of your soup. Try adding carrots or celery. Chop them finely and sauté with the onion. Spinach or kale also works well. Add them towards the end of cooking. This way, they stay vibrant and full of nutrients. For a heartier soup, toss in some diced potatoes. They make it filling, plus they blend well with the flavors. Spices can elevate your soup to a new level. Consider adding a pinch of nutmeg for warmth. A dash of cayenne can bring a nice kick. Fresh herbs like parsley or basil can brighten the flavor. Add these just before serving for the best effect. For a unique twist, try a splash of hot sauce. It adds depth and a bit of heat. These small changes can make a big difference in taste. Pro Tips Fresh Broccoli is Best: For the most vibrant flavor and nutritional value, use fresh broccoli instead of frozen. Look for firm, green florets and avoid any yellowing. Cheese Selection: While sharp cheddar adds a great flavor, try mixing in other cheeses like Gruyère or Parmesan for a more complex taste and creamy texture. Adjusting Consistency: If the soup is too thick after blending, use additional vegetable broth or water to achieve your desired creaminess. Add gradually to avoid making it too thin. Flavor Boost: Enhance the flavor by adding a splash of lemon juice or a pinch of nutmeg at the end. This adds brightness and depth to the creamy soup. {{image_4}} You can mix up the cheese in your soup. Sharp cheddar is classic, but you can try other types too. Gruyère adds a nutty taste. Fontina melts well and gives a creamy feel. For a bit of kick, pepper jack offers a spicy twist. Just keep the cheese amount the same for the best texture. If you want a vegan version, skip the cheese and cream. Use a plant-based cheese that melts well. You can also swap heavy cream with coconut milk or cashew cream. This keeps the soup rich and creamy. Make sure to check the broth too; some brands have animal products. This soup is already gluten-free! Just make sure your vegetable broth has no gluten. If you want to thicken the soup, use cornstarch mixed with water. This will help you avoid flour, keeping it gluten-free. Enjoy your creamy soup without worry! After you enjoy your delicious soup, let it cool down. Pour it into an airtight container. This helps keep the soup fresh. Store it in the fridge for up to three days. If you want to keep it longer, freezing is a great option. Always label your container with the date. This way, you know when to use it. To freeze the soup, use freezer-safe containers. Leave some space at the top. The soup will expand when frozen. You can also freeze it in ice cube trays for small portions. Once frozen, transfer the cubes to a bag. Use within three months for best taste. When you’re ready to eat, take the soup from the fridge or freezer. If frozen, thaw it overnight in the fridge. To reheat, pour the soup into a pot. Heat it over medium heat, stirring often. This prevents it from sticking. If the soup is too thick, add a little vegetable broth. For microwave reheating, use a microwave-safe bowl. Heat it in short bursts, stirring in between. Enjoy your warm bowl of soup! You can enjoy broccoli cheddar soup with many sides. A fresh salad adds crunch. Pair it with crusty bread for dipping. Grilled cheese sandwiches also work well. For a heartier meal, serve it with a quiche. These options complement the soup’s creamy texture. You can even sprinkle some extra cheese on top for fun. Yes, frozen broccoli is a great choice. It saves time and still tastes good. Just thaw and chop it before cooking. Frozen broccoli is often pre-washed and cut. This means less prep for you! Use the same amount of frozen broccoli as fresh. The soup will still be creamy and delicious. To thicken your soup, use a few easy tricks. Blend the soup longer for a creamier texture. You can also add more cheese, which thickens it and adds flavor. If you want a veggie boost, add a potato. Cook it with the broccoli, then blend it all together. Adjust the thickness by adding broth or cream as needed. You learned how to make easy broccoli cheddar soup from scratch. We covered ingredients, cooking steps, tips, and variations. You can adjust flavors and textures to fit your taste. Don't forget storage tips to keep your soup fresh. Try serving it with bread or a salad for a meal. With practice, you'll master this comforting dish. Enjoy making your broccoli cheddar soup and share it with friends!

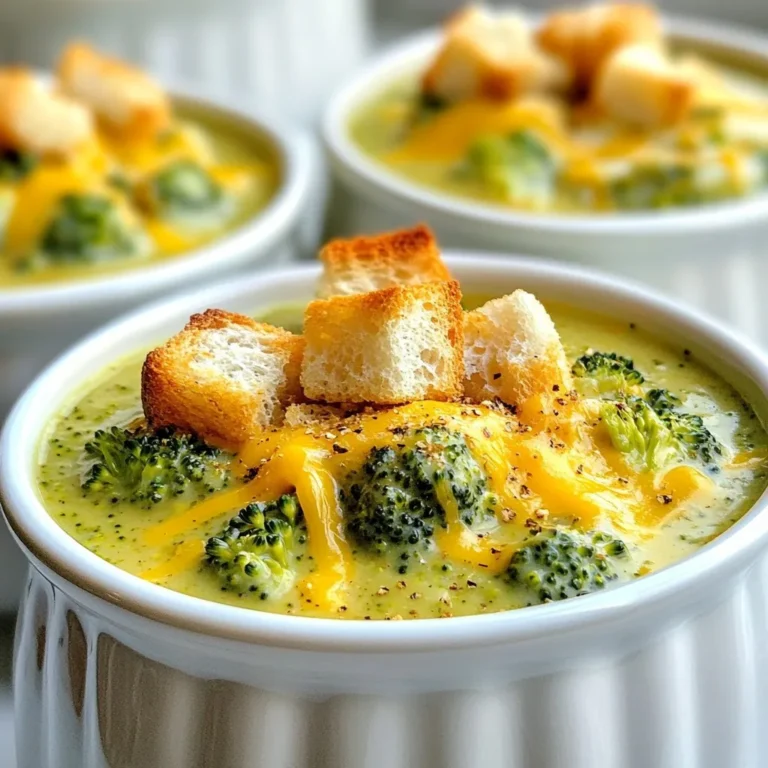
Easy Broccoli Cheddar Soup Simple and Tasty Recipe

You need 1 pint of fresh strawberries for this recipe. Make sure to wash them well and dry them gently. Choose ripe strawberries with bright colors for the best taste. The fresh fruit will give a sweet and juicy burst in each bite. For the chocolate coating, use 8 ounces of semi-sweet chocolate chips. This type of chocolate melts nicely and gives a rich flavor. Add 2 tablespoons of coconut oil or vegetable oil. The oil helps the chocolate melt smoothly and coat the strawberries evenly. You can get creative with toppings! Use 1/2 cup of crushed nuts, such as almonds, pistachios, or hazelnuts. These nuts add a nice crunch. For a pop of color, you can also use 1/2 cup of colorful sprinkles. They make your pops fun and festive! Use lollipop sticks or wooden skewers to hold the strawberries while you dip them in chocolate. Arrange the finished pops in a decorative glass for a charming display. {{ingredient_image_2}} Start by washing the strawberries well. Dry them gently with a clean towel. Next, grab a lollipop stick or skewer. Carefully poke it into the stem end of each strawberry. Make sure it goes in far enough to hold the berry but not too deep to pierce through. This stick will help you dip the strawberries later. Now, let’s melt the chocolate! In a microwave-safe bowl, mix the semi-sweet chocolate chips with coconut oil. The oil helps the chocolate melt smoothly. Heat the bowl in the microwave. Do this in 30-second intervals. Stir the chocolate between each round. Keep going until it is completely melted and glossy. This smooth chocolate will make a great coating. Grab each strawberry by the stick. Dip it into the melted chocolate. Rotate it gently to cover the whole strawberry. Allow any extra chocolate to drip back into the bowl. While the chocolate is still wet, roll the strawberry in your choice of toppings. You can use crushed nuts or colorful sprinkles for a fun look. Make sure to cover all sides for a tasty crunch. Once coated, it’s time to set the pops. Place the chocolate-covered strawberries upright. You can use a foam block, a sturdy glass, or a baking sheet lined with parchment paper. Make sure they don’t touch each other. This will help them keep their shape. Now, pop them in the refrigerator for about 30 minutes. This will let the chocolate harden and be ready to eat. To get smooth chocolate, use semi-sweet chocolate chips. Mix in 2 tablespoons of coconut oil. This oil helps the chocolate melt evenly. Heat it in the microwave. Use 30-second bursts to avoid burning. Stir well after each burst. The chocolate should be glossy and thick, perfect for coating. Get creative with toppings! Try crushed nuts like almonds or pistachios. They add crunch and flavor. Colorful sprinkles make the pops look fun and festive. You can also use shredded coconut or mini chocolate chips. Roll the chocolate-dipped strawberries in toppings while the chocolate is still wet. This helps the toppings stick better. For a great presentation, stand the pops up in a foam block or a glass. This keeps them from touching and ruining the chocolate. You can also use a baking sheet lined with parchment paper. Add extra sprinkles around the base for flair. These pops are perfect for parties or gifts. Enjoy them chilled for the best taste! Pro Tips Choose the Right Chocolate: Using high-quality chocolate will enhance the flavor of your pops. Consider using dark or milk chocolate for a richer taste. Keep Strawberries Dry: Ensure that your strawberries are completely dry before dipping. Any moisture can cause the chocolate to seize and not adhere properly. Experiment with Toppings: Get creative with your toppings! Try using crushed cookies, shredded coconut, or even edible glitter for a unique touch. Storage Tips: Store your chocolate-covered strawberry pops in an airtight container in the refrigerator to keep them fresh. Enjoy within a few days for the best taste! {{image_4}} You can use many types of chocolate for your pops. Semi-sweet chocolate is a classic choice. Dark chocolate gives a rich taste. Milk chocolate adds sweetness. White chocolate is fun and creamy. You can mix chocolates for a unique flavor. Each type brings its own twist to the treat. While strawberries are great, you can try other fruits. Fresh bananas are a fun option. Pineapple chunks offer a tropical touch. Apples, with their crispness, work well too. Even grapes can be dipped for a bite-sized treat. Just pick fruits that are firm and easy to dip. You can change the look of your pops for any season. For spring, use pastel sprinkles and flowers. In summer, bright colors add cheer. For fall, add orange and brown toppings. Winter calls for snowflake sprinkles or chocolate drizzle. These small touches make your pops festive and fun. To keep your chocolate covered strawberry pops fresh, store them in a cool place. Use an airtight container to prevent moisture from ruining the chocolate. Avoid stacking the pops directly on top of each other. Instead, place parchment paper between them to avoid sticking. If you want to keep them fresh longer, the refrigerator is a good choice. These delightful treats stay fresh for about 2 to 3 days in the fridge. After that, the strawberries may lose their crispness, and the chocolate may start to look dull. If you notice any signs of spoilage, it’s best to toss them out. Trust me, you want to enjoy them while they are at their best! Freezing is a great option if you want to save your pops for later. To freeze, arrange the pops on a baking sheet lined with parchment paper. Place them in the freezer until solid, around 1 to 2 hours. Once frozen, transfer them to an airtight container or freezer bag. They can last up to 2 months in the freezer. When you’re ready to eat them, let them sit in the fridge for a few hours before serving. This will help them regain their texture. Enjoy your delicious treats! I love using semi-sweet chocolate for coating. It strikes the right balance between sweet and rich. Milk chocolate can be too sweet, while dark chocolate can be bitter. If you want a different taste, try white chocolate. Just remember to add coconut oil for smoothness. This will help your chocolate melt well and coat evenly. I recommend fresh strawberries for the best taste. Frozen strawberries can release extra water when thawed. This can make the chocolate slide off. If you only have frozen strawberries, let them thaw completely and dry them well. This way, you can still enjoy a tasty treat, but fresh berries work best! To avoid cracking, melt your chocolate slowly. Use a microwave-safe bowl and heat in short bursts. Stir well between each burst. Adding coconut oil helps too. It makes the chocolate smoother and more flexible. Once coated, let the pops cool at room temperature before chilling. This helps the chocolate set without cracking. Yes! You can use dairy-free chocolate chips. Look for brands that are labeled dairy-free or vegan. You can still follow the same melting process. Just ensure your coconut oil is also dairy-free. This way, everyone can enjoy these tasty chocolate-covered strawberry pops! In this post, we covered how to make delicious chocolate-covered strawberries. We explored fresh ingredients, step-by-step instructions, and helpful tips. You now know how to melt chocolate, coat strawberries, and add fun toppings. We also looked at variations and storage tips to keep your treats fresh. Making these pops is simple and fun. Enjoy experimenting with different flavors and decorations. Share them with friends and family, as they are sure to impress! Happy popping!

Chocolate Covered Strawberry Pops Delightful Treats

For this Mediterranean Chicken Bake, gather these fresh and vibrant ingredients: - 4 boneless, skinless chicken breasts - 1 cup cherry tomatoes, halved - 1 bell pepper (red or yellow), diced - 1 medium red onion, thinly sliced - 1 cup Kalamata olives, pitted and halved - 2 cloves garlic, finely minced - 1 tablespoon dried oregano - 1 teaspoon paprika - 1/4 cup extra virgin olive oil - Salt and freshly ground black pepper to taste - Fresh parsley, chopped (for garnish) - 1 lemon, zest and juice This dish serves four people, and each serving provides a healthy balance of protein, carbs, and fats. The chicken is lean and high in protein, helping to build muscle. The vegetables add fiber and vitamins, while olives and olive oil give healthy fats. Here’s a rough breakdown per serving: - Calories: 320 - Protein: 30g - Carbohydrates: 15g - Fat: 15g - Fiber: 3g You can swap some ingredients if needed. If you don’t have Kalamata olives, green olives work well too. For the bell pepper, use any color you like, or skip it altogether. If you want a milder taste, try using shallots instead of red onion. You can also use fresh herbs if you have them on hand, like fresh oregano or basil. This dish is flexible and allows for your own touch! {{ingredient_image_2}} First, set your oven to 400°F (200°C). This heat will cook the chicken and veggies just right. Grab a 9x13 inch baking dish. Lightly grease it with cooking spray or a little olive oil. This helps keep the food from sticking. Next, take a large mixing bowl. Add 1 cup of halved cherry tomatoes, 1 diced bell pepper, and 1 thinly sliced red onion. Toss in 1 cup of Kalamata olives too. Mix everything well. Make sure all the veggies are combined and ready to shine. In a smaller bowl, whisk together 1/4 cup of extra virgin olive oil, 2 minced garlic cloves, 1 tablespoon of dried oregano, and 1 teaspoon of paprika. Add the grated zest and juice of 1 lemon. Don’t forget to season with salt and black pepper. This mixture packs a lot of flavor. Lay the 4 chicken breasts in your greased baking dish. Drizzle half of your olive oil mixture over the chicken. Make sure each piece gets coated well. Next, spoon the veggie mix around and on top of the chicken. Drizzle the rest of the olive oil mixture over everything. This creates a tasty blend. Cover the dish tightly with aluminum foil. Bake it for 25 minutes in your preheated oven. After 25 minutes, take off the foil. Bake it uncovered for another 15-20 minutes. The chicken should reach an internal temperature of 165°F (75°C). The veggies will be tender and smell amazing. Once done, let it rest for a few minutes. Garnish with fresh chopped parsley for a pop of color. Enjoy your meal! To cook chicken safely, check the internal temperature. It should reach 165°F or 75°C. Use a meat thermometer for accuracy. Insert it into the thickest part of the chicken. This will help you avoid undercooked or dry chicken. Remember to let the chicken rest after baking. This keeps juices inside, making it tender. For a deeper flavor, marinate the chicken before baking. Use the olive oil mixture and let it sit for at least 30 minutes. You can also add more herbs, like thyme or basil, for extra taste. Fresh herbs work well, too! When baking, cover the dish with foil for the first part of cooking. This traps steam and keeps everything moist. Serve the Mediterranean Chicken Bake right from the dish for a warm feel. For a fancier look, plate it on individual servings. Add a fluffy bed of couscous or quinoa underneath. This adds height and color. Top with fresh parsley and a lemon wedge. The lemon gives a nice pop of brightness. Pro Tips Marinate for Extra Flavor: For an elevated flavor profile, consider marinating the chicken breasts in the olive oil mixture for at least 30 minutes before baking. This will allow the flavors to penetrate the chicken, making it even more delicious. Vegetable Variations: Feel free to swap out the vegetables based on what you have on hand. Zucchini, eggplant, or artichokes can add unique flavors and textures to your Mediterranean Chicken Bake. Cheese, Please: For a cheesy twist, sprinkle some crumbled feta cheese over the vegetables 5 minutes before the baking time is up. It will melt beautifully and provide a creamy contrast to the dish. Leftover Magic: This dish makes fantastic leftovers! Store any extras in an airtight container in the fridge and enjoy them cold in salads or reheated for a quick meal. {{image_4}} You can easily swap ingredients to suit your taste. Try skinless turkey breasts instead of chicken. For veggies, use zucchini or eggplant for added flavor. If you don’t like olives, capers work well too. You can try different herbs like thyme or basil for a new twist. For a spicy kick, add some red pepper flakes or fresh chili. You can cook this dish in different ways. If you prefer grilling, marinate the chicken in the olive oil mixture and grill it. Use a grill basket for the veggies. If you want a quicker option, try cooking it in an air fryer. Set it to 375°F and cook for about 20 minutes. You can check the chicken's doneness with a meat thermometer. Serving can be fun and creative. You can serve the chicken bake straight from the dish for a cozy feel. If you want a fancy touch, plate it over couscous or quinoa. Add some lemon wedges on the side for zest. Fresh parsley on top brightens the dish and adds color. For extra texture, serve with crusty bread to soak up the juices. After you make the Mediterranean Chicken Bake, let it cool. Place leftovers in an airtight container. Store in the fridge for up to three days. Always recheck for freshness before eating. To freeze, let the dish cool completely. Transfer it to a freezer-safe container. Wrap it well to prevent freezer burn. You can freeze it for up to three months. Label the container with the date for easy tracking. When ready to eat, thaw the chicken bake overnight in the fridge. Preheat your oven to 350°F (175°C). Place the dish in the oven for about 20 minutes. Check if it’s heated through. You can also use a microwave for quick reheating. Just cover the dish to keep moisture in. Enjoy your tasty meal! You can pair Mediterranean Chicken Bake with many tasty sides. Some great options include: - Couscous - Quinoa - Rice - A fresh green salad - Garlic bread Each choice adds flavor and makes the meal more filling. I love serving it with couscous. It soaks up the juices and adds a nice texture. To check if your chicken is done, use a meat thermometer. The internal temperature should reach 165°F (75°C). If you don't have a thermometer, cut into the chicken. The juices should run clear, not pink. This method works well, but I always prefer the thermometer for accuracy. Yes, you can prepare Mediterranean Chicken Bake ahead of time. Just follow these steps: 1. Assemble the dish as directed. 2. Cover it tightly with foil. 3. Store it in the fridge for up to 24 hours. When ready to bake, just add 10-15 minutes to the cooking time. This makes it a great option for busy nights. Absolutely! To make this dish in a slow cooker: 1. Prepare the chicken and veggies as you would for baking. 2. Place everything in the slow cooker. 3. Cook on low for 4-6 hours or high for 2-3 hours. This method keeps everything moist and full of flavor. It’s a great way to enjoy this dish without heating your oven. This blog post covered a delicious Mediterranean Chicken Bake. We explored ingredients and their nutrition. You learned how to prep and cook the dish step-by-step. Tips helped ensure perfect cooking and great presentation. We also shared variations and how to store leftovers. Enjoy experimenting with this recipe in your kitchen. You'll have a tasty meal ready for any occasion!

Mediterranean Chicken Bake Flavorful and Easy Recipe

To make this tasty drink, gather these key items: - 2 cups whole milk - 2 tablespoons unsweetened cocoa powder - 2 tablespoons granulated sugar - 1/2 teaspoon pure vanilla extract - 1/4 teaspoon ground cinnamon - 1/4 teaspoon freshly grated nutmeg These ingredients form the rich base of our RumChata Hot Cocoa. Whole milk gives the cocoa a creamy texture. Cocoa powder adds deep chocolate flavor. Sugar sweetens the drink, making it delightful. Vanilla extract enhances the taste, while cinnamon and nutmeg add warmth. Toppings make this drink even better. Here are great options: - Whipped cream - Chocolate shavings - Cocoa powder - 2 cinnamon sticks Whipped cream creates a fluffy crown on your cocoa. Chocolate shavings add a sweet touch and a bit of elegance. A sprinkle of cocoa powder can enhance the chocolate flavor. Cinnamon sticks not only look nice but also add more taste. You can customize your cocoa with extra flavors. Think about these options: - Peppermint extract - Sea salt - Ground ginger Peppermint extract gives a minty twist, perfect for winter. A pinch of sea salt can balance sweetness and deepen flavors. Ground ginger adds a spicy kick, making your cocoa unique. Feel free to mix and match to find your favorite blend! {{ingredient_image_2}} Start by pouring 2 cups of whole milk into a small saucepan. Place it over medium heat. Add 2 tablespoons of unsweetened cocoa powder and 2 tablespoons of granulated sugar. Use a whisk to blend these ingredients well. Keep whisking until the mixture is smooth and hot, but do not let it boil. This step keeps your cocoa creamy and rich. Once the milk mixture is steaming, add 1/4 teaspoon of ground cinnamon and 1/4 teaspoon of freshly grated nutmeg. These spices will make your hot cocoa exciting and fragrant. Whisk again to ensure they mix in well. This addition enhances the flavor and gives warmth to the drink. Next, remove the saucepan from heat. Stir in 1/2 teaspoon of pure vanilla extract. This will add a lovely depth to your cocoa. Carefully pour the hot cocoa into two mugs, filling them about three-quarters full. Top each mug with a generous dollop of whipped cream. Let it cascade down the sides for a beautiful look. For a fancy touch, add chocolate shavings or a light dusting of cocoa powder on top. Finally, place a cinnamon stick in each mug for stirring and as a nice garnish. Enjoy your cozy drink! To make your RumChata hot cocoa smooth, use whole milk. Whole milk gives a rich base. Heat it slowly so it does not boil. Stir often to mix everything well. This keeps the cocoa creamy and prevents lumps. If you want extra creaminess, try adding some heavy cream. This will make each sip feel like a warm hug. You can change the sweetness of your cocoa. Start with two tablespoons of sugar. If you like it sweeter, add more sugar a little at a time. For spice, I use a quarter teaspoon of ground cinnamon and nutmeg. You can adjust these to your taste. If you want more kick, add a pinch of cayenne pepper. This gives a nice warm finish. How you serve your cocoa can make it special. Use big mugs to show off your hot cocoa. Top it with a big scoop of whipped cream. Let it flow down the sides for a pretty look. Finish with chocolate shavings or a light dusting of cocoa powder. Add a cinnamon stick in each mug for a fun stirrer. It also adds a nice touch of flavor. Pro Tips Adjust Sweetness: Feel free to modify the amount of sugar based on your personal preference for sweetness. You can also substitute with honey or maple syrup for a natural alternative. Milk Alternatives: For a dairy-free version, substitute whole milk with almond milk, oat milk, or coconut milk. Each will add its unique flavor to the cocoa. Spice Variations: Experiment with adding other spices like cardamom or ginger for an extra layer of warmth and complexity in your hot cocoa. Presentation Matters: For a beautiful presentation, use clear mugs to showcase the layers of whipped cream and cocoa. Adding a sprinkle of cinnamon on top enhances the visual appeal. {{image_4}} You can easily change the taste of your RumChata hot cocoa. Adding a mint flavor makes it refreshing. Just stir in 1-2 drops of mint extract. If you love coffee, mix in a spoon of instant coffee or espresso powder for a mocha twist. This gives your drink a rich, bold flavor that warms you up. If you want a creamy drink but need dairy-free options, try almond or oat milk. Both add a nice nutty flavor. Coconut milk gives a tropical touch. Use full-fat versions for a richer experience. Just follow the same steps in the recipe, and enjoy your drink without worry! Make your hot cocoa match the seasons! In fall, add pumpkin spice for a warm, cozy feel. Mix in 1 teaspoon of pumpkin puree and a pinch of pumpkin pie spice. For winter, try adding a splash of eggnog. This will create a festive vibe. You can even throw in a little cinnamon for extra flavor. Each season can bring a new twist to this cozy drink! If you have extra RumChata Hot Cocoa, store it in a sealed container. Let it cool to room temperature first. Then, place it in the fridge. It will stay fresh for up to three days. Make sure to stir it well before serving again. To reheat your cocoa, pour it into a saucepan. Heat it on low to avoid burning. Stir often to keep it smooth. You can also use a microwave. Heat it in short bursts, about 30 seconds, stirring in between. This way, you keep the creamy texture. RumChata Hot Cocoa lasts up to three days in the fridge. After that, it may spoil. If it smells strange or looks off, throw it away. Always check for freshness before enjoying your cocoa. Yes, you can make RumChata Hot Cocoa in advance. Just prepare the cocoa base without the RumChata. Store it in the fridge for up to two days. When ready to serve, heat it gently on the stove. Once hot, stir in the RumChata. This keeps the flavor fresh and tasty. RumChata is a cream liqueur made with rum, cinnamon, and vanilla. It adds a smooth, sweet taste to the cocoa. The hint of cinnamon pairs well with the cocoa and spices. This makes each sip warm and comforting. You’ll love the rich, creamy texture it brings. Yes, there are non-alcoholic options. You can use a vanilla-flavored syrup or a cream soda. Both can mimic the sweet and creamy taste of RumChata. Look for creamers with cinnamon or vanilla flavors. They will enhance your cocoa without the alcohol. Absolutely! You can use almond, soy, or oat milk instead of whole milk. Each type of milk offers a unique flavor and texture. Almond milk gives a nutty taste, while oat milk adds creaminess. Just choose what you like best for your hot cocoa. In this post, we explored how to make RumChata Hot Cocoa. We covered the main ingredients, toppings, and spices that enhance flavor. I gave step-by-step instructions for preparing and serving. You learned tips for texture, sweetness, and presentation. We also looked at fun variations and storage options. Now, you can easily create this warm drink at home. Enjoy the flavors and feel free to experiment with your own ideas!

RumChata Hot Cocoa Rich and Cozy Winter Treat

- 14 oz firm tofu, thoroughly pressed and cut into 1-inch cubes - 3 tablespoons cornstarch - 2 tablespoons vegetable oil (preferably canola or sunflower) - 3 cloves garlic, finely minced - 1/4 cup honey (or maple syrup for a vegan option) - 1/4 cup soy sauce (low sodium preferred) - 1 tablespoon rice vinegar (or apple cider vinegar) - 1/2 teaspoon red pepper flakes (adjust based on your spice preference) - 2 green onions, thinly sliced (for garnish) - Sesame seeds (for garnish) - Best Types of Tofu for Crispiness: Firm tofu works best. It holds its shape and crisps up well. Extra-firm tofu is also great if you want even more texture. Avoid silken tofu as it’s too soft. - Substitutions for Honey (Vegan options): For a vegan option, use maple syrup instead of honey. It provides a similar sweetness and flavor. Agave nectar is another option if you want to mix things up. - Choosing Low Sodium Soy Sauce: Low sodium soy sauce is best for this dish. It keeps the flavor rich without being too salty. This helps balance the sweetness of the honey or maple syrup. {{ingredient_image_2}} Pressing Tofu for Optimal Texture To get the best texture, you must press the tofu. Wrap it in paper towels. Place a heavy object on top. This removes excess water. Press it for at least 30 minutes. A tofu press works well too. This step makes the tofu firmer and crispier. Cutting Tofu into Uniform Cubes Once pressed, cut the tofu into 1-inch cubes. Make sure to keep them even. This helps them cook evenly. Use a sharp knife for clean cuts. Uniform cubes will help each piece get crispy. Cornstarch Coating Technique In a bowl, add the cubed tofu. Sprinkle 3 tablespoons of cornstarch over it. Gently toss the tofu until all pieces are coated. The cornstarch gives the tofu a crunchy crust. Make sure every piece gets an even layer. Perfect Oil Temperature for Frying Heat 2 tablespoons of vegetable oil in a skillet. Use medium-high heat for best results. Wait until the oil shimmers. This shows the oil is hot enough. Proper temperature prevents sticking and gives a nice crisp. Techniques for Cooking Garlic Lower the heat to medium. Add minced garlic to the skillet. Stir for about 30 seconds. You want it fragrant but not burnt. Garlic adds a lovely flavor to your sauce. Combining Ingredients for the Sauce Next, pour in the honey and soy sauce. Add rice vinegar and red pepper flakes. Stir well to mix everything. Let it simmer for 2-3 minutes. This will blend the flavors nicely. Tossing Tofu in Sauce Return the crispy tofu to the skillet. Toss it in the honey garlic sauce. Make sure each piece is well coated. Let it cook for another 2 minutes. This helps the tofu absorb the sauce. Garnishing with Green Onions and Sesame Seeds Transfer the glazed tofu to a serving dish. Garnish with sliced green onions and sesame seeds. This adds extra color and texture. Enjoy your crispy honey garlic tofu with pride! - Frying Tips for Tofu: Start with firm tofu. Press it well to remove water. This step helps it get crispy. Coat the tofu cubes in cornstarch. This creates a nice layer that fries well. Heat the oil until it shimmers. This shows it is hot enough. - Importance of Not Overcrowding the Pan: Fry the tofu in batches. If you crowd the pan, the tofu will steam. This makes it soggy instead of crispy. Leave space between each piece. This allows hot air to circulate and fry evenly. - Adding More Spice: Alternatives to Red Pepper Flakes: You can use fresh chili or sriracha instead. Both add heat and flavor. For a milder option, use black pepper. This gives a subtle kick without being too hot. - How to Adjust Sweetness: If you find the dish too sweet, reduce the honey. You can also add a splash of vinegar. This balances out the flavors. If you love sweetness, add more honey or maple syrup. - Plating Ideas for Eye-Catching Serving: Serve the tofu on a bed of rice or quinoa. This makes a great base. Add bright vegetables for color, like bell peppers or green beans. Drizzle some sauce on top for a glossy finish. - Pairing Suggestions (Rice, Quinoa, Vegetables): Pair the tofu with steamed vegetables. Broccoli and snap peas work well. A squeeze of lime adds a fresh taste. Enjoy your colorful plate and tasty meal! Pro Tips Press Tofu Well: Ensure you press the tofu adequately for at least 30 minutes to remove excess moisture, which results in a firmer texture and better absorption of flavors. Uniform Coating: When coating the tofu with cornstarch, make sure each piece is evenly covered. This ensures consistent crispiness and prevents any soggy spots during frying. Hot Oil is Key: Always let the oil heat until it shimmers before adding the tofu. This will help create a crispy exterior and prevent the tofu from sticking to the pan. Flavor Infusion: After glazing the tofu in the sauce, allow it to cook for a few extra minutes. This step helps the tofu absorb the sweet and savory flavors of the honey garlic sauce more intensely. {{image_4}} You can easily make this dish vegan. Just swap honey for maple syrup. Maple syrup gives a sweet touch. It blends well with garlic and soy sauce. This change makes the dish plant-based and just as tasty. You can use different types of tofu. Silken tofu is softer and creamier. It works well in sauces but may not hold its shape when frying. Extra-firm tofu is denser and crisps up nicely. Choose the type based on your texture preference. Add a citrus twist to your recipe. Lime or lemon juice brightens the flavors. Just a splash can wake up the dish. You can also try different sauces. Teriyaki and sweet and sour sauces bring new tastes. Feel free to experiment and discover your favorite! To keep your crispy honey garlic tofu fresh, follow these tips. First, let the tofu cool to room temperature. Then, place it in an airtight container. Refrigerate it for up to three days. To keep tofu crispy for later, store it separately from the sauce. The sauce can make the tofu soggy. You can save the sauce in another container. This way, you can reheat the tofu and add the sauce just before serving. To reheat tofu without losing its crispiness, use the oven or skillet. Preheat your oven to 375°F (190°C). Spread the tofu on a baking sheet. Bake it for about 10-15 minutes, or until it’s warm and crispy again. If you choose a skillet, heat it on medium heat. Add a little oil to prevent sticking. Toss the tofu for a few minutes until it's hot and crispy. Yes, you can freeze cooked tofu. However, the texture may change a bit. To freeze it, let the tofu cool and place it in a freezer-safe bag. Press out any air before sealing. It can last up to three months in the freezer. When you're ready to eat, thaw the tofu overnight in the fridge. To reheat frozen tofu, follow the same steps as mentioned above for reheating. This will help regain some of its crispiness. To press tofu, start with firm or extra-firm tofu. Here are common methods: - Tofu Press: Use a tofu press for the best results. It removes moisture evenly. - Paper Towels: Wrap tofu in paper towels. Place a heavy object on top for at least 30 minutes. - Plate Method: Place tofu on a plate. Set another plate on top and add weight. Each method helps make your tofu firmer and gives it a better texture. Yes, you can use less oil for frying tofu by trying these healthier options: - Non-Stick Spray: Lightly spray your pan with non-stick cooking spray. - Sautéing: Use a small amount of water or vegetable broth to sauté tofu. - Broiling: Place tofu under the broiler to get crispy without much oil. These methods reduce fat while still making tasty tofu. You can make crispy tofu in the oven or air fryer with these tips: - Oven-Baking: Preheat your oven to 400°F (200°C). Arrange coated tofu on a baking sheet. Bake for 25-30 minutes, flipping halfway. - Air-Frying: Preheat the air fryer to 375°F (190°C). Cook tofu for about 15 minutes, shaking halfway through. Both methods give you crispy tofu with less oil and hassle. No, honey is not vegan as it comes from bees. Here are some alternatives: - Maple Syrup: Use maple syrup for a sweet and similar flavor. - Agave Nectar: This is another great sweetener that works well in recipes. - Brown Rice Syrup: This syrup has a mild flavor and is vegan-friendly. These substitutes keep your dish delicious and suitable for a vegan diet. This blog post covers how to make crispy tofu with a tasty honey garlic sauce. You learned about key ingredients, like firm tofu and cornstarch, and how to prepare, cook, and serve the dish. Remember to check ingredient tips for the best flavor and texture. You can also explore fun variations to suit your taste. Enjoy creating a dish that’s both healthy and delicious. Tofu can be easy and fun to cook!

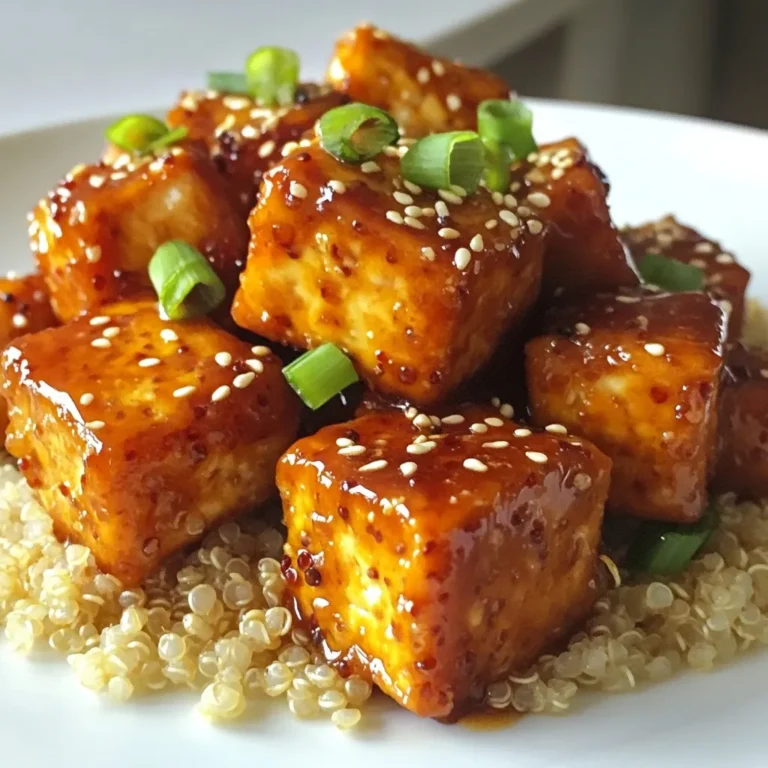
Crispy Honey Garlic Tofu Irresistible Flavor Recipe

- 200g feta cheese, crumbled - 4 large eggs - 1 cup cherry tomatoes, halved - 2 tablespoons extra virgin olive oil - 1 teaspoon dried oregano - 1/2 teaspoon red pepper flakes (optional) - Salt and freshly ground black pepper to taste - Fresh parsley, finely chopped (for garnish) - Crusty bread, sliced (for serving) The main ingredients for Baked Feta Eggs are simple yet flavorful. You start with 200g of crumbled feta cheese. This cheese melts and becomes creamy when baked. Next, you need 4 large eggs. They bring richness and protein to the dish. Then, add 1 cup of halved cherry tomatoes. They add sweetness and acidity, balancing the feta. For seasoning, you’ll use 2 tablespoons of extra virgin olive oil. This oil enhances the taste and helps cook the tomatoes. A teaspoon of dried oregano gives a lovely herbal note. If you like a kick, add 1/2 teaspoon of red pepper flakes. Adjust the salt and black pepper to your taste. Finally, garnish with fresh parsley. It adds color and freshness to the dish. For serving, have some crusty bread ready. It’s perfect for soaking up the tasty sauce. Each ingredient plays a key role in making this dish delightful and tasty. {{ingredient_image_2}} - Preheat your oven to 400°F (200°C). - Arrange tomatoes and feta in a baking dish. Start by warming up your oven. This helps your dish cook evenly. Next, take a medium-sized baking dish. Place halved cherry tomatoes evenly. Then, add crumbled feta cheese on top. This gives each bite a creamy touch. - Drizzle with olive oil and season. - Bake until feta is golden and tomatoes blister. Now, drizzle olive oil over the tomatoes and feta. This adds flavor and helps everything cook nicely. Sprinkle dried oregano, red pepper flakes, salt, and pepper. Mix it all together gently. Place your dish in the hot oven. Bake for 15-20 minutes. Watch for the feta to turn golden brown and the tomatoes to blister. They should release their juices, making a delicious sauce. - Create wells for eggs and bake to desired doneness. - Garnish with parsley and serve. After baking, carefully take the dish out of the oven. Use a spoon to make small wells in the mixture. Each well should be big enough for an egg. Crack one egg into each well. Be careful not to break the yolk. Put the dish back in the oven. Bake for another 10-15 minutes. Check the eggs to see how runny you like the yolks. When done, remove the dish from the oven. Let it cool for a few minutes. Sprinkle fresh parsley on top for color and flavor. Serve warm with slices of crusty bread. This bread is perfect for soaking up the tasty sauce! To make Baked Feta Eggs great, start with even layers of tomatoes and feta. This mix helps each bite taste balanced. When the eggs bake, watch them closely. The cooking time can change based on how you like your yolks. I prefer mine runny, but adjust to your taste. Add herbs to boost flavor. Basil and thyme work well with the feta. You can also toss in sautéed veggies. Spinach or bell peppers add color and nutrition. These small changes can take your dish from good to amazing! Make your meal special by serving in ramekins. This gives each guest a personal touch. For a pop of color, use bright toppings. Chopped fresh herbs or sliced olives can make the dish look even better. Remember, we eat with our eyes first! Pro Tips Use Fresh Ingredients: Fresh cherry tomatoes and high-quality feta cheese will elevate the flavor of this dish significantly. Customize the Flavor: Feel free to add other herbs like basil or thyme for a different taste profile that pairs well with feta and eggs. Check for Doneness: Keep an eye on the eggs while baking; different ovens may require slightly different baking times. Perfect Bread Pairing: Choose a hearty crusty bread, like sourdough or ciabatta, to soak up the delicious juices from the tomatoes and feta. {{image_4}} If you want a gluten-free option, skip the bread. You can serve the dish with grilled veggies or lettuce wraps instead. For a vegan twist, use firm tofu or chickpea flour to replace the eggs. This way, you still get a good texture and flavor. To make it more Mediterranean, add olives or capers. These ingredients add a salty, briny taste. You can also swap the feta for goat cheese or ricotta for a different flavor profile. Each cheese brings its own unique taste and creaminess. You can easily cook this dish on the stovetop. Just sauté the tomatoes and feta in a pan. Then, crack the eggs directly into the pan. For a slow cooker option, layer your ingredients and let them cook for a few hours. This method is great for meal prep days. After enjoying your Baked Feta Eggs, store leftovers in an airtight container. You can keep them in the fridge for up to 3 days. When you're ready to eat, reheat gently. You can use the oven or microwave for this. If you want to save your dish for later, freeze it before adding the eggs. This helps keep the eggs fresh. When you are ready to eat, thaw the dish in the fridge. After that, you can reheat it like before. For the best taste, enjoy your Baked Feta Eggs soon after cooking. Freshness is key! Also, keep the bread stored separately. This stops it from getting soggy from the sauce. Total prep and cooking time is approximately 35 minutes. This includes 10 minutes for prep and 25 minutes for baking. You can enjoy a tasty meal in no time! Yes, prep the dish ahead and bake just before serving. This makes it easy to entertain guests or enjoy a quick meal later. Just remember to store it in the fridge and pop it in the oven when you’re ready. Pair with crusty bread, salad, or roasted vegetables. The bread is perfect for soaking up the rich sauce. A fresh salad adds color and crunch. Roasted veggies give a nice balance to the dish. Omit or reduce red pepper flakes for a milder flavor. If you want a kick, keep them in. Adjusting the spice makes this dish perfect for everyone at your table! This blog post shared a simple recipe for Baked Feta Eggs. We covered its main ingredients, preparation steps, and ways to enhance flavors. I offered tips on storing leftovers and suggested variations to fit your needs. Baked Feta Eggs is a dish you can easily customize. Experiment with flavors and presentation to make it your own. Enjoy making this tasty dish for brunch or any meal. It’s quick and rewarding!

Baked Feta Eggs Delightfully Simple and Tasty Meal

PREV 1 … 45 46 47 NEXT
snack joy kitchen

explore

DessertsDinnerAppetizersDrinks

Our Policies

  • Cookie Policy
  • Copyright Policy
  • Disclaimer
  • GDPR Policy
  • Terms Of Use
Back to Top
  • About
  • Contact Us
  • Privacy Policy
© 2026 snack joy kitchen