FREE DINNER EBOOK! Get your copy!
  • Cookie Policy
  • GDPR Policy
  • Disclaimer
  • Terms Of Use
  • Visit my other site: Fun Cookie Recipes
snack joy kitchen
  • Home
  • Dinner
  • Desserts
  • Drinks
  • Appetizers
  • Contact
  • About
  • Privacy Policy
  • Home
  • Dinner
  • Desserts
  • Drinks
  • Appetizers
  • Contact
  • About
  • Privacy Policy
  • Cookie Policy
  • GDPR Policy
  • Disclaimer
  • Terms Of Use
Visit my other site: Fun Cookie Recipes

HOME / CATEGORIES /

Latest

For these tasty wraps, you will need: - 1 lb ground chicken - 2 tablespoons sesame oil - 2 cloves garlic, minced - 1 tablespoon fresh ginger, finely grated - 1/4 cup soy sauce (or tamari for a gluten-free option) - 1 tablespoon honey - 1 tablespoon rice vinegar - 1 cup bell peppers, diced (choose red, yellow, or a colorful mix) - 1 cup water chestnuts, diced for crunch - 1/4 cup green onions, sliced thin - 1 head of butter or iceberg lettuce, leaves carefully separated Each ingredient plays a key role. The ground chicken serves as the base. Garlic and ginger add a strong flavor. The soy sauce, honey, and rice vinegar create a sweet and salty sauce. Bell peppers and water chestnuts bring color and crunch. The lettuce wraps everything up, making it easy to eat. To make your wraps even better, consider these garnishes: - Sesame seeds for garnish - Fresh cilantro leaves for garnish These add flavor and a nice look. You can also serve lime wedges on the side. They add a fresh zing when squeezed over the wraps. If you want a gluten-free option, use tamari instead of soy sauce. This small swap keeps your dish safe for those with gluten sensitivities. All other ingredients are naturally gluten-free. Enjoy your flavorful meal without worry! {{ingredient_image_2}} Start by heating 2 tablespoons of sesame oil in a large skillet over medium-high heat. Wait about one minute for the oil to warm. Once it shimmers, add 2 cloves of minced garlic and 1 tablespoon of finely grated fresh ginger. Sauté these for about 30 seconds, stirring constantly. You want to smell their wonderful aroma but not burn them. Next, add 1 pound of ground chicken to the skillet. Use a spatula to break the meat into smaller pieces. Cook the chicken for about 5 to 7 minutes. Stir occasionally until it turns a nice golden brown and is fully cooked. Make sure there is no pink left. While the chicken cooks, mix your sauce. In a small bowl, whisk together 1/4 cup of soy sauce, 1 tablespoon of honey, and 1 tablespoon of rice vinegar until smooth. Once the chicken is done, pour this sauce over it in the skillet. Then, stir in 1 cup of diced bell peppers and 1 cup of diced water chestnuts. Cook everything together for another 3 to 4 minutes. This will let the peppers soften a bit while still staying crunchy. Take your lettuce leaves, which can be from a head of butter or iceberg lettuce. Carefully separate the leaves. Now, scoop a generous amount of the chicken filling into the center of each leaf. This creates a tasty base for your wrap. For a nice finish, sprinkle sesame seeds and fresh cilantro leaves on top. This adds color and flavor to your wraps. When picking lettuce for wraps, aim for fresh, crisp leaves. I love using butter or iceberg lettuce. Both types have a nice shape and hold the filling well. Look for leaves that are bright green and free of brown spots. You want them to be sturdy, yet flexible. If the leaves are too thick, they might break. If they're too thin, they may tear. Choose the largest leaves to make wrapping easier. Cooking the chicken properly is key. I recommend using a non-stick skillet for easy cleanup. Heat the skillet over medium-high heat, and add sesame oil. This oil adds a nice flavor. Make sure the oil is hot before adding the chicken. Break the meat into small pieces as it cooks. Stir often to avoid browning too much. This keeps the chicken juicy and tender. The aromatics, like garlic and ginger, add amazing flavor when sautéed first. To boost the flavor of your wraps, think of fun extras. You can add diced carrots or chopped mushrooms for more texture and taste. A splash of lime juice gives a fresh kick. If you like spice, try adding sriracha or crushed red pepper flakes. For an herb boost, fresh mint or basil can work wonders. Just remember to balance flavors. Sweet, salty, spicy, and fresh all make the dish shine. Pro Tips Prep Your Ingredients: Before you start cooking, dice your bell peppers and water chestnuts, and have all ingredients ready to go. This will make the cooking process quicker and more efficient. Use Fresh Herbs: Adding fresh cilantro just before serving gives the wraps a bright flavor. Consider also including mint or basil for an extra twist! Experiment with Wraps: While lettuce is a classic choice, you can also use cabbage leaves or rice paper for a different texture and flavor for your wraps. Make it Spicy: If you enjoy heat, add some chopped chili or a dash of sriracha to the chicken mixture for a spicy kick that complements the sesame and ginger flavors. {{image_4}} You can enjoy these wraps without meat. Use mushrooms or tofu as great substitutes. Mushrooms add umami, while tofu absorbs flavors well. Sauté diced mushrooms or crumbled tofu in sesame oil just like the chicken. Add the same sauce for a tasty mix. You can also use cooked lentils for added protein. If you prefer, swap ground chicken for other meats. Ground turkey makes a lighter choice. You can also use pork or beef for richer flavors. Cook them the same way as the chicken. Just adjust cooking times if needed, ensuring meat is fully cooked. You can change the flavor with spices. Add chili paste or sriracha for heat. For a sweeter version, increase the honey in the sauce. You can mix in chopped pineapple for a fruity twist. Try adding a splash of lime juice for brightness. These tweaks make the dish unique to your taste. To store leftovers, let your chicken filling cool to room temperature. Then, place it in an airtight container. The filling can last in the fridge for up to three days. Keep the lettuce leaves separate to prevent wilting. This way, they stay crisp and fresh for your next meal. When you’re ready to enjoy the leftovers, reheat the chicken filling. Use a skillet over medium heat for even warming. Stir it occasionally to ensure every part heats well. You can also use the microwave. Heat it in short bursts, stirring in between, until warm. Avoid reheating the lettuce, as it tastes best fresh. If you want to save some for later, freezing is a great option. Cool the chicken filling completely first. Then, transfer it to a freezer-safe bag or container. Remove as much air as possible to prevent freezer burn. The filling can stay frozen for up to three months. When ready to eat, thaw it overnight in the fridge before reheating. You can use ground turkey or ground pork. Both options work well for wraps. If you prefer a plant-based option, try crumbled tofu or tempeh. These alternatives absorb flavors nicely and provide a satisfying texture. Yes, you can make the sauce ahead of time. Mix the soy sauce, honey, and rice vinegar in a bowl. Store it in an airtight container in the fridge. This makes your meal prep easier and saves time on busy days. The wraps are best enjoyed fresh. However, you can store leftover filling in the fridge for up to three days. Keep the lettuce leaves separate to maintain their crispness. Assemble your wraps just before eating for the best taste and texture. In this article, we explored how to make tasty Sesame Ginger Chicken Lettuce Wraps. You learned about the main ingredients and several options for garnishes. The step-by-step guide makes cooking easy, and tips help you choose the best lettuce. We discussed fun variations and storage methods to keep your wraps fresh. Now, you can enjoy a great meal that fits your needs. Try your own twists to make this dish your own!

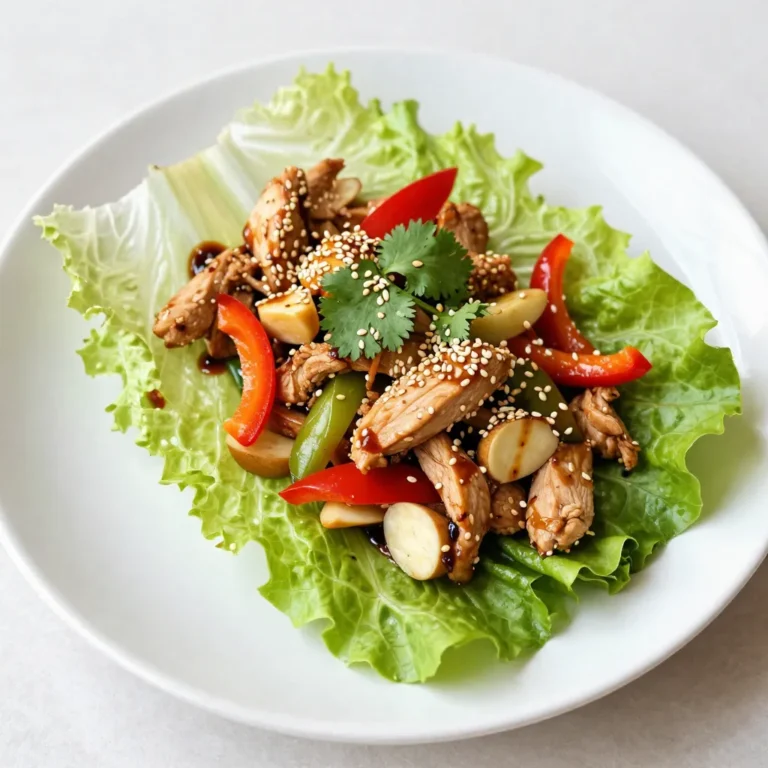
Savory Sesame Ginger Chicken Lettuce Wraps Recipe

To make churro cheesecake bars, you need the following ingredients: - 1 cup all-purpose flour - 1/2 teaspoon baking powder - 1/4 teaspoon salt - 1/2 cup unsalted butter, softened - 1 cup granulated sugar (3/4 cup + 1/4 cup) - 1 large egg - 1 teaspoon pure vanilla extract - 8 oz cream cheese, softened - 1/2 cup sour cream - 1 tablespoon ground cinnamon Measuring accurately is key. Use a dry measuring cup for flour. Level it off with a knife for precision. For the butter, it should be soft but not melted. Room temperature helps it blend well. The egg also needs to be at room temperature to mix easily. Cream cheese and sour cream should be soft, too. This ensures a smooth filling. You can add fun toppings to your bars. Here are some ideas: - Powdered sugar dusting for sweetness - Caramel sauce for extra flavor - Chocolate drizzle for a twist These garnishes not only look good but also add more taste. Enjoy trying different combinations! {{ingredient_image_2}} Start by preheating your oven to 350°F (175°C). This heat will help bake the bars evenly. Next, grab an 8x8 inch baking pan. Line it with parchment paper. Make sure some paper hangs over the edges. This will help you lift the bars out later. In a medium bowl, mix 1 cup of all-purpose flour, 1/2 teaspoon of baking powder, and 1/4 teaspoon of salt. Whisk these dry ingredients together well. Set this bowl aside for now. In a larger bowl, beat 1/2 cup of softened unsalted butter with 3/4 cup of granulated sugar. Use an electric mixer on high speed. Mix it for about 3-4 minutes. The mixture should be light and fluffy. Now, add in 1 large egg and 1 teaspoon of pure vanilla extract. Mix until combined smoothly. Gradually add the dry mixture into the wet mixture. Stir until just combined. Be careful not to overmix. This could make the crust tough. Take about two-thirds of this dough and press it evenly into the bottom of your prepared baking pan. This will create a solid crust layer. In a separate bowl, beat 8 oz of softened cream cheese with the remaining 1/4 cup of granulated sugar. Mix until smooth and creamy. Then, add 1/2 cup of sour cream and blend well. Spread this cream cheese mixture evenly over the crust. Crumble the remaining dough over this cream cheese layer. Make sure to distribute it evenly. In a small bowl, mix 1 tablespoon of ground cinnamon with 2 tablespoons of granulated sugar. Sprinkle this mixture generously over the crumbled dough. Now, place the baking pan in your preheated oven. Bake for 35-40 minutes. Look for a golden brown top and slightly wobbly filling. Once done, let the bars cool in the pan for 30 minutes. Use the parchment paper to lift them out. Transfer to the fridge for at least 2 hours. This chilling time helps the bars set completely. After chilling, cut the cheesecake bars into squares for serving. Enjoy the tasty treat! To get that smooth and creamy cheesecake texture, start with room temperature ingredients. Use softened cream cheese and sour cream. This helps them blend well. Mix the cream cheese and sugar until smooth. Avoid overmixing; too much can add air, making your bars puff up. Bake them until just set. If they wobble slightly in the middle, that's perfect! One common mistake is using cold ingredients. Cold items do not mix well. This can lead to lumps in your filling. Another mistake is overbaking. If you bake too long, the bars can dry out. Make sure to check them at the 35-minute mark. Lastly, don’t skip the chilling step. This helps the bars set and makes slicing easier. To serve your Churro Cheesecake Bars nicely, cut them into even squares. Place them on a pretty platter. You can dust them with powdered sugar for a nice touch. Drizzling caramel sauce adds a sweet finish. For added flavor, sprinkle some extra cinnamon on top. These small details make your dessert look fancy and inviting! Pro Tips Chill the Cream Cheese: Ensure your cream cheese is fully softened at room temperature for a smooth filling. This avoids lumps and creates a creamy texture. Don't Overmix: When combining the crust and filling, mix just until incorporated. Overmixing can lead to dense and tough bars. Perfect Cooling: Allow the bars to cool completely in the refrigerator for at least 2 hours. This step is crucial for achieving the perfect texture. Presentation Matters: For an elegant touch, dust the bars with powdered sugar and drizzle with caramel before serving for an impressive presentation. {{image_4}} You can easily change the flavor of churro cheesecake bars. For a rich twist, try adding chocolate. Simply mix in half a cup of melted chocolate into the cream cheese filling. For a fall treat, pumpkin works great too. Use half a cup of pumpkin puree in place of sour cream. Add a pinch of nutmeg for a warm spice kick. Making these bars gluten-free is simple. Substitute all-purpose flour with a 1:1 gluten-free blend. For a dairy-free version, swap cream cheese with a dairy-free cream cheese option. Use a dairy-free sour cream too. You can also replace butter with coconut oil. These swaps keep the bars tasty and enjoyable for everyone. Seasonal ingredients can make your bars shine. In spring, add fresh berries to the filling. Raspberries or strawberries can brighten the flavor. In winter, a dash of peppermint extract gives a festive touch. For summer, try lemon zest in the cream cheese. It adds a refreshing zing that pairs well with cinnamon. To keep your churro cheesecake bars fresh, store them in an airtight container. Place a piece of parchment paper between layers if stacking. This prevents sticking and keeps the bars intact. Make sure they are fully cooled before storing. If you don’t have an airtight container, wrap them tightly with plastic wrap. You can freeze churro cheesecake bars for longer storage. First, cut them into squares. Then, wrap each square in plastic wrap. Next, place them in a freezer bag or container. They will last for about three months in the freezer. To thaw, take them out and leave them in the fridge overnight. This keeps them moist and tasty. Churro cheesecake bars can last for up to a week in the fridge. Keep them covered to prevent drying out. For serving, try adding a drizzle of chocolate or caramel sauce on top. A sprinkle of cinnamon sugar enhances the flavor. You can also serve them with fresh fruit for a refreshing touch. Enjoy with a cup of coffee or tea for a delightful treat! You can tell your cheesecake bars are done when the top is golden brown. The filling should be slightly wobbly in the center. If it jiggles too much, they need more time. Check them after 35 minutes. If they look good, let them cool. This cooling will help them set better. Yes, you can use other cheeses for a twist on this recipe. Some good options are mascarpone or ricotta. They will change the texture and flavor a bit. Just make sure the cheese is softened for easy mixing. This will keep your filling creamy and smooth. You can serve these bars with many tasty options. Here are a few ideas: - Whipped cream for a light touch - Fresh berries for a fruity contrast - A drizzle of chocolate or caramel sauce - A sprinkle of powdered sugar for a sweet finish These toppings will enhance your dessert and make it even more special! We covered the key ingredients and steps to make delicious churro cheesecake bars. I shared tips for perfect texture and showed how to avoid common mistakes. We explored fun variations and provided storage tips for freshness. You can feel confident making this treat for any occasion. Enjoy your baking journey, and remember to share your tasty results!

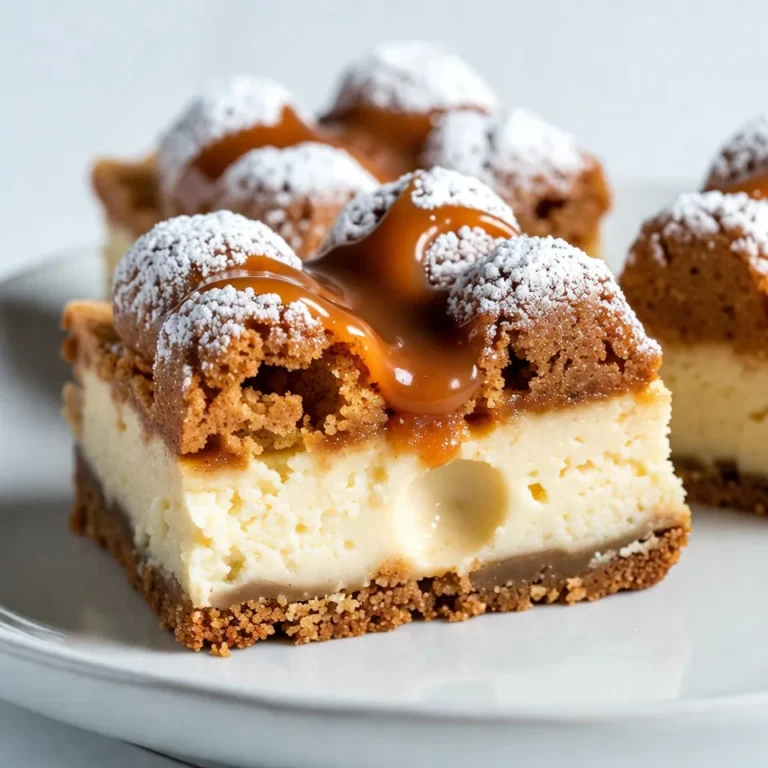
Churro Cheesecake Bars Simple and Delicious Recipe

- Large shrimp: 1 pound, peeled and deveined - Unsalted butter: 2 tablespoons, divided - Extra virgin olive oil: 1 tablespoon - Garlic: 4 cloves, finely minced - Red pepper flakes: 1/2 teaspoon (optional for spice) - Cherry tomatoes: 1 cup, halved - Fresh spinach: 1 cup, roughly chopped - Heavy cream: 1/2 cup - Parmesan cheese: 1/4 cup, freshly grated - Salt and black pepper: to taste - Fresh basil leaves: for garnish When I make Garlic Butter Tuscan Shrimp, I focus on fresh, quality ingredients. The shrimp must be large, peeled, and deveined. This makes them easy to cook and eat. The unsalted butter adds a rich flavor. I use two tablespoons, which really enhances the dish. Extra virgin olive oil is key for sautéing. It gives a nice base for the garlic flavor. I add four cloves of finely minced garlic. Garlic brings a warm aroma and taste. If you want some heat, add red pepper flakes. Just half a teaspoon does the trick. The veggies are important too. I use one cup of halved cherry tomatoes. They burst with juice, adding freshness. One cup of roughly chopped spinach adds color and nutrients. For creaminess, I add half a cup of heavy cream. It creates a luscious sauce that coats the shrimp perfectly. Finally, I sprinkle in a quarter cup of freshly grated Parmesan cheese. This makes the sauce even creamier. Don’t forget salt and black pepper to taste. Fresh basil leaves finish the dish with a pop of flavor and color. Each ingredient plays a vital role, making this meal truly special. {{ingredient_image_2}} First, grab a large skillet. Heat 1 tablespoon of olive oil and 1 tablespoon of butter over medium heat. Wait until the butter is fully melted. This mix makes a great base for flavor. Next, add 4 cloves of finely minced garlic. If you like spice, add 1/2 teaspoon of red pepper flakes. Sauté for about 1 minute. Stir often until the garlic smells good but isn’t browned. Now, increase the heat a little. Add 1 pound of peeled and deveined shrimp to the skillet. Sprinkle a pinch of salt and some black pepper for taste. Cook each side for 2-3 minutes. The shrimp should turn pink and opaque. Once done, take them out and place them on a plate. In the same skillet, throw in 1 cup of halved cherry tomatoes. Cook them for about 2 minutes. They should soften and release some juice. Next, stir in 1 cup of roughly chopped spinach. Cook for 1 minute until it wilts. Pour in 1/2 cup of heavy cream. Stir to mix everything well. Let it simmer for 2-3 minutes. This helps all the flavors blend together nicely. After that, add 1/4 cup of freshly grated Parmesan cheese. Keep stirring until it melts and the sauce becomes creamy. Gently add the cooked shrimp back into the skillet. Toss them in the creamy sauce to coat well. Let them cook for another minute to heat through. Finally, take the skillet off the heat. Stir in the remaining tablespoon of butter. This adds a nice richness to the sauce. Transfer the dish to serving plates. Garnish with fresh basil leaves for extra flavor and color. Enjoy your Garlic Butter Tuscan Shrimp! To make your Garlic Butter Tuscan Shrimp shine, balance the seasoning well. Start with a pinch of salt. Taste as you go. If you want more kick, add red pepper flakes. They bring heat without overpowering the dish. For that creamy sauce you crave, use heavy cream. It gives richness. When adding Parmesan, do it slowly. Stir until it melts completely. This creates a smooth, velvety texture. Use pre-peeled and deveined shrimp. This cuts down your prep time. You can find them in the freezer section. Just thaw before cooking. Plan ahead for quick weeknight dinners. You can chop the tomatoes and spinach earlier in the day. Store them in the fridge until you’re ready. This way, dinner comes together fast. Serve your Garlic Butter Tuscan Shrimp over pasta. Linguine or angel hair works best. You can also pair it with garlic bread. The bread soaks up the tasty sauce. For a pretty touch, garnish with fresh basil leaves. A sprinkle of extra Parmesan adds flair too. This makes your dish not just tasty, but beautiful! Pro Tips Perfectly Cooked Shrimp: Be careful not to overcook the shrimp, as they can become tough. They should turn pink and opaque, usually taking 2-3 minutes per side. Enhance the Flavor: For an extra depth of flavor, consider adding a splash of white wine to the skillet after sautéing the garlic. Let it reduce before adding the cream. Substitute Ingredients: If you don’t have heavy cream, you can use half-and-half or even a combination of Greek yogurt and milk for a lighter sauce. Fresh Herbs Matter: Always use fresh basil for garnish to brighten up the dish. Dried herbs can be used in a pinch, but fresh will elevate the flavor significantly. {{image_4}} You can swap shrimp for chicken or scallops. Chicken works well with the garlic butter sauce. Just cook it until it’s fully done. Scallops bring a sweet flavor that pairs nicely with the sauce. If you want a vegetarian option, use firm tofu or tempeh. Just sauté them until golden. They soak up the flavors well. Feel free to add more veggies to your dish. Bell peppers and zucchini add color and crunch. You can sauté them with the garlic for extra flavor. For garnishes, try parsley or chives instead of basil. They add a fresh touch and make the dish pop. Need a gluten-free dish? Use gluten-free pasta or skip the pasta entirely. For a dairy-free option, replace the heavy cream with coconut cream. Nutritional yeast can stand in for the cheese. Both keep the rich taste while meeting dietary needs. To store leftover Garlic Butter Tuscan Shrimp, let it cool first. Place it in an airtight container. This keeps it fresh and tasty. I recommend using glass or BPA-free plastic containers. These are safe and help avoid spills. When reheating, you want to keep it juicy. Use low heat on the stove. Add a splash of cream or broth to the pan. This keeps the sauce from drying out. Gently stir as it warms. This way, the flavors stay rich and delicious. You can freeze this dish for later. First, let it cool completely. Then, put it in a freezer-safe container. It’s best to use it within three months. When you’re ready, thaw it in the fridge overnight. Reheat gently on the stove, adding a bit of cream to refresh the sauce. Making Garlic Butter Tuscan Shrimp is quick. You need about 10 minutes to prep. Cooking takes around 10 minutes. Altogether, it takes 20 minutes from start to finish. Yes, you can prep this dish ahead. Cook the shrimp and sauce but store them separately. This keeps the shrimp fresh and tasty. When ready to eat, just reheat them together. This dish pairs well with many sides. Here are a few ideas: - Linguine or angel hair pasta - Crusty garlic bread - Fresh salad with greens - Steamed vegetables like broccoli or asparagus The recipe can be spicy if you use red pepper flakes. If you want it mild, skip them. Adjust the spice to suit your taste. This blog post covered a simple and tasty Garlic Butter Tuscan Shrimp recipe. You learned about the main ingredients, easy step-by-step cooking instructions, and helpful tips for flavor and presentation. I shared variations to suit different diets or preferences, plus storage and reheating advice. Cooking can be fun and rewarding. Enjoy making this dish that impresses your family and friends with ease. Happy cooking!

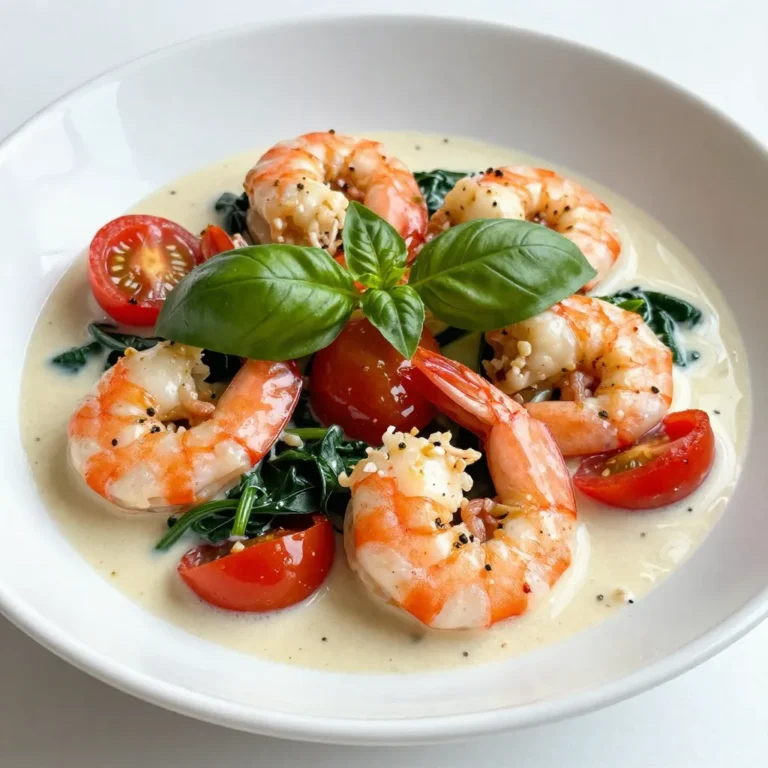
Garlic Butter Tuscan Shrimp Flavorful and Easy Meal

To make Coconut Lime Chicken, you will need the following ingredients: - 4 boneless, skinless chicken breasts - 1 can (13.5 oz) coconut milk - Zest from 2 fresh limes - Juice from 2 fresh limes - 3 cloves garlic, finely minced - 1 tablespoon fresh ginger, grated - 1 tablespoon brown sugar - 1 teaspoon salt - 1 teaspoon freshly ground black pepper - 1 tablespoon olive oil - Fresh cilantro leaves, for garnish These ingredients come together to create a bright, flavorful dish. The coconut milk adds a creamy texture. Lime juice and zest give it a zesty kick. Garlic and ginger add depth and warmth. Brown sugar balances the flavors, while salt and pepper enhance everything. The olive oil helps in cooking, and the cilantro gives a fresh touch when serving. When choosing your ingredients, opt for fresh limes and high-quality coconut milk. This choice will make a big difference in taste. Each bite should burst with flavor, making this dish a hit at your dinner table. {{ingredient_image_2}} To make the marinade, grab a large mixing bowl. In the bowl, whisk together these ingredients: - 1 can (13.5 oz) coconut milk - Zest from 2 fresh limes - Juice from 2 fresh limes - 3 cloves garlic, finely minced - 1 tablespoon fresh ginger, grated - 1 tablespoon brown sugar - 1 teaspoon salt - 1 teaspoon freshly ground black pepper Whisking these ingredients well is key. You want them fully combined. This mix gives the chicken a rich flavor. Marinating time is important. I suggest at least 1 hour, but overnight is best. This wait allows the flavors to soak into the chicken. Take your chicken breasts and coat them well in the marinade. Make sure each piece is covered. Place the chicken in the bowl and cover it. You can use plastic wrap or a lid. Let the chicken marinate in the fridge. This step makes a big difference in taste. When you are ready to cook, preheat your grill or skillet. Set it to medium-high heat. Add 1 tablespoon of olive oil and let it heat up. Take the marinated chicken out of the bowl. Let any extra marinade drip off. Place the chicken on the grill or skillet. Cook the chicken for about 6-7 minutes on each side. You want it to reach an internal temperature of 165°F (74°C). Look for nice grill marks too. After cooking, remove the chicken from the heat. Let it rest on a plate for 5 minutes. Resting helps keep the chicken juicy. Slice the rested chicken into thick pieces. Serve it warm with warmed marinade drizzled on top. Use only the marinade that did not touch raw chicken. For a nice touch, garnish with fresh cilantro leaves. This will add color and flavor to your dish. Fresh ingredients make a big difference in this dish. Use ripe limes and high-quality coconut milk. These simple choices elevate the flavor. For the best results, consider marinating the chicken overnight. This extra time allows the flavors to soak in deeply. If you're short on time, even an hour of marinating works well. You can choose between grilling or skillet cooking for this recipe. Grilling adds a smoky flavor and nice char. Skillet cooking is great for quick meals, too. No matter your choice, use a meat thermometer. This tool helps ensure the chicken reaches 165°F (74°C) for safe eating. Cooking time usually takes about 6-7 minutes per side. To make your dish pop, garnish with fresh cilantro leaves. This adds a touch of color and a burst of flavor. For serving, place the chicken on a bright plate. Add lime wedges on the side for extra zest. Pair it with a light salad or coconut rice to complete your meal. This makes your dining experience more enjoyable and vibrant. Pro Tips Marinade Time: For the best flavor, allow the chicken to marinate overnight. This gives the ingredients time to penetrate the meat, resulting in a more flavorful dish. Grilling Technique: Ensure your grill or skillet is preheated before adding the chicken. This helps to create a nice sear, locking in juices and flavor. Resting Period: Let the chicken rest for at least 5 minutes after cooking. This step is crucial for juicy chicken, as it allows the juices to redistribute throughout the meat. Serving Suggestion: Pair your chicken with coconut rice or a fresh salad to complement the tropical flavors of the dish. {{image_4}} For a tasty grilled version, use the same marinade. First, marinate the chicken as usual. Preheat your grill to medium-high heat. Add a little olive oil to prevent sticking. Grill each chicken breast for 6-7 minutes on each side. Check that the internal temperature hits 165°F (74°C). This gives you a smoky flavor that pairs well with the lime. If you prefer baking, preheat your oven to 400°F (200°C). Prepare the chicken just like before. Place the marinated chicken in a baking dish. Bake for about 25-30 minutes. Ensure it reaches 165°F (74°C) in the center. This method keeps the chicken tender and juicy, while the coconut flavor deepens. Add seasonal veggies for extra flavor. You can mix bell peppers, zucchini, or snap peas. Toss them into the marinade with the chicken. This adds vitamins and color to your dish. Bake or grill as mentioned above. The veggies soak up the coconut and lime, enhancing the meal. Enjoy the added texture and taste! To store your leftover coconut lime chicken, place it in an airtight container. This keeps it fresh and prevents odors from the fridge. Let the chicken cool to room temperature before putting it away. You can keep it in the fridge for up to three days. After that, it may lose flavor and texture. If you want to save it for later, freezing is a great option. Place the cooked chicken in a freezer-safe bag or container. Squeeze out as much air as possible to avoid freezer burn. You can freeze it for up to three months. When you're ready to eat, thaw the chicken in the fridge overnight. To reheat, place it in a skillet over low heat until warmed through. This keeps the chicken juicy and delicious. Yes, you can use bone-in chicken. You should adjust cooking times. Bone-in chicken takes longer to cook than boneless. Cook it for about 10-12 minutes per side. Use a meat thermometer to check for doneness. The chicken should reach 165°F (74°C). This ensures the chicken is safe and juicy. Coconut lime chicken pairs well with many sides. Here are some great options: - Coconut rice adds a nice touch. - A light salad with citrus dressing keeps it fresh. - Grilled vegetables bring out the flavors. - Quinoa or couscous can add texture and nutrients. - Steamed broccoli offers a healthy crunch. These sides will help make a complete meal. To make this recipe dairy-free, you can still use coconut milk. Coconut milk is a great alternative. If you want a different flavor, try almond milk or oat milk. You can also use cashew cream for a rich taste. Just ensure that your alternative has a similar consistency to coconut milk. This keeps your dish creamy and delicious. This recipe for Coconut Lime Chicken is simple and tasty. We covered the essential ingredients, step-by-step preparation, and cooking methods. Knowing how to marinate the chicken and choosing the right cooking technique will boost flavor. Remember, fresh ingredients make a big difference. Explore variations to suit your taste, from grilled to baked options. Finally, store leftovers properly to enjoy later. Try this dish and share it with others; they’ll love it! Enjoy cooking and impress your friends with this delightful meal!

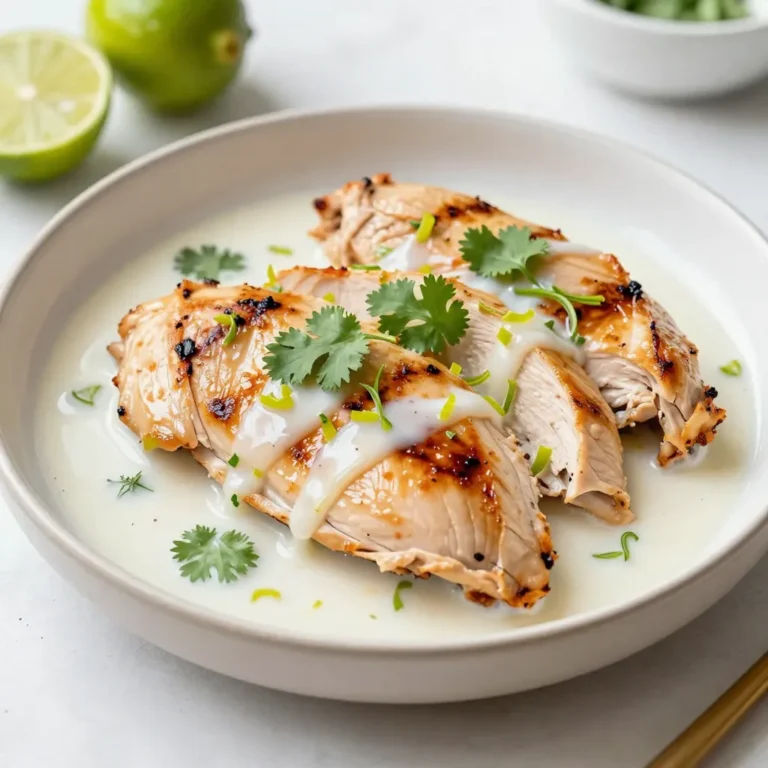
Coconut Lime Chicken Flavorful and Easy Recipe

For this Amish Hamburger Steak Bake, you need: - 1 lb ground beef - 1 cup breadcrumbs - 1 small onion, finely chopped - 1 large egg - 1 teaspoon garlic powder - 1 teaspoon Worcestershire sauce - Salt and black pepper to taste - 2 cups beef broth - 2 cups frozen mixed vegetables (like carrots, peas, and corn) - 1 can (10.5 oz) cream of mushroom soup - 1 tablespoon soy sauce - 1 cup shredded sharp cheddar cheese These ingredients blend well to create a hearty dish. The ground beef adds flavor and protein. The breadcrumbs help bind the patties together. The onion and garlic powder add great taste. The cream of mushroom soup gives a rich, creamy texture. You can customize this dish with these optional ingredients: - Fresh mushrooms, sliced - Bell peppers, chopped - Corn kernels - Green beans Adding these ingredients can boost the flavor and nutrition. Feel free to mix and match according to your taste. Seasoning is key for great flavor. You can adjust salt and pepper to your liking. Here are some garnishes to try: - Fresh parsley, chopped - Chives, chopped - Additional cheese, for extra richness Garnishing with herbs adds color and a fresh touch. It makes the dish look appealing and inviting. {{ingredient_image_2}} Start by preheating your oven to 375°F (190°C). This step wakes up the oven for baking. In a large bowl, mix together 1 pound of ground beef, 1 cup of breadcrumbs, and 1 finely chopped small onion. Add 1 large egg, 1 teaspoon of garlic powder, 1 teaspoon of Worcestershire sauce, and salt and black pepper to taste. Get in there with your hands or a spatula. Mix until everything comes together as one. Next, form the mixture into oval patties, about ½ inch thick. Place them on a plate and set them aside. Heat a large skillet over medium heat. Once hot, add the patties to the skillet. Cook them for about 3 to 4 minutes on each side. You want them nice and brown but not fully cooked. They will finish cooking in the oven later. This step adds flavor and color to the patties. While the patties cook, prepare the sauce. In a separate bowl, whisk together 2 cups of beef broth, 1 can of cream of mushroom soup, and 1 tablespoon of soy sauce. Make sure it’s smooth and mixed well. In a large baking dish, lay the browned patties in a single layer. Carefully pour the mushroom soup mixture over the patties. Make sure every patty gets a good coat. Next, spread 2 cups of frozen mixed vegetables over the top. They should be evenly distributed. Cover the dish tightly with aluminum foil. Place it in the oven and bake for 30 minutes. This helps the flavors blend and the patties cook through. After 30 minutes, remove the foil and sprinkle 1 cup of shredded sharp cheddar cheese over the top. Bake uncovered for another 10 to 15 minutes until the cheese is melted and bubbly. After cooking, let the dish cool for a few minutes and garnish with freshly chopped parsley or chives. Enjoy your meal! To make great patties, start with cold ground beef. It helps keep the shape. Mix the meat gently with other ingredients. You want a good texture but not too dense. Make them oval and about ½ inch thick. This size ensures they cook evenly. For more flavor, try adding herbs like thyme or rosemary. You can also mix in grated cheese into the meat. A splash of hot sauce can add a nice kick. Don't forget to season well with salt and pepper. This makes a big difference in taste. If your patties are thicker, increase the cooking time. Keep an eye on them while they bake. If you like a crispy top, uncover the dish a bit earlier. Always check if the meat is fully cooked. It should reach an internal temperature of 160°F. Pro Tips Use Fresh Ingredients: Always opt for fresh vegetables and high-quality ground beef to enhance the flavor of your dish. Customize the Vegetables: Feel free to substitute or add your favorite vegetables to the mix, such as bell peppers or green beans, for a personal touch. Let It Rest: Allow the dish to cool for a few minutes after baking. This helps the flavors to settle and makes serving easier. Experiment with Seasoning: Don’t hesitate to adjust the seasoning to your preference; adding herbs like thyme or rosemary can elevate the dish. {{image_4}} You can make a tasty vegetarian version of this dish. Swap the ground beef for a plant-based meat alternative. Use 1 pound of lentils or mushrooms for texture and flavor. Mix in the same breadcrumbs and seasonings. You can also add some black beans for added protein. This change keeps the dish hearty and filling while catering to vegetarian diets. Cheese makes this dish extra delicious. While sharp cheddar is a classic choice, you can try other types. Mozzarella adds a gooey texture. Pepper jack gives a spicy kick. For a rich taste, consider using gouda. Feel free to mix different cheeses for a unique flavor profile. Don’t hesitate to change up the vegetables. While frozen mixed veggies work great, fresh veggies can shine too. Try bell peppers, zucchini, or green beans for a fresh taste. You can also add spinach for a pop of color and nutrients. The key is to use what you have on hand and what you love. This flexibility allows you to create a dish that suits your taste perfectly. You can store leftover Amish Hamburger Steak Bake in the fridge. Place the dish in an airtight container. It will stay fresh for up to three days. Make sure to cool it to room temp before sealing. If you want to keep it longer, freeze the leftovers. Cut the dish into portions and wrap each portion tightly in plastic wrap. Then, place them in a freezer-safe bag. This way, it will last up to three months. Label the bags with the date for easy tracking. To reheat, take the frozen portion out of the freezer. Let it thaw in the fridge overnight. You can heat it in the oven at 350°F (175°C) for about 20 minutes. Make sure it’s hot throughout. Stir it halfway through for even heating. If you prefer a microwave, heat in short bursts. Check every minute to avoid overcooking. Enjoy your comforting dish warm! You can use crushed crackers or oats. Both work well to bind the meat. You can also try ground almonds for a nutty flavor. If you need a gluten-free option, use gluten-free breadcrumbs or crushed cornflakes. Yes, fresh vegetables can replace frozen ones. Just chop them into small pieces. You may need to adjust the cooking time since fresh veggies cook faster. Try carrots, green beans, or bell peppers for great flavor. To make it gluten-free, swap regular breadcrumbs for gluten-free ones. Also, check your cream of mushroom soup for gluten-free labels. Use gluten-free soy sauce instead of regular soy sauce to keep the dish safe. Mashed potatoes are a great match. You can also serve it with a side salad or corn on the cob. Roasted vegetables add a nice touch too. These sides balance the meal and enhance the comfort feel. The Hamburger Steak Bake is simple and quick to make. We discussed the main ingredients, optional add-ins, and seasoning choices. I provided step-by-step instructions, from preparing and cooking patties to assembling your bake. You learned tips for perfecting your meal and how to adapt it for different diets. Lastly, we covered how to store, freeze, and reheat leftovers. Enjoy experimenting and making this dish your own! It’s a tasty meal that everyone will love.

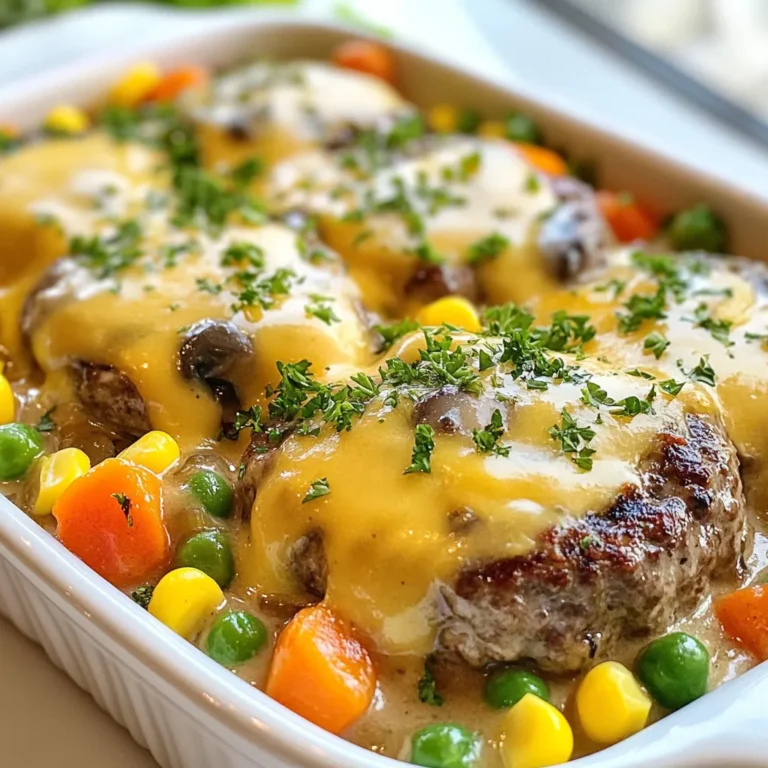
Amish Hamburger Steak Bake Savory Comfort Dish

- 500g chicken breast, cut into bite-sized cubes - 1 cup coconut milk - Zest and juice of 2 limes - 2 tablespoons honey - 2 cloves garlic, minced - 1 teaspoon ground ginger - 1 teaspoon salt - 1/2 teaspoon black pepper - Fresh cilantro, chopped, for garnish - Bamboo skewers (soaked in water for 30 minutes) To make Coconut Lime Chicken Skewers, start with fresh chicken breast. Cut it into small cubes. This helps the chicken cook evenly and absorb the marinade well. The coconut milk gives the skewers a rich flavor. The zest and juice of limes add brightness and freshness. Next, we create the marinade. Combine honey, minced garlic, and ground ginger in your mixing bowl. The honey adds a hint of sweetness. The garlic gives a nice punch. The ginger brings warmth and depth. Season the mix with salt and black pepper. These simple seasonings highlight the other flavors. Once mixed, add the chicken. Make sure each piece gets coated well. Cover the bowl and let it sit in the fridge. If you can, marinate overnight. This step ensures the chicken is tender and full of flavor. For grilling, use soaked bamboo skewers. Soaking prevents them from burning on the grill. After marinating, thread the chicken onto the skewers. Leave a little space between each piece. This allows for even cooking and better grill marks. When ready to cook, make sure your grill is hot. This helps to sear the chicken nicely. Grill the skewers for 10 to 12 minutes. Remember to turn them often. Use a meat thermometer to check if they are done. The chicken should reach 75°C (165°F). After grilling, let the skewers rest. This step keeps the chicken juicy. Garnish with fresh cilantro and serve with lime wedges. Enjoy the tropical flavors that will take you to a sunny beach! {{ingredient_image_2}} First, grab a big mixing bowl. Whisk together these ingredients: - 1 cup coconut milk - Zest and juice of 2 limes - 2 tablespoons honey - 2 cloves garlic, minced - 1 teaspoon ground ginger - 1 teaspoon salt - 1/2 teaspoon black pepper Mix until smooth and well blended. This marinade adds rich flavor to the chicken. The lime gives a nice zing, while the honey balances it with sweetness. Next, cut 500g of chicken breast into bite-sized cubes. Add these cubes to your marinade. Stir gently until all chicken pieces are covered. Cover the bowl tightly with plastic wrap. Place it in the fridge. Let it marinate for at least 1 hour. For the best flavor, let it sit overnight. This step is key for making your chicken juicy and tasty. When you're ready to cook, preheat your grill to medium-high heat. Soak bamboo skewers in water for 30 minutes to prevent burning. Once the grill is hot, thread the marinated chicken onto the skewers. Leave a little space between pieces for even cooking. Grill the skewers for 10-12 minutes. Turn them every few minutes. This helps achieve a nice char and ensures the chicken is cooked through. Use a meat thermometer. Make sure the chicken reaches an internal temperature of 75°C (165°F). After grilling, take the skewers off the heat. Let them rest for a few minutes. This helps keep the chicken juicy. Serve with fresh cilantro and lime wedges for a burst of flavor! For the best flavor and tenderness, marinate the chicken for at least 1 hour. I recommend marinating overnight if you can. This allows the chicken to soak up all the yummy flavors from the coconut milk and lime. The longer it sits, the more it will taste like a tropical dream. To get perfect grill marks, preheat your grill to medium-high heat. Make sure it’s hot before adding the skewers. Grill the chicken for about 10-12 minutes. Turn them every few minutes for even cooking. Use a meat thermometer to check if the chicken reaches 75°C (165°F). After grilling, let the chicken rest for a few minutes. This helps keep it juicy and tasty. When serving, arrange the skewers on a bright platter. Add lime wedges around them for a pop of color. A sprinkle of fresh cilantro on top makes it look fancy. You can also serve it with coconut rice or a fresh salad. This adds a nice touch and balances the tropical flavors. Pro Tips Marinate Longer for Better Flavor: For the best results, allow the chicken to marinate overnight. This extra time allows the flavors to deeply penetrate the meat, resulting in a more flavorful dish. Preheat Your Grill: Always preheat your grill to medium-high heat before adding the skewers. This ensures a nice sear and helps lock in the juices, keeping the chicken tender and juicy. Use a Meat Thermometer: To ensure your chicken is perfectly cooked, use a meat thermometer to check the internal temperature. It should reach 75°C (165°F) for safe consumption. Presentation Matters: Arrange your skewers on a vibrant platter and garnish with fresh cilantro and lime wedges. Not only does it look appealing, but it also enhances the overall dining experience. {{image_4}} You can play with the main ingredients for Coconut Lime Chicken Skewers. If you want a leaner option, try turkey breast. It also picks up the marinade well. For a vegetarian twist, use firm tofu or tempeh. Both soak up flavors nicely. You can also try different marinades. For example, use yogurt instead of coconut milk for a tangy taste. Honey can be swapped with maple syrup for a vegan option. While grilling gives a smoky flavor, you can still enjoy these skewers in other ways. If you don’t have a grill, bake them in the oven. Preheat your oven to 200°C (400°F). Place skewers on a baking sheet lined with parchment paper. Bake for 15-20 minutes, turning halfway. You’ll get juicy skewers without the grill. You can also pan-sear them in a skillet. Just add a bit of oil and cook on medium heat, turning until golden. Want to spice things up? Add a dash of cayenne pepper for heat. You can also mix in some smoked paprika for a deeper flavor. Fresh herbs like basil or mint can add a fresh twist. For a tangy kick, consider adding a splash of fish sauce or soy sauce to the marinade. This enhances the umami taste and makes the chicken more savory. Don't hesitate to experiment with your favorite flavors! To keep your Coconut Lime Chicken Skewers fresh, store them properly. First, let the skewers cool down to room temperature. Next, place them in an airtight container or wrap them tightly in plastic wrap. You can refrigerate the skewers for up to three days. If you want to save them longer, freeze them. Wrap each skewer in plastic wrap, then place them in a freezer bag. They can last for about three months in the freezer. To reheat the skewers, avoid drying them out. The best method is to use the oven. Preheat the oven to 180°C (350°F). Place the skewers on a baking sheet and cover them with foil. Heat for about 10-15 minutes or until warm. You can also use a microwave. Just place the skewers on a microwave-safe plate and cover with a damp paper towel. Heat in short bursts of 30 seconds, checking to see if they are warm. Marinated chicken can last in the fridge for up to two days before cooking. Once cooked, the Coconut Lime Chicken Skewers can stay fresh in the fridge for about three days. Always check for any off smells or changes in color before eating. If stored properly, these skewers make a great meal for later! You can serve many tasty sides with these skewers. Here are some great ideas: - Fluffy coconut rice - Crisp green salad - Grilled vegetables - Quinoa with lime and cilantro - Fresh fruit salad These sides enhance the tropical flavors and add freshness. They make the meal more fun and colorful. Yes, you can! These skewers work well with other proteins. Here are a few options: - Shrimp: Marinate and grill them for a quick cooking time. - Tofu: Use firm or extra-firm tofu for a tasty plant-based option. - Pork: Cubed pork tenderloin can soak up the marinade well. Feel free to be creative. Each protein has its own unique flavor and texture. To check if the chicken is done, use a meat thermometer. The internal temperature should reach 75°C (165°F). You can also look for these signs: - The chicken should be firm to the touch. - The juices should run clear, not pink. These tips help ensure your skewers are safe and delicious. Enjoy your flavorful grilled delight! In this post, we covered how to make Coconut Lime Chicken Skewers. You learned about the key ingredients, marinade, and grilling steps. I shared tips for flavor, presentation, and how to store leftovers. Remember, marinating adds great taste and tenderness. You can also swap ingredients or try different cooking methods. Make these skewers your own with your favorite sides. Enjoy the grilling process and the delicious results!

Coconut Lime Chicken Skewers Flavorful Grilled Delight

- 8 oz soba noodles - 2 tablespoons sesame oil - 1 tablespoon fresh ginger, minced - 2 tablespoons soy sauce or tamari - 1 tablespoon rice vinegar - 1 tablespoon honey or maple syrup - 1 cup cucumber, finely julienned - 1 cup carrots, shredded - 1 red bell pepper, thinly sliced - 2 green onions, chopped - 1/4 cup fresh cilantro, roughly chopped - A pinch of red pepper flakes - 1 tablespoon sesame seeds Gather these ingredients before starting. Each one plays a key role in bringing the salad to life. Soba noodles are the heart of this dish. Their nutty flavor and chewy texture make them perfect for salads. Sesame oil adds depth and richness. The fresh ginger brings a zing that wakes up your taste buds. Soy sauce or tamari brings saltiness, while rice vinegar adds a nice tang. Honey or maple syrup balances the flavors with sweetness. Fresh vegetables give crunch and color. Cucumber and carrots add a refreshing crispness. The red bell pepper adds sweetness, while green onions and cilantro provide vibrant flavors. If you want a bit of heat, include red pepper flakes. For extra crunch, sprinkle sesame seeds on top. These ingredients make this salad a fun and tasty dish to enjoy. {{ingredient_image_2}} To cook soba noodles, follow the package instructions. Boil water in a pot and add the noodles. Cook them for about 4 to 5 minutes. Once done, drain the noodles in a colander. Rinse them under cold running water. This stops the cooking and cools the noodles quickly. In a large mixing bowl, combine the sesame oil, minced fresh ginger, soy sauce, rice vinegar, and honey. Whisk these ingredients together until smooth. This dressing brings all the flavors together in the salad. First, add the cooled soba noodles to the mixing bowl with the dressing. Toss gently to coat each noodle strand. Next, fold in the julienned cucumber, shredded carrots, sliced red bell pepper, chopped green onions, and fresh cilantro. This mix adds crunch and color to your salad. Taste your salad and adjust the flavors. You may want a bit more soy sauce for saltiness. If you like it sweeter, add more honey. For some heat, sprinkle in red pepper flakes. Let the salad rest for about 10 minutes. This helps the flavors blend better. When ready to serve, sprinkle sesame seeds on top for a nice crunch. Enjoy your fresh and flavorful Sesame Ginger Noodle Salad! To make your soba noodles just right, rinse them well. After cooking, drain the noodles and put them under cold water. This stops the cooking and keeps them from sticking. You want each noodle to be separate and springy. Balancing flavors is key. The sweet from honey or maple syrup needs to mix well with the salty soy sauce. Taste as you go. If the salad feels bland, add a bit more soy sauce. If it’s too salty, a touch of honey can help. For a great presentation, use a large, colorful bowl. This makes your salad look fresh and inviting. You can also serve it in individual bowls. Top it with extra cilantro or sesame seeds for a nice touch. This salad tastes best chilled or at room temperature. Let it sit for about ten minutes before serving. This resting time helps all the flavors mix together nicely. You can customize this salad with spices. If you want some heat, add a pinch of red pepper flakes. This gives your dish a nice kick without overpowering it. Fresh herbs can change the game too! While cilantro is great, you could try using mint or basil for a different twist. Each herb adds its own flavor, making the salad unique. Pro Tips Tip Title: Cook Noodles Al Dente: For the best texture, cook the soba noodles until they are al dente, as they will continue to soften slightly when mixed with the dressing. Tip Title: Customize Your Veggies: Feel free to substitute or add other vegetables like bell peppers, snap peas, or edamame for even more color and crunch. Tip Title: Make It Ahead: This salad can be made a few hours in advance. Just keep it refrigerated until serving, but add sesame seeds right before you serve to maintain their crunch. Tip Title: Perfect Your Dressing: Adjust the sweetness and saltiness of the dressing to your liking. Start with less soy sauce and honey, and taste before adding more. {{image_4}} You can add grilled chicken for extra protein. It brings a nice smoky flavor. Simply slice it and toss it in with the noodles. Tofu or tempeh are great plant-based options. Both soak up flavors well. Just cube them and mix in for a satisfying meal. Feel free to swap in other fresh veggies. You can use zucchini or shredded cabbage instead of bell pepper. Seasonal vegetables work well too. Try using snap peas in the spring or roasted butternut squash in the fall. Each swap adds a unique twist. You can change the oil for a different taste. Peanut oil gives a rich, nutty flavor. If you want a sweeter touch, swap honey for agave syrup. Maple syrup is another great option. Each change can make the salad feel fresh and new. To store leftover salad, place it in an airtight container. This keeps it fresh. You can use plastic wrap or a lid to seal the container. Make sure to chill it in the fridge right away. This helps keep the flavors and crunch intact. The salad stays fresh for about three days in the fridge. After that, the veggies may lose their crispness. To maintain its quality, eat it within this time frame. If you want to keep the salad longer, consider storing the dressing separately. Combine them just before serving for the best taste. This salad is best served cold, but you can enjoy it at room temperature. If you prefer to warm it up, do so gently. Use a microwave on low heat for short bursts. Be careful not to overheat it, or the veggies will become soft. Enjoy your leftovers the next day for a quick and tasty meal! If you need a gluten-free option, you can use rice noodles. They cook quickly and have a nice texture. Another great choice is zucchini noodles. You can spiralize zucchini for a fresh twist. Yes, you can prep this salad in advance. Make the dressing and cook the noodles a day ahead. Just store them in separate containers. Mix them just before serving for the best taste. This recipe is almost vegan. To make it fully vegan, swap honey for maple syrup. Check your soy sauce; some brands are vegan. This way, everyone can enjoy this tasty dish! This recipe for Sesame Ginger Noodle Salad covers all you need. You learned about important ingredients like soba noodles and fresh veggies. We discussed easy steps to cook the noodles and make a tasty dressing. You also got tips for texture, flavor, and how to store leftovers. Incorporate these ideas into your cooking. Experiment with variations and enjoy a fresh meal. Eating well can be simple and fun. Trust me, you will love this salad!

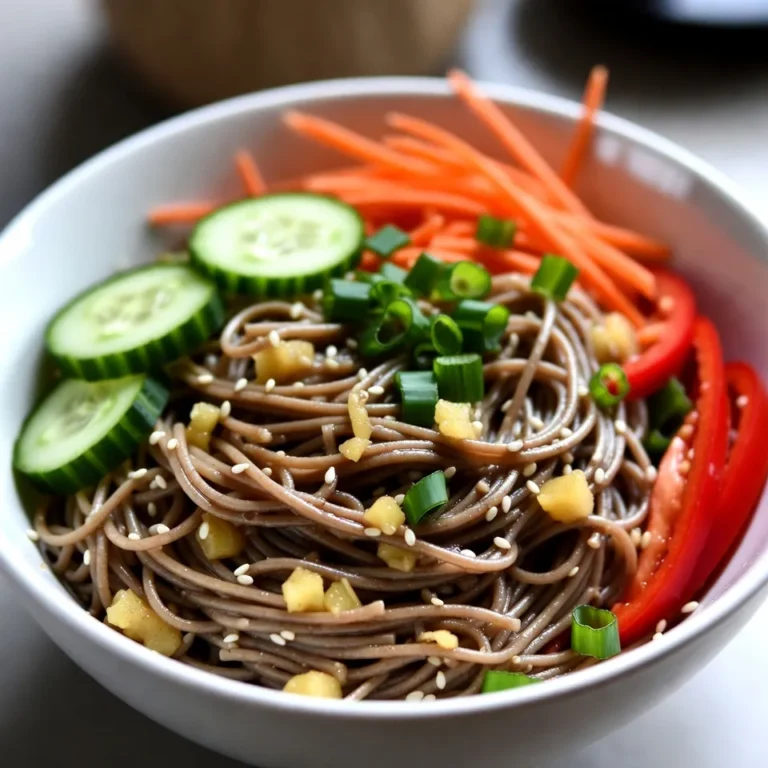
Sesame Ginger Noodle Salad Fresh and Flavorful Dish

- 6 large eggs - 1/4 cup canned pumpkin puree - 2 tablespoons mayonnaise - 1 teaspoon Dijon mustard - 1/2 teaspoon pumpkin pie spice - 1/4 teaspoon sea salt - 1/8 teaspoon black pepper - 1 tablespoon fresh chives, finely chopped - Paprika To make Pumpkin Patch Deviled Eggs, you need simple yet tasty ingredients. Start with six large eggs. The eggs provide a creamy base. Next, add 1/4 cup of canned pumpkin puree. This gives the dish its fall flavor. For creaminess, use two tablespoons of mayonnaise. One teaspoon of Dijon mustard adds a nice zing. For the perfect taste, season with 1/2 teaspoon of pumpkin pie spice. This spice mix brings warmth and comfort. You will also need 1/4 teaspoon of sea salt and 1/8 teaspoon of black pepper for balance. For garnishing, chop one tablespoon of fresh chives. They add a pop of color and freshness. Finally, a sprinkle of paprika gives the eggs a lovely finish. Each ingredient plays a key role in making these deviled eggs special. {{ingredient_image_2}} Start by placing the eggs in a saucepan. Ensure they are covered with water by about one inch. Set the pot on medium-high heat and bring the water to a rolling boil. Once boiling, cover the pot with a lid and remove it from the heat. Let the eggs sit undisturbed for 12 minutes. This method helps them cook evenly. After the eggs steep, transfer them to a bowl filled with ice water. This ice bath stops the cooking process quickly. Let the eggs sit in the ice water for about 5 minutes until they are cool. Cooling them helps with peeling later. To peel the eggs, gently tap each one against a hard surface to create small cracks. Peel the shells under running water. This trick makes the shells come off easier and leaves smooth egg whites. After peeling, slice each egg in half lengthwise. Carefully separate the yolks from the whites and place the yolks in a mixing bowl. - Use room temperature eggs for easier peeling. Cold eggs can stick to the shell. - Experiment with steeping times for desired yolk firmness. Twelve minutes gives a nice soft yolk. - Use a piping bag for a neat presentation. This helps create a fun look. - Adjust thickness of filling for personal preference. Add more pumpkin or mayo for creaminess. Pro Tips Fresh Eggs for Easier Peeling: Use eggs that are at least a week old for easier peeling. Fresh eggs tend to stick to the shell, making them harder to peel smoothly. Customize the Spice Level: Adjust the amount of pumpkin pie spice to your taste. For a bolder flavor, add a pinch of cayenne pepper or more spice blend. Presentation Matters: Use a piping bag to fill the egg whites for a professional look. This creates a beautiful mound that is visually appealing. Chill Before Serving: Allow the deviled eggs to chill in the refrigerator for at least 30 minutes before serving. This helps the flavors meld together and enhances the overall taste. {{image_4}} You can easily change up the flavor of your pumpkin patch deviled eggs. One fun option is to add bacon bits. This gives a nice savory twist that pairs well with the pumpkin. The crunch of bacon adds a great texture too. Another option is to use smoked paprika. It brings a deeper, smokier flavor to the dish. Just a sprinkle can transform your deviled eggs into something special. If you're looking for a healthier choice, swap out mayonnaise for Greek yogurt. This change keeps the creaminess while lowering fat. Greek yogurt also adds a nice tang that balances the sweetness of the pumpkin. For a plant-based version, try using vegan mayonnaise. This option works well if you want a dish that everyone can enjoy. It keeps the flavor rich while meeting dietary needs. To keep your Pumpkin Patch Deviled Eggs fresh, refrigerate them. Place the eggs in an airtight container and cover them well. They will stay tasty for up to three days. This method helps maintain their creamy texture and bright colors. You can make the filling ahead of time. Prepare the pumpkin yolk mix and store it in the fridge. Just be sure to fill the egg whites right before serving. This keeps the egg whites from getting soggy. For best results, peel the eggs and store them in water. This can help keep them moist until you are ready to assemble your dish. Deviled eggs can last in the fridge for about three days. To keep them fresh, store them in an airtight container. This helps prevent them from absorbing other smells. Always check for any changes in smell or texture before eating leftovers. Yes, you can use fresh pumpkin. To prepare fresh pumpkin, peel and cut it into cubes. Boil or steam the pumpkin until it's soft, then mash it. Fresh pumpkin has a lighter taste than canned. It can add a unique twist to your deviled eggs. There are many spices to try! You could add: - Smoked paprika for a smoky taste - Garlic powder for a savory kick - Cayenne pepper for heat - Fresh herbs like dill or parsley for freshness These additions can change the flavor and make your deviled eggs more exciting! You've learned how to make tasty deviled eggs with pumpkin. We covered key ingredients, step-by-step instructions, and helpful tips. Experiment with flavors and find your favorites. Store leftovers properly to keep them fresh. With these techniques, you can enjoy a fun twist on a classic dish. Now, gather your ingredients and get cooking!

Pumpkin Patch Deviled Eggs Flavorful Fall Treat

- 1 lb ground beef or ground turkey - 1/2 cup breadcrumbs - 1 large egg - 1 teaspoon garlic powder - 1 teaspoon onion powder - 1/2 teaspoon smoked paprika - Salt and pepper, to taste - 1/2 cup shredded sharp cheddar cheese - Mini burger buns (about 12) - 1/4 cup ketchup - 1/4 cup mustard - Pickle slices - Leafy lettuce - Fresh parsley leaves Use ketchup and mustard as your main condiments. They add great taste. Pickles and lettuce give crunch. Fresh parsley leaves make cute stems. These details make your burgers fun and festive. You can lay them out on a platter to look like a pumpkin patch. This will impress your guests! {{ingredient_image_2}} Start by grabbing a large mixing bowl. Add 1 pound of ground beef or turkey. Mix in 1/2 cup of breadcrumbs, 1 large egg, 1 teaspoon of garlic powder, and 1 teaspoon of onion powder. Don’t forget 1/2 teaspoon of smoked paprika, along with salt and pepper to taste. Use your hands or a spatula to blend everything well. You want a nice, even mix that holds together. Now it's time to shape your patties. Take a small scoop of the meat mixture. Roll it into a ball, about the size of a medium lemon. Gently pinch the sides to make ridges. This helps them look like pumpkins! Press a small indent in the center for even cooking. Aim for about 12 patties total. Heat a non-stick skillet or grill over medium-high heat. Carefully place your patties in the skillet. Cook them for about 4 to 5 minutes on each side. Make sure they cook all the way through. The internal temperature should reach 165°F for turkey or 160°F for beef. In the last minute, add some shredded cheese on top of each patty. Let it melt for that gooey goodness. Grab your mini burger buns. Spread ketchup and mustard on the bottom halves. Place a pumpkin-shaped patty on top. If you like, add optional pickle slices and crisp lettuce. Finish by placing the top halves of the buns on each burger. For a final touch, use fresh parsley leaves on top to mimic a pumpkin stem. These mini burgers are now ready to impress! To make the perfect pumpkin-shaped patties, start with even portions of meat. Use your hands to shape the patties like little pumpkins. Pinch the sides gently to form ridges. This helps them look cute and adds texture. Remember to press a small indent in the center. This helps them cook evenly and keeps them from puffing up. Whether you use ground beef or turkey, cooking times vary. For beef, cook until it reaches 160°F. For turkey, make sure it hits 165°F. Use a meat thermometer for accuracy. If you use turkey, it may need a bit more time in the pan. Always check that the meat is no longer pink in the middle. To melt cheese perfectly on your patties, add it during the last minute of cooking. Place a spoonful of shredded cheese on each patty. Cover the skillet with a lid. This traps heat and helps the cheese melt smoothly. Aim for a gooey finish that adds flavor and fun to your burgers. Pro Tips Use Fresh Ingredients: Whenever possible, opt for fresh ground meat and quality toppings. Fresh ingredients enhance the flavor and overall quality of your mini burgers. Experiment with Spices: Feel free to adjust the spices and seasonings in the meat mixture to suit your taste. Adding a pinch of cayenne pepper can give your burgers a delightful kick! Perfect Patty Size: Make sure to keep your patties uniform in size for even cooking. Using a measuring cup can help ensure they are all the same size and shape. Serving Presentation: Assemble the burgers on a decorative platter and consider garnishing with seasonal veggies or herbs. A beautiful presentation will make your dish more appealing to guests! {{image_4}} If you want a vegetarian burger, use black beans or lentils. Mash them with breadcrumbs and spices. For a vegan option, skip the egg and use a flax egg instead. Mix 1 tablespoon of flaxseed meal with 2.5 tablespoons of water and let it sit until thick. Form your patties just like the meat ones. To make these mini burgers gluten-free, swap breadcrumbs for gluten-free ones or crushed rice crackers. Always check labels on your condiments too. This way, you can enjoy the same great taste without the gluten. You can change the spices to match your taste. Add chili powder for heat or Italian herbs for a different vibe. Consider using different cheeses too. Pepper jack adds a nice kick, while mozzarella gives a milder flavor. Don't be afraid to experiment and find your favorite mix! After enjoying your pumpkin-shaped mini burgers, store any leftovers in a safe way. Place them in an airtight container. This keeps the burgers fresh and tasty. Make sure to refrigerate them within two hours of cooking. They can last in the fridge for up to three days. If you want to save your mini burgers for later, freezing is a great option. First, let the burgers cool completely. Then, wrap each burger tightly in plastic wrap. Place the wrapped burgers in a freezer-safe bag or container. They can stay in the freezer for up to three months. When you’re ready to eat them, just take out the desired amount. Reheating your mini burgers is simple. For the best results, use an oven or toaster oven. Preheat the oven to 350°F. Place the burgers on a baking sheet and heat for about 10-15 minutes. If you want to use a microwave, place the burger on a plate. Heat it for about 30 seconds to 1 minute. Check that they are hot all the way through before serving. Enjoy your tasty treat again! You can use ground turkey or chicken. They will taste great too! For a vegetarian option, try black beans or lentils. Mash them well and mix in breadcrumbs and spices. Yes, you can prepare the patties a day before. Store them in the fridge, wrapped tightly. You can also cook them and keep them warm. Just reheat before serving. Some local grocery stores might sell them. Look in the freezer section or the deli. You can also check specialty stores or online shops for fun options. Arrange the mini burgers on a platter like a pumpkin patch. Use small pumpkins for decoration. You can also serve with colorful dipping sauces for fun! You can create fun pumpkin-shaped mini burgers with simple ingredients and easy steps. We covered how to prepare the meat mixture, form patties, and cook them just right. You learned helpful tips to shape your patties, cook different meats, and melt cheese. Don’t forget the variations for vegetarians and those with gluten-free needs. Store leftovers properly and enjoy these tasty treats later. Use our FAQs for common questions. Now you can impress your friends with these fun and tasty burgers!

Pumpkin-Shaped Mini Burgers Tasty and Fun Treat

To make Minute Berry Chia Jam, you need simple and fresh ingredients. Here’s what you will need: - 1 cup mixed berries (choose from strawberries, blueberries, or raspberries) - 2 tablespoons maple syrup (or honey for a different sweetness) - 1 tablespoon chia seeds - 1 teaspoon fresh lemon juice - A pinch of sea salt These ingredients work together to create a tasty jam. Berries give the jam its fruity flavor. Maple syrup or honey adds sweetness. Chia seeds help thicken the jam and add healthy fiber. Fresh lemon juice brightens the taste, while sea salt enhances all the flavors. You can mix and match the berries based on what you like or have on hand. Using fresh ingredients makes a big difference in taste. Choose ripe and juicy berries for the best flavor. If you want to switch things up, try adding other fruits or flavors later! {{ingredient_image_2}} - Start by placing 1 cup of mixed berries in a medium bowl. - Use a fork to mash the berries gently. Decide if you want a smooth or chunky jam. I like to keep some berry pieces for texture. - Add 2 tablespoons of maple syrup (or honey), 1 tablespoon of chia seeds, 1 teaspoon of fresh lemon juice, and a pinch of sea salt to the mashed berries. - Mix everything well to combine. Make sure the chia seeds spread evenly throughout the mixture. - Let the berry mixture rest for about 5 to 10 minutes. - During this time, the chia seeds absorb moisture. This process helps thicken your jam. You will see it change from a loose mixture to a jam-like consistency. - If you want a smoother jam, use a hand blender briefly. - After blending, taste the jam. If it needs more sweetness, add a little more maple syrup or honey. - Carefully move the jam to a clean glass jar or an airtight container. - Store it in the refrigerator. It will stay fresh for up to one week. Enjoy this quick and tasty jam with your favorite foods! Adjust the sweetness of your jam to fit your taste. If you want it sweeter, add more maple syrup or honey. You can also try using agave nectar or coconut sugar as alternatives. These options can change the flavor slightly, so feel free to experiment until you find your favorite. Let the chia seeds rest in the mixture for 5-10 minutes. This time is key because it allows the seeds to absorb liquid and thicken the jam. If you want a smoother texture, use a hand blender. Blend for just a few seconds to keep some berry pieces intact while making the jam easy to spread. Serve the jam in small glass jars, topped with a sprig of fresh mint for a pop of color. This makes a lovely gift or a treat for guests. You can pair the jam with toasted bread, yogurt, or pancakes. It makes for a tasty and healthy snack that everyone will love! Pro Tips Choose Fresh Berries: For the best flavor, use fresh, ripe berries. Frozen berries can be used but may result in a slightly different texture. Experiment with Sweetness: Adjust the sweetness based on your taste. Try using agave syrup or coconut sugar for different flavor profiles. Store Properly: Make sure to use an airtight container to preserve the freshness of your jam, and always keep it refrigerated. Use as a Versatile Topping: This jam is not just for toast! Try it on pancakes, waffles, or mixed into yogurt for a delicious treat. {{image_4}} You can create your jam using just one type of berry. Strawberries are sweet and juicy. Blueberries offer a nice tartness. Raspberries are bright and tangy. Each berry gives a unique flavor. You can also mix in less common berries. Blackberries add a deep, rich taste. Cranberries bring a nice tartness and a pop of color. Try adding vanilla extract for warmth. Just a splash can change the jam's flavor. You might also add spices like cinnamon or nutmeg. These spices can make your jam taste even better. Another idea is to use citrus zest. Lemon or orange zest brightens the flavors and adds freshness. If you want a sugar-free jam, use low-calorie sweeteners. Stevia or monk fruit are good choices. They keep the sweetness without the sugar. You can also sweeten naturally. Try adding more ripe berries for sweetness. Applesauce or mashed bananas can also help. These options keep your jam tasty and healthy. To keep your Minute Berry Chia Jam fresh, use an airtight container. Glass jars work great for this. They seal well and do not hold odors. Make sure the jar is clean before filling it with jam. This keeps bacteria out and helps the jam taste better. In the fridge, your jam lasts about one week. Look for signs of spoilage. If you see mold or if it smells off, throw it away. A change in color can also mean it’s time to discard the jam. Always trust your senses to keep safe. You can freeze your chia jam for longer storage. To do this, pour the jam into a freezer-safe container. Leave some space at the top, as it will expand when frozen. When you want to use it, thaw the jam in the fridge overnight. You can stir it and enjoy it on toast or yogurt. Chia jam lasts about one week in the fridge. Store it in an airtight container for best results. Always check for any signs of spoilage, like an off smell or mold. If it looks good and smells fresh, it’s still safe to eat. Yes, you can use frozen berries for chia jam. Just thaw them first and mash them up. They work well and are often just as tasty as fresh berries. This is a great option if fresh berries are out of season or hard to find. Chia jam can be vegan if you use plant-based sweeteners. Maple syrup is a great choice. If you prefer honey, remember that honey is not vegan. Always check labels to ensure sweeteners fit your diet. To make chia jam thicker, increase the chia seeds. You can also let the jam sit longer to absorb more liquid. If you want a smoother texture, blend the jam after it thickens. Adding more berries can also help. Chia jam is super versatile! You can spread it on toast, mix it into yogurt, or use it as a topping for pancakes. It also works great in smoothies or as a filling for desserts. Get creative and enjoy! In this post, we explored how to make delicious chia jam using simple ingredients. You learned the steps to prepare the berries, mix the ingredients, and achieve the perfect texture. I shared helpful tips for flavor and presentation, along with storage advice. Now you can enjoy homemade chia jam in various ways. With a little practice, you’ll create tasty variations that suit your taste. Homemade jam is fun and rewarding, so dive in and savor your creations!

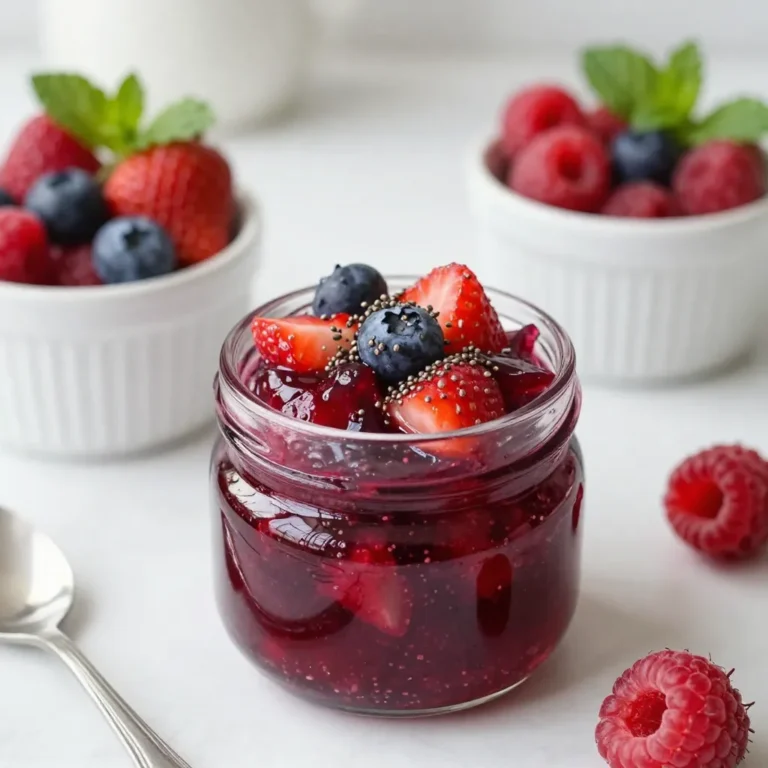
Minute Berry Chia Jam Quick and Tasty Recipe

PREV 1 … 43 44 45 … 47 NEXT
snack joy kitchen

explore

DessertsDinnerAppetizersDrinks

Our Policies

  • Cookie Policy
  • Copyright Policy
  • Disclaimer
  • GDPR Policy
  • Terms Of Use
Back to Top
  • About
  • Contact Us
  • Privacy Policy
© 2026 snack joy kitchen