FREE DINNER EBOOK! Get your copy!
  • Cookie Policy
  • GDPR Policy
  • Disclaimer
  • Terms Of Use
  • Visit my other site: Fun Cookie Recipes
snack joy kitchen
  • Home
  • Dinner
  • Desserts
  • Drinks
  • Appetizers
  • Contact
  • About
  • Privacy Policy
  • Home
  • Dinner
  • Desserts
  • Drinks
  • Appetizers
  • Contact
  • About
  • Privacy Policy
  • Cookie Policy
  • GDPR Policy
  • Disclaimer
  • Terms Of Use
Visit my other site: Fun Cookie Recipes

HOME / CATEGORIES /

Latest

- 2 boneless, skinless chicken breasts, cut into bite-sized pieces - 1 cup assorted bell peppers (red, yellow, and green), thinly sliced - 1 medium zucchini, sliced into half-moons - 1 medium red onion, thinly sliced - 2 cloves garlic, minced - 1 can (15 oz) black beans, rinsed and drained - 1 tablespoon olive oil - 1 teaspoon smoked paprika - 1 teaspoon ground cumin - 1 teaspoon chili powder - Salt and black pepper to taste - Fresh cilantro, chopped (for garnish) - 1 ripe avocado, diced (for serving) - Lime wedges (for serving) - Substitutions for Chicken: You can use turkey or tofu for a lighter option. - Alternative Veggies: Try broccoli, carrots, or snap peas for a different twist. - Extras for Serving: Add sour cream, cheese, or hot sauce to spice it up. Creating this Chicken and Vegetables Skillet is easy and fun. The main ingredients shine with bright colors and flavors. Each item plays an important role. The chicken adds protein, while the veggies give great taste and nutrition. You can easily swap out ingredients based on what you have at home. This dish is all about flexibility. {{ingredient_image_2}} - Heat the Oil: Start by pouring one tablespoon of olive oil into a large skillet. Turn the heat to medium. Wait until the oil shimmers. This means it is hot enough. - Cook the Chicken: Add two boneless, skinless chicken breasts, cut into bite-sized pieces. Season the chicken with smoked paprika, ground cumin, chili powder, salt, and black pepper. Cook for 7-8 minutes. Stir the chicken often until it is browned and fully cooked. - Add Garlic: After the chicken is ready, add two minced garlic cloves. Stir constantly for 1-2 minutes. You want the garlic to smell great but not burn. - Incorporate Vegetables: Next, toss in 1 cup of assorted bell peppers, a medium zucchini, and a medium red onion. Stir-fry all these colorful veggies with the chicken. Cook for about 5-6 minutes. The veggies should be tender-crisp and bright. - Mix in Black Beans: Now, fold in one can of rinsed and drained black beans. Cook for another 2-3 minutes. This helps everything heat through and blend well. - Taste and Adjust: Before you serve, taste the mix. If it needs more flavor, add a bit more salt, pepper, or spices. When it tastes great, remove the skillet from the heat. - Presentation Tips: For a cozy feel, serve directly from the skillet. If you prefer plating, spoon the mixture onto plates. Top each serving with diced avocado and a sprinkle of fresh cilantro. - How to Serve: Serve with lime wedges on the side. This adds a zesty touch to each bite. Enjoy your vibrant and tasty chicken and veggie dish! - Best Techniques for Tender Chicken: Start with even-sized chicken pieces for even cooking. Use medium heat to avoid drying out the chicken. Cook until it’s golden brown, about 7-8 minutes. - How to Achieve Perfectly Cooked Vegetables: Cut vegetables into uniform pieces. This ensures they cook at the same rate. Stir-fry them quickly over high heat to keep them crisp and colorful. - Spice Adjustments: Feel free to tweak the spices. If you like heat, add more chili powder. For a smoky taste, increase the smoked paprika. - Adding Fresh Ingredients: Toss in fresh herbs like cilantro right before serving. It adds a burst of flavor. You can also squeeze fresh lime juice for zing. - Prepping Ingredients Ahead: Chop all vegetables and chicken before cooking. Store them in the fridge to save time. This makes cooking quick and fun. - Quick Cooking Techniques: Use one pan for everything. This saves time on cleanup. Stir-fry and mix ingredients quickly to keep them fresh and vibrant. Pro Tips Marinate for Extra Flavor: For enhanced taste, consider marinating the chicken in the spices and olive oil for at least 30 minutes before cooking. This allows the flavors to penetrate the meat thoroughly. Use Fresh Ingredients: Whenever possible, opt for fresh vegetables and herbs. They not only enhance the flavor but also improve the overall nutritional profile of the dish. Adjust Spice Levels: If you prefer a milder dish, reduce the amount of chili powder or use a bell pepper blend without spiciness. You can also serve with yogurt or sour cream to balance the heat. One-Pan Advantage: To save time on cleanup, use parchment paper to line the skillet. This prevents sticking and makes for an easier cleanup process. {{image_4}} Mexican-Inspired Additions For a Mexican twist, add corn and cilantro. You could also include diced jalapeños for heat. A squeeze of lime brightens the flavors and adds freshness. Serve with warm tortillas for a fun meal. Mediterranean Twist For a Mediterranean flair, switch bell peppers for eggplant and add olives. Use herbs like oregano and thyme for seasoning. A drizzle of feta cheese before serving adds a nice touch. Serve with pita bread for a complete meal. Keto-Friendly Modifications To make this dish keto-friendly, skip the black beans. Use more low-carb vegetables like spinach or broccoli. You can also replace the avocado with a creamy dressing made from Greek yogurt. Vegetarian or Vegan Options For a vegetarian version, replace chicken with firm tofu or tempeh. Cook the tofu until golden for texture. For vegan, omit the cheese and use plant-based garnishes instead of sour cream. Burrito Bowl Inspiration Create a burrito bowl by layering the chicken and veggies over rice or cauliflower rice. Top with salsa, sour cream, or guacamole. This makes a filling and delicious meal! Salad or Wrap Ideas You can serve this dish as a salad. Just add mixed greens and drizzle with your favorite dressing. For a wrap, use a tortilla to hold the chicken and veggies. Add fresh greens for crunch and flavor. Refrigeration Tips After you enjoy your Chicken and Vegetables Skillet, let it cool down. Store it in an airtight container. This keeps moisture in and helps it stay fresh. Place the container in your fridge. Keeping Ingredients Fresh To keep your dish fresh, use a container that seals tightly. This helps keep out air and prevents spoilage. Use it within three to four days for the best taste. Freezing the Dish If you want to save it for later, freezing is a great option. Allow the dish to cool completely. Then, place it in a freezer-safe container or bag. Make sure to remove as much air as possible. This helps avoid freezer burn. Reheating Instructions When you’re ready to eat, thaw it in the fridge overnight. Heat it in a skillet over medium heat until hot. Stir often to ensure even heating. You can also microwave it in short bursts, stirring in between. How Long It Lasts in the Fridge In the fridge, the Chicken and Vegetables Skillet lasts about three to four days. If you freeze it, it can last up to three months. Just remember to label your container with the date! Signs of Spoilage Check for changes in smell or color. If it smells sour or looks off, it's best to toss it. Make sure to avoid any mold growth. Always trust your senses when it comes to food safety! How do I know when chicken is fully cooked? You can check if chicken is done by using a meat thermometer. The inside should reach 165°F (75°C). If you cut it, the juices should run clear, not pink. Always ensure to check the thickest part of the chicken to be safe. This way, you avoid any risk of undercooking. Can I make this dish in advance? Yes, you can prepare this dish ahead of time. Cook it, let it cool, and store it in the fridge. It will stay fresh for about three days. When you’re ready to eat, just reheat it gently on the stove or in the microwave. This makes it a great option for meal prep. Caloric Content per Serving Each serving of this Chicken and Vegetables Skillet has about 400 calories. This number can change based on how much oil or other ingredients you use. Dietary Benefits of Ingredients This dish is packed with protein from chicken and fiber from black beans and veggies. Bell peppers and zucchini provide essential vitamins. Using olive oil adds healthy fats. Overall, it’s a wholesome meal that supports a balanced diet. Best Skillet Options A large non-stick skillet works best for this recipe. It helps prevent sticking and makes cleaning easier. If you have cast iron, that’s perfect too. It retains heat well and gives a nice sear to the chicken. Recommended Utensils for Cooking and Serving You will need a spatula for stirring, a meat thermometer for checking chicken, and a knife for cutting veggies. For serving, you can use a big spoon or even serve straight from the skillet for a fun touch. This blog post covered how to create a tasty dish using chicken, veggies, and spices. I shared tips for cooking, storage, and variations to suit your taste. With these insights, you can cook confidently and enjoy your meals more. Remember, experimenting in the kitchen can lead to great flavors. Use these ideas to make meals fun and delicious. Happy cooking!

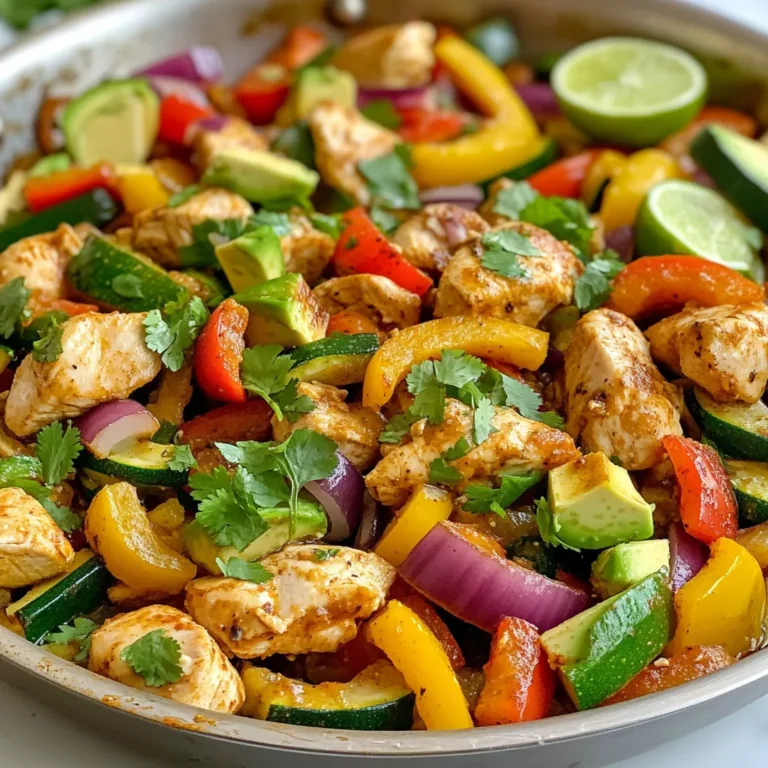
Chicken and Vegetables Skillet Easy and Tasty Meal

- 1 large tortilla wrap (10-inch) - 4 oz cream cheese, softened to room temperature - 1/2 cup shredded cheddar cheese - 1/2 cup shredded mozzarella cheese - 1/4 cup pickled jalapeños, diced (adjust for heat preference) - 1/4 cup cooked bacon, crumbled (optional; substitute with extra jalapeños for a vegetarian option) - 1 teaspoon garlic powder - 1 teaspoon onion powder - 1/2 teaspoon smoked paprika - Salt and pepper to taste - Fresh cilantro, finely chopped (for garnish) You can swap the cream cheese for Greek yogurt for a lighter option. If you want a different flavor, try using goat cheese. For the tortillas, whole wheat or spinach wraps work well. If you skip bacon, use extra jalapeños or black beans for protein. To make these pinwheels milder, use fewer jalapeños. You can also remove the seeds for less heat. If you love spice, add fresh chopped spicy peppers or a dash of hot sauce to the cheese mixture. This way, you can customize the heat to fit your taste! {{ingredient_image_2}} First, gather your ingredients. You will need cream cheese, cheddar cheese, mozzarella cheese, diced jalapeños, and optional bacon. In a medium bowl, combine 4 ounces of softened cream cheese with 1/2 cup of shredded cheddar cheese and 1/2 cup of shredded mozzarella. Use a spatula or fork to mix until the cheeses are smooth and creamy. Next, add 1/4 cup of diced jalapeños, 1/4 cup of crumbled bacon (if you want it), 1 teaspoon of garlic powder, 1 teaspoon of onion powder, and 1/2 teaspoon of smoked paprika. Stir everything until it blends well. Now it's time for the tortilla! Place a large, 10-inch tortilla on a clean surface. Take your cheese mixture and spread it evenly over the tortilla. Leave a half-inch border around the edges. This helps keep the filling inside. Once spread, start at one end of the tortilla and roll it tightly into a log shape. Tuck the filling in as you roll to make sure nothing spills out. After rolling, wrap the tortilla log tightly in plastic wrap. Place it in the fridge for at least 30 minutes. This step helps the log firm up, making it easier to slice. When it’s chilled, take off the wrap. Use a sharp knife to cut the log into 1-inch thick pinwheels. Be gentle as you cut, using a sawing motion to avoid squishing the filling. Arrange the sliced pinwheels on a platter and enjoy! To get a good roll, start with a flat tortilla. Spread the cheese mixture evenly. Leave a small border at the edges. This helps keep the filling inside. When you roll, start at one end. Tuck the filling in as you go. Roll tightly but not too tight, so it doesn’t squish out. If the tortilla tears, just use a bit of extra filling to patch it up. The right texture is key for great pinwheels. Mix the cream cheese well until it’s soft and smooth. This helps all the cheeses blend nicely. Use room-temperature cream cheese for easy mixing. If you want a creamier texture, add a touch of sour cream. Chill the rolled pinwheel for at least 30 minutes. This makes slicing easier and keeps the shape. Serve your pinwheels on a nice platter. They look great with a sprinkle of fresh cilantro. For dips, I recommend creamy ranch or sour cream. These add a nice contrast to the spicy jalapeños. You can also try a zesty salsa or guacamole for a fun twist. Feel free to get creative with your dips! Pro Tips Use Fresh Ingredients: For the best flavor, opt for fresh jalapeños and high-quality cheeses. Fresh ingredients elevate the taste and texture of your pinwheels. Experiment with Spices: Feel free to customize the spice level by adding more jalapeños or incorporating spices like cayenne pepper or chili powder for an extra kick. Slice with Care: Use a sharp knife to slice the pinwheels, and employ a gentle sawing motion to avoid squishing the filling. This helps maintain a beautiful presentation. Make Ahead: These pinwheels can be made a day in advance. Just keep them tightly wrapped in plastic wrap in the refrigerator until you're ready to serve. {{image_4}} For a tasty vegetarian option, skip the bacon. You can add extra diced jalapeños for more heat. You may also mix in some black beans for added protein and texture. These beans pair well with the creamy cheese and give a fun twist to the flavor. Just use the same cheese mix for a savory treat! You can switch up the cheeses to match your taste. Try using pepper jack cheese for a spicy kick. Alternatively, goat cheese adds a tangy flavor that mixes well with the jalapeños. You can also use a mix of Gruyère and mozzarella for a rich, creamy texture. The options are endless, so feel free to experiment with your favorites. If you want to turn up the heat, add some diced serrano peppers. They pack a punch and work great with the cream cheese. You can also mix in a bit of hot sauce into the cheese blend for extra flavor. For a unique twist, try adding some chorizo for a smoky flavor that complements the jalapeños well. Each variation can make these pinwheels even more exciting! You can keep leftover pinwheels in the fridge. Place them in an airtight container. They will stay fresh for up to three days. If you want to keep them longer, consider freezing them. To freeze, wrap each pinwheel tightly in plastic wrap. Then, place them in a freezer-safe bag. They can last for up to three months in the freezer. When you’re ready to eat, just thaw them in the fridge overnight. This keeps them tasty and safe. To reheat, you can use the microwave or the oven. For the microwave, heat them for about 30 seconds. Check to see if they are warm. In the oven, preheat to 350°F and bake for 10 minutes. This gives you a warm, cheesy snack without losing texture. Enjoy your tasty pinwheels! Yes, you can use low-fat cream cheese. It will still give a creamy texture, but the flavor may be less rich. The pinwheels will still taste great. Just ensure it is soft for easy mixing. You can make these pinwheels up to a day ahead. After rolling, wrap them tightly in plastic wrap. Keep them in the fridge. This chilling helps the flavors meld nicely. Slice them just before serving for the best look. Serve these pinwheels on a large platter. Add dips like ranch or sour cream for extra flavor. Garnish with fresh cilantro for a pop of color. You can also add jalapeño slices on top for a fun touch. This blog post covered how to make Cheesy Jalapeño Popper Pinwheels. We discussed the key ingredients and substitutions, along with adjusting spice levels. I shared clear steps to prepare, spread, roll, chill, and slice your pinwheels. You learned helpful tips for rolling and texture, plus serving ideas. I also offered variations and storage tips. Make these pinwheels your own. Experiment with flavors and ingredients. Enjoy tasty snacks that will impress your friends and family.

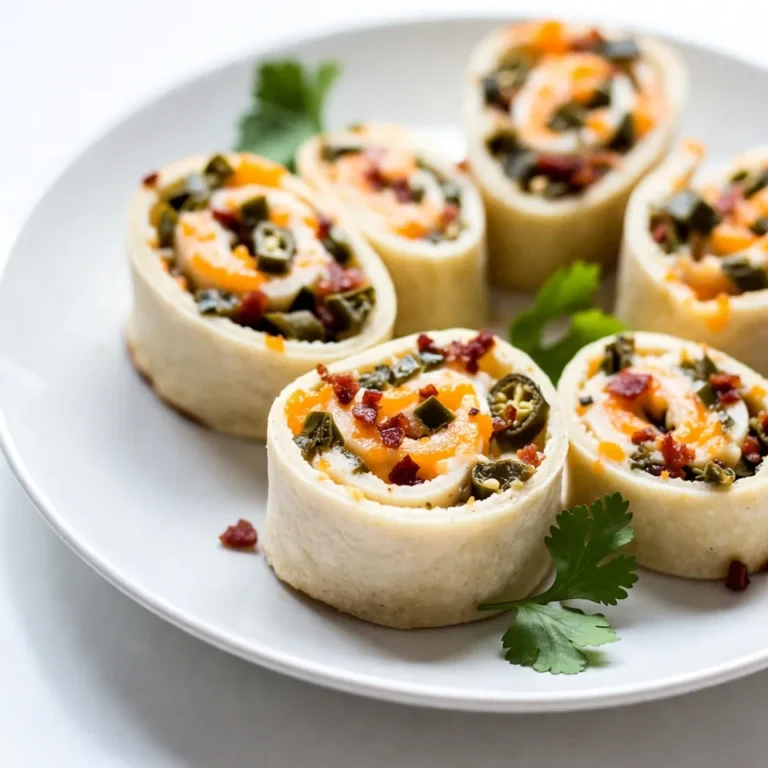
Cheesy Jalapeño Popper Pinwheels Easy Party Snack

Here is what you need to make delicious Maple Chai Cookies: - 1 cup unsalted butter, softened - 1 cup packed brown sugar - 1/3 cup pure maple syrup - 1 teaspoon vanilla extract - 2 cups all-purpose flour - 1 teaspoon baking soda - 1/2 teaspoon salt - 1 teaspoon ground cinnamon - 1/2 teaspoon ground ginger - 1/4 teaspoon ground cardamom - 1/4 teaspoon ground cloves - 1/4 teaspoon black pepper (optional) - 1/2 cup chopped walnuts (optional) - 1/2 cup dark chocolate chips (optional) Each ingredient plays a key role in the flavor and texture. The butter adds richness, while brown sugar gives a deep sweetness. Maple syrup brings a warm, earthy note. The spices make this cookie special. They give it a unique chai flavor. If you like crunch, add walnuts. For a sweet surprise, toss in dark chocolate chips. You can mix and match based on your taste. Enjoy gathering these ingredients and get ready to bake! {{ingredient_image_2}} Start by preheating your oven to 350°F (175°C). This step is key for perfect cookies. While the oven warms, line a large baking sheet with parchment paper. This prevents sticking and helps with even baking. Make sure to use enough parchment to cover the entire sheet. In a large mixing bowl, place 1 cup of softened unsalted butter and 1 cup of packed brown sugar. Using an electric mixer or a wooden spoon, cream these together. Mix until the blend is light and fluffy, which takes about 2-3 minutes. This step adds air to the mix, making your cookies soft. Now, pour in 1/3 cup of pure maple syrup along with 1 teaspoon of vanilla extract. Stir until the mixture is smooth and well-combined. The texture should be creamy and homogenous. This adds rich flavor to your cookies and gives them a sweet twist. To keep your cookies soft, avoid overmixing the dough. When you add dry ingredients, mix until just combined. This helps the cookies stay tender. If you see streaks of flour, that’s fine! For chewy cookies, bake them until the edges are golden and the centers look soft. This balance is key. Let them rest on the baking sheet for a few minutes. This step helps them set while keeping a gooey center. You can add extra flavors to your cookies. Consider mixing in walnuts or dark chocolate chips. Toasted walnuts add a nutty crunch. Dark chocolate gives a rich, sweet flavor. You can also add black pepper for a spicy kick. Experiment with these options to find your favorite mix! Pro Tips Chill the Dough: For even better flavor and texture, chill the cookie dough for at least 30 minutes before baking. This helps the flavors to meld and results in a chewier cookie. Use Fresh Spices: For the best flavor, use freshly ground spices instead of pre-ground. This enhances the aromatic qualities of your cookies and makes them more fragrant. Experiment with Mix-Ins: Feel free to get creative with your mix-ins! Try adding dried fruits like cranberries or apricots for a chewy texture and a burst of flavor. Storage Tips: Store the cookies in an airtight container at room temperature for up to a week. You can also freeze the dough for up to 3 months to bake fresh cookies whenever you like! {{image_4}} You can swap out maple syrup for other sweeteners. Honey offers a floral taste. Agave syrup is lower in calories but sweet. Coconut sugar gives a caramel touch. Adjust the quantity to match sweetness levels. Get creative with add-ins! Try dried cranberries for tartness. Chopped pecans bring a nice crunch. You can even use white chocolate chips for a sweet twist. Mix and match based on your taste. To make these cookies gluten-free, use a gluten-free flour blend. Almond flour adds a nutty flavor. Just ensure it has a good mix of starch to bind well. You may need to adjust the liquid in the dough. Always check for cross-contamination if needed. Store your Maple Chai Cookies at room temperature. Use an airtight container to keep them fresh. They can last for about a week. Place parchment paper between layers to avoid sticking. This little tip helps maintain their soft texture. You can freeze these cookies for longer storage. First, let them cool completely. Then, place them in a freezer-safe bag or container. They can last up to three months in the freezer. To thaw, take them out and let them sit at room temperature for 30 minutes. You can also warm them up in the oven for a few minutes. This makes them taste fresh again. Choose sturdy, airtight containers for storage. Glass or plastic containers work well. If you’re freezing, use freezer bags for space-saving. Label your containers with the date. This way, you’ll remember how long they’ve been stored. Yes, you can use other syrups. Honey or agave syrup works well. Keep in mind that these options change the flavor. Honey gives a floral taste, while agave is milder. If you want to stay close to the original flavor, stick with maple. If your dough feels sticky, add more flour. Start with one tablespoon at a time. Mix well until it feels right. You can also chill the dough for about 30 minutes. This makes it easier to handle. To make vegan cookies, swap the butter for coconut oil or vegan butter. Use a flax egg instead of a regular egg. Mix one tablespoon of flaxseed meal with three tablespoons of water. Let it sit until it thickens. Replace maple syrup with a vegan-friendly sweetener if needed. You now have a clear recipe and steps for delicious cookies. We covered ingredients, techniques, and variations to make your cookies unique. Remember to balance flavors and avoid overmixing for the best texture. Storage tips will help keep your treats fresh. Try different sweeteners and add-ins to personalize your cookies. Baking is fun and allows you to explore your creativity. Enjoy your baking adventure and share these cookies with friends and family!

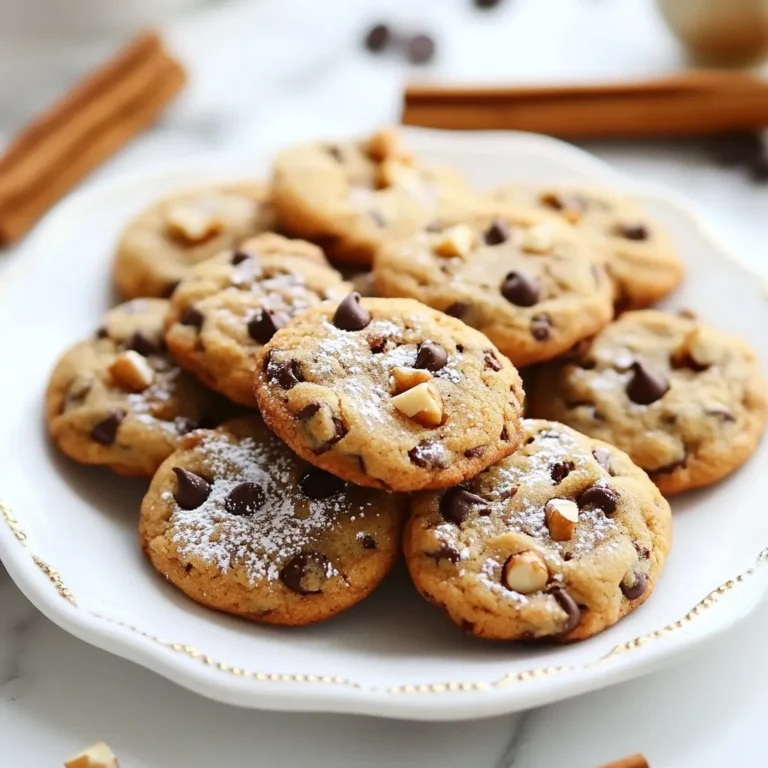
Maple Chai Cookies Irresistible and Flavorful Treat

To create these blondies, you will need the following ingredients: - 1 cup (2 sticks) unsalted butter - 1 cup brown sugar, packed - 1/2 cup granulated sugar - 2 large eggs - 1 teaspoon vanilla extract - 2 cups all-purpose flour - 1 teaspoon baking powder - 1/2 teaspoon baking soda - 1 teaspoon cream of tartar - 1/2 teaspoon salt - 1 teaspoon ground cinnamon - 1/4 cup granulated sugar (for topping) - 1 teaspoon ground cinnamon (for topping) Each ingredient plays a key role in achieving that rich, buttery flavor and soft texture. The unsalted butter is crucial for allowing you to control the saltiness of the blondies. The combination of brown and granulated sugar gives the blondies sweetness and a slight chew. For those using the metric system, here are the conversions: - 1 cup of unsalted butter = 227 grams - 1 cup of brown sugar = 220 grams - 1/2 cup of granulated sugar = 100 grams - 2 large eggs = approximately 120 grams - 2 cups of all-purpose flour = 240 grams - 1 teaspoon = 5 milliliters - 1/2 teaspoon = 2.5 milliliters These conversions ensure that all cooks can enjoy these blondies, no matter where they are. If you need substitutions, here are some options: - For gluten-free blondies, substitute all-purpose flour with a 1:1 gluten-free flour blend. - You can replace unsalted butter with coconut oil for a dairy-free version. - Use maple syrup instead of granulated sugar for a different flavor. These substitutions allow everyone to indulge in the joy of brown butter snickerdoodle blondies, regardless of dietary needs. {{ingredient_image_2}} Start by preheating your oven to 350°F (175°C). This step is key for even baking. Next, take a 9x13 inch baking dish. Lightly grease it and line it with parchment paper. Leave some paper over the edges. This helps you lift the blondies out later. Browning butter adds a rich, nutty flavor. In a medium saucepan, add 1 cup of unsalted butter. Heat it on medium and stir often. Watch closely as it melts. After about 5-7 minutes, the butter will turn deep golden brown and smell amazing. Remove it from the heat and let it cool for a few minutes. This step is crucial for flavor. In a large mixing bowl, combine the browned butter with 1 cup of packed brown sugar and 1/2 cup of granulated sugar. Whisk them together until the mix is smooth. Then, add 2 large eggs one at a time. Beat well after each egg, and stir in 1 teaspoon of vanilla extract. In another bowl, whisk together your dry ingredients: 2 cups of all-purpose flour, 1 teaspoon of baking powder, 1/2 teaspoon of baking soda, 1 teaspoon of cream of tartar, and 1/2 teaspoon of salt. Add 1 teaspoon of ground cinnamon, too. Make sure there are no clumps. Gently fold the dry mix into the wet mix. Just mix until combined. Avoid overmixing, as this keeps the blondies soft. To get chewy blondies, use room temperature eggs. They mix better and create a softer texture. Be sure to brown the butter until it's deep golden. This adds a rich flavor that makes these blondies special. Also, avoid overmixing the batter. Mix just until you see no dry flour. This keeps your blondies soft and chewy. For the right texture, let the blondies cool in the pan for 10 minutes. Use the parchment paper to lift them out. This helps them stay moist. When you cut them, use a sharp knife. Wipe the knife between cuts for clean edges. This way, each piece looks great and tastes amazing. Store your blondies in an airtight container. Keep them at room temperature for up to a week. If you want them to last longer, freeze them. Cut the blondies into squares before freezing. Wrap each piece tightly in plastic wrap. This helps keep them fresh and tasty for later. Pro Tips Brown the Butter Correctly: Make sure to keep an eye on the butter while it's browning. Swirling the pan occasionally helps prevent it from burning and ensures an even color. Measure Flour Accurately: Use the spoon and level method to measure your flour. Spoon it into your measuring cup and level it off with a knife to avoid packing, which can lead to dry blondies. Cool Before Cutting: Allow the blondies to cool completely before cutting into squares. This helps them set and makes for cleaner cuts without crumbling. Enhance Flavor with Add-ins: Consider adding chocolate chips or nuts for extra texture and flavor. Just fold them into the batter before transferring it to the baking dish. {{image_4}} You can mix things up with your blondies. Try adding chocolate chips for a sweet twist. They melt and create pockets of gooey goodness. Chopped nuts also work great. Walnuts or pecans add a crunchy texture. You can even use butterscotch chips for a new flavor. Be bold and combine different flavors for a fun treat. Change your blondies for the seasons! For fall, add pumpkin spice. Just swap in 1 teaspoon of pumpkin spice for the cinnamon. You can also mix in some chopped apples for a fruity touch. During the winter, try a blend of holiday spices. Nutmeg and cloves will warm up your treats. These variations keep your baking fresh and fun. Want a lighter treat? You can reduce the sugar in your recipe. Try using 3/4 cup brown sugar instead of a full cup. Another option is to use whole wheat flour. This adds fiber and gives your blondies a nutty flavor. You can also use applesauce in place of some butter. This keeps them moist while cutting down on fat. Enjoy your delicious blondies, even with a healthier twist! To keep your blondies fresh, store them in an airtight container. Place a piece of parchment paper between layers to prevent sticking. They will stay soft for up to five days at room temperature. If you need longer storage, consider freezing them. To freeze your blondies, let them cool completely first. Cut them into squares. Wrap each square tightly in plastic wrap. Then, place the wrapped blondies in a freezer bag. They can last up to three months in the freezer. When you are ready to enjoy, just thaw them in the fridge overnight. To reheat your blondies, place them in a microwave-safe dish. Heat for about 10-15 seconds. Check to see if they are warm enough. If you want a crispy edge, pop them in the oven at 350°F for 5-10 minutes. Enjoy them warm with a scoop of ice cream for an extra treat! Yes, you can use salted butter. However, this may change the taste. The blondies may taste a bit saltier. If you use salted butter, reduce the added salt in the recipe. This keeps the flavor balanced. To check if your blondies are done, use a toothpick. Insert it into the middle. If it comes out clean or with a few crumbs, they are ready. The edges should also look lightly golden brown. Be careful not to overbake! First, let the blondies cool in the pan for about 10 minutes. Then, use the parchment paper to lift them out. This makes it easy to remove without sticking. Once out, place them on a wire rack to cool completely. Cut them into squares and enjoy! In summary, this blog post covered everything you need for perfect brown butter snickerdoodle blondies. We explored essential ingredients and their swaps for gluten-free diets. You learned step-by-step instructions for browning butter and mixing. We shared tips for achieving that chewy texture and storing them well. Don’t forget to try fun flavor variations, too. With these insights, you can bake blondies that everyone will love. Enjoy your baking adventure and impress your friends and family!

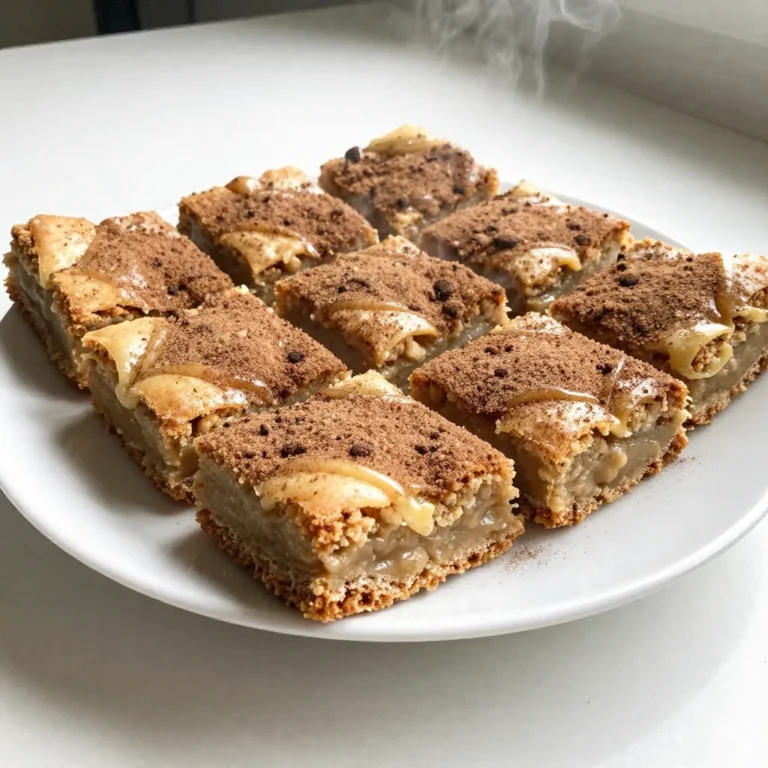
Brown Butter Snickerdoodle Blondies Irresistible Treat

To create Marry Me Chicken Tortellini, you need fresh ingredients that make this dish shine. Here’s what you will need: - 2 boneless, skinless chicken breasts - 1 tablespoon olive oil - Salt and freshly ground pepper, to taste - 2 cloves garlic, finely minced - 1 cup cherry tomatoes, halved - 1 cup heavy cream - 1 cup low-sodium chicken broth - 1 cup fresh baby spinach - 1 teaspoon Italian seasoning - 8 ounces plain or cheese-filled tortellini - ½ cup freshly grated Parmesan cheese - Fresh basil leaves, for garnish Each ingredient plays a key role in building flavor and texture. The chicken forms the heart of the dish. The olive oil helps in cooking and adds richness. Salt and pepper bring out the flavors of the chicken. Garlic adds a lovely aroma; it’s essential for depth. Cherry tomatoes add sweetness and a pop of color. Heavy cream creates the luscious sauce, while chicken broth adds a savory base. Fresh baby spinach contributes nutrients and brightens the dish. Italian seasoning infuses a touch of herbaceous flavor. Tortellini adds a comforting element, and Parmesan gives a salty finish. Finally, fresh basil elevates the presentation and adds freshness. Gather these ingredients to set yourself up for success. Every bite will be a delightful mix of flavors, making this dinner a memorable one. {{ingredient_image_2}} To start, season both sides of the chicken breasts. Use salt and freshly ground pepper. Next, heat olive oil in a large skillet over medium heat. Once the oil is hot, add the chicken breasts. Cook them for about 6-7 minutes on each side. They should turn golden brown and reach an internal temperature of 165°F. After cooking, transfer the chicken to a cutting board. Let it rest for a few minutes before slicing it into bite-sized pieces. Now, let’s make the sauce! In that same skillet, reduce the heat to medium-low. Add the minced garlic and sauté it for about 30 seconds. Stir it often until it smells fragrant and turns lightly golden. Be careful not to burn it. Next, add the halved cherry tomatoes to the skillet. Stir them and cook for 2-3 minutes. This helps them soften and release their juices. After that, pour in the heavy cream and chicken broth. Sprinkle in the Italian seasoning and stir well. Increase the heat a bit and let it simmer for about 2 minutes. It's time to cook the tortellini! Add the tortellini to the sauce in the skillet. Follow the package instructions, which is usually about 3-5 minutes. Make sure the tortellini cooks until it is al dente. This means it should be firm when you bite into it. Stir gently to coat the tortellini with the sauce. Once the tortellini is cooked, fold in the fresh baby spinach and grated Parmesan cheese. Stir until the spinach wilts and the cheese melts. Then, slice the rested chicken into strips. Return the chicken to the skillet and gently mix everything together. Heat through for an additional minute. It’s time to plate the dish! Serve hot with creamy tortellini, chicken, and spinach. Top with fresh basil leaves for extra flavor. - Optimizing chicken tenderness: Start by seasoning your chicken well. Salt and pepper enhance flavor. Sear the chicken in olive oil over medium heat. Cook until golden brown, about 6-7 minutes per side. Let it rest before slicing. This keeps it juicy. - Perfectly sautéing garlic: Use medium-low heat for garlic. Add it to the skillet after cooking chicken. Stir it for around 30 seconds until fragrant. Watch closely; garlic can burn quickly. A light golden color is ideal. - Suggestions for additional herbs: Fresh herbs boost flavor. Try adding thyme or oregano for depth. You can also mix in some chopped parsley for freshness. These herbs complement the dish well. - Tips for seasoning: Taste your sauce as you cook. Adjust salt and pepper gradually to avoid over-seasoning. A pinch of red pepper flakes can add a nice kick. - Ideal pairings with side dishes: This dish pairs well with a simple green salad. Garlic bread also complements the creamy sauce. Roasted vegetables can add color and nutrition. - Creative plating ideas: Serve the tortellini in a shallow bowl. This lets you showcase the colorful ingredients. Garnish generously with fresh basil leaves. A sprinkle of extra Parmesan cheese can make it look fancy. Pro Tips Choose Quality Chicken: Opt for organic or free-range chicken breasts for better flavor and texture in your dish. Perfectly Sautéed Garlic: Keep a close eye on the garlic while sautéing to prevent burning; it should be fragrant and golden, not dark brown. Customize Your Tortellini: Feel free to use flavored tortellini, such as spinach or mushroom, to add an extra layer of flavor to your dish. Fresh Basil Addition: Add the fresh basil at the end for maximum flavor; it will wilt slightly but retain its vibrant color and aroma. {{image_4}} - Alternatives for chicken: You can use turkey or pork in place of chicken. They provide a similar taste and texture. If you want a lighter option, consider using grilled shrimp. - Vegetarian options: Swap the chicken for hearty mushrooms or eggplant. These options add rich flavors and a satisfying bite. You can also use tofu to make it a protein-packed meal. - Adding different vegetables: Try adding bell peppers or zucchini for extra color and crunch. You can also toss in broccoli or peas for a touch of sweetness. These veggies cook quickly and blend well with the sauce. - Changing sauce ingredients: Instead of heavy cream, use coconut milk for a dairy-free twist. You can also add a splash of white wine for a depth of flavor. Experimenting with different herbs can also enhance the taste. - Different types of tortellini to use: Choose from cheese-filled, spinach, or meat tortellini. Each type brings its own unique flavor to the dish. - Gluten-free alternatives: Look for gluten-free tortellini made from rice or corn flour. These options ensure everyone can enjoy this meal without worry. To keep your Marry Me Chicken Tortellini fresh, use airtight containers. Glass or plastic containers work well. Make sure the dish cools down before you put it in the fridge. Let it sit at room temperature for about 30 minutes. This step helps prevent moisture build-up. When you want to enjoy leftovers, the stove is best. Heat it in a pan over low heat. Stir often to warm it evenly. If you use a microwave, do it in short bursts. This way, you avoid overcooking the tortellini. If you want to save some for later, freezing works great. Place the dish in freezer-safe containers. Leave a little space at the top for expansion. To thaw, move it to the fridge overnight. Reheat on the stove or microwave until hot. Enjoy your delicious meal again! Marry Me Chicken Tortellini is a creamy pasta dish. It features tender chicken and delicious tortellini. The dish gets its name from its rich flavors, making it perfect for special occasions. The blend of garlic, tomatoes, and spinach adds fresh tastes. You will love the warmth and comfort it brings to your dinner table. Yes, you can prepare Marry Me Chicken Tortellini ahead. Cook the chicken and make the sauce in advance. Store them in separate containers in the fridge. When ready to serve, heat the sauce and add the tortellini. This method saves time and still tastes great. To lighten this dish, you can swap some ingredients. Use boneless chicken thighs instead of breasts for more flavor. Replace heavy cream with half-and-half or coconut milk for fewer calories. You can also use whole wheat tortellini for more fiber. Fresh herbs can give it great taste without extra calories. This dish pairs well with various sides. A simple green salad adds freshness. Garlic bread is great for dipping into the creamy sauce. Roasted vegetables also complement the flavors nicely. For a light option, steamed broccoli or asparagus works well too. This dish combines tender chicken, creamy sauce, and tortellini for a true delight. You learned how to prepare each ingredient and enhance flavors with simple tips. Variations allow you to customize the recipe based on your taste. Proper storage and reheating methods keep leftovers fresh. Whether you serve it to friends or family, this meal impresses every time. Enjoy your culinary creation, and feel free to make it your own!

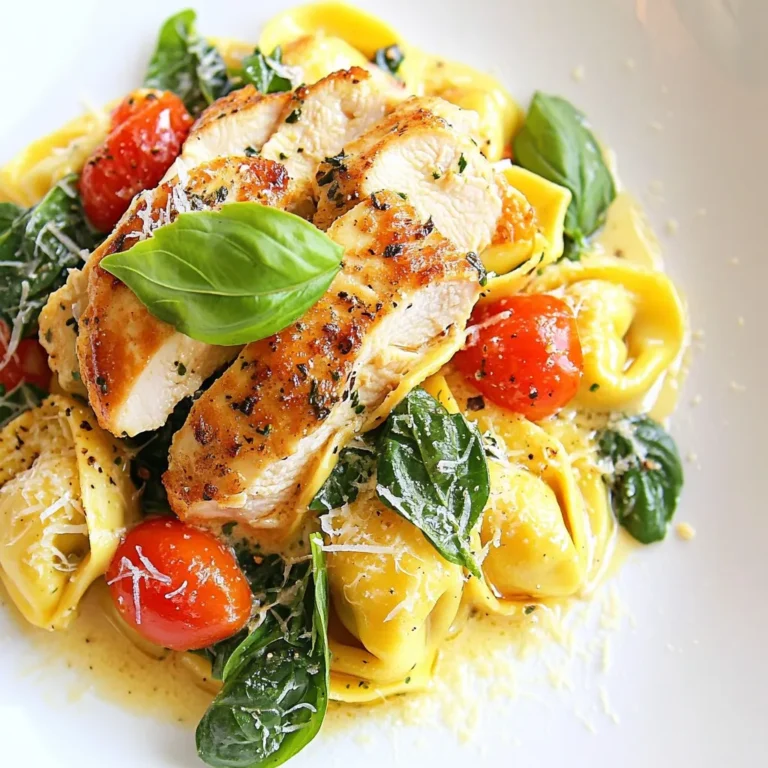
Marry Me Chicken Tortellini Flavorful Dinner Delight

- 1 wheel of Brie cheese (approximately 8 oz) - 1/4 cup fig jam - 1/4 cup pecans, roughly chopped - 1 package of puff pastry (thawed if frozen) These main ingredients create the heart of the dish. The Brie cheese melts beautifully, becoming creamy and rich. Fig jam adds sweetness and a fruity touch. The pecans give a crunchy texture and nutty flavor. Puff pastry wraps it all up, turning golden in the oven. - 1 tablespoon honey - 1 tablespoon olive oil - Fresh thyme leaves, for garnish - Salt and pepper to taste These additions enhance the dish. Honey adds a sweet glaze. Olive oil helps achieve a golden crust. Fresh thyme gives a fragrant touch. A pinch of salt and pepper balances the flavors. - Crackers - Sliced baguette When you serve baked Brie, offer it with crispy crackers or warm sliced baguette. These pair well with the creamy cheese and sweet jam. The crunch adds contrast to the soft filling. You can also drizzle honey on top for an extra sweet bite. {{ingredient_image_2}} - Preparing the oven: Start by preheating your oven to 375°F (190°C). This step gets your oven ready for a perfect bake. - Rolling out puff pastry: Lightly dust your countertop with flour. Roll out the puff pastry to about 1/8 inch thick. This keeps the pastry light and flaky. - Adding fig jam: Place the Brie cheese in the center of the pastry. Spoon the fig jam over the Brie. Spread it evenly for a sweet flavor that pairs well with the cheese. - Preparing the pecan mixture: In a small bowl, mix the chopped pecans with honey, olive oil, and a pinch of salt and pepper. Stir until well combined. Spoon this mixture over the fig jam. - Encasing the Brie: Gently fold the edges of the pastry over the Brie. Make sure to cover it fully. Trim any excess pastry and press the seams to keep the filling inside. - Baking times and temperatures: Place the wrapped Brie on a baking sheet with parchment paper. Bake for 25-30 minutes. Look for a golden color on the pastry; that means it's ready! To get that perfect golden puff pastry, watch your oven closely. Bake until the pastry is puffy and brown. This takes about 25 to 30 minutes at 375°F. Let the Brie cool for a few minutes after baking. This helps the cheese settle and makes it easier to cut. Try adding toppings like walnuts or almonds for a different crunch. A sprinkle of cinnamon or nutmeg can add a warm flavor. Pair your baked Brie with a fruity wine or a light beer. These drinks enhance the sweet and nutty notes of the dish. Serve your baked Brie on a rustic wooden board. This makes it look inviting and stylish. Surround it with crispy crackers and warm slices of baguette. For a finishing touch, drizzle honey on top. Fresh thyme leaves also add a pop of color and flavor. This makes your dish not just tasty, but beautiful too! Pro Tips Choose Quality Brie: Opt for a high-quality, creamy Brie cheese to ensure a rich flavor and smooth texture that will melt beautifully. Customize Your Jam: Feel free to experiment with different flavors of jam, such as apricot or cranberry, to create unique flavor combinations that suit your taste. Chill Before Baking: For best results, chill the wrapped Brie in the refrigerator for about 15 minutes before baking to help it keep its shape while cooking. Serve with Variety: Enhance your serving platter with a variety of accompaniments like fresh fruits, nuts, or even charcuterie items for a beautiful and inviting spread. {{image_4}} You can change the nuts for a different taste. Try walnuts or almonds instead of pecans. Each nut adds a unique crunch and flavor. For jams, swap fig jam with apricot or raspberry jam. These options give a fresh twist to the dish. If you want vegan baked Brie, use a plant-based cheese. Find one that melts well. For gluten-free options, choose gluten-free puff pastry. This way, everyone can enjoy this tasty treat. Add seasonal fruits for extra flavor. In fall, try apple slices or pears. In summer, use berries like strawberries or blueberries. You can also create themed presentations. For holidays, add festive decorations or edible flowers. This makes your baked Brie look lovely and inviting. To store any leftover Baked Brie, let it cool first. This step is key. Place the cheese in the fridge for safe keeping. Use an airtight container to keep it fresh. If you don't have one, wrap it in plastic wrap. Make sure it’s snug to block air. For oven reheating, preheat your oven to 350°F (175°C). Place the Brie on a baking sheet. Heat for about 10-15 minutes. Keep an eye on it to avoid burning. The goal is to warm it through without drying it out. For the microwave, use a microwave-safe plate. Heat in short bursts of 15 seconds. Check each time to see if it’s warm. Avoid overheating, as this can make the cheese tough. You can freeze Baked Brie before baking. Wrap it well in plastic wrap, then foil. This method keeps it safe from freezer burn. Use it within two months for best taste. Once baked, freezing isn't the best option. The texture changes and may not taste as good. If you must freeze, wrap it up tightly. Thaw in the fridge overnight before reheating. Baked Brie pairs well with many items. Here are my favorites: - Crackers: Choose a variety of textures and flavors. - Sliced baguette: Warm or toasted, it's a classic choice. - Fruits: Fresh apples or pears add a nice crunch. - Nuts: Serve extra pecans or walnuts for a rich bite. - Honey: A drizzle enhances the sweet and savory mix. For a creative twist, try serving Baked Brie on a wooden board. Surround it with colorful fruit and nuts. Add a small bowl of extra fig jam for dipping. This makes it fun and inviting for guests. Baked Brie can last for about 3 to 5 days in the fridge. To store it: - Wrap it well: Use plastic wrap or foil. - Keep it in an airtight container: This helps keep it fresh. Check for spoilage signs like an off smell or mold. If it looks or smells strange, toss it. Yes, you can prep Baked Brie ahead of time. Here’s how: - Assemble it: Follow the recipe until wrapping the Brie. - Chill it: Cover and place it in the fridge until you’re ready to bake. When ready to serve, remove it from the fridge. You may need to add a few extra minutes to the baking time. This helps ensure it warms evenly. Baked Brie is simple and fun to make. We covered the key ingredients like Brie cheese, fig jam, and puff pastry. I shared tips for perfecting your bake and suggested delicious ways to serve it. You can even customize flavors with different nuts or jams. Enjoy the process, and don’t hesitate to try your own spins on this dish. With these steps, you can impress friends and family every time you serve Baked Brie. Dive in and create a tasty treat!

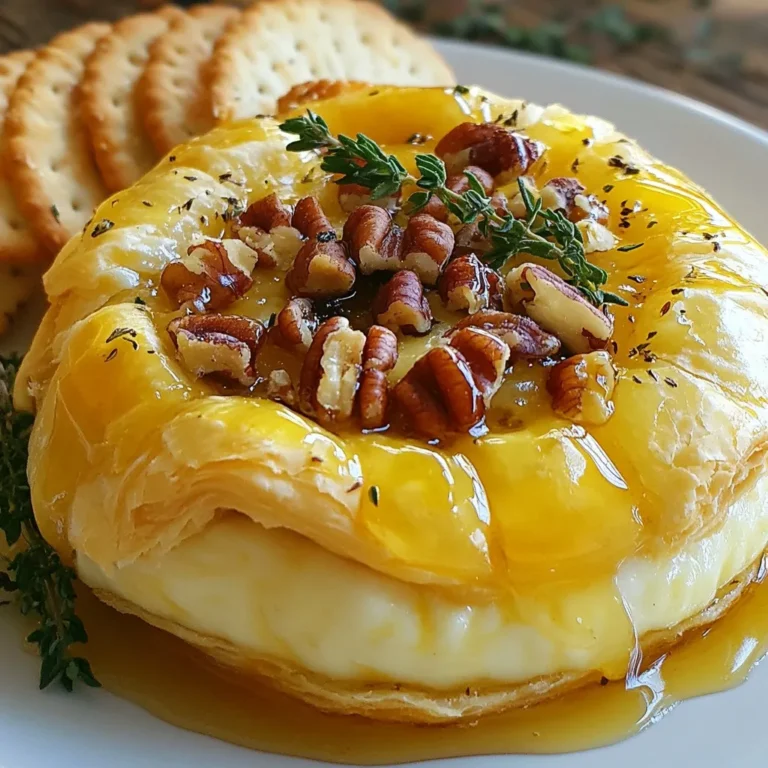
Baked Brie with Fig Jam & Pecans Simple Delight

- 500g boneless chicken thighs, sliced - 2 tablespoons vegetable oil - 1 tablespoon sesame oil - 1 medium onion, sliced - 1 red bell pepper, sliced - 1 green bell pepper, sliced - 3 cloves garlic, finely minced - 1-inch piece fresh ginger, grated - 2 tablespoons gochujang (Korean chili paste) - 1 tablespoon soy sauce - 1 tablespoon honey - 1 teaspoon sugar - Salt and pepper, to taste - Green onions - Toasted sesame seeds - Crushed nuts like peanuts or cashews - For chicken, use beef or tofu if you like. - Use gluten-free soy sauce for a safe option. - For vegetarian dishes, try using mushrooms or eggplant. Gather these ingredients before you start cooking. They bring the bold and spicy flavor to your dish. Each item plays a key role. The chicken provides protein, while the gochujang adds that famous Korean spice. The mix of vegetables gives color and crunch, making the dish more fun to eat. Don't forget the garnishes! Green onions and sesame seeds make it look pretty and add more flavor. {{ingredient_image_2}} To start, take a medium bowl. Add the sliced chicken thighs. Mix in gochujang, soy sauce, honey, and sugar. Stir well until the chicken is fully coated. Cover the bowl with plastic wrap. Place it in the fridge for at least 30 minutes. This time lets the flavors blend. Next, grab a large skillet or wok. Pour in the vegetable oil and sesame oil. Heat it over medium-high until the oil shimmers. The right temperature is key for good flavor. Oils also help the chicken cook evenly. Now, carefully add the marinated chicken. Spread it in a single layer. This step is important for even cooking. Cook for about 5-7 minutes. Stir occasionally until the chicken turns golden brown. Make sure it is fully cooked. After the chicken is done, toss in the sliced onion and bell peppers. Cut the vegetables into thin strips. This helps them cook fast. Stir-fry everything for 3-4 minutes. The veggies should look bright and stay crunchy. Next, add the minced garlic and grated ginger. Stir them into the mix. Cook for one more minute. This timing is crucial for releasing their strong flavors. You want the dish to smell great! Finally, taste the stir-fry. Add salt and pepper as needed. If you like more heat, mix in extra gochujang. Once seasoned, remove it from heat. Transfer the stir-fry to a serving platter. Garnish with chopped green onions and toasted sesame seeds. For extra crunch, sprinkle on crushed nuts if you like. Enjoy this colorful dish! - Use high heat to cook quickly. This keeps the chicken juicy and tender. - Cook in small batches. This helps to prevent steaming and ensures a nice sear. - Stir often for even cooking. This makes sure all pieces get that delicious flavor. - Add vegetables like carrots or snap peas for more color and crunch. - Try adding a splash of lime juice for a fresh taste. - For more heat, add extra gochujang or some red pepper flakes. Adjust the spice to your liking. - Chop vegetables and marinate chicken a day before. This saves time and boosts flavor. - Store prepped ingredients in airtight containers in the fridge. Keep them fresh until you cook. - Reheat leftovers in a skillet over medium heat. Add a splash of water to keep it moist. Pro Tips Marination Magic: Allow the chicken to marinate for at least 1 hour for deeper flavor absorption. Overnight marination will yield even better results! Oil Temperature: Ensure your oils are hot before adding the chicken. This helps achieve a nice sear and keeps the chicken juicy. Crunch Factor: Add a variety of vegetables such as snap peas or carrots for extra crunch and color, enhancing both texture and visual appeal. Spice Control: Adjust the amount of gochujang to suit your heat preference; start with less and add more if you enjoy a spicier dish! {{image_4}} You can swap chicken for beef or tofu. If you choose beef, use thinly sliced flank steak. Marinate it just like the chicken. If you prefer tofu, use firm tofu. Press it to get rid of excess water. Cut it into cubes and fry until golden. This gives you a tasty and different texture. Change up your veggies based on the season. Try using broccoli, snow peas, or zucchini. These add color and crunch. You can also experiment with different chili pastes. If you like heat, use sambal oelek instead of gochujang. For a milder flavor, try sriracha or sweet chili sauce. Mix Korean flavors with other cuisines for fun twists. Try adding some Mexican spices for a spicy kick. You can serve the stir-fry with warm tortillas. This makes a tasty wrap! Or pair it with Italian pasta. A bit of soy sauce can make a unique noodle dish. Store leftover Korean Spicy Chicken Stir-Fry in an airtight container. This keeps it fresh. It lasts in the fridge for about 3 to 4 days. Make sure it cools before you seal it. This helps prevent moisture build-up. Yes, you can freeze this dish! Just let it cool fully before freezing. Use a freezer-safe container or bag. It keeps well for up to 3 months. To reheat, thaw it overnight in the fridge. Then, heat it in a pan over medium heat until hot. This stir-fry is great for meal prep. You can use it for lunch or dinner throughout the week. Pair it with steamed rice or quinoa for a full meal. Try adding steamed broccoli or carrots on the side, too. This adds color and nutrition to your meal prep routine. Gochujang is a Korean chili paste. It is thick, sweet, and spicy. The paste adds depth to dishes. It comes from fermented soybeans, red chili powder, and salt. You can find gochujang at Asian grocery stores. Look in the international aisle at larger supermarkets. Online stores like Amazon also carry it. Yes, you can adapt this recipe for vegetarian or vegan diets. Use tofu or tempeh instead of chicken. You can also try mushrooms for a meaty texture. Replace honey with maple syrup for sweetness. Adjust the gochujang to taste, as it can be spicy. Add more vegetables to enhance flavor and nutrition. Several side dishes go well with this stir-fry. Popular options include: - Steamed rice: A classic pairing that balances the spice. - Kimchi: This fermented dish adds tang and crunch. - Korean pickled radish: It brings a refreshing contrast. - Cucumber salad: A cool, crisp option to tone down heat. These sides create a complete meal that is both tasty and satisfying. You can create a delicious Korean spicy chicken stir-fry with simple steps. We covered essential ingredients, marinades, and cooking techniques. Using high heat and quick cooking brings out the best flavor. Remember, you can customize this dish with different proteins and vegetables. Plus, meal prep ideas make it easy for busy days. Enjoy experimenting with garnishes and spices. With these tips, you'll wow your family and friends as you serve this delightful meal. Your kitchen adventures await!

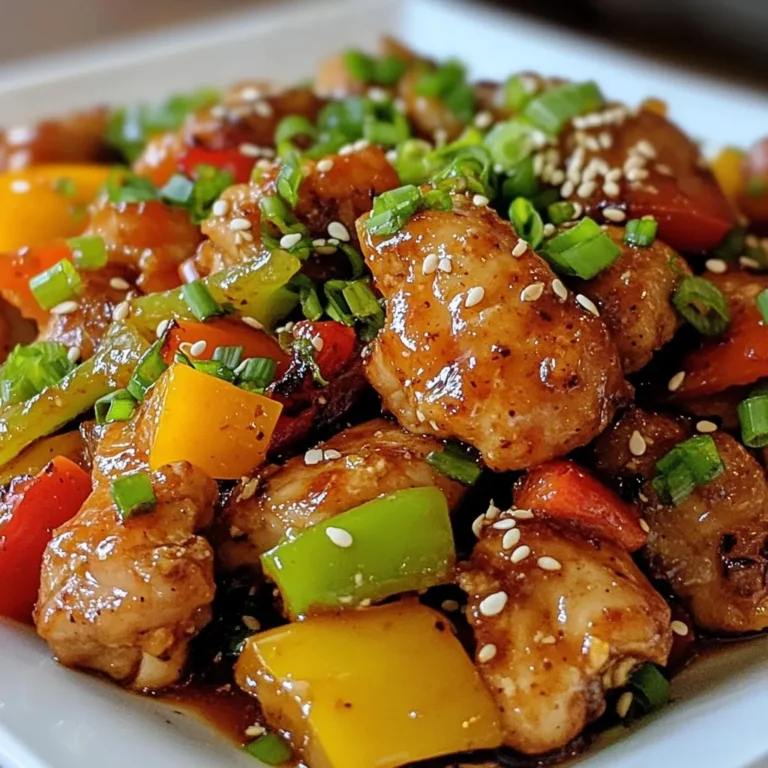
Korean Spicy Chicken Stir-Fry Flavorful and Fast Dish

To make churro cheesecake bars, you need the following ingredients: - 1 cup all-purpose flour - 1/2 teaspoon baking powder - 1/4 teaspoon salt - 1/2 cup unsalted butter, softened - 1 cup granulated sugar (3/4 cup + 1/4 cup) - 1 large egg - 1 teaspoon pure vanilla extract - 8 oz cream cheese, softened - 1/2 cup sour cream - 1 tablespoon ground cinnamon Measuring accurately is key. Use a dry measuring cup for flour. Level it off with a knife for precision. For the butter, it should be soft but not melted. Room temperature helps it blend well. The egg also needs to be at room temperature to mix easily. Cream cheese and sour cream should be soft, too. This ensures a smooth filling. You can add fun toppings to your bars. Here are some ideas: - Powdered sugar dusting for sweetness - Caramel sauce for extra flavor - Chocolate drizzle for a twist These garnishes not only look good but also add more taste. Enjoy trying different combinations! {{ingredient_image_2}} Start by preheating your oven to 350°F (175°C). This heat will help bake the bars evenly. Next, grab an 8x8 inch baking pan. Line it with parchment paper. Make sure some paper hangs over the edges. This will help you lift the bars out later. In a medium bowl, mix 1 cup of all-purpose flour, 1/2 teaspoon of baking powder, and 1/4 teaspoon of salt. Whisk these dry ingredients together well. Set this bowl aside for now. In a larger bowl, beat 1/2 cup of softened unsalted butter with 3/4 cup of granulated sugar. Use an electric mixer on high speed. Mix it for about 3-4 minutes. The mixture should be light and fluffy. Now, add in 1 large egg and 1 teaspoon of pure vanilla extract. Mix until combined smoothly. Gradually add the dry mixture into the wet mixture. Stir until just combined. Be careful not to overmix. This could make the crust tough. Take about two-thirds of this dough and press it evenly into the bottom of your prepared baking pan. This will create a solid crust layer. In a separate bowl, beat 8 oz of softened cream cheese with the remaining 1/4 cup of granulated sugar. Mix until smooth and creamy. Then, add 1/2 cup of sour cream and blend well. Spread this cream cheese mixture evenly over the crust. Crumble the remaining dough over this cream cheese layer. Make sure to distribute it evenly. In a small bowl, mix 1 tablespoon of ground cinnamon with 2 tablespoons of granulated sugar. Sprinkle this mixture generously over the crumbled dough. Now, place the baking pan in your preheated oven. Bake for 35-40 minutes. Look for a golden brown top and slightly wobbly filling. Once done, let the bars cool in the pan for 30 minutes. Use the parchment paper to lift them out. Transfer to the fridge for at least 2 hours. This chilling time helps the bars set completely. After chilling, cut the cheesecake bars into squares for serving. Enjoy the tasty treat! To get that smooth and creamy cheesecake texture, start with room temperature ingredients. Use softened cream cheese and sour cream. This helps them blend well. Mix the cream cheese and sugar until smooth. Avoid overmixing; too much can add air, making your bars puff up. Bake them until just set. If they wobble slightly in the middle, that's perfect! One common mistake is using cold ingredients. Cold items do not mix well. This can lead to lumps in your filling. Another mistake is overbaking. If you bake too long, the bars can dry out. Make sure to check them at the 35-minute mark. Lastly, don’t skip the chilling step. This helps the bars set and makes slicing easier. To serve your Churro Cheesecake Bars nicely, cut them into even squares. Place them on a pretty platter. You can dust them with powdered sugar for a nice touch. Drizzling caramel sauce adds a sweet finish. For added flavor, sprinkle some extra cinnamon on top. These small details make your dessert look fancy and inviting! Pro Tips Chill the Cream Cheese: Ensure your cream cheese is fully softened at room temperature for a smooth filling. This avoids lumps and creates a creamy texture. Don't Overmix: When combining the crust and filling, mix just until incorporated. Overmixing can lead to dense and tough bars. Perfect Cooling: Allow the bars to cool completely in the refrigerator for at least 2 hours. This step is crucial for achieving the perfect texture. Presentation Matters: For an elegant touch, dust the bars with powdered sugar and drizzle with caramel before serving for an impressive presentation. {{image_4}} You can easily change the flavor of churro cheesecake bars. For a rich twist, try adding chocolate. Simply mix in half a cup of melted chocolate into the cream cheese filling. For a fall treat, pumpkin works great too. Use half a cup of pumpkin puree in place of sour cream. Add a pinch of nutmeg for a warm spice kick. Making these bars gluten-free is simple. Substitute all-purpose flour with a 1:1 gluten-free blend. For a dairy-free version, swap cream cheese with a dairy-free cream cheese option. Use a dairy-free sour cream too. You can also replace butter with coconut oil. These swaps keep the bars tasty and enjoyable for everyone. Seasonal ingredients can make your bars shine. In spring, add fresh berries to the filling. Raspberries or strawberries can brighten the flavor. In winter, a dash of peppermint extract gives a festive touch. For summer, try lemon zest in the cream cheese. It adds a refreshing zing that pairs well with cinnamon. To keep your churro cheesecake bars fresh, store them in an airtight container. Place a piece of parchment paper between layers if stacking. This prevents sticking and keeps the bars intact. Make sure they are fully cooled before storing. If you don’t have an airtight container, wrap them tightly with plastic wrap. You can freeze churro cheesecake bars for longer storage. First, cut them into squares. Then, wrap each square in plastic wrap. Next, place them in a freezer bag or container. They will last for about three months in the freezer. To thaw, take them out and leave them in the fridge overnight. This keeps them moist and tasty. Churro cheesecake bars can last for up to a week in the fridge. Keep them covered to prevent drying out. For serving, try adding a drizzle of chocolate or caramel sauce on top. A sprinkle of cinnamon sugar enhances the flavor. You can also serve them with fresh fruit for a refreshing touch. Enjoy with a cup of coffee or tea for a delightful treat! You can tell your cheesecake bars are done when the top is golden brown. The filling should be slightly wobbly in the center. If it jiggles too much, they need more time. Check them after 35 minutes. If they look good, let them cool. This cooling will help them set better. Yes, you can use other cheeses for a twist on this recipe. Some good options are mascarpone or ricotta. They will change the texture and flavor a bit. Just make sure the cheese is softened for easy mixing. This will keep your filling creamy and smooth. You can serve these bars with many tasty options. Here are a few ideas: - Whipped cream for a light touch - Fresh berries for a fruity contrast - A drizzle of chocolate or caramel sauce - A sprinkle of powdered sugar for a sweet finish These toppings will enhance your dessert and make it even more special! We covered the key ingredients and steps to make delicious churro cheesecake bars. I shared tips for perfect texture and showed how to avoid common mistakes. We explored fun variations and provided storage tips for freshness. You can feel confident making this treat for any occasion. Enjoy your baking journey, and remember to share your tasty results!

Churro Cheesecake Bars Simple and Delicious Recipe

- 2 cups cooked chicken, shredded - 1 cup carrots, diced into small pieces - 1 cup peas (fresh or frozen) - 1 cup potatoes, peeled and diced - 1 cup onion, finely chopped - 2 cloves garlic, minced - 1/2 cup celery, diced - 1/3 cup all-purpose flour - 2 cups chicken broth (low-sodium preferred) - 1 cup milk (whole or 2%) - 2 tablespoons olive oil - 1 teaspoon dried thyme - 1/2 teaspoon black pepper - 1/2 teaspoon salt - 1 package of refrigerated pie crusts (contains 2 crusts) - 1 egg, beaten (for egg wash) The heart of any chicken pot pie lies in its ingredients. This dish shines with simple, wholesome foods. You start with cooked chicken. Shredded chicken works best. It adds great flavor and texture. Next, gather fresh vegetables to make your filling colorful and tasty. You will need carrots, peas, potatoes, onions, garlic, and celery. Each vegetable brings its own flavor. Dicing them small helps them cook evenly. For the sauce, you will use all-purpose flour, chicken broth, and milk. These three create a rich, creamy filling. The flour thickens the sauce. The broth and milk add depth and smoothness. Don’t forget your seasonings! Dried thyme, black pepper, and salt bring out the best in this dish. They pair well with the chicken and vegetables. Finally, you need pie crusts. Store-bought crusts save time, but feel free to make your own if you prefer. An egg wash gives the top a nice golden color when baked. With these ingredients, you are on your way to making a comforting chicken pot pie that will warm your heart and fill your belly! {{ingredient_image_2}} First, heat olive oil in a large skillet over medium heat. Add chopped onions, diced carrots, celery, and minced garlic. Sauté these vegetables until they are tender, which takes about 5-7 minutes. Stir often until the onions look clear. Next, add the diced potatoes to the skillet. Cook them for another 3-4 minutes to soften them a bit. Now, dust the veggies with all-purpose flour. Stir well to coat everything evenly. Cook for 1-2 minutes to remove the raw flour taste. Now, slowly whisk in the chicken broth and milk. Keep stirring until the mixture is smooth and thick. This should take about 5-7 minutes. Once thickened, fold in the shredded chicken, peas, dried thyme, salt, and black pepper. Mix well, then take the skillet off the heat. On a clean surface, unroll one pie crust and place it into a 9-inch pie dish. Press it gently into the corners. Pour the chicken filling into the crust. Spread it out evenly across the bottom. Next, unroll the second pie crust and lay it over the filling. Trim any excess dough hanging over the edge. Crimp the edges together to seal the pie. Use a sharp knife to cut several slits in the top crust. This lets steam escape while baking. Brush the top crust with the beaten egg. This helps it turn a nice golden color when baked. Preheat your oven to 425°F (220°C). Once hot, slide the pie into the oven. Bake it for 30-35 minutes. Look for a deep golden brown crust and bubbling filling. For a perfect crust, keep an eye on the time. If the edges brown too fast, cover them with foil. This stops them from burning while the rest cooks. - Choosing the best poultry I recommend using cooked chicken for a rich flavor. You can use rotisserie chicken for ease. Fresh or leftover chicken works too. Aim for skinless, boneless pieces for a tender bite. - Ensuring a flavorful filling Start with fresh vegetables for the best taste. Diced carrots, peas, and potatoes add color and texture. Use low-sodium chicken broth to keep the filling rich without being salty. This layer of flavor makes each bite special. - Techniques for a flaky crust Use cold pie crusts. This keeps the fat solid, leading to a flaky texture. Do not overwork the dough; handle it gently. Cut slits in the top crust to allow steam to escape. This helps avoid a soggy bottom. - Preparing filling in advance You can make the filling a day ahead. Store it in an airtight container in the fridge. This saves time and allows the flavors to meld. Just warm it up before filling the crust. - Freezing tips for the pie If you want to freeze the pie, assemble it first. Wrap it well in plastic wrap and foil. It can last up to three months in the freezer. Bake it straight from the freezer; just add extra time. This way, you’ll have a comforting meal ready when you need it! Pro Tips Use Leftover Chicken: This recipe is perfect for utilizing leftover roast chicken or rotisserie chicken, making it a quick and easy option for a weeknight dinner. Vegetable Variations: Feel free to customize the vegetable blend based on seasonal produce or personal preferences. Mushrooms, green beans, or corn can be great additions! Thickening the Filling: If you prefer a thicker filling, you can add a bit more flour or let the mixture simmer a little longer to evaporate some liquid. Freezing Tips: This pot pie freezes well! Assemble the pie, but do not bake it. Wrap it tightly and store it in the freezer for up to 3 months, baking it from frozen when you’re ready to enjoy. {{image_4}} You can easily change the protein in your pot pie. If you want a twist, use turkey instead of chicken. This works great, especially around holidays. Beef is another option. Use cooked beef to give a hearty flavor. For a lighter choice, try mushrooms or tofu. Both add a nice texture and absorb flavors well. These vegetarian options make pot pie fun for everyone. Adding herbs and spices can really boost the taste. Fresh thyme or rosemary gives a nice aroma. You can also use spices like paprika for warmth. Another great way to enhance flavor is using a flavored broth. Chicken broth adds depth, while vegetable broth works for veggies. Consider using cream in the filling for richness. It makes your pot pie even more creamy and delicious. When it comes to the crust, you have choices. You can make a homemade crust for a personal touch. This allows you to control the ingredients. If you want something quick, store-bought crusts save time. They can still give you that perfect golden finish. If you need a gluten-free option, look for gluten-free pie crusts. Many brands offer tasty alternatives that work well in pot pies. To store your chicken pot pie, let it cool first. This step keeps the crust from getting soggy. Wrap it tightly in plastic wrap or foil. You can also place it in an airtight container. Store it in the fridge for up to 3 days. This way, it stays fresh and tasty. You can freeze chicken pot pie both before and after baking. For freezing before baking, wrap it tightly in plastic wrap and then foil. This keeps out air and frost. You can freeze it for up to 3 months. To freeze after baking, let the pie cool completely. Wrap it in plastic wrap and foil as well. When you want to eat it, thaw it in the fridge overnight. Reheat it in the oven at 350°F (175°C) until hot, about 25-30 minutes. This way, it tastes fresh and delicious again. Yes, you can make chicken pot pie without a crust. Here are some great options: - Mashed potatoes on top for a comforting twist. - Biscuits can add a fluffy and soft texture. - Cornbread gives a sweet and hearty flavor. - Polenta adds a creamy touch to the dish. Each of these choices brings a unique taste and texture. You can customize your pot pie based on what you like best. To check if your pot pie is done, look for these signs: - The crust should be a deep golden brown. - The filling should be bubbling through the slits in the top. - A knife inserted in the center should come out hot. These signs show that your chicken pot pie is ready to enjoy. It means the inside is warm and the crust is perfectly cooked. Pairing sides with chicken pot pie can enhance your meal. Here are some tasty suggestions: - Mixed greens salad for a fresh crunch. - Steamed green beans for a tender bite. - Roasted carrots bring sweetness and color. - Mashed potatoes offer extra comfort. These sides balance the richness of the pot pie and create a complete meal. Enjoy your meal with these delightful additions! You learned how to make a classic chicken pot pie from scratch. We covered each step, from choosing the right ingredients to baking tips for a golden crust. You can even try variations like using turkey or a veggie version. Remember, storing leftovers properly will keep your pot pie fresh. Don’t hesitate to experiment with flavors and fillings. Enjoy your cooking journey, and soon, you’ll impress everyone with your homemade pot pie!

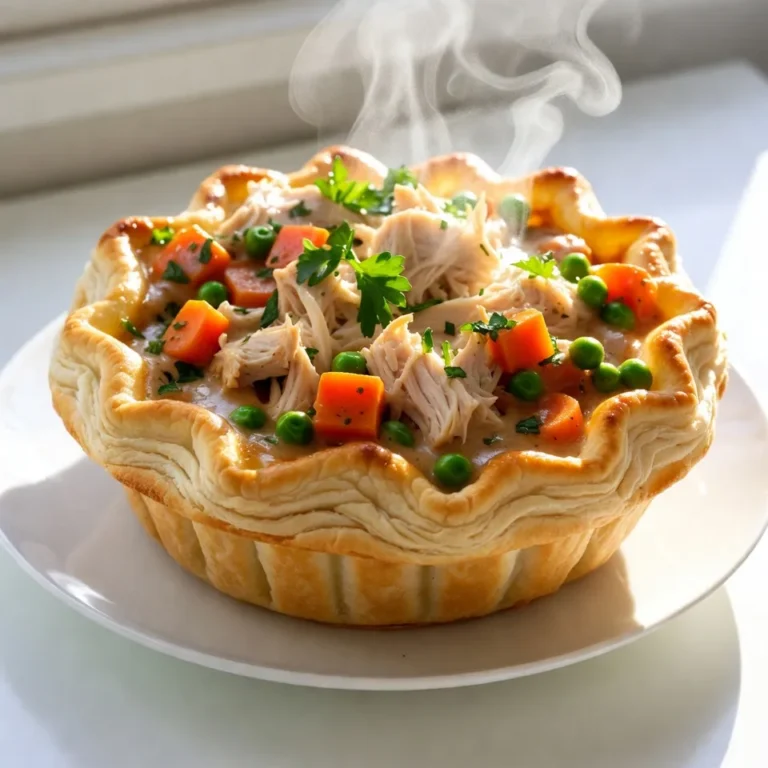
Classic Chicken Pot Pie Comforting and Hearty Dish

To make hot honey baked chicken, gather these must-have items: - 4 bone-in, skin-on chicken thighs - 1/4 cup honey - 2 tablespoons hot sauce (like Sriracha) - 1 tablespoon olive oil - 1 teaspoon garlic powder - 1 teaspoon smoked paprika - 1/2 teaspoon sea salt - 1/2 teaspoon freshly cracked black pepper - Fresh herbs for garnish (like parsley or cilantro) You can add your personal touch with these options: - Lemon juice for added tang - Ginger for a zesty kick - Brown sugar to enhance sweetness - Chili flakes for extra heat Don’t have everything on hand? Here are some swaps: - Use boneless chicken thighs if you prefer less fat. - Maple syrup can replace honey for a different sweet flavor. - Any hot sauce can work in place of Sriracha. - Vegetable oil can substitute olive oil if needed. These ingredients set the stage for a dish bursting with sweet and spicy notes. Each item plays a role in creating a flavor experience that is hard to forget. Experiment with options to make it your own! {{ingredient_image_2}} First, wash your chicken thighs under cold water. Pat them dry with paper towels. This step helps the marinade stick well. Next, place the thighs in a large baking dish. Make sure they are spread out evenly. This allows them to cook properly. A good space helps the heat circulate. In a medium mixing bowl, combine the following ingredients: - 1/4 cup honey - 2 tablespoons hot sauce - 1 tablespoon olive oil - 1 teaspoon garlic powder - 1 teaspoon smoked paprika - 1/2 teaspoon sea salt - 1/2 teaspoon black pepper Whisk these together until smooth. This mix blends sweet and spicy flavors. You can adjust the hot sauce to fit your taste. If you want it spicier, add more sauce. Preheat your oven to 425°F (220°C). This ensures your chicken cooks well. Brush the chicken thighs with the marinade. Make sure to coat the tops well. Reserve some marinade for basting later. Bake the chicken for 25 minutes. After that, take it out and baste it with the reserved mix. This adds more flavor. Return the chicken to the oven for another 10-15 minutes. Check that the internal temperature reaches 165°F (74°C). For a crispy skin, broil the chicken for 2-3 minutes. Watch it closely to avoid burning. After cooking, let the chicken rest for 5-7 minutes. This helps keep it juicy. Garnish with fresh herbs before serving. Enjoy your flavorful hot honey baked chicken! To get the best glaze for your chicken, mix honey and hot sauce well. Use a whisk to blend them until smooth. The olive oil helps it stick to the chicken. Add garlic powder and smoked paprika for depth. Don't forget sea salt and black pepper; they boost flavor. Brush the glaze on the chicken thighs generously. Reserve some for later basting. This step adds more layers of taste. Juicy chicken starts with the right cooking method. Bake the chicken at 425°F (220°C) for a crisp skin. The first 25 minutes cook the chicken well. Basting with the reserved glaze keeps it moist. Let the chicken rest after baking. This step allows juices to settle, making every bite tender. Use bone-in thighs; they tend to be juicier than boneless cuts. Always check the internal temperature of the chicken. It should reach 165°F (74°C) for safe eating. Use a meat thermometer for accuracy. Insert it into the thickest part of the thigh, avoiding the bone. If you want extra crispiness, broil for 2-3 minutes. Watch closely to prevent burning. Once cooked, let the chicken rest for 5-7 minutes before serving. This wait is key for juicy chicken. Pro Tips Marinate Longer for More Flavor: If time allows, marinate the chicken thighs for a few hours or overnight in the refrigerator. This will enhance the sweet and spicy flavors absorbed by the meat. Use a Meat Thermometer: To ensure your chicken is perfectly cooked, use a meat thermometer. The internal temperature should reach 165°F (74°C) for safe consumption. Adjust Heat Levels: Feel free to adjust the amount of hot sauce in the marinade according to your heat preference. Adding more will give you a spicier kick, while less will tone it down. Pair with a Cooling Side: Serve the chicken with a cooling side, like a cucumber salad or yogurt-based dip, to balance the heat and bring out the flavors of the dish. {{image_4}} You can cook hot honey baked chicken in different ways. Grilling adds a smoky flavor. To grill, preheat your grill to medium-high. Cook the chicken for about 6-8 minutes per side. Baste with the honey mixture while grilling for extra flavor. Air frying gives you a crispy skin with less oil. Set your air fryer to 400°F (200°C). Cook the chicken for about 25-30 minutes, turning halfway. Baste with the honey mixture halfway through for a sweet finish. You can adjust the heat and sweetness to suit your taste. If you want it spicier, add more hot sauce. Try using a hotter sauce like habanero for a real kick. For less heat, reduce the hot sauce by half or use a milder option. For added sweetness, mix in more honey. You can also try maple syrup for a different flavor. Combining honey and brown sugar works well too. This balances the heat with a rich sweetness. Garnishing makes your dish look pretty and adds flavor. Fresh herbs like parsley or cilantro brighten the chicken. You can also add sliced green onions for a crunch. Try sprinkling sesame seeds for a nutty touch. For extra heat, add thin slices of fresh chili on top. These small details enhance your meal and make it more inviting. Once you enjoy your Hot Honey Baked Chicken, let it cool down. Place the chicken in an airtight container. Be sure to store it in the fridge. The chicken stays fresh for up to three days. If you want to keep it longer, consider freezing. To reheat your chicken, use the oven for the best taste. Preheat your oven to 350°F (175°C). Place the chicken on a baking sheet. Cover it with foil to keep it moist. Heat for about 15-20 minutes. You can check if it's warm inside by using a meat thermometer. It should read 165°F (74°C). For freezing, wrap each piece in plastic wrap. Then, place them in a freezer bag. Squeeze out the air before sealing. This helps avoid freezer burn. You can freeze the chicken for up to three months. When you’re ready to eat, thaw it overnight in the fridge before reheating. I love serving Hot Honey Baked Chicken with sides that balance its sweet and spicy taste. Here are my top picks: - Roasted vegetables like carrots, zucchini, and bell peppers - A fresh garden salad with crisp greens and a light vinaigrette - Creamy mashed potatoes to soak up any extra sauce - Fluffy rice or quinoa adds a nice texture and absorbs flavors These sides enhance the meal and make it feel special. Yes, you can use different cuts of chicken for this recipe. Bone-in chicken thighs work best, but other options include: - Bone-in chicken breasts for a leaner option - Drumsticks for a fun, finger-food vibe - Skinless chicken thighs if you prefer less fat Adjust cook times based on the cut you choose. Chicken should always reach 165°F for safety. Meal prepping this dish is easy and fun! Here’s how to do it: - Cook a batch of chicken as per the recipe. - Let the chicken cool before storing it in airtight containers. - Pair it with your favorite sides, like roasted veggies or grains. - Store in the fridge for up to 4 days or freeze for longer storage. Reheat in the oven for the best results. This keeps the chicken juicy and flavorful! You learned about the key ingredients and steps for making hot honey baked chicken. Customizing flavors and cooking methods can make this dish your own. Remember to keep your chicken juicy by following the right tips and safety guidelines. Storing leftovers and reheating properly will let you enjoy this meal again. I hope these insights help you create a delicious chicken dish that impresses family and friends. Have fun cooking and enjoy your tasty results!

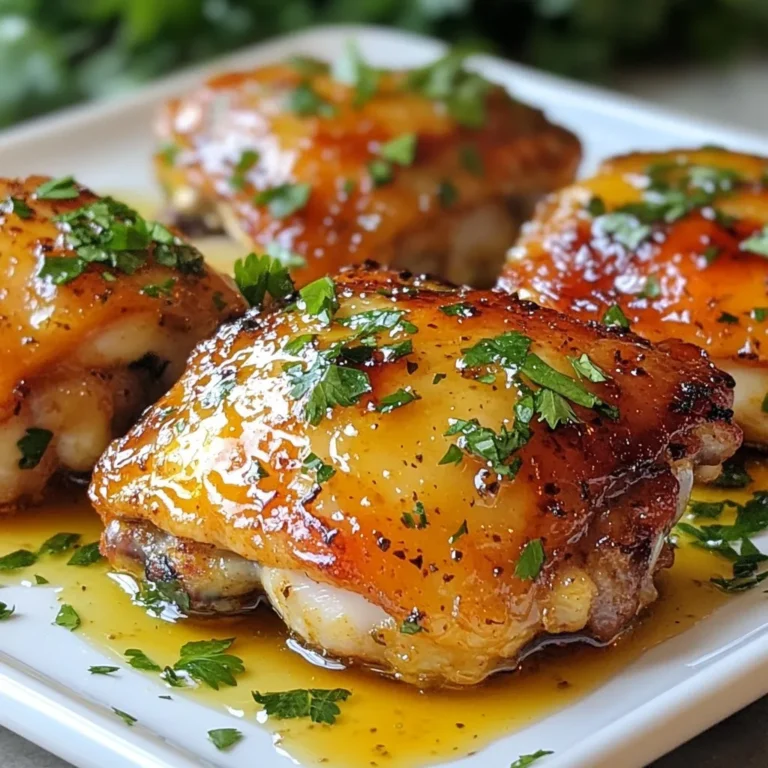
Hot Honey Baked Chicken Flavorful and Simple Recipe

PREV 1 … 41 42 43 … 47 NEXT
snack joy kitchen

explore

DessertsDinnerAppetizersDrinks

Our Policies

  • Cookie Policy
  • Copyright Policy
  • Disclaimer
  • GDPR Policy
  • Terms Of Use
Back to Top
  • About
  • Contact Us
  • Privacy Policy
© 2026 snack joy kitchen