FREE DINNER EBOOK! Get your copy!
  • Cookie Policy
  • GDPR Policy
  • Disclaimer
  • Terms Of Use
  • Visit my other site: Fun Cookie Recipes
snack joy kitchen
  • Home
  • Dinner
  • Desserts
  • Drinks
  • Appetizers
  • Contact
  • About
  • Privacy Policy
  • Home
  • Dinner
  • Desserts
  • Drinks
  • Appetizers
  • Contact
  • About
  • Privacy Policy
  • Cookie Policy
  • GDPR Policy
  • Disclaimer
  • Terms Of Use
Visit my other site: Fun Cookie Recipes

HOME / CATEGORIES /

Latest

- 1 cup unsalted butter - 1 cup granulated sugar - 1/2 cup packed brown sugar - 1/4 cup pumpkin puree - 1 large egg - 1 teaspoon vanilla extract - 3 cups all-purpose flour - 1 teaspoon baking soda - 1 teaspoon cream of tartar - 1/2 teaspoon salt - 2 teaspoons ground cinnamon - 1 teaspoon ground ginger - 1/4 teaspoon nutmeg - 1/4 cup granulated sugar (for rolling) - 2 teaspoons ground cinnamon (for rolling) These ingredients create a warm and cozy flavor for your Brown Butter Pumpkin Snickerdoodles. The unsalted butter gives a rich base, while the pumpkin puree adds moisture and a hint of fall. The mix of sugars brings sweetness and depth. Spices like cinnamon and ginger give these cookies their exciting flavor. Each ingredient plays a key role, making them the perfect treat. For rolling, the cinnamon and sugar combination adds a lovely touch. It helps create that classic snickerdoodle taste. Gathering these ingredients is the first step to baking these delicious cookies. Each bite will be soft and full of flavor! {{ingredient_image_2}} To make brown butter, start by melting 1 cup of unsalted butter in a medium saucepan over medium heat. Stir it constantly as it melts. Keep cooking until the butter turns a rich, golden brown and gives off a nutty smell. This should take about 5 to 7 minutes. Once it reaches the right color, take it off the heat and let it cool slightly. Cooling is key to avoid cooking the eggs later. In a large mixing bowl, combine the warm brown butter with 1 cup of granulated sugar and 1/2 cup of packed brown sugar. Use an electric mixer to beat this mixture until it becomes smooth and creamy. Now, add in 1/4 cup of pumpkin puree, 1 large egg, and 1 teaspoon of vanilla extract. Mix these ingredients together until everything is fully blended. In a separate bowl, whisk together 3 cups of all-purpose flour, 1 teaspoon of baking soda, 1 teaspoon of cream of tartar, 1/2 teaspoon of salt, 2 teaspoons of ground cinnamon, 1 teaspoon of ground ginger, and 1/4 teaspoon of nutmeg. Gradually add this dry mix to the wet ingredients. Stir gently until just combined. Avoid overmixing to keep cookies tender. Cover the bowl with plastic wrap or transfer the dough to an airtight container. Refrigerate for at least 1 hour, or up to 24 hours. Chilling helps the flavors develop and makes the dough easier to roll. When ready to bake, preheat your oven to 350°F (175°C). Line a baking sheet with parchment paper to keep the cookies from sticking. Once baked, let the cookies cool on the baking sheet for 5 minutes. Then, transfer them to a wire rack to cool completely. This cooling step helps achieve the perfect texture. Enjoy your delicious Brown Butter Pumpkin Snickerdoodles with family or friends! To make great brown butter, watch for three key signs. First, the butter should melt completely. Next, it will start to foam. Finally, look for a rich golden-brown color. You will also notice a nutty smell. This process takes about 5-7 minutes. Remove it from heat right away to avoid burning. Let it cool slightly before using. Mixing is important, but too much can ruin your cookies. When adding dry ingredients to wet, mix until just combined. You want a soft dough. Overmixing makes cookies tough. Use a gentle hand when blending. This way, your snickerdoodles will stay tender and soft. Chilling the dough boosts flavor and texture. I recommend at least one hour in the fridge. If you can wait, chill for up to 24 hours. This extra time helps the flavors meld. It also makes the dough easier to roll. The result? A more delicious cookie every time. Pro Tips Use Fresh Spices: For the best flavor, ensure your ground spices are fresh. Old spices can lose their potency and affect the overall taste of your cookies. Experiment with Add-Ins: Consider adding chocolate chips, nuts, or dried cranberries to the dough for an extra layer of flavor and texture. Check Oven Temperature: Use an oven thermometer to ensure your oven is at the correct temperature, as inaccuracies can lead to undercooked or overbaked cookies. Don’t Skip Chilling the Dough: Chilling the dough not only makes it easier to handle but also enhances the flavors and helps the cookies maintain their shape while baking. {{image_4}} If you want a gluten-free treat, you can swap the all-purpose flour. Use a 1:1 gluten-free flour blend instead. Many of these blends work well in cookies. Look for one that contains xanthan gum. This will help your cookies hold their shape. Want to make your snickerdoodles even more special? Try adding chocolate chips or chopped nuts. A cup of semi-sweet chocolate chips will add a rich flavor. If you love nuts, add 1/2 cup of chopped pecans or walnuts. Stir these into the dough after mixing the dry ingredients. You can change the spices for a fun twist. Try adding cloves or allspice for a bolder taste. You can also use pumpkin pie spice instead of individual spices. This will give your cookies a cozy flavor. Don’t be afraid to experiment and find your perfect blend! To keep your cookies fresh, use an airtight container. Place parchment paper between layers to avoid sticking. Store them at room temperature. They will stay soft and tasty for up to a week. If you want to keep them longer, consider freezing. Freezing cookie dough is simple. First, scoop the dough into balls. Place them on a baking sheet and freeze until solid. Then, transfer the dough balls to a freezer bag. They can last up to three months. When you are ready to bake, let them thaw for about 30 minutes before baking. Baked cookies last about a week at room temperature. If you store them in the fridge, they can last up to two weeks. For the freshest taste, eat them within a few days. If they get a bit hard, you can warm them in the oven for a few minutes. You can use applesauce or butternut squash puree. Both options add moisture and sweetness. If you prefer a richer taste, try using mashed sweet potatoes. These alternatives can change the flavor slightly but will keep the cookies soft. For best results, use the same amount of the substitute as pumpkin puree in the recipe. Yes, you can use regular melted butter. However, the cookies will lack the nutty taste that brown butter gives. Brown butter adds a rich depth to the flavor. Without it, the cookies may taste a bit lighter. If brown butter is not an option, consider adding a pinch of salt to enhance the overall flavor. Look for lightly golden edges and soft centers. The cookies should look set but not dry. If the tops still look a bit shiny, they may need a minute more. Once you pull them from the oven, they will continue to firm up as they cool. Let them rest on the pan for five minutes, then transfer them to a wire rack. You now have all the details to bake delicious cookies. We discussed ingredients, the importance of brown butter, and the right techniques. Remember to chill your dough for better flavor. Experiment with variations like gluten-free options or adding nuts. Store your cookies properly to keep them fresh. With these tips, you can create the perfect treat for any occasion. Happy baking!

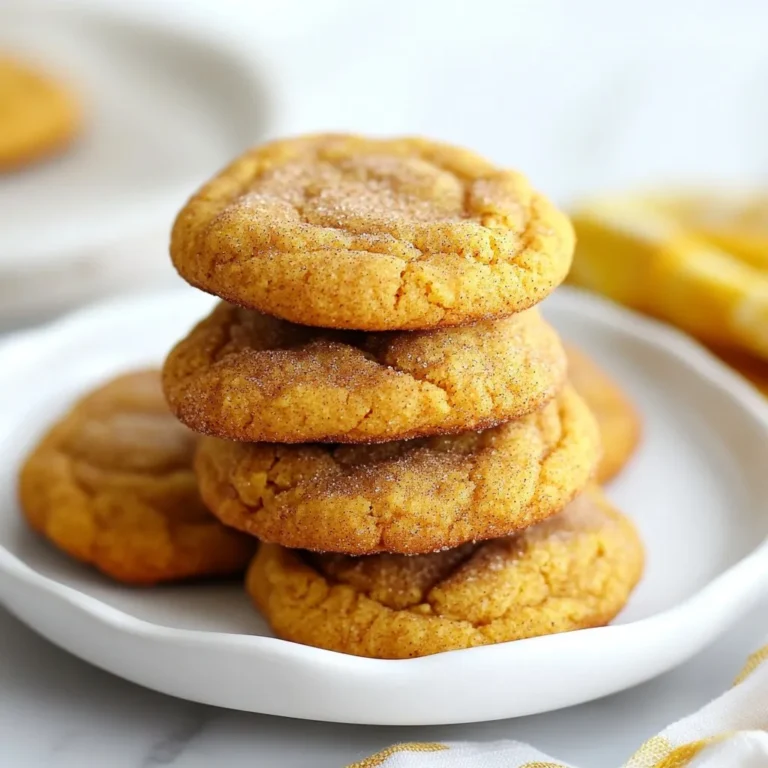
Brown Butter Pumpkin Snickerdoodles Delicious Treat

For these tasty wraps, gather the following: - 1 lb ground chicken - 1 tablespoon sesame oil - 2 cloves garlic, finely minced - 1 tablespoon fresh ginger, freshly grated - 1/4 cup soy sauce (or tamari for gluten-free) - 2 tablespoons honey - 1 tablespoon rice vinegar - 1 cup carrots, finely shredded - 1/2 cup bell peppers, finely diced (red or yellow) - 2 green onions, thinly sliced - Salt and pepper, to taste - 12 large lettuce leaves (butter or iceberg) - Sesame seeds for garnish - Optional: Sriracha for heat You can add more flavor with these options: - Chopped cilantro for freshness - Chopped peanuts for crunch - Avocado for creaminess - Cucumber for extra crunch - Lime juice for a zesty kick If you have special diets, try these swaps: - Use ground turkey or beef instead of chicken. - Replace soy sauce with coconut aminos for a soy-free option. - Choose agave syrup in place of honey for vegan wraps. - Use large collard greens if you want a sturdier wrap. {{ingredient_image_2}} Gather all your ingredients first. This makes cooking easier and more fun. You need: - 1 lb ground chicken - 1 tablespoon sesame oil - 2 cloves garlic, finely minced - 1 tablespoon fresh ginger, freshly grated - 1/4 cup soy sauce - 2 tablespoons honey - 1 tablespoon rice vinegar - 1 cup carrots, finely shredded - 1/2 cup bell peppers, finely diced - 2 green onions, thinly sliced - Salt and pepper, to taste - 12 large lettuce leaves - Sesame seeds for garnish - Optional: Sriracha Make sure to wash the lettuce leaves well. Set them aside on a clean towel for drying. Heat the sesame oil in a large skillet over medium heat. Once it shimmers, add the minced garlic and freshly grated ginger. Sauté them for about 1 minute. You want the kitchen to smell amazing! Next, add the ground chicken. Use a spatula to break it into smaller pieces. Cook this for 5-7 minutes. Stir often until the chicken is cooked through and no longer pink. Now, pour in the soy sauce, honey, and rice vinegar. Stir this mix well so the chicken gets coated. Let it cook for another 2-3 minutes. The flavors will blend beautifully. Add the shredded carrots and diced bell peppers next. Stir them into the chicken. Cook for another 2-3 minutes until the veggies soften just a bit but stay crunchy. Finally, take the skillet off the heat. Fold in the sliced green onions. Season with salt and pepper to your liking. Now comes the fun part! Take a large lettuce leaf and scoop some of the chicken mixture into the center. Don’t hold back; make it a generous scoop! Sprinkle sesame seeds on top for a nice finish. If you like heat, drizzle some Sriracha on top or serve it on the side. Arrange your filled lettuce wraps on a colorful platter. They look great and taste even better! Enjoy your tasty and fresh meal. To get the best flavor in your wraps, start by using fresh ginger and garlic. Sauté them in sesame oil. This adds a rich aroma to your dish. Cook them until they smell great, about one minute. This step wakes up all the flavors. Using ground chicken is key for a juicy filling. It cooks fast and absorbs flavors well. Break it into small pieces as you cook. This helps it cook evenly. Stir often for a nice brown color. Cook the chicken until it is no longer pink. This usually takes about five to seven minutes. Use a spatula to break it up as it cooks. This ensures every bite is tasty and tender. Add soy sauce, honey, and rice vinegar after cooking the chicken. This adds depth to the taste. Let it simmer for a few minutes. This allows the chicken to soak up all those yummy flavors. When serving, use large lettuce leaves. Butter lettuce or iceberg works best. They are crisp and hold the filling well. Place a scoop of chicken in each leaf. Top with sesame seeds for a nice touch. For those who like heat, add Sriracha on the side. It brings a fun kick to the meal. Arrange the wraps on a bright platter. This makes your dish look inviting and fresh. Enjoy your tasty and fresh sesame ginger chicken lettuce wraps! Pro Tips Use Fresh Ingredients: Fresh garlic and ginger will elevate the flavor of your chicken wraps, making them more aromatic and vibrant. Adjusting Spice Levels: If you prefer a milder flavor, reduce the amount of ginger and Sriracha. For more heat, add extra Sriracha or some red pepper flakes. Crunchy Texture: Don't overcook the vegetables; they should remain slightly crunchy for texture contrast against the tender chicken. Perfect Lettuce Leaves: Choose sturdy lettuce varieties like butter or iceberg to hold the filling without tearing, making it easier to enjoy as a wrap. {{image_4}} If you want to switch up the protein, ground turkey works well. It has a similar texture and absorbs flavors nicely. For a richer taste, try ground pork. It gives a nice twist to the dish. Even shredded chicken is a great choice if you already have some on hand. You can easily make this dish vegetarian by using mushrooms. Finely chop them to mimic the texture of meat. Tofu is another excellent option. Just press it to remove water, then crumble it into the pan. For a vegan twist, swap honey with maple syrup. This keeps the sweetness while making it plant-based. If you're looking for a change, consider adding sesame paste for a richer flavor. You can also experiment with different sauces. Try hoisin sauce for a sweet and tangy taste. Red pepper flakes or chili paste will add heat if you like spice. This flexibility lets you create new wraps each time you make them. To keep your leftover wraps fresh, place them in an airtight container. Store the chicken mixture separately from the lettuce leaves. This helps the lettuce stay crisp. You can keep the chicken in the fridge for up to three days. When you're ready to eat, gently heat the chicken mixture. Use a skillet over low heat. Stir occasionally until it's warmed through. Avoid using the microwave, as it can make the chicken dry. If you have lettuce leaves left, eat them fresh for the best taste. If you want to save some for later, freezing works well. Let the chicken mixture cool completely. Then, place it in a freezer-safe bag. Remove as much air as possible before sealing. You can freeze the chicken for up to three months. Just thaw it in the fridge overnight before reheating. Enjoy your wraps fresh and tasty! Yes, you can use other types of lettuce. Butter lettuce and iceberg are great choices. They stay crisp and hold the filling well. If you want a fun twist, try romaine for a crunchy bite. Just avoid thick-leaved varieties, as they may not wrap easily. These wraps pair well with many sides. Try a light salad with citrus dressing for freshness. Rice or quinoa can add some heartiness to the meal. You can also serve them with a small bowl of Sriracha for those who like heat. Fresh fruit, like pineapple or mango, complements the flavors nicely. You can store the chicken mixture in the fridge for about three days. Just keep it in an airtight container. Make sure to heat it well before serving. If you want to keep it longer, consider freezing it. It can last for up to three months in the freezer. Just thaw it overnight in the fridge before reheating. In this post, we covered the key ingredients for sesame ginger chicken lettuce wraps, including various options and substitutions. I provided step-by-step instructions for preparation, cooking, and assembly. You also learned helpful tips for cooking and serving these wraps, along with tasty variations to explore. Finally, I shared storage tips for leftovers and answered common questions. Enjoy making and customizing these wraps to fit your taste and dietary needs! They are a delicious and fun meal option.

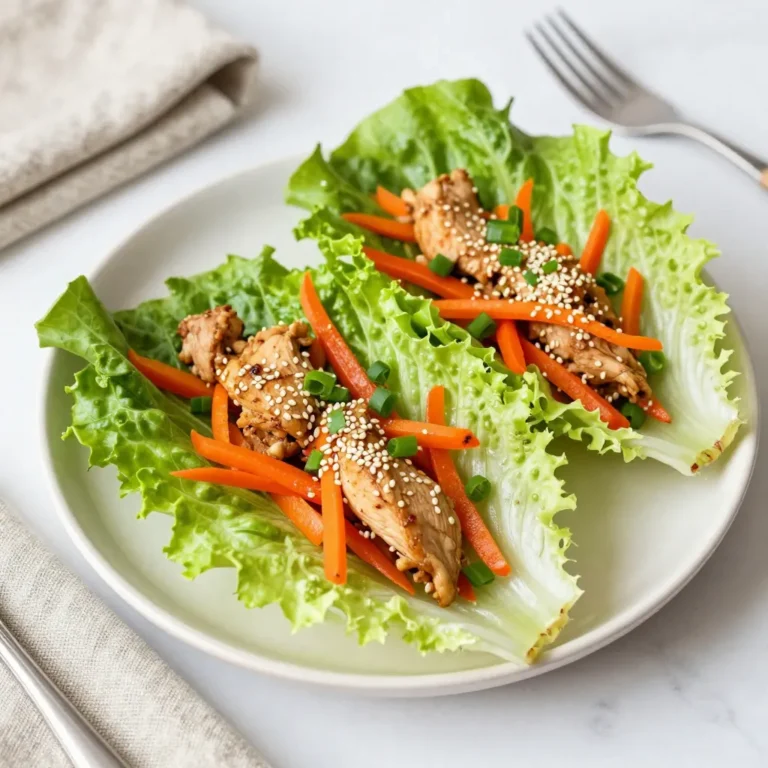
Sesame Ginger Chicken Lettuce Wraps Tasty and Fresh

To make One-Pot Creamy Tomato Basil Tortellini, gather these simple ingredients: - 2 tablespoons extra virgin olive oil - 1 small onion, diced - 3 cloves garlic, finely minced - 1 can (14 oz) crushed tomatoes - 4 cups vegetable broth - 1 teaspoon dried oregano - 1 teaspoon dried basil - 250g (approximately 9 oz) cheese tortellini (fresh or frozen) - 1 cup heavy cream - 1 cup fresh basil leaves, roughly chopped - Salt and freshly ground black pepper to taste - Grated Parmesan cheese, for garnish These ingredients come together to create a rich and creamy dish. Each one plays a key role in building flavor. The olive oil adds a nice base, while the onion and garlic bring depth. The crushed tomatoes and vegetable broth provide a hearty sauce. The dried herbs, oregano and basil, enhance the tomato flavor, making it vibrant. Choose fresh or frozen cheese tortellini based on what you have. The heavy cream adds the perfect creaminess. Fresh basil gives a bright finish. Finally, a sprinkle of Parmesan cheese makes it special. {{ingredient_image_2}} Start by warming the olive oil in a large pot over medium heat. Add the diced onion and sauté for about 3-4 minutes until it is soft and clear. This step builds a strong flavor base. Next, add the minced garlic and cook for another 1-2 minutes. Stir often to avoid burning the garlic. You want it fragrant, not brown. Now, pour in the crushed tomatoes and vegetable broth. Sprinkle in the dried oregano and basil. Season with salt and pepper to taste. Mix well and bring this mixture to a gentle simmer. Once your base is simmering, it's time to add the tortellini. Stir them gently into the pot. Fresh tortellini usually cooks in about 5-7 minutes. If using frozen, check the package for the right time. Keep an eye on the pasta to ensure it cooks just right. After the tortellini is tender, reduce the heat to low. Stir in the heavy cream and chopped fresh basil. Mix until everything is well combined and warm. Taste your dish and adjust the seasoning if needed. Now, serve the creamy tortellini hot. Garnish with grated Parmesan cheese and more fresh basil for a lovely touch. Enjoy your delicious meal! - How to prevent overcooking tortellini: To avoid mushy tortellini, watch the cooking time. Fresh tortellini cooks faster than frozen. Start checking them at 5 minutes. They should be soft but firm. If they feel too soft, they are overcooked. - Achieving optimal creaminess in the sauce: Add the heavy cream at the end of cooking. Stir it in on low heat. This keeps the cream smooth and prevents it from curdling. For extra creaminess, you can also add a bit more cheese. - Additional spices to consider: You can spice up your dish with a pinch of red pepper flakes. This adds a nice kick. Smoked paprika can also add depth to the flavor. - How to customize with different herbs: Fresh herbs can change the whole dish. Try using thyme or parsley instead of basil. They give a fresh taste and new vibe. You can also mix herbs for a unique twist. - Garnishing with Parmesan and basil: When serving, sprinkle grated Parmesan on top. Add fresh basil leaves for color. This makes your dish look fancy and inviting. - Creative serving ideas: Serve the tortellini in wide bowls for a nice look. Drizzle some olive oil on top for shine. You can also add a slice of crusty bread on the side. This makes a great meal. Pro Tips Fresh vs. Frozen Tortellini: If using fresh tortellini, reduce the cooking time to about 3-4 minutes. Frozen tortellini will need the full 5-7 minutes to cook through. Customize Your Herbs: Feel free to experiment with other herbs like thyme or parsley for a unique flavor twist. Make It Dairy-Free: Substitute heavy cream with coconut cream or a non-dairy alternative for a lighter, dairy-free version. Leftover Storage: Store any leftovers in an airtight container in the fridge for up to 3 days. Reheat gently on the stove, adding a splash of broth if needed. {{image_4}} You can swap tortellini with other pastas like penne or farfalle. This change keeps the dish fun and allows for different textures. If you want a dairy-free or vegan dish, try using plant-based cream. There are great options made from coconut or cashews. This way, you keep the creaminess while making it friendly for all diets. Adding protein can bring new life to your meal. Chicken or shrimp work great in this dish. Just cook them with the onions and garlic before adding the tomatoes. You can also add fresh vegetables like spinach or bell peppers. They not only add color but also boost the nutrition in your dish. Feeling adventurous? Experiment with different tomato sauces. A roasted garlic sauce or a spicy arrabbiata can change the flavor completely. If you like some heat, sprinkle in red pepper flakes. This simple addition can elevate your creamy dish to a new level of deliciousness. To keep your One-Pot Creamy Tomato Basil Tortellini fresh, follow these tips: - Refrigerating Leftovers: Place cooled leftovers in an airtight container. Store in the fridge for up to three days. This keeps the dish fresh and safe. - Freezing Tips: For longer storage, freeze the dish. Use a freezer-safe container. It can last up to three months. When ready to eat, thaw it overnight in the fridge. Reheating creamy dishes needs care to avoid issues: - Best Practices: Heat in a pot over low heat. Stir gently and often to warm it evenly. You can also use the microwave. If using the microwave, heat in short bursts. - Avoiding Separation: To prevent the cream from separating, add a splash of broth or water. This helps maintain a smooth texture. Leftovers can be tasty, but watch for signs of spoilage: - How Long to Keep: Keep your leftovers in the fridge for up to three days. If frozen, use them within three months for the best taste. - Signs of Spoilage: Check for off smells, strange colors, or mold. If you see any of these, it’s best to throw it away. Always prioritize food safety! Can I make One-Pot Creamy Tomato Basil Tortellini ahead of time? Yes, you can make this dish ahead of time. Store it in the fridge for up to three days. Just heat it gently when you are ready to serve. The flavors will deepen and taste even better! What can I serve it with? This creamy tortellini pairs well with a simple green salad. Garlic bread or a crusty baguette also makes a great side. You can enjoy it with a glass of white wine for a special touch. Is this recipe gluten-free? No, this recipe is not gluten-free due to the cheese tortellini. However, you can use gluten-free tortellini to make it suitable for a gluten-free diet. Can I use fresh herbs instead of dried? Absolutely! Fresh herbs add vibrant flavor. Use three times the amount of fresh herbs as dried. So, if the recipe asks for one teaspoon of dried, use three teaspoons of fresh. How do I know when the tortellini is done cooking? Tortellini cooks quickly. It is done when it floats to the top of the pot. If you taste it, it should be tender but still firm. Can I substitute heavy cream with another dairy? Yes, you can use half-and-half or whole milk instead. For a lighter option, try using Greek yogurt. Just stir it in after cooking to avoid curdling. What if I can’t find cheese tortellini? If you can’t find cheese tortellini, use any small pasta shape. Options like penne or farfalle work well. Just adjust the cooking time as needed for different pasta types. This blog post provided a clear recipe for One-Pot Creamy Tomato Basil Tortellini. We discussed each step, from cooking the base to serving. I also shared tips for customizing flavors and ensuring a creamy sauce. Remember that storage and reheating are key to enjoying leftovers. In the end, this dish is versatile and fun to make. You can adjust it to fit your taste. Enjoy exploring this comforting meal that can delight anyone at your table!

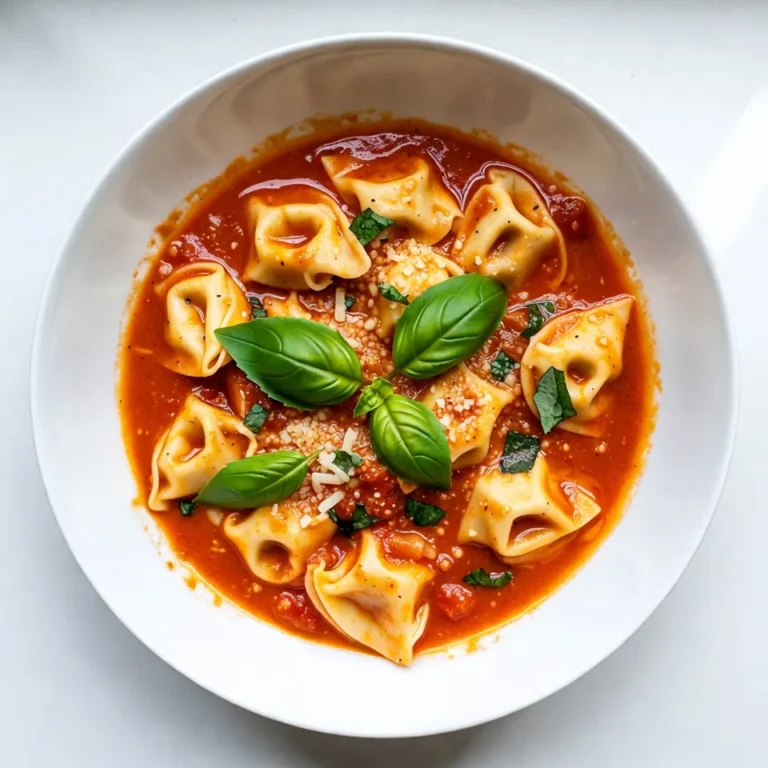
One-Pot Creamy Tomato Basil Tortellini Wonder

For this hearty salad, you need: - 2 cups butternut squash, peeled and cut into 1-inch cubes - 2 cups Brussels sprouts, trimmed and halved - 1 cup carrots, sliced into thin rounds - 1 red onion, cut into wedges These veggies add great colors and flavors. They are perfect for winter meals. To make the vegetables pop, use: - 2 tablespoons extra-virgin olive oil - 1 teaspoon dried thyme - 1 teaspoon smoked paprika - Salt and freshly cracked black pepper to taste The olive oil helps the veggies roast well. Thyme and paprika bring warmth and depth. I love adding a few extras for texture and taste: - 1/4 cup feta cheese, crumbled (for creaminess) - 1/4 cup walnuts, toasted and roughly chopped The feta adds a nice saltiness. Walnuts give a lovely crunch. You can skip them if you want. {{ingredient_image_2}} Start by preheating your oven to 400°F (200°C). This heat will help the veggies roast well. In a large bowl, add the butternut squash, Brussels sprouts, sliced carrots, and red onion wedges. Make sure to mix everything evenly. This step ensures that all vegetables cook the same way. Drizzle the extra-virgin olive oil over the veggies. Next, add dried thyme, smoked paprika, salt, and black pepper. Toss everything together to coat the veggies well. Spread the vegetable mix onto a large baking sheet. Ensure the vegetables are in a single layer. This will help them roast evenly. Place the baking sheet in your preheated oven. Roast for 25-30 minutes. The vegetables should become fork-tender and golden-brown. Halfway through, stir the veggies to ensure they roast evenly. Once done, take them out and let them cool for about 5 minutes. In a large serving bowl, combine the roasted vegetables. If you like, fold in the crumbled feta cheese and toasted walnuts for added flavor. Drizzle the balsamic glaze over the top. This will add a nice tangy touch. Gently toss everything together without smashing the veggies. For a beautiful presentation, serve the salad in a rustic wooden bowl. Top it with more feta and whole walnuts. Enjoy the delightful flavors! Choose firm, fresh vegetables for the best taste. Look for butternut squash that feels heavy. Pick Brussels sprouts that are bright green and tight. Carrots should be smooth and vibrant. Also, select red onions that are firm and free of spots. These choices ensure your salad shines with flavor and color. Preheat your oven to 400°F (200°C). This temperature helps the vegetables caramelize nicely. Cut vegetables into uniform pieces so they cook evenly. Spread them out in a single layer on the baking sheet. This step avoids steaming and promotes browning. Stir halfway through cooking to ensure all sides roast well. Aim for a fork-tender texture with a golden-brown finish. Use a mix of spices to boost flavor. Dried thyme adds earthiness, while smoked paprika gives a warm kick. Don’t forget salt and freshly cracked black pepper for balance. For creaminess, fold in crumbled feta cheese after roasting. Toasted walnuts add crunch and nutty flavor. Drizzle balsamic glaze for a tangy touch that ties everything together. These simple steps create a salad that’s both hearty and delicious. Pro Tips Choose Fresh Vegetables: Opt for the freshest seasonal vegetables to enhance the flavor and nutritional value of your salad. Uniform Cutting: Cut all vegetables into similar sizes to ensure even roasting and consistent texture throughout the dish. Experiment with Spices: Feel free to add your favorite spices or herbs, such as rosemary or cumin, to give the salad a unique twist. Serve Warm: This salad is best enjoyed warm, as it enhances the flavors and provides a comforting contrast to the creamy feta. {{image_4}} You can change up the vegetables based on what you like. Try adding sweet potatoes for extra sweetness. Beets give a lovely color and earthy taste. You can use parsnips for a unique twist. Broccoli florets or cauliflower can also work well. Just remember to cut them into similar sizes for even cooking. To keep this salad vegan, skip the feta cheese. You can use avocado for creaminess instead. It adds good fats and keeps the dish rich. For gluten-free options, this salad is already safe. Just ensure your balsamic glaze has no added gluten. You can play with dressings to match your taste. A lemon vinaigrette adds freshness. A tahini dressing brings a nutty flavor. For toppings, think about seeds or nuts. Pumpkin seeds or sunflower seeds add crunch and nutrition. You can also sprinkle pomegranate seeds for a burst of color and flavor. To keep your roasted winter vegetable salad fresh, store it in an airtight container. This helps keep moisture in. You can place it in the fridge for up to three days. Always let the salad cool down before sealing the container. It prevents condensation and sogginess. When you're ready to eat the leftovers, you can reheat them easily. Place the salad in a microwave-safe dish. Heat it in 30-second intervals until warm. Stir after each interval to ensure even heating. If you prefer, you can also reheat it in a skillet over medium heat. Just toss gently until warmed through. Freezing this salad is possible, but it may change the texture. If you want to freeze it, do so right after cooling. Place the salad in a freezer-safe container. It can last for about two months. Thaw it in the fridge overnight before reheating. Note that the vegetables might be softer after freezing. Yes, you can prepare this salad ahead of time. Roast the veggies and cool them. Store them in an airtight container. You can add the feta and walnuts just before serving. This keeps them fresh and crunchy. The flavors will blend nicely, making the salad even tastier. Roasted vegetables are healthy and full of nutrients. They provide vitamins and minerals like vitamin A from butternut squash and vitamin C from Brussels sprouts. Roasting enhances flavors without needing extra fats. The process also makes fiber more digestible, helping your gut health. Plus, they are low in calories, making them a great choice for any meal. To make this salad more filling, add a grain like quinoa or farro. These grains add protein and fiber. You can also include beans, like chickpeas or black beans. They boost protein and make the salad heartier. Finally, consider adding more nuts or seeds for extra crunch and healthy fats. Roasting winter vegetables creates a warm, tasty salad you can enjoy anytime. We covered the best veggies, seasonings, and how to roast them to get the right texture. I shared tips on selecting fresh ingredients and variations to fit your diet. To store leftovers, I provided some simple methods so you can enjoy your dish later. Overall, this salad is easy to make and can be adjusted to your liking. Enjoy making it your own!

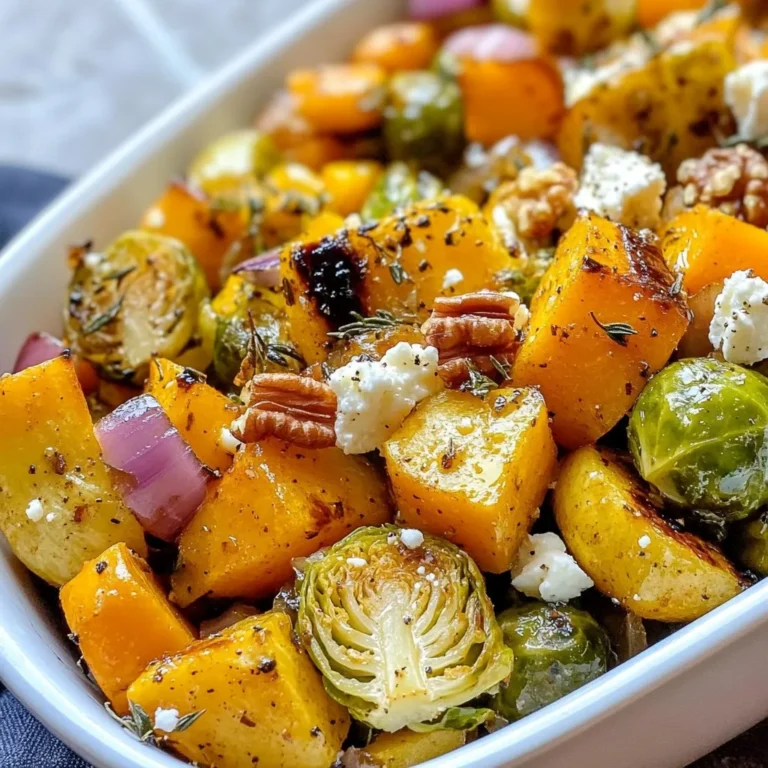
Roasted Winter Vegetable Salad Flavorful and Hearty Dish

To make Spinach Ricotta Stuffed Shells, you need a few key ingredients. Here’s the list: - 20 jumbo pasta shells - 1 cup fresh ricotta cheese - 1 cup fresh spinach, finely chopped - 1/2 cup finely grated Parmesan cheese - 1/2 cup shredded mozzarella cheese - 1 large egg - 2 cups marinara sauce (store-bought or homemade) - 1 teaspoon garlic powder - 1 teaspoon Italian seasoning blend - Salt and freshly cracked black pepper, to taste - Fresh basil leaves, for garnish Each ingredient plays a role in making this dish rich and tasty. Jumbo Pasta Shells: These large shells hold the filling perfectly. They provide a nice bite and a great texture. Fresh Ricotta Cheese: This cheese gives a creamy base to the filling. It melts well and adds a lovely taste. Fresh Spinach: Spinach adds a pop of color and a hint of earthiness. It also packs in nutrients. Grated Parmesan Cheese: This cheese brings a salty, nutty flavor. It enhances the richness of the dish. Shredded Mozzarella Cheese: Mozzarella melts beautifully and adds a stretchy, gooey texture. It makes the dish comforting. Large Egg: The egg helps bind the filling. This keeps everything together as it cooks. Marinara Sauce: Marinara adds moisture and flavor to the dish. It complements the cheese and spinach nicely. Spices and Seasonings: Garlic powder and Italian seasoning add depth and warmth to the filling. Salt and pepper boost the overall flavor. Garnish Options: Fresh basil leaves add a lovely touch. They bring freshness and brightness to the dish when served. Gather these ingredients, and you’re ready to create a delicious meal that is both savory and simple. {{ingredient_image_2}} 1. Preheat the Oven: Start by setting your oven to 375°F (190°C). This helps the shells cook evenly. 2. Cooking the Pasta Shells: Bring a large pot of salted water to a boil. Once it boils, add the jumbo pasta shells. Cook them until they are al dente. This usually takes about 8 to 10 minutes. After cooking, drain the shells and rinse them with cold water to stop the cooking. This step keeps them from sticking together. 3. Preparing the Filling: In a big bowl, mix together the fresh ricotta cheese, finely chopped spinach, grated Parmesan cheese, and shredded mozzarella cheese. Add one large egg, garlic powder, Italian seasoning, salt, and freshly cracked black pepper. Stir everything together until it is smooth and well combined. 1. Stuffing the Shells: Take each cooked pasta shell and fill it with about 2 tablespoons of the ricotta-spinach mixture. Place each filled shell seam side-up in a greased baking dish. This helps the shells cook evenly and not stick. 2. Adding Marinara Sauce: Pour half of the marinara sauce over the stuffed shells. Make sure to cover each shell well. This will keep them moist as they bake. 1. Baking the Stuffed Shells: Cover the baking dish with aluminum foil. Place it in your preheated oven. Bake for 25 minutes. After that, remove the foil and bake for another 10 to 15 minutes. This helps the cheese on top to get bubbly and golden. 2. Cooling and Garnishing: Once you take the dish out of the oven, let it cool for a few minutes. This makes the flavors better and helps avoid burns. Before serving, sprinkle fresh basil leaves on top. This adds nice flavor and color to your dish. - Tips for cooking pasta shells: Use a large pot with plenty of water. Salt the water well. This adds flavor to the pasta. Cook the shells until they are al dente. This means they should be firm but not hard. Drain them and rinse with cold water. This stops the cooking and helps them not stick. - How to prevent filling overflow: Don’t overfill the pasta shells. Use about 2 tablespoons of filling per shell. If you overstuff, the filling can leak out while baking. Press gently when filling to avoid air pockets. This ensures even cooking and keeps the filling inside. - Alternatives for ricotta cheese: You can use cottage cheese for a similar texture. Blend it for a smoother consistency. Cream cheese also works well if you want a richer flavor. - Non-dairy options: For a vegan choice, try tofu. Drain and blend it until smooth. Add some lemon juice and nutritional yeast for flavor. Cashew cream is another great option. Soak cashews, then blend them with water for a creamy texture. - Best side dishes to pair: A fresh salad pairs nicely. Try a simple green salad with vinaigrette. Garlic bread is another great choice. It adds crunch and is perfect for dipping in sauce. - Ideal beverages to serve: A nice red wine goes well with stuffed shells. Look for a medium-bodied wine, like Chianti. If you prefer non-alcoholic drinks, try sparkling water with lemon. It refreshes your palate and balances the meal. Pro Tips Use Fresh Ingredients: Opt for fresh spinach and high-quality ricotta for the best flavor and texture in your stuffed shells. Don't Overcook the Pasta: Cook the pasta shells just until al dente, as they will continue to cook while baking and shouldn't become mushy. Add Extra Cheese: For a richer flavor, consider adding more mozzarella or a sprinkle of feta cheese to the filling. Experiment with Herbs: Feel free to add fresh herbs like parsley or thyme to the filling for an extra layer of flavor. {{image_4}} You can make these stuffed shells even more tasty. Try adding other vegetables. Chopped mushrooms, bell peppers, or zucchini work great. They add color and nutrients. You can also play with the cheese. Instead of just ricotta and mozzarella, try goat cheese or feta. This will give your dish a different taste. Mixing cheeses creates a unique flavor every time. If you need gluten-free options, use gluten-free pasta shells. Many brands offer good alternatives that taste great. Just ensure they cook properly, as gluten-free pasta can behave differently. For vegan stuffed shells, swap out the cheeses. Use tofu or a nut-based cheese instead. You can mix in nutritional yeast for a cheesy taste. Replace the egg with a flaxseed meal mix or applesauce to bind the filling. This way, everyone can enjoy this dish! To keep your Spinach Ricotta Stuffed Shells fresh, place them in an airtight container. Make sure to cover the shells with extra marinara sauce. This keeps the pasta from drying out. Store the container in the fridge for up to three days. When you are ready to eat, reheat the shells in the oven. Preheat your oven to 350°F (175°C). Cover the dish with foil to keep the moisture in. Heat for about 20 minutes or until warm. To freeze your stuffed shells, let them cool completely after baking. Arrange the shells in a single layer on a baking sheet. Freeze them for about an hour, so they don’t stick together. Once firm, transfer the shells to a freezer-safe bag or container. Label it with the date and type of dish. You can freeze the shells for up to three months. When you’re ready to enjoy them, pull them from the freezer. Thaw in the fridge overnight. Then, reheat them in a preheated oven at 350°F (175°C) for 25-30 minutes. You can also cook them straight from frozen. Just add some extra time to the baking. Yes, you can prepare the stuffed shells in advance. Just follow the recipe up to the baking step. After stuffing the shells, cover them with sauce and foil. Store the dish in the fridge for up to 24 hours. When ready to bake, just add a few extra minutes to the cooking time. If you don’t have marinara sauce, you can use Alfredo sauce or pesto. Both options add a rich flavor. You can also try a homemade tomato sauce with herbs for a fresh taste. You will know the stuffed shells are done when the cheese is melted and bubbly. The edges of the shells should be slightly golden. A good way to check is to insert a knife in the middle. It should feel hot when you pull it out. You can use many herbs to season your shells. Fresh basil and parsley work well. Oregano and thyme can add depth. Feel free to mix and match herbs based on your taste! In this post, we explored how to make delicious Spinach Ricotta Stuffed Shells. We covered essential ingredients, detailed preparation and assembly steps, and offered useful cooking tips. Remember to experiment with filling variations and ingredient substitutions to suit your taste. Proper storage methods help keep leftovers tasty. You can make these shells ahead of time for quick meals. Enjoy cooking these easy, satisfying shells that can fit many diets. It's time to gather the ingredients and start your culinary adventure. Happy cooking!

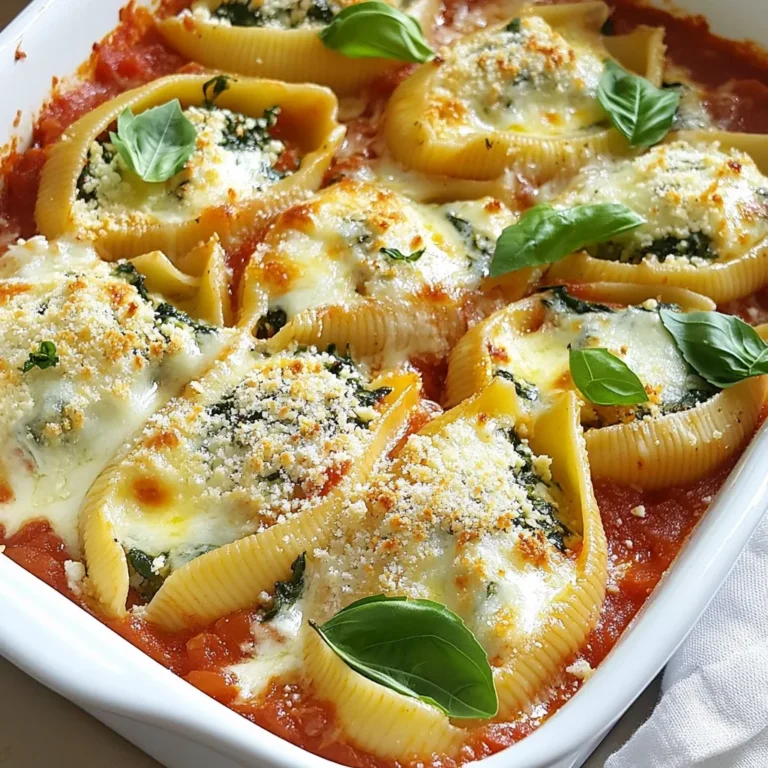
Spinach Ricotta Stuffed Shells Savory and Simple Meal

- 1 lb ground turkey - 3 medium zucchinis - 1 cup cherry tomatoes - 1 cup onion - 2 cloves garlic - 1 cup cooked quinoa - 1 cup shredded mozzarella cheese - 1/2 cup grated parmesan cheese - Dried oregano and basil, salt, black pepper, and olive oil I love how simple and fresh this recipe is. The main ingredients, like ground turkey and zucchini, create a hearty base. Ground turkey is lean and full of protein. Zucchini adds a nice crunch and moisture. Cherry tomatoes bring sweetness and flavor. For supporting ingredients, I use onion and garlic. They boost the dish's taste and aroma. Cooked quinoa adds fiber and makes the casserole filling. Now, let’s talk about seasonings and toppings. I use shredded mozzarella for that gooey texture. Grated parmesan gives a sharp flavor that blends well. I always add dried oregano and basil to bring in herb notes. A pinch of salt and black pepper balances all flavors. Finally, I drizzle olive oil for richness. With these ingredients, you can create a tasty and healthy meal that everyone will love! {{ingredient_image_2}} - Preheat the oven to 375°F (190°C). - Grease a 9x13 inch baking dish with cooking spray or olive oil. - In a large skillet, heat olive oil over medium heat. - Add diced onion and minced garlic; sauté for 3-4 minutes until soft. - Next, add ground turkey. Break it apart with a spoon and brown for 5-7 minutes. - Once the turkey is no longer pink, add sliced zucchinis and halved cherry tomatoes. - Season with dried oregano, dried basil, salt, and pepper. Stir often for 5 minutes until the zucchinis soften. - In a large bowl, mix the turkey and veggie blend with cooked quinoa. - Make sure all ingredients are combined well. - Transfer the mixture to the greased baking dish, spreading it out evenly. - Top with shredded mozzarella and grated parmesan cheese for a cheesy finish. - Place the baking dish in the oven and bake for 25-30 minutes. - The cheese should melt, bubble, and turn golden brown. - Once baked, let the casserole cool for about 5 minutes before serving. To ensure your turkey is cooked thoroughly, always check the internal temperature. It should reach 165°F (73.9°C). Use a meat thermometer for accuracy. If you don't have one, cut into the turkey to check it’s no longer pink. When sautéing vegetables, heat olive oil over medium heat. Add onion and garlic first. Cook until they are soft. Then, add zucchini and tomatoes. Stir them gently so they keep some crunch. This way, they won’t become mushy. Adding herbs can take flavor to the next level. Consider fresh basil or thyme for a nice twist. You can also use parsley or cilantro for a fresh touch. Feel free to substitute or add different veggies. Bell peppers, spinach, or even carrots can work well. They add color and nutrients, making the dish even better. This casserole pairs nicely with a light garden salad. The fresh greens offer a crisp contrast to the warm, hearty casserole. You could also serve it with steamed vegetables for extra color. For presentation, serve the casserole warm from the baking dish. Garnish each plate with fresh basil or parsley. This adds a lovely pop of color and freshness. Pro Tips Use Fresh Herbs: Fresh herbs like basil and oregano elevate the flavor profile of the casserole, adding brightness and aroma. Pre-cook Quinoa: Ensure you use properly cooked quinoa for the best texture. Undercooked quinoa can absorb too much moisture and affect the casserole consistency. Experiment with Cheese: Feel free to mix different cheeses, such as cheddar or feta, for a unique twist on the classic flavor. Adjust the Veggies: Customize the casserole by adding or substituting veggies like bell peppers or spinach according to your preference. {{image_4}} You might not have ground turkey at home. You can easily swap it for ground chicken or beef. Both options will work well and keep the dish hearty. If you want a vegan choice, use plant-based protein. Brands like Beyond Meat or lentils can add great texture. Want to spice things up? Try adding diced jalapeños or crushed red pepper flakes. This will give your casserole a nice kick. For an Italian twist, pour in some marinara sauce. It adds a rich flavor that blends well with the other ingredients. If you're gluten-free, just swap quinoa for rice or gluten-free pasta. This keeps the dish safe for those with gluten issues. For a low-carb version, skip the quinoa. You can add more zucchini or other low-carb veggies instead. This keeps your casserole filling but lighter. To keep your Turkey Zucchini Casserole fresh, store it in the fridge. Use an airtight container. This keeps moisture in and prevents odors from mixing. You can safely store it for up to three days. Be sure to let it cool down before sealing. Freezing the casserole is simple. First, let it cool completely. Next, cut it into portions. Wrap each piece tightly in plastic wrap and place it in a freezer-safe bag or container. You can freeze it for up to three months. To thaw, move it to the fridge overnight. Reheat in the oven or microwave until hot. For storing your casserole, glass or plastic containers work well. Glass is great for reheating, while plastic is lightweight and easy to handle. If you want easy meals, portion out servings. This way, you can grab a quick meal when needed. You can use rice instead of quinoa. Brown rice adds nice texture. Cauliflower rice is a great low-carb choice. For a grain-free option, try riced broccoli or even mashed sweet potatoes. Each option offers unique flavors that blend well with the turkey and veggies. Bake the casserole for 25 to 30 minutes. Look for melted cheese that is bubbling and golden. This shows it's ready to eat. Remember, every oven is a bit different, so check it after 25 minutes for your perfect bake. Yes, you can prepare this casserole ahead of time. Assemble it, then cover and chill it in the fridge. When ready, just bake it straight from the fridge. This makes meal prep easy and helps save time on busy days. This casserole is quite healthy. Ground turkey is lean and full of protein. Zucchini adds fiber and vitamins. Tomatoes are rich in antioxidants. Using quinoa boosts the dish with more nutrients. Overall, it’s a balanced meal that supports a healthy diet. This turkey zucchini casserole is simple, healthy, and tasty. You learned about key ingredients, like ground turkey and zucchini. I shared tips on cooking, serving, and storing it well. You can customize it with different proteins or spices, making it truly yours. Try out this dish for family meals or gatherings. It’s a great way to enjoy veggies. Enjoy this easy recipe, and make it your own!

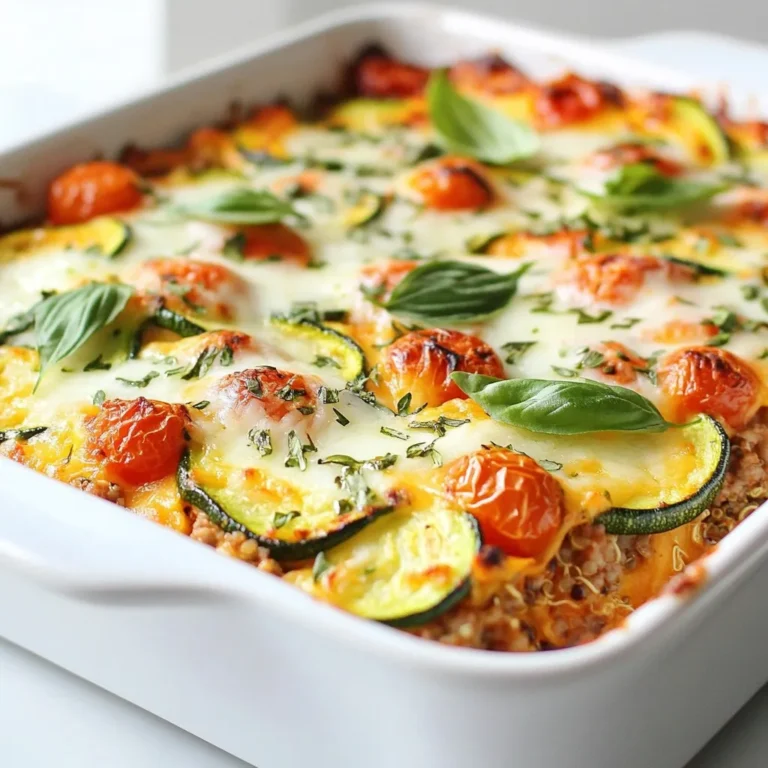
Turkey Zucchini Casserole Hearty and Flavorful Meal

- 4 boneless, skinless chicken breasts - 2 cups fresh spinach, chopped - 1 cup ricotta cheese - 1/2 cup mozzarella cheese, shredded - 1/4 cup Parmesan cheese, grated - 2 cloves garlic, minced - 1 teaspoon dried oregano - 1/2 teaspoon salt - 1/4 teaspoon black pepper - Olive oil, for cooking - Toothpicks or kitchen twine (for securing) When making spinach stuffed chicken breasts, you need fresh ingredients for the best flavor. The chicken breasts should be boneless and skinless. This helps them cook evenly and makes stuffing easier. Fresh spinach adds a nice color and taste. You will also use three kinds of cheese. Ricotta gives a creamy texture. Mozzarella adds stretch and richness. Parmesan provides a sharp flavor. The garlic and oregano enhance the dish's aroma and taste. Seasoning is simple. A little salt and black pepper makes a big difference. Olive oil is key for cooking and helps the chicken brown nicely. Finally, toothpicks or kitchen twine keeps the filling from spilling out. With these ingredients, you can create a delicious meal that is both easy and impressive. Gather everything, and you are ready to start cooking! {{ingredient_image_2}} 1. Preheat the oven: Start by setting your oven to 375°F (190°C). This step is key for even cooking. 2. Sautéing garlic and spinach: In a medium skillet, heat 1 tablespoon of olive oil over medium heat. Add 2 minced garlic cloves. Cook for about 30 seconds until they smell great. Then, add 2 cups of chopped spinach. Stir it until it wilts, which takes about 2-3 minutes. Remove it from heat and let it cool. 3. Mixing the filling: In a bowl, mix the wilted spinach with 1 cup of ricotta cheese, 1/2 cup of shredded mozzarella cheese, and 1/4 cup of grated Parmesan cheese. Add 1 teaspoon of dried oregano, 1/2 teaspoon of salt, and 1/4 teaspoon of black pepper. Stir well to blend all the flavors. 1. Creating pockets in the chicken breasts: Take 4 boneless, skinless chicken breasts and slice each one horizontally. Cut deep to make a pocket, but don’t cut all the way through. 2. Filling and securing the chicken: Generously stuff each pocket with the spinach and cheese mix. Use toothpicks or kitchen twine to close the openings. This step keeps the filling from spilling out during cooking. 1. Searing the stuffed breasts: Heat a couple of tablespoons of olive oil in an oven-safe skillet over medium-high heat. Once hot, place the stuffed chicken breasts in the skillet. Cook for 3-4 minutes on each side. Look for a nice golden-brown crust. 2. Baking in the oven: Transfer the skillet to your preheated oven. Bake for 25-30 minutes. The chicken is ready when its internal temperature hits 165°F (75°C) and the juices run clear. 3. Resting before serving: Once baked, take the skillet out of the oven. Let the chicken rest for about 5 minutes. This step keeps the juices locked inside, giving you a juicy bite. After resting, remove the toothpicks or twine. You can slice the chicken in half for a lovely presentation if you wish. - Ensuring proper seasoning: Season your chicken breasts well. Use salt and pepper both inside and outside. The filling also needs seasoning. The ricotta and spinach blend needs flavor. This makes every bite tasty. - Achieving the right texture: The filling should be creamy yet firm. Use fresh spinach for a bright taste and texture. Mix the cheeses well. This gives a nice, cheesy pull when you cut into the chicken. - Overstuffing the chicken: It’s easy to want to pack in more filling. However, overstuffing can lead to mess. The chicken may burst, letting the filling escape. Stick to a generous but manageable amount. - Not resting the chicken before slicing: Let your chicken rest after baking. This keeps the juices inside. If you cut too soon, the juices run out. This can make the chicken dry. Rest it for about five minutes for the best result. Pro Tips Use Fresh Spinach: Fresh spinach will provide a vibrant flavor and texture compared to frozen spinach. Make sure to wash and dry it thoroughly before use. Experiment with Cheese: Feel free to mix and match cheeses. Adding feta or goat cheese can give the filling a unique twist that complements the chicken beautifully. Secure Properly: Ensure the chicken pockets are secured tightly with toothpicks or twine. This prevents the filling from leaking out during cooking, ensuring a juicy and flavorful bite. Rest Before Serving: Allow the stuffed chicken to rest for a few minutes after baking. This step helps the juices redistribute, resulting in a more succulent texture when sliced. {{image_4}} You can make this dish fit your needs. Here are some smart swaps: - Cheese Choices: Use lactose-free cheese if you're avoiding dairy. - Veggie Add-ins: Try sun-dried tomatoes or bell peppers for extra flavor. These changes keep the meal tasty while making it fit different diets. Want to make your spinach stuffed chicken even better? Here are my top tips: - Herbs and Spices: Add fresh basil, thyme, or a pinch of red pepper flakes. - Protein Options: Use turkey or even tofu if you prefer something different. These options add depth and fun to your dish. Don't be afraid to mix and match! To keep your spinach stuffed chicken breasts fresh, store them properly. First, let the chicken cool down to room temperature. Then, wrap each piece tightly in plastic wrap or place it in an airtight container. Store in the fridge for up to three days. If you want to save them for later, consider freezing. Place the chicken in a freezer-safe bag, squeezing out any air. This way, they can last up to three months in the freezer. When you are ready to enjoy the leftovers, reheating them properly is key. To keep your chicken moist, use the oven. Preheat it to 350°F (175°C). Place the chicken in an oven-safe dish and add a splash of chicken broth or water. Cover with foil to trap steam and heat for about 15-20 minutes. You can also use a microwave, but do so carefully. Heat in short bursts, checking regularly to avoid drying it out. Enjoy your delicious meal again! To check if the chicken is done, use a meat thermometer. Insert it into the thickest part of the chicken. The internal temperature should reach 165°F (75°C). This ensures the chicken is safe to eat. You can also look for visual signs. The juices should run clear, not pink. The chicken should feel firm and no longer be soft to the touch. Yes, you can prepare stuffed chicken breasts ahead of time. You can stuff the chicken and store it in the fridge for a day. This saves you time when cooking. Just be sure to cover it well to keep it fresh. If you want to freeze them, wrap them tightly. Use plastic wrap or a freezer bag to prevent freezer burn. Thaw them in the fridge before cooking. Several side dishes complement spinach stuffed chicken breasts nicely. Here are a few ideas: - Roasted vegetables, like carrots or broccoli - A light salad with mixed greens and vinaigrette - Garlic mashed potatoes for a creamy side - Quinoa or rice pilaf for a hearty base These options balance the flavors and add color to your plate. Enjoy mixing and matching to find your favorite! This post outlined how to make delicious stuffed chicken breasts. You learned about key ingredients, simple steps, and useful tips. Proper seasoning and resting are vital for the best flavor and texture. You can also make adjustments for different diets or preferences. Following these guidelines ensures a tasty meal. Don't forget to store leftovers properly for later enjoyment. With this knowledge, you can cook confidently and impress anyone at the table. Enjoy your cooking adventure with stuffed chicken!

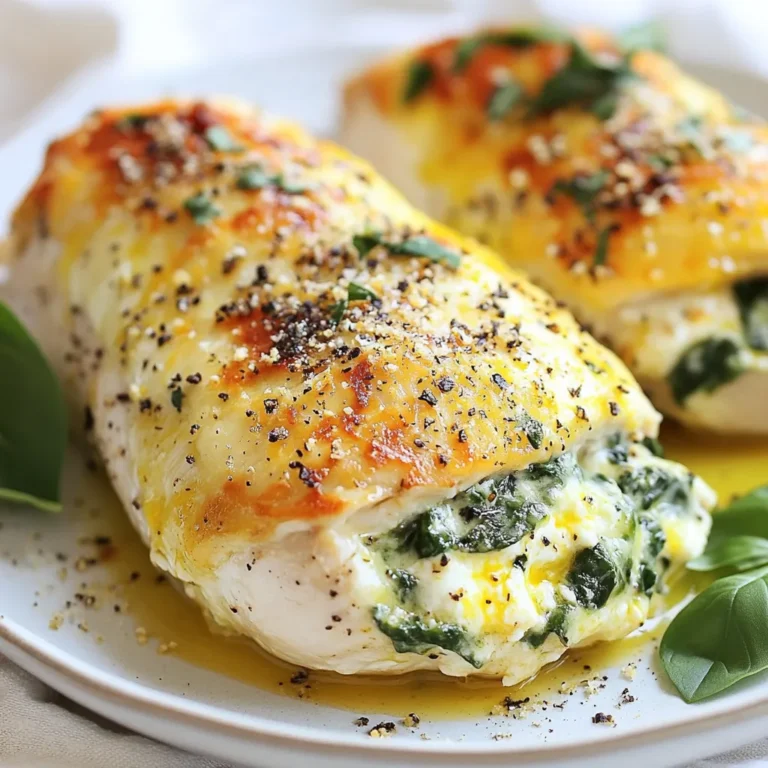
Spinach Stuffed Chicken Breasts Flavorful and Easy Meal

- 4 cups fresh watermelon, cubed - 1/2 cup freshly squeezed lime juice (about 4-5 limes) - 1/4 cup honey or agave syrup (adjust to taste) Fresh watermelon is the star. It gives the drink a sweet, juicy base. Use ripe watermelon for the best flavor. When you pick one, look for a uniform shape and a hollow sound when you tap it. Fresh lime juice adds a bright kick. Squeeze the limes just before you use them. This keeps the flavor fresh and zesty. You can also adjust the amount of lime juice if you prefer it sweeter or tangier. For sweetener, choose between honey or agave syrup. Honey adds a distinct flavor, while agave gives a more neutral sweetness. Start with less sweetener and add more if needed. This way, you can get the taste just right. - Fresh mint leaves - Lime slices Fresh mint leaves bring a burst of coolness. They pair well with the watermelon and lime. Just a few leaves enhance the drink's aroma and look. Lime slices make your drink pop visually. They add a colorful touch and a hint of extra lime flavor. Place a slice on the rim of the glass for a fun detail. - High-speed blender - Fine mesh sieve - Large pitcher - Glasses for serving A high-speed blender is key for making smooth watermelon juice. It breaks down the fruit quickly. This saves time and ensures a silky texture. A fine mesh sieve helps you strain the juice. Use it to remove any pulp. This gives you clear, refreshing liquid. A large pitcher is perfect for mixing your ingredients. It allows enough space for stirring without spilling. Finally, have some glasses ready for serving. Choose fun, colorful ones to make the drink even more inviting. {{ingredient_image_2}} Start by cutting the watermelon into cubes. Use about four cups for this recipe. Next, place the cubed watermelon into a high-speed blender. Blend until the watermelon is smooth. This should take about 30 seconds. After blending, we need to strain it. Use a fine mesh sieve to separate the juice from the pulp. Pour the blended watermelon through the sieve into a large pitcher. You can discard the pulp or save it for another dish. Now it’s time to mix the flavors. Pour half a cup of freshly squeezed lime juice into the pitcher. This juice comes from about four to five limes. Add a quarter cup of honey or agave syrup to the pitcher. Stir the mixture well until the sweetener is fully dissolved in the juice. You want the lime and watermelon to blend perfectly, so make sure you mix well. The last step is to add the sparkling water. Pour in two cups of well-chilled sparkling water. Use a gentle stirring motion to combine everything. Be careful not to disturb the bubbles too much. Taste your watermelon limeade. If it needs more sweetness, add a bit more honey or agave syrup. For serving, fill glasses with ice cubes. Pour the sparkling watermelon limeade over the ice. To make it pretty, garnish each glass with fresh mint leaves and a slice of lime. To balance flavors in your sparkling watermelon limeade, taste as you mix. Start with 1/4 cup of honey or agave syrup. If you want it sweeter, add more a little at a time. Honey adds a floral note, while agave gives a smoother sweetness. Both work well, so choose based on your taste. For a smooth drink, blend the watermelon until it is completely liquid. Use a high-speed blender for the best results. Strain the juice through a fine mesh sieve to remove any pulp. This gives your drink a nice, clean texture. If you prefer some pulp, keep a little in the mix for added body. Garnish your drinks for a fun look! Use fresh mint leaves and lime slices. Place a mint leaf on top of the drink and a lime slice on the rim. This adds color and makes it more inviting. Serve the limeade very cold over ice. This keeps it refreshing and perfect for hot days. Pro Tips Choose Ripe Watermelon: Select a watermelon that feels heavy for its size and has a uniform shape. A yellow spot on the rind indicates ripeness. Adjust Sweetness: Taste the mixture before adding more sweetener. Depending on the sweetness of the watermelon, you may need less honey or agave syrup. Chill Ingredients: Ensure the sparkling water and glasses are well-chilled to maintain the refreshing nature of the drink, especially on a hot day. Creative Garnishes: Experiment with additional garnishes like basil or cucumber slices for a unique twist that complements the limeade flavor. {{image_4}} You can turn Sparkling Watermelon Limeade into a fun adult drink. Adding spirits like vodka or rum gives it a kick. Start with 1 to 2 ounces of your favorite spirit. Mix it with the watermelon limeade before adding sparkling water. This change makes a refreshing summer cocktail. You can even add a splash of triple sec for extra flavor. For kids or non-drinkers, keep it simple and tasty. You can create a fun drink without alcohol. Use the same fresh ingredients from the recipe. Just skip the spirits. You can also add soda or lemonade for more fizz and sweetness. This way, everyone can enjoy a delicious, refreshing drink. Get creative with flavors! You can infuse your limeade with herbs or other fruits. Fresh mint is a great choice. Just muddle a few leaves into the watermelon juice before mixing. You can also try adding berries or even cucumber slices. These additions make your drink unique and exciting. Experiment and find your favorite combo! To store leftovers, first, pour the Sparkling Watermelon Limeade into a clean container. Use a glass or plastic pitcher with a tight lid. Keep it in the fridge. This keeps the drink fresh and bubbly. Avoid using metal containers, as they can affect the flavor. The Sparkling Watermelon Limeade stays fresh for about 2 to 3 days. After that, the flavor may dull, and bubbles will fade. Always check for any signs of spoilage before drinking. Don't toss out leftover watermelon juice! You can use it in many ways. Mix it into smoothies for extra flavor. Use it as a base for salad dressings. You can even freeze it in ice cube trays. These cubes make great additions to other drinks. Using bottled lime juice is easy, but it has pros and cons. Pros: It is convenient and saves time. You don’t need to squeeze limes. Cons: Fresh lime juice has a brighter flavor. Bottled juice may taste sourer. For the best taste, I suggest using fresh limes. Yes, Sparkling Watermelon Limeade is quite healthy! - Watermelon: It is low in calories and high in water content. This helps keep you hydrated. - Lime juice: It is rich in vitamin C, which boosts the immune system. - Honey or agave syrup: These natural sweeteners offer nutrients, unlike refined sugar. Overall, this drink is refreshing and full of nutrients. You can make this drink ahead, but store it well. - Preparation: Blend the watermelon and mix with lime and sweetener. - Storage: Keep the mix in the fridge. Add sparkling water right before serving. - Tips: This keeps the fizz fresh and tasty. Enjoy your drink chilled! We explored how to make refreshing Sparkling Watermelon Limeade. You learned about the key ingredients, like fresh watermelon and lime juice, and the tools needed. I shared tips for perfecting sweetness and achieving the right consistency. You also discovered fun variations and storage tips for leftovers. Enjoy this vibrant drink, whether you serve it at a party or just for yourself. Experiment with flavors and garnishes. Each sip can brighten your day!

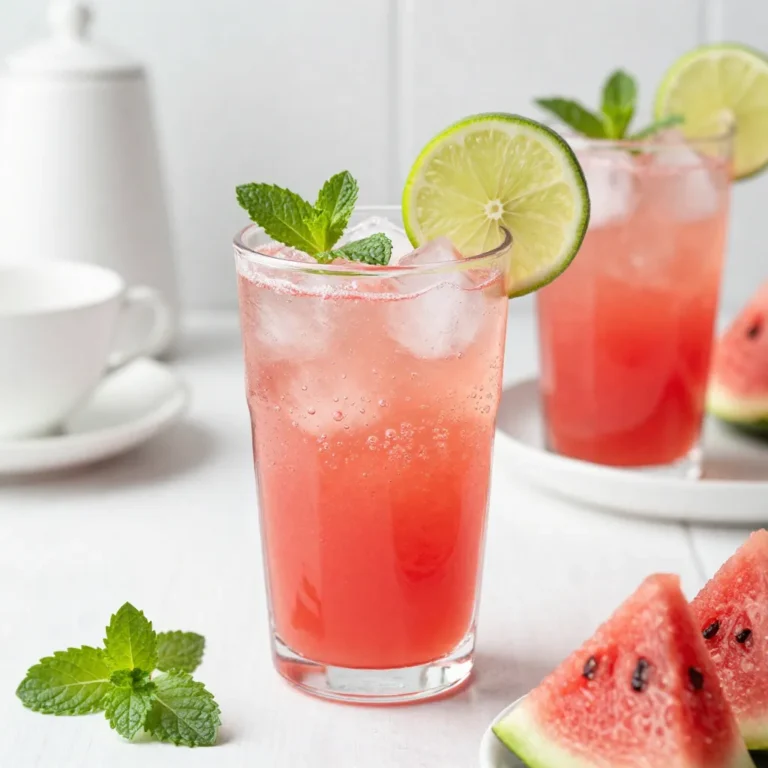
Sparkling Watermelon Limeade Refreshing Summer Drink

- 1 lb boneless chicken thighs - 1/2 cup sweet chili sauce - 2 tablespoons soy sauce - 1 tablespoon rice vinegar - 1 tablespoon honey - 2 garlic cloves, minced - 1 teaspoon fresh ginger, grated - 1 bell pepper (red or yellow), sliced into strips - 1 small zucchini, sliced into half-moons - 1 tablespoon vegetable oil - 1 teaspoon sesame oil - Salt and pepper to taste I love using boneless chicken thighs for this dish. They stay juicy and tender. The sweet chili sauce gives a great balance of spice and sweetness. I always add soy sauce, rice vinegar, and honey to boost the flavor. The garlic and ginger add a nice kick. For veggies, I choose bell peppers and zucchini. They add color and crunch. The vegetable oil helps cook everything evenly, while sesame oil adds a nutty flavor. Don't forget salt and pepper to season. - Green onions - Sesame seeds Green onions add freshness. They are easy to chop and sprinkle on top. Sesame seeds provide a nice crunch and look great on the plate. These garnishes make the dish pop and taste even better. {{ingredient_image_2}} First, I mix the marinade in a large bowl. I use these ingredients: - 1/2 cup sweet chili sauce - 2 tablespoons soy sauce - 1 tablespoon rice vinegar - 1 tablespoon honey - 2 minced garlic cloves - 1 teaspoon grated ginger I stir all these until smooth. Next, I add the chicken pieces. I coat them well with the marinade. Cover the bowl and let it sit. I recommend marinating for at least 30 minutes. For better flavor, refrigerate overnight. I heat vegetable oil in a large skillet over medium-high heat. When the oil shimmers, I take the chicken out of the marinade. I discard any extra marinade. I add the chicken to the hot skillet carefully. I stir-fry it for about 5-7 minutes. It should turn golden brown and be fully cooked. Once the chicken is ready, I add bell pepper and zucchini to the skillet. I cook them for 3-4 minutes. I want them tender-crisp, keeping their bright colors. To keep the veggies vibrant, I avoid overcooking them. This way, they stay colorful and tasty. For great taste, marinate your chicken for at least 30 minutes. If you can, let it sit overnight. This time helps the flavors soak in deeply. You can change the taste by using different sauces or veggies. Try teriyaki sauce for a sweet twist or sriracha for heat. You can also add pineapple or carrots for extra sweetness and crunch. You can use a skillet or a wok to cook your chicken. A skillet gives a nice golden color, while a wok cooks fast and evenly. If you want a healthier option, try grilling or baking the chicken. Grilling adds a smoky flavor, while baking is easy and less messy. Just make sure to check that the chicken is cooked through. Serving Sweet Chili Chicken is fun! You can plate it over fluffy rice or serve it with stir-fried noodles. This makes the meal more filling. For a beautiful finish, add green onions and sesame seeds on top. These not only look good but also add flavor and texture. Enjoy showing off your delicious dish! Pro Tips Marinate for Maximum Flavor: Letting the chicken marinate for at least 30 minutes allows the flavors to penetrate deeply. For the best results, marinate overnight in the refrigerator. High Heat for Perfect Browning: Cooking the chicken over medium-high heat ensures it gets a beautiful golden brown color while remaining juicy inside. Make sure your oil is hot before adding the chicken. Variety of Vegetables: Feel free to mix in other vegetables like broccoli, snap peas, or carrots for added color and nutrition. Just adjust the cooking time to ensure they remain crisp. Serving Suggestions: Serve the Sweet Chili Chicken Delight over jasmine rice or alongside stir-fried noodles. This dish pairs well with a side of steamed vegetables for a balanced meal. {{image_4}} You can swap chicken for many other proteins. Tofu works well for a vegetarian dish. It soaks up the sauce and adds a nice texture. Shrimp is another great choice. It cooks fast and adds a sweet flavor. For those who enjoy beef, try thinly sliced flank steak. It pairs nicely with the sweet chili sauce. You can change the sweetness or spice levels of the dish. Add more sweet chili sauce for extra sweetness. If you like heat, mix in some hot sauce or red pepper flakes. Want to try something new? Add teriyaki or hoisin sauce to give a fusion twist. These sauces can create a unique flavor profile that you will love. Incorporate seasonal vegetables for a fresh taste. In spring, use asparagus or snap peas. They add crunch and color. In fall, try adding roasted pumpkin or butternut squash. These veggies bring warmth to the dish. For holidays, think about adding cranberries for a festive touch. They will add a sweet-tart flavor that balances well with the other ingredients. To store leftovers properly, let the Sweet Chili Chicken cool first. Place it in an airtight container. You can use glass or plastic containers with tight lids. This helps keep the chicken fresh and tasty. It is best to eat it within three days for the best flavor. For freezing Sweet Chili Chicken, first let it cool completely. Then, transfer it to a freezer-safe bag or container. Remove as much air as possible to prevent freezer burn. You can freeze it for up to three months. When you’re ready to eat, thaw it in the fridge overnight. To reheat, use a skillet over medium heat. Add a splash of water or broth to keep it moist. Stir until hot, and enjoy! In the fridge, Sweet Chili Chicken lasts about three days. If frozen, it can last up to three months. Look for signs like a sour smell or off-color to know if it should be discarded. If you see ice crystals, it may still be safe but won’t taste as good. Always trust your senses when deciding whether to eat leftovers. Yes, you can use frozen chicken! - First, thaw the chicken in the fridge overnight. - If you’re in a hurry, use the microwave’s defrost setting. - After thawing, cut the chicken into bite-sized pieces. - Marinate as usual, but cook for a couple of extra minutes. Making sweet chili sauce is simple! - Use these basic ingredients: - 1/2 cup sugar - 1/2 cup rice vinegar - 1 tablespoon soy sauce - 1 tablespoon chili paste - 1 teaspoon garlic powder - Combine all ingredients in a saucepan. - Cook over medium heat, stirring until the sugar dissolves. - Let it cool before using it in the recipe. Sweet chili chicken pairs well with many sides! - Here are some great options: - Fluffy white rice - Stir-fried noodles - Steamed broccoli - Fresh salad with a tangy dressing - For drinks, try a chilled ginger ale or iced tea. In this post, we covered a great sweet chili chicken recipe. You learned about the main ingredients and how to marinate and cook the chicken. We also explored tips for flavor and storage options. Don't forget about the variations, which let you customize the dish. Whether you stick to the original or try new ingredients, enjoy this tasty meal! Perfect for any dinner table, it brings flavor and fun. Embrace your creativity, and happy cooking!

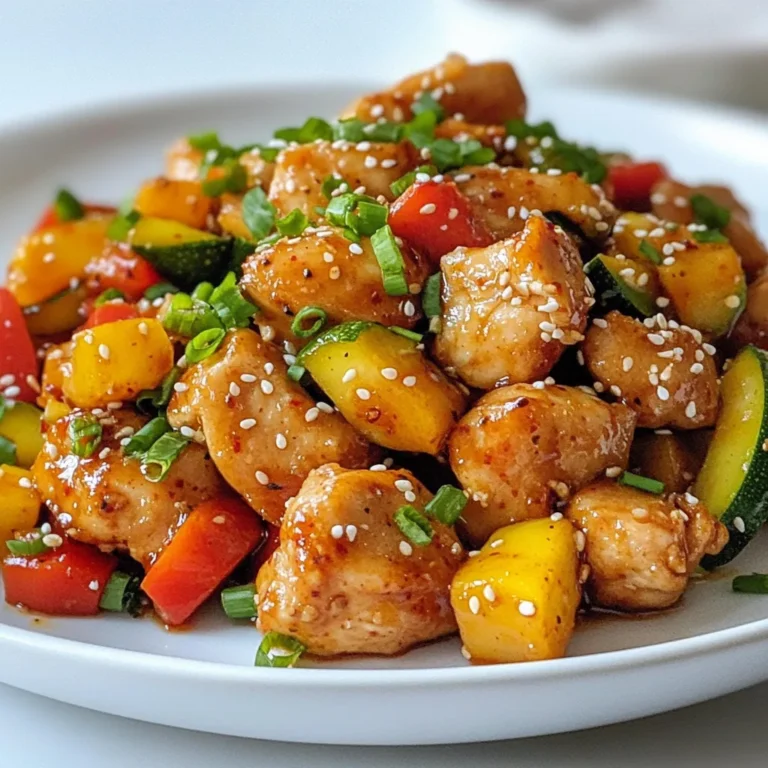
Sweet Chili Chicken Flavor-Packed Delight Recipe

- 4 large portobello mushrooms, stems removed - 1 cup cherry tomatoes, halved - 1 cup fresh mozzarella balls, halved - 1/2 cup fresh basil leaves, chopped - 2 tablespoons balsamic vinegar - 2 tablespoons extra virgin olive oil - 2 cloves garlic, minced - Salt and pepper to taste - 1/4 teaspoon red pepper flakes (optional) Caprese stuffed portobello mushrooms are a tasty delight. Each ingredient adds a special touch. The large portobello mushrooms serve as the perfect base. Their meaty texture holds the filling well and enhances the dish. Cherry tomatoes bring a burst of flavor. They add sweetness and a juicy pop. Fresh mozzarella adds creaminess and richness. When it melts, it becomes a gooey layer of joy. Fresh basil adds a crisp, fragrant note. It brightens every bite and complements the other flavors. Balsamic vinegar gives a tangy kick. It balances the creaminess of the cheese. Extra virgin olive oil adds smoothness and depth. It helps the flavors blend together nicely. Minced garlic adds a savory punch, making the dish even more flavorful. For seasoning, use salt and pepper to taste. Red pepper flakes can give a nice heat. They are optional but can add a fun twist. With these ingredients, you create a dish that is vibrant and satisfying. {{ingredient_image_2}} First, set your oven to 375°F (190°C). This step gets it hot and ready for baking. Next, clean the portobello mushrooms. Use a damp cloth to wipe off dirt. Take out the stems and place the mushrooms gill side up on a baking sheet lined with parchment paper. In a bowl, combine halved cherry tomatoes, mozzarella balls, and chopped basil. Add balsamic vinegar, olive oil, minced garlic, salt, and pepper. If you like some heat, toss in red pepper flakes. Mix gently to keep the cheese intact. Now, fill each mushroom cap with the Caprese mixture. Use a spoon and pack it in well. This ensures every bite is full of flavor. Drizzle a little extra virgin olive oil on top. This will make the mushrooms even tastier as they cook. Put the baking sheet in the oven and bake for about 20 minutes. The mushrooms should get tender, and the cheese will bubble and turn golden. Once done, take them out and let them cool a bit before serving. For a great look, serve them on a nice plate. Add fresh basil leaves and a drizzle of balsamic reduction for a special touch. To get the best flavor, clean your mushrooms well. Use a damp cloth to wipe off dirt. Remove the stems carefully so you don’t break the caps. When you stuff them, pack the filling tightly. This helps the flavors blend well as they bake. Always choose fresh ingredients for this dish. Look for ripe cherry tomatoes and creamy mozzarella balls. Fresh basil adds a bright taste that really enhances the dish. The quality of your ingredients makes a big difference in flavor. Fresh ingredients bring out the best in every bite. To impress your guests, think about how you plate your mushrooms. A wooden board or a nice plate works well. Drizzle some balsamic reduction around the mushrooms for a pop of color. Add a few fresh basil leaves on top for a beautiful finish. This not only makes it look great but also adds extra flavor. Pro Tips Use Fresh Ingredients: For the best flavor, always use fresh mozzarella and ripe cherry tomatoes. The quality of your ingredients makes a significant difference in the overall taste of the dish. Marinate for Extra Flavor: Consider letting the Caprese filling sit for about 15 minutes before stuffing the mushrooms. This allows the flavors to meld together, enhancing the overall taste. Experiment with Cheese: If you're feeling adventurous, try substituting the mozzarella with burrata for a creamier texture or goat cheese for a tangy twist. Check Mushroom Size: Make sure your portobello mushrooms are large and sturdy enough to hold the filling. Smaller mushrooms can work too, but adjust the cooking time accordingly. {{image_4}} You can easily make this dish vegan. Instead of mozzarella, use vegan cheese. Look for a brand that melts well. You can also replace balsamic vinegar with a splash of lemon juice for brightness. This keeps the dish fresh and tasty while fitting into a plant-based diet. Feel free to add more veggies to the filling. Spinach or bell peppers work well. You can also mix in some olives for a briny kick. If you love herbs, try adding oregano or thyme for extra flavor. For a bit of heat, increase the red pepper flakes or drizzle some hot sauce on top before serving. These mushrooms shine at any gathering. Serve them as a starter at parties. They also make a great side to grilled meats. For a light lunch, pair them with a salad. If you’re hosting a fancy dinner, garnish with fresh basil and balsamic reduction. This adds a nice touch and makes the dish pop on the plate. After you enjoy your Caprese stuffed portobello mushrooms, store any leftovers in the fridge. Place them in an airtight container. They will stay fresh for about three days. Make sure they cool down to room temperature before sealing them up. This helps keep them tasty and safe to eat. When you're ready to eat your leftovers, reheating is simple. Preheat your oven to 350°F (175°C). Place the mushrooms on a baking sheet. Heat them for about 10 to 15 minutes. This warms them up evenly and keeps the cheese gooey. If you’re in a hurry, you can microwave them. Just cover them with a damp paper towel and heat for 1 to 2 minutes. If you want to save some for later, freezing is a great option. First, let the stuffed mushrooms cool completely. Then, wrap each one in plastic wrap. Place them in a freezer-safe bag or container. They can last for about one month in the freezer. When you want to eat them, thaw in the fridge overnight before reheating. This way, you can enjoy this dish even more! The best mushrooms for stuffing are large portobello mushrooms. They have a big cap and a sturdy shape. Their rich flavor and meaty texture make them perfect for filling. You can also use large shiitake or cremini mushrooms, but they may need more care. Portobello mushrooms hold their shape well and allow for a generous amount of filling. Yes, you can make this recipe ahead of time. Prepare the filling and stuff the mushrooms a few hours before baking. Just cover the mushrooms and store them in the fridge. When you’re ready to eat, pop them in the oven. This saves time and makes it easy to enjoy a quick meal. To add spice, sprinkle in red pepper flakes. You can increase the amount based on your taste. Another option is to add chopped jalapeños or a drizzle of hot sauce. These options will enhance the flavor while giving your dish a spicy kick. Caprese stuffed portobello mushrooms pair well with many sides. Here are some tasty options: - A fresh green salad - Garlic bread or crusty rolls - Quinoa or couscous for a grain side - Roasted vegetables for added flavor These sides balance the dish and add variety to your meal. This blog post covered how to make delicious Caprese Stuffed Portobello Mushrooms. We talked about the key ingredients, like mushrooms, mozzarella, and fresh herbs. I provided steps to prep, stuff, and bake your dish perfectly. Plus, I shared tips for best results and variations for different diets. Remember, fresh ingredients make a big difference. Enjoy these mushrooms as an appetizer or main dish. You can easily store leftovers for later meals. With this guide, you can impress anyone with your cooking skills. Happy cooking!

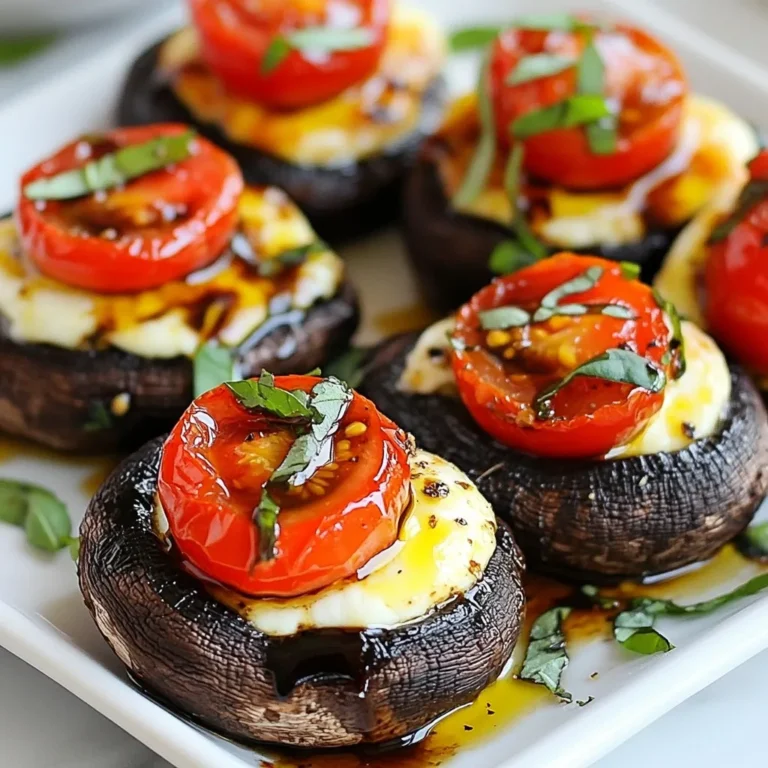
Caprese Stuffed Portobello Mushrooms Flavor Boost

PREV 1 … 40 41 42 … 47 NEXT
snack joy kitchen

explore

DessertsDinnerAppetizersDrinks

Our Policies

  • Cookie Policy
  • Copyright Policy
  • Disclaimer
  • GDPR Policy
  • Terms Of Use
Back to Top
  • About
  • Contact Us
  • Privacy Policy
© 2026 snack joy kitchen