FREE DINNER EBOOK! Get your copy!
  • Cookie Policy
  • GDPR Policy
  • Disclaimer
  • Terms Of Use
  • Visit my other site: Fun Cookie Recipes
snack joy kitchen
  • Home
  • Dinner
  • Desserts
  • Drinks
  • Appetizers
  • Contact
  • About
  • Privacy Policy
  • Home
  • Dinner
  • Desserts
  • Drinks
  • Appetizers
  • Contact
  • About
  • Privacy Policy
  • Cookie Policy
  • GDPR Policy
  • Disclaimer
  • Terms Of Use
Visit my other site: Fun Cookie Recipes

HOME / CATEGORIES /

Latest

- 4 large bell peppers (red, yellow, or green) - 1 cup quinoa, thoroughly rinsed - 2 cups vegetable broth - 1 cup black beans, drained and rinsed - 1 cup corn kernels (fresh or frozen) - 1 cup diced tomatoes (canned or fresh) - 1 teaspoon ground cumin - 1 teaspoon chili powder - 1 teaspoon garlic powder - ½ teaspoon onion powder - Salt and pepper to taste - 1 cup shredded cheese (cheddar, Monterey Jack, or Mexican blend) - Fresh cilantro, chopped (for garnish) - 1 avocado, diced (for topping) Each serving is packed with nutrients: - Calories: 350 - Protein: 15 grams - Carbohydrates: 50 grams - Fiber: 10 grams - Fat: 10 grams If you need alternatives, here are some ideas: - Use brown rice instead of quinoa for a different grain. - Swap black beans for pinto or kidney beans. - Try zucchini or mushrooms in place of corn for added veggies. - Use dairy-free cheese if you're vegan or lactose intolerant. - Add spices like paprika or cayenne for extra heat. Feel free to mix and match these options to suit your taste and dietary needs! {{ingredient_image_2}} First, I preheat my oven to 375°F (190°C). This helps the peppers cook evenly. Next, I grab my bell peppers. I slice off the tops and remove the seeds inside. I keep the tops if I want to use them later. It adds a nice touch! Now, I move to the stove. I take a medium saucepan and add rinsed quinoa and vegetable broth. I bring it to a boil over medium heat. Once it boils, I reduce the heat to low. I cover it and let it simmer for about 15 minutes. The quinoa will absorb the liquid and become fluffy. In a large bowl, I mix the cooked quinoa, black beans, corn, and diced tomatoes. I add ground cumin, chili powder, garlic powder, onion powder, salt, and pepper. I gently stir everything until combined. This mix is where all the flavors come together! Next, I fill each bell pepper with the quinoa mixture. I pack it tightly to help them hold their shape. I place the stuffed peppers upright in a baking dish. If they wobble, I trim a small slice from the bottom. I cover the dish with aluminum foil and bake for 25 minutes. This lets the flavors meld nicely. After 25 minutes, I take off the foil and sprinkle shredded cheese on top of each pepper. I put them back in the oven for another 10 minutes. I want the cheese to melt and bubble. Once done, I take the peppers out and let them cool for a few minutes. Just before serving, I add diced avocado and chopped cilantro for a fresh finish. To cook quinoa well, start by rinsing it. Rinsing removes bitter flavors. Use one cup of quinoa and two cups of vegetable broth. Bring them to a boil in a medium saucepan. Once boiling, lower the heat and cover it. Let it simmer for about 15 minutes. You want the quinoa to absorb all the liquid. When it's done, it should be fluffy and light. Fluff it with a fork before mixing it into your filling. If you have leftover stuffed peppers, store them carefully. Wait until they cool down. Place them in an airtight container. They can last in the fridge for up to three days. If you want to freeze them, wrap each pepper in plastic wrap. Then, put them in a freezer bag. They can last for about three months in the freezer. To reheat, just pop them in the oven at 350°F (175°C) until warm. Toppings can take your stuffed peppers to the next level. Fresh cilantro adds a bright touch. Diced avocado brings creaminess that pairs well with the spices. A squeeze of lime juice adds a zesty kick. You can also use salsa or sour cream for extra flavor. Experiment with your favorite toppings to make each meal unique. Pro Tips Choose Colorful Peppers: Using a mix of red, yellow, and green bell peppers not only makes the dish visually appealing but also adds a variety of flavors and nutrients. Perfectly Cooked Quinoa: Ensure the quinoa is thoroughly rinsed before cooking to remove its natural coating, saponin, which can impart a bitter taste to your dish. Customize Your Filling: Feel free to add other ingredients like diced onions, jalapeños, or olives to the filling for additional flavor and texture. Serve with a Twist: A squeeze of fresh lime juice over the stuffed peppers just before serving elevates the flavors and adds a refreshing zing. {{image_4}} You can change the protein in stuffed peppers. Here are a few ideas: - Ground Beef: Use cooked ground beef for a hearty filling. - Turkey: Ground turkey adds a lean option. - Chicken: Shredded chicken gives a mild flavor. - Tofu: Crumbled tofu offers a plant-based protein choice. These options mix well with quinoa and spices. Just cook the meat or tofu before adding it to the mix. Making stuffed peppers vegan is easy. Here’s how: - Omit Cheese: Skip the cheese or use a vegan cheese alternative. - More Beans: Increase black beans or add lentils for extra protein. - Add Veggies: Mix in diced zucchini or spinach for added nutrients. These changes keep the dish delicious and plant-based. You won’t miss the meat! Adjusting the spice level can make a big difference. Here are some tips: - Add Jalapeños: For extra heat, mix in chopped jalapeños. - Use Hot Sauce: Drizzle hot sauce into the filling for added flavor. - Seasoning: Increase chili powder or cumin to boost the spice. Tailoring the heat helps fit your taste. You can make it mild for kids or spicy for adults. Enjoy experimenting! Mexican stuffed peppers shine on their own, but they pair well with many sides. Here are some great ideas: - Mexican rice: Fluffy rice with spices adds a nice touch. - Guacamole: Creamy avocado dip enhances flavor and texture. - Salsa: Fresh salsa brings a bright kick to the meal. - Corn salad: A cool salad with corn and lime balances the warmth of the peppers. Make your meal visually appealing! Here are some fun plating tips: - Use a colorful platter: Arrange peppers on a vibrant dish to stand out. - Add lime wedges: Place lime wedges around the peppers for a zesty touch. - Scatter fresh cilantro: Sprinkle chopped cilantro around the plate for a pop of green. - Serve with the pepper tops: Place the tops around the dish for a charming look. Garnishes can elevate your stuffed peppers. Here are a few tasty options: - Diced avocado: Adds creaminess and freshness. - Chopped cilantro: Brightens the dish with herbal notes. - Sour cream: A dollop adds a cool and tangy flavor. - Lime juice: A squeeze of lime brightens all the flavors. These simple ideas make your dish even more special. Enjoy your cooking! Yes, you can prepare these peppers ahead of time. You can stuff the peppers and store them in the fridge for up to one day. Just cover them tightly with plastic wrap or foil. When you are ready to bake, simply remove them from the fridge and follow the baking steps. You may need to add a few minutes to the cooking time since they will be cold. You will know the peppers are fully cooked when they are tender. The skin should be slightly wrinkled, and you can easily pierce them with a fork. If you prefer a firmer texture, cook them for less time. The cheese on top should also be melted and bubbling. Stuffed peppers pair well with many sides. You can serve them with: - A fresh green salad - Mexican rice or cilantro-lime rice - Guacamole or salsa - Tortilla chips for crunch These sides will help create a full and satisfying meal. Enjoy your tasty creation! In this blog post, we covered how to make tasty stuffed peppers. We explored the right ingredients, helpful cooking steps, and smart tips. Remember, you can swap ingredients and add your own flair. This dish is flexible, so feel free to experiment with flavors and proteins. Finally, stuffed peppers are great for meal prep and can pair well with many sides. Enjoy your cooking and make this dish your own!

Mexican Stuffed Peppers Flavorful and Easy Recipe

- 4 boneless, skinless chicken breasts - 1 cup grated Parmesan cheese - 1/2 cup almond flour - 1 teaspoon garlic powder - 1 teaspoon onion powder - 1 teaspoon smoked paprika - 1/2 teaspoon black pepper - 1/2 teaspoon salt - 2 large eggs - 2 tablespoons Dijon mustard - 1 tablespoon olive oil Gathering the right ingredients is key to making this Parmesan crusted keto chicken shine. First, choose fresh, boneless, and skinless chicken breasts. They cook evenly and stay juicy. Next, grab some grated Parmesan cheese. It adds a rich flavor and a nice crunch. Almond flour is your go-to for a low-carb base, giving that perfect texture. For spices, garlic powder and onion powder bring depth. Smoked paprika adds a lovely warmth, while black pepper and salt enhance all the flavors. To bind everything, you will need eggs and Dijon mustard. The eggs help the crust stick. The mustard adds a touch of tang. A drizzle of olive oil keeps the chicken moist and flavorful during baking. With these ingredients, you're set to create a simple and savory meal that delights the senses. {{ingredient_image_2}} 1. Preheat your oven to 400°F (200°C). This ensures even cooking and a nice crust. 2. Line a baking sheet with parchment paper. This helps prevent sticking and makes cleanup easy. 3. Mix the coating ingredients. In a bowl, combine: - 1 cup grated Parmesan cheese - 1/2 cup almond flour - 1 teaspoon garlic powder - 1 teaspoon onion powder - 1 teaspoon smoked paprika - 1/2 teaspoon black pepper - 1/2 teaspoon salt Stir well to blend the flavors. 1. Dip the chicken in the egg mixture. In a separate bowl, whisk together: - 2 large eggs - 2 tablespoons Dijon mustard This mixture helps the crust stick to the chicken. 2. Coat with the Parmesan crust mixture. Take a chicken breast, dip it in the egg mixture, then roll it in the Parmesan mixture, pressing gently. Repeat this for all chicken breasts. 1. Arrange the chicken on the baking sheet. Make sure the pieces are spaced apart for even cooking. 2. Drizzle with olive oil. Use 1 tablespoon of olive oil to enhance flavor and moisture. 3. Bake for 25-30 minutes. The chicken should turn golden brown and reach 165°F (75°C) inside. To ensure the coating sticks well, start with dry chicken. Pat the chicken breasts with a paper towel before dipping them. This helps the egg mixture cling better. When coating, press down firmly into the Parmesan mix. This step adds more crunch when baked. For a golden brown finish, drizzle a bit of olive oil on top of each chicken piece. This oil helps the crust crisp up and get that beautiful color. Bake at 400°F for about 25-30 minutes. Keep an eye on it; every oven is different! For a stunning presentation, serve the chicken on a nice platter. Drizzle a balsamic reduction around the chicken for a pop of color. It adds a sweet and tangy flavor that pairs well with the savory crust. Ideal sides include a fresh garden salad or steamed veggies. A mix of greens adds color and freshness. You can also serve with cauliflower rice for a hearty yet keto-friendly meal. Feel free to experiment with seasonings. Instead of smoked paprika, try Italian herbs like oregano or basil for a different taste. You can also add a pinch of cayenne for a spicy kick. If you want to make this dish dairy-free, swap the Parmesan for a dairy-free cheese. You can also try using crushed pork rinds in place of almond flour for a crunchy, low-carb option. Pro Tips Use Fresh Ingredients: Always opt for fresh chicken and spices to enhance the flavor of your dish and ensure the best texture. Ensure Even Cooking: Make sure the chicken breasts are of uniform thickness; this helps them cook evenly and prevents drying out. Let it Rest: Allowing the chicken to rest after baking helps the juices redistribute, resulting in a juicier and more flavorful piece of chicken. Experiment with Seasonings: Feel free to adjust the spices in the crust to suit your personal taste, such as adding cayenne for heat or Italian herbs for extra flavor. {{image_4}} Parmesan crusted keto chicken is both tasty and low in carbs. Each serving has about 370 calories. The macronutrient content breaks down like this: - Protein: 40g - Fat: 22g - Carbohydrates: 4g This dish fits perfectly into a keto diet. With only 4 grams of carbs, you can enjoy a hearty meal without breaking your carb limit. The portions are generous, making it a satisfying option for lunch or dinner. Using Parmesan cheese in this recipe brings a lot of great benefits. It is rich in protein and calcium, which helps build strong bones. Parmesan also adds a nice flavor without extra carbs, making it perfect for keto diets. Almond flour is another star in this dish. It is lower in carbs compared to regular flour. Almond flour provides healthy fats and fiber, which can help keep you full. Plus, it has a nice nutty flavor that enhances the chicken’s taste. After you make Parmesan crusted keto chicken, store leftovers in the fridge. Place the chicken in an airtight container. This keeps it fresh for up to three days. If you want to keep it longer, freeze it. Wrap each piece in plastic wrap, then put it in a freezer bag. This method helps avoid freezer burn. You can freeze the chicken for up to three months. When you want to reheat, take it out of the freezer. Let it thaw in the fridge overnight. Then, reheat in the oven at 350°F (175°C) for about 15-20 minutes. This warms it evenly and keeps the crust crispy. For busy weeks, you can prep this dish ahead of time. Follow the recipe until step 4, where you coat the chicken. Store the coated chicken in the fridge for up to two days. When you're ready to eat, just bake it as directed. You can also use leftover chicken in other meals. Chop the chicken and add it to salads, wraps, or stir-fries. You can mix it with veggies for a quick meal. This keeps your meals exciting and helps reduce waste. - Can I use chicken thighs instead of breasts? Yes, you can use chicken thighs. They add a rich flavor and stay juicy. Just adjust the cooking time, as thighs may need a bit longer. - How can I make this recipe dairy-free? To make it dairy-free, skip the Parmesan cheese. Use nutritional yeast for a cheese-like flavor. You can also try a dairy-free cheese substitute. - What side dishes pair well with Parmesan crusted chicken? Great sides include a fresh garden salad or roasted vegetables. You can also serve it with cauliflower rice or zucchini noodles for a keto-friendly meal. - What is the best way to ensure chicken stays juicy? Brining chicken in saltwater for 30 minutes helps keep it juicy. Also, avoid overcooking. Baking until it reaches 165°F keeps it moist. - How do I know when the chicken is fully cooked? Use a meat thermometer to check the internal temperature. It should reach 165°F. The juices should run clear when you cut into it. This blog post covered a delicious crispy Parmesan chicken recipe. You saw what ingredients to use, from chicken to almond flour. I shared easy steps for preparation, coating, and baking. Plus, I provided tips to ensure a perfect crust. Don’t forget the nutritional facts, storage tips, and common questions. Experiment with different spices or sides to make it your own. Enjoy creating this tasty dish!

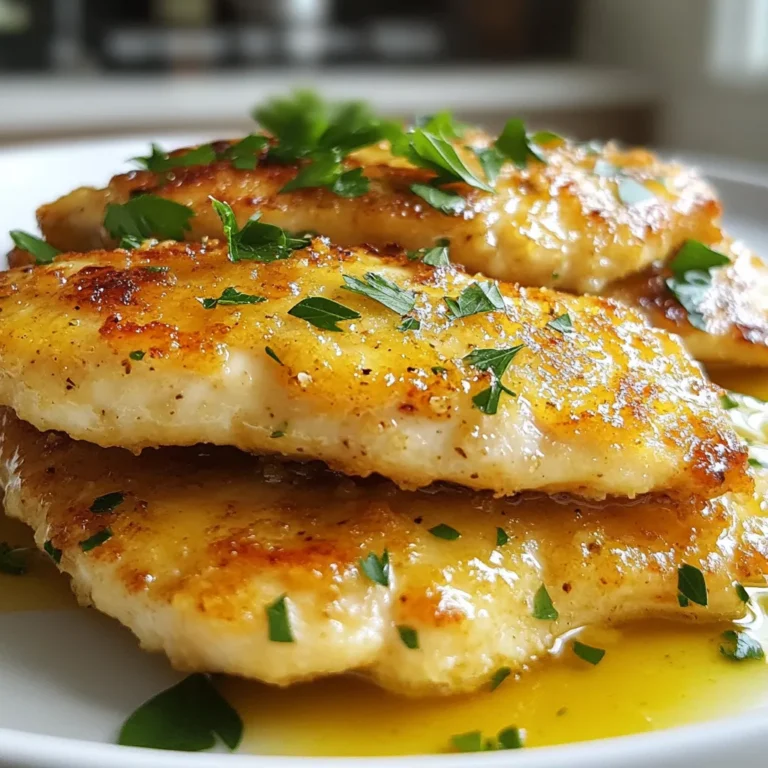
Parmesan Crusted Keto Chicken Simple and Savory Meal

- 500g boneless chicken thighs, cut into bite-sized pieces - 1 cup red lentils, rinsed - 2 medium potatoes, diced - 1 carrot, diced - Aromatic spices: turmeric, garam masala, coriander - 1 tablespoon vegetable oil - 4 cups chicken stock - Salt to taste - Fresh cilantro for garnish - Large pot or Dutch oven - Cooking utensils: knife, cutting board, stirring spoon Gather these ingredients to create a rich and hearty Irish Chicken Dhansak. The chicken thighs give a tender bite, while the red lentils add creaminess. Potatoes and carrots bring sweetness and texture. You will also need basic cooking essentials, which are easy to find. Make sure to have a large pot ready. A Dutch oven works great for even cooking. Having a good knife and cutting board will make prep easy. Enjoy the process of cooking this delightful meal! {{ingredient_image_2}} To start, heat the vegetable oil in a large pot over medium heat. Once hot, add the mustard seeds and cumin seeds. Let them sizzle for a few seconds. This releases their lovely aroma. Next, add the finely chopped onion. Sauté it for about 5-7 minutes until it turns golden brown. The color change means the onion is ready. Now, stir in the minced garlic, grated ginger, and slit green chilies. Cook this mix for 2-3 minutes. You want the garlic to smell good but not burn. Now it’s time to add the bite-sized chicken pieces. Cook the chicken, stirring often, until it’s no longer pink. This takes about 5 minutes. Once cooked, sprinkle the turmeric powder, garam masala, and coriander powder over the chicken. Mix well to coat every piece in those bright spices. This step adds depth and warmth to your dish. Next, pour in the rinsed red lentils, diced potatoes, and diced carrot. Add the chicken stock, too. Stir everything together and raise the heat to bring it all to a boil. When it starts boiling, reduce the heat to a gentle simmer. Cover the pot and let it cook for about 25-30 minutes. Stir it once in a while. The lentils should become soft, and the chicken should be fully cooked. After cooking, taste it and add salt if needed. If you want more flavor, let it simmer for another 5 minutes. Before serving, sprinkle fresh cilantro on top for color and taste. To make your Irish Chicken Dhansak shine, always taste as you cook. Adjust the seasoning to your liking. You may want to add more salt or spices. Simmering is key. Letting the dish cook for a good 25-30 minutes helps blend the flavors. If you want a deeper taste, let it simmer a bit longer. This will make the meal rich and tasty. Choosing the right lentils matters. I recommend using red lentils for their quick cooking time. They break down nicely, giving the dish a thick texture. When cooking chicken, keep an eye on it. Cook the chicken until it is tender but not dry. This will give you a juicy bite in every spoonful. When it's time to serve, use deep bowls. This highlights the rich, hearty texture of the dish. Pair it with warm naan or fluffy rice. These sides soak up all the lovely sauce. For a finishing touch, sprinkle fresh cilantro on top. This adds color and a burst of flavor. Pro Tips Marinate for Flavor: Allowing the chicken to marinate in spices for at least 30 minutes prior to cooking can enhance the overall flavor of the dish. Use Fresh Ingredients: Fresh garlic and ginger will add a more vibrant taste than pre-minced versions, elevating the dish's aroma and flavor profile. Adjust Spice Levels: Modify the number of green chilies to control the heat level. You can also remove the seeds for a milder flavor. Let it Rest: Allowing the dhansak to sit for 10 minutes after cooking can help meld the flavors together, resulting in a richer taste. {{image_4}} You can easily make Irish Chicken Dhansak vegetarian. Instead of chicken, use vegetables or tofu. Choose hearty veggies like bell peppers, zucchini, or mushrooms. They soak up the rich flavors well. For tofu, press it to remove extra water before cooking. Cut it into cubes and add it when the chicken would go in. This change keeps the dish filling and tasty. If you like heat, adjust the green chilies. Start with two, then taste the dish. If it needs more spice, add another chili. You can also mix in extra spices. Try cayenne pepper or crushed red pepper flakes. This way, you can make it as spicy as you want. Just remember to balance heat and flavor. You can add a twist by using traditional Irish ingredients. Instead of chicken stock, use a good vegetable broth made from local veggies. You might also try adding some Irish potatoes. They add a nice texture and flavor. Finally, consider using spices that are easy to find in local markets. This makes the dish more unique while keeping it true to its roots. To keep your Irish Chicken Dhansak fresh, cover the dish well. You can use plastic wrap or a tight lid. Store it in the fridge. This will keep it safe for up to three days. Use glass or plastic containers for the best results. They help keep the flavors locked in. When it's time to eat again, there are safe ways to reheat it. You can use the microwave or a pot on the stove. If using a microwave, heat it on medium for two to three minutes. Stir halfway through to warm it evenly. If using a pot, add a splash of chicken stock or water. This helps keep the dish moist. Freezing your Irish Chicken Dhansak is easy. Allow it to cool completely before you freeze it. Portion it into containers or freezer bags. This way, you can take out just what you need. To thaw it, place it in the fridge overnight. When you're ready, reheat it using the methods mentioned above. Enjoy the tasty flavors even after freezing! Yes, you can make Irish Chicken Dhansak ahead of time. This dish stores well. Once cool, put it in an airtight container. It lasts up to three days in the fridge. When ready to eat, reheat it on the stove. Stir often to heat evenly. You can also use a microwave for quick reheating. Just add a splash of water to keep it moist. Irish Chicken Dhansak pairs nicely with various sides. Here are some great options: - Warm naan bread - Fluffy steamed rice - A fresh green salad - Spicy pickles or chutney For drinks, try a light beer or a fruity lassi. These options balance the flavors well. Cooking red lentils takes about 20 to 30 minutes. First, rinse them well under cold water. This removes any dust or debris. Add them to your pot with the chicken and other ingredients. Stir them in well. Keep an eye on them as they cook. They should be soft but not mushy. If they’re too firm, let them simmer a bit longer. In this blog post, we discussed the key ingredients for Irish Chicken Dhansak, including chicken, lentils, and spices. I outlined step-by-step cooking instructions, tips for flavor and texture, and variations for different diets. Remember, adjusting spices can make this dish your own. Proper storage and reheating keep it tasty for later meals. With these guidelines, you can easily create a satisfying and flavorful dish. Enjoy experimenting and make it a family favorite!

Irish Chicken Dhansak Delightful and Flavorful Meal

- 3 lbs beef chuck roast: This cut is perfect for slow cooking. It becomes tender and flavorful. - 4 dried guajillo peppers: These add a rich, mild heat. Remove seeds and stems for a smoother taste. - 2 dried ancho peppers: Sweet and smoky, they deepen the flavor. Like guajillos, remove seeds and stems. - 4 cloves of garlic, minced: Fresh garlic gives a great aroma and taste. Use more if you love garlic! - 1 medium onion, roughly chopped: Adds sweetness and depth. Use yellow or white onions for best results. - 2 bay leaves: These enhance the dish’s flavor. Remember to take them out before serving. - 2 teaspoons ground cumin: It brings warmth and earthiness. Freshly ground is best if you can. - 1 teaspoon dried oregano: This herb adds a nice touch. Use Mexican oregano for a more authentic flavor. - 1 teaspoon smoked paprika: It gives a subtle smokiness. Perfect for adding depth to the dish. - 1/2 teaspoon freshly ground black pepper: Freshly ground pepper has a stronger flavor. Adjust to your spice level. - 1 teaspoon salt: Season to taste. Start with this amount and adjust as needed. - 4 cups beef broth: This is the base of your cooking liquid. Use low-sodium broth for better control over salt. - 1/4 cup apple cider vinegar: It adds acidity and brightness. Balances the rich flavors of the beef. - Fresh cilantro, finely chopped: Use for garnish to add freshness and flavor. - Lime wedges: Serve on the side. The acidity brightens the dish! - Corn tortillas: These are essential for serving. They hold the birria well and add flavor. Using fresh spices makes a huge difference. Fresh herbs and spices have more flavor than dried. You can swap dried spices with fresh ones. A rule of thumb is to use three times more fresh than dried. If you need a substitute, try using chicken or vegetable broth instead of beef broth. This recipe is flexible. If you can’t find dried guajillo or ancho peppers, use chipotle peppers for a smoky kick. Just remember, cooking is about taste and creativity! {{ingredient_image_2}} First, soak the dried guajillo and ancho peppers in hot water. Let them sit for 15 to 20 minutes. This makes them soft and easier to blend. After soaking, drain the water from the peppers. Next, place the softened peppers in a blender. Add these ingredients: - 4 cloves of garlic, minced - 1 medium onion, roughly chopped - 2 teaspoons ground cumin - 1 teaspoon dried oregano - 1 teaspoon smoked paprika - 1/2 teaspoon freshly ground black pepper - 1 teaspoon salt (adjust to taste) - 1/4 cup apple cider vinegar - 1 cup beef broth Blend until smooth. This creates a vibrant marinade full of flavor. Now, set up your crockpot. Place the beef chunks inside. Pour the marinade over the beef, coating each piece well. Then, add the remaining beef broth and bay leaves. Stir gently to mix everything. Cover the crockpot with the lid. Cook on low for 8 to 10 hours or on high for 4 to 6 hours. The beef should be fork-tender when done. When the cooking time is up, carefully remove the beef chunks from the crockpot using tongs. To shred the beef, use two forks. Pull the meat apart until it is finely shredded. Return the shredded beef to the pot. Mix it back into the broth. This keeps the meat moist and flavorful. Now, it’s time to prepare the tortillas. Warm corn tortillas in a skillet over medium heat. You can also use an open flame for that perfect char. Fill each tortilla with a generous portion of birria beef. Top with fresh chopped cilantro. Serve with lime wedges on the side. Enjoy your delicious beef birria! To ensure your meat is tender and full of flavor, choose a good cut. I recommend beef chuck roast. It has fat and connective tissue that break down during cooking. This makes the beef juicy and easy to shred. - Soak the dried guajillo and ancho peppers in hot water. - Let them sit for 15-20 minutes to soften. - Blend the softened peppers with garlic, onion, and spices. This marinade adds depth. When blending spices, use whole spices when possible. They bring more flavor than pre-ground ones. Toast them lightly in a pan before blending. This step helps release their oils. For serving birria tacos, warm corn tortillas in a skillet or over an open flame. This gives them a nice char. Fill each tortilla with a generous amount of shredded beef. You can get creative by adding toppings. Try fresh cilantro, chopped onions, or radishes. Serve with lime wedges for a burst of freshness. Pair your birria with a small bowl of the rich broth for dipping. This adds an extra layer of flavor. Enjoy! Pro Tips Use Fresh Ingredients: Always opt for fresh herbs and spices to enhance the flavor of your birria. Fresh cilantro and lime can brighten up the dish significantly. Marinate Overnight: For an even deeper flavor, consider marinating the beef overnight in the blended sauce before cooking. This allows the spices to penetrate the meat. Customize Spice Level: If you prefer a spicier birria, add some jalapeños or chipotle peppers to the blender with the other ingredients for extra heat. Save the Broth: Don't discard the cooking liquid! It can be used as a rich broth for soups or as a flavorful base for other dishes, adding depth to your cooking. {{image_4}} You can change the beef cut for birria. I like using beef chuck roast, but you can try brisket or short ribs. Each cut gives a different taste and texture. If you want a lighter option, use chicken. Just adjust the cooking time. For a vegetarian or vegan twist, use jackfruit or mushrooms. These options soak up the spices well. They also give a nice texture. You can use vegetable broth instead of beef broth for flavor too. Adjusting the spice level is easy. If you like heat, add more guajillo or ancho peppers. You can also add jalapeños or chipotle peppers for extra kick. Start with small amounts and taste as you go. Get creative with the marinade! Add ingredients like orange juice or smoked chipotle powder. These can give unique flavors. You can also try different herbs, like thyme or basil, for a fresh twist. Enjoy mixing and matching! To store leftovers, place the beef birria in an airtight container. Make sure it's cool before sealing. You can keep it in the fridge for up to four days. If you want to enjoy it later, always check for any off smells or changes in color before eating. To freeze beef birria, use a freezer-safe container. Leave some space at the top since the liquid will expand. It can last up to three months in the freezer. When you’re ready to eat, thaw it overnight in the fridge. Reheat gently on the stove or in the microwave until hot. This keeps the flavors fresh and tasty. How to make Crockpot Beef Birria spicier? You can add fresh or dried chili peppers. Jalapeños or chipotle peppers work great. You can also increase the amount of black pepper or add hot sauce to the marinade. Can I cook birria on the stovetop instead? Yes, you can use a large pot. Cook on low heat for about 2-3 hours. This method helps keep the beef tender. What sides go well with Beef Birria tacos? Try serving with rice, beans, or a fresh salad. Pickled onions and radishes add a nice crunch too. How long does it take to make Beef Birria? The total time is about 9 hours. This includes 30 minutes of prep and 8-10 hours of cooking in the crockpot. Can I use fresh peppers instead of dried? Yes, fresh peppers can be used. Just adjust the amount to get the right flavor and spice level. Fresh peppers will give a different taste and texture. What's the best way to serve Beef Birria? Serve in warm corn tortillas. Add fresh cilantro and a squeeze of lime for extra flavor. Offer a small bowl of broth for dipping. This article showed you how to make delicious Beef Birria. We explored ingredients, preparation, cooking, and serving methods. We also shared tips for perfecting your dish and provided helpful storage info. Use fresh spices for the best flavor and enjoy creative serving ideas. Don't forget the cooking variations to suit your taste. With this guide in hand, you're ready to create a satisfying meal that everyone will love. Enjoy your cooking journey and share your birria with friends and family!

Crockpot Beef Birria Bold and Flavorful Dish

- 2 cups granulated sugar - 1/2 cup unsalted butter - 1/2 cup heavy cream - 1 cup pure maple syrup These main ingredients create the sweet base for your fudge. Granulated sugar adds sweetness, while unsalted butter gives richness. Heavy cream brings a creamy texture, and pure maple syrup adds that unique maple flavor. - 1 teaspoon vanilla extract - 1/2 teaspoon salt - 1/4 teaspoon ground cinnamon (optional) The flavor enhancers deepen the taste. Vanilla extract adds warmth. A pinch of salt balances the sweetness. If you choose to add cinnamon, it gives a cozy, warm touch to the fudge. - 1 cup chopped pecans (lightly toasted) Chopped pecans provide a delightful crunch. Toasting them enhances their flavor. This step adds extra depth to your fudge. You can adjust the amount based on your preference for nuts. With these ingredients, you set the stage for a rich and creamy maple pecan fudge. Each component plays a vital role in achieving that perfect bite. {{ingredient_image_2}} To start, line an 8-inch square baking dish with parchment paper. Leave some paper hanging over the edges. This helps you pull out the fudge later. Next, lightly grease the parchment paper. This step ensures your fudge comes out smoothly. In a medium-sized heavy saucepan, combine these ingredients: - 2 cups granulated sugar - 1/2 cup unsalted butter - 1/2 cup heavy cream - 1 cup pure maple syrup Stir everything together over medium heat. Keep stirring until the sugar and butter melt completely. Once melted, turn up the heat a bit. Let the mixture reach a gentle boil. Now, let it boil without stirring for about 5 to 7 minutes. Use a candy thermometer to check the temperature. You want it to reach the soft-ball stage, which is 238°F (114°C). This temperature is key for the fudge to set correctly. When the mixture hits that perfect temperature, take it off the heat. Stir in: - 1 teaspoon vanilla extract - 1/2 teaspoon salt - 1/4 teaspoon ground cinnamon (optional) Mix these in well. Then, carefully fold in 1 cup of chopped pecans. Make sure they are evenly spread throughout the mixture. Now, pour the hot fudge into your prepared baking dish. Use a spatula to smooth the top for a nice finish. Let the fudge cool at room temperature for at least 2 hours. If you’re in a hurry, you can also put it in the fridge for about an hour. Once the fudge is cool and set, lift it out of the pan using the parchment paper. Use a sharp knife to cut it into small squares or rectangles. Enjoy your homemade maple pecan fudge! To make smooth fudge, you must reach the right temperature. The soft-ball stage is key. This means boiling the mixture until it hits 238°F (114°C). Use a candy thermometer for accuracy. If you miss this, your fudge may be too soft or too hard. Common fudge-making mistakes include stirring during the boil. This can cause sugar crystals to form. Let the mixture boil without stirring. Another tip is to ensure all the sugar dissolves completely. If you see granules, your fudge might not set well. To serve your fudge elegantly, use a decorative plate. Cut the fudge into neat squares or rectangles. This makes it look appealing. You can garnish each piece with whole pecans. A light drizzle of maple syrup adds both flavor and beauty. For a festive touch, consider adding a sprinkle of cinnamon on top. It enhances the look and gives a warm aroma. Store your fudge in an airtight container. This keeps it fresh and soft. Place a piece of parchment paper between layers if you stack them. If you want to keep it longer, freezing is a great option. Wrap the fudge tightly in plastic wrap, then place it in a freezer bag. This way, it can last for up to three months. When you’re ready to enjoy, let it thaw in the fridge. Pro Tips Use a Candy Thermometer: For precision, a candy thermometer is essential in achieving the perfect soft-ball stage, ensuring your fudge has the right texture. Toast Your Pecans: Lightly toasting the pecans enhances their flavor, adding a deeper, nuttier taste to your fudge. Cool Gradually: Allow the fudge to cool at room temperature before refrigerating. This gradual cooling helps maintain the right consistency and prevents crystallization. Experiment with Flavors: Don’t hesitate to add other spices like nutmeg or cardamom for a unique twist. The optional cinnamon adds a warm finish, but you can get creative! {{image_4}} You can switch up the nuts in your fudge. Walnuts add a rich flavor, while almonds offer a nice crunch. If you want a nut-free option, try using seeds like sunflower or pumpkin. These seeds can give you the same texture without nuts. Adding different extracts can change the taste of your fudge. Use maple extract for a stronger maple flavor, or almond extract for a unique twist. You can even mix in chocolate chips to create a chocolate-maple fudge. Just fold them in before pouring the mixture into the baking dish. If you want a vegan version, replace the butter with coconut oil and the cream with coconut cream. For those watching their sugar intake, use a sugar substitute like erythritol. This keeps the fudge sweet without the calories. Adjusting the recipe makes it fit your needs while keeping it delicious. You can find amazing maple pecan fudge at local candy shops or bakeries. Look for places that make sweets from scratch. I recommend checking out small confections shops in your area. They often carry fudge made with high-quality ingredients. You might also find seasonal or unique flavors that add a nice twist. Ask the staff for their best-sellers; they usually know what's popular. If you cannot find fudge locally, many trusted websites sell high-quality fudge. Amazon has a great selection of fudge from different brands. You can also check specialty food sites like Fudge Factory or Maple Grove Farms. These retailers often provide detailed descriptions and customer reviews. Make sure to read the product reviews before buying. This way, you can find the best quality fudge. When selecting maple pecan fudge, focus on a few key factors: - Ingredients: Look for fudge made with pure maple syrup and real butter. Avoid fudge with artificial flavors or preservatives. - Texture: Good fudge should be smooth and creamy. It should not be grainy or overly hard. - Reviews: Read customer feedback to see what others think. Positive reviews can guide your choice. - Nut Quality: Check if the pecans are fresh and lightly toasted. This enhances their flavor. Pay attention to these details, and you will enjoy a delicious maple pecan fudge! To keep your maple pecan fudge fresh, wrap it in plastic wrap. Place it in an airtight container. This helps keep the fudge soft. You can also layer fudge squares with parchment paper. Avoid exposing it to air. Store it in a cool, dry place. If you want it to last longer, you can freeze it. Just be sure to wrap it well. Yes, you can use either light or dark maple syrup. Light syrup has a milder flavor. Dark syrup has a stronger, more robust taste. The choice will change the fudge's flavor. If you want a deep maple taste, go for dark syrup. For a lighter touch, use light syrup. Both options will work well in your fudge. Maple pecan fudge can last up to two weeks at room temperature. If stored properly, it stays fresh longer. In the fridge, it may last up to a month. Homemade fudge often lasts less time than store-bought. This is due to fewer preservatives. Always check for signs of spoilage, like a change in smell or texture. This blog post covered how to make delicious maple pecan fudge. We talked about key ingredients like butter, sugar, and maple syrup. I also shared tips to perfect your fudge and ideas for fun variations. The right techniques make a big difference in taste and texture. Whether you bake at home or buy fudge, use high-quality ingredients. Enjoy making this sweet treat and share it with others! You’ll impress everyone with your fudge skills.

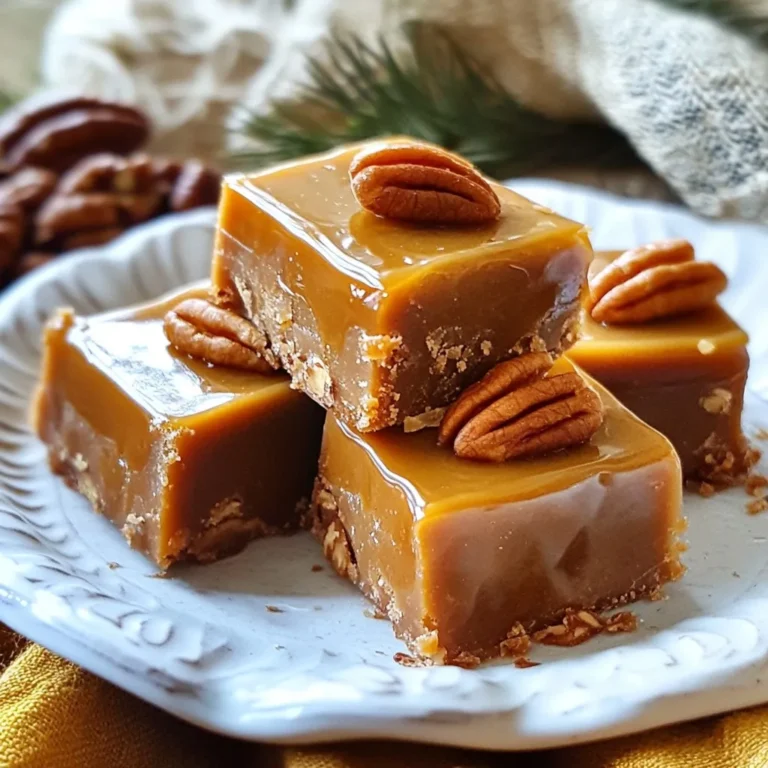
Maple Pecan Fudge Irresistible Sweet Treat Recipe

- 2 pounds Yukon Gold potatoes - 4 tablespoons unsalted butter - 1/2 cup heavy cream (or milk) - 4 cloves garlic - 1 teaspoon dried thyme - 1 teaspoon fresh rosemary - Salt and black pepper - Fresh chives When making buttery herb garlic mashed potatoes, start with high-quality ingredients. Yukon Gold potatoes shine here. Their creamy texture adds depth. Next, unsalted butter brings richness. Heavy cream adds a smooth finish. If you want a lighter version, milk works too. Garlic is a key flavor booster. Use fresh cloves for the best taste. Dried thyme and fresh rosemary bring out the earthiness. Salt and black pepper complete the dish, enhancing all the flavors. Fresh chives add a pop of color and taste as a garnish. Gather these ingredients before you start. It makes cooking easier and more enjoyable. {{ingredient_image_2}} Start by boiling the potatoes. Fill a large pot with salted water and bring it to a rolling boil. Carefully add your 2 pounds of Yukon Gold potatoes, cut into 1-inch cubes. Cook them until they are tender, about 15 to 20 minutes. To test doneness, pierce a potato with a fork. If it breaks apart easily, your potatoes are ready. While the potatoes cook, you can make the garlic butter. In a small saucepan, melt 4 tablespoons of unsalted butter over medium heat. As soon as the butter melts, add in 4 finely minced cloves of garlic. Sauté for 1 to 2 minutes. Keep stirring to prevent the garlic from burning. You want to release that amazing aroma without turning the garlic too dark. Once the potatoes are tender, drain them well. Return the drained potatoes to the pot. This helps any extra moisture steam off. Now, drizzle your freshly melted garlic butter over the warm potatoes. Be sure to scrape any garlic bits into the pot for added flavor. Next, pour in 1/2 cup of heavy cream or milk, add 1 teaspoon of dried thyme, 1 teaspoon of chopped fresh rosemary, and season with salt and pepper. Now it’s time to mash. Use a potato masher or hand mixer to mash the potatoes until they are smooth and creamy. You can adjust the texture by adding more cream for a creamier mash or less for something thicker. Once mashed, taste your potatoes and adjust seasoning with more salt or pepper if needed. Serve the mashed potatoes hot in a warm, deep bowl. Create a small well in the center of the potatoes to hold a dab of melting butter. Don’t forget to sprinkle fresh chives on top for a burst of color and flavor. This simple touch makes your dish look fancy and inviting! To get the best mashed potatoes, you need the right tools. I recommend using a sturdy potato masher. A hand mixer also works well, but don’t overmix. This can make the potatoes gummy. When it comes to cream, adjust it for your desired thickness. If you like creamier potatoes, add more cream. For thicker mash, use less. To make your mashed potatoes sing with flavor, infuse the herbs deeply. You can do this by adding the thyme and rosemary while the potatoes cook. This releases their oils and gives a richer taste. Avoid burning the garlic! Sauté it for only 1-2 minutes. Stir it constantly to keep it from turning bitter. Presentation matters! Serve your mashed potatoes in a warm bowl. Create a small well in the center. Place a pat of butter there to melt. Add a sprinkle of fresh chives on top for color and flavor. This not only looks great but also adds a fresh touch. Pro Tips Use Yukon Gold Potatoes: Their creamy texture makes for the best mashed potatoes, delivering a rich and buttery flavor. Don't Overmix: Overmixing can make the potatoes gluey. Mash just until smooth for the perfect consistency. Infuse Your Butter: Consider infusing the butter with herbs beforehand to enhance the flavor profile of your mashed potatoes. Warm Your Cream: Warm the cream before adding it to the potatoes to keep everything hot and achieve a silky smooth texture. {{image_4}} You can make Buttery Herb Garlic Mashed Potatoes lighter. One way is to substitute heavy cream with milk. This change reduces fat while keeping the taste rich. You still get a creamy texture, just with fewer calories. Another option is to use low-sodium butter. This swap helps control your salt intake. You can enjoy the same buttery flavor without the extra sodium. Feel free to mix in different herbs to boost flavor. Parsley or sage can add new notes to your mash. These herbs bring freshness and a unique twist to the classic recipe. You can also add other ingredients for creaminess. Cream cheese or sour cream work well. They add richness and a slight tang that makes each bite more interesting. To enhance your meal, pair these mashed potatoes with great side dishes. Roasted vegetables or a crisp salad can balance the creaminess. They also add color to your plate. For main dishes, try serving with grilled chicken or beef. The savory flavors of the meat complement the buttery mashed potatoes. These pairings create a satisfying meal that everyone will enjoy. To keep your buttery herb garlic mashed potatoes fresh, store them properly. - Refrigeration tips: Place the leftovers in an airtight container. They will stay good for 3 to 5 days in the fridge. Make sure to cool them down before sealing. This helps avoid steam buildup, which can make them soggy. - Freezing guidelines: If you want to save them longer, you can freeze the mashed potatoes. Use a freezer-safe container or a heavy-duty freezer bag. They can last up to 2 months in the freezer. When you’re ready to use them, thaw in the fridge overnight. When it’s time to enjoy your leftovers, reheating them right is key to keeping their tasty texture. - Methods for best texture retention: The best way to reheat mashed potatoes is on the stove. Heat them in a pot over low heat. Stir gently and add a little cream or milk to keep them creamy. You can also use a microwave, but cover the bowl with a lid or wrap to keep the moisture in. - Tips for reviving flavor: To boost the flavor, mix in a little fresh butter or herbs while reheating. This will bring back some of that delicious taste and aroma. Don’t forget to season with a pinch of salt if needed. To make sure your mashed potatoes are creamy, use Yukon Gold potatoes. They have a buttery texture. Boil them until tender, about 15-20 minutes. Drain them well to remove extra water. Add warm heavy cream or milk gradually. This helps keep them smooth. Use a potato masher or hand mixer to achieve your desired texture. If they seem thick, add more cream. Always taste and adjust seasoning with salt and pepper. Yes, you can make these mashed potatoes ahead of time. Prepare the dish as directed and cool it quickly. Store them in an airtight container in the fridge for up to three days. When ready to serve, reheat gently on the stove. Add a bit of cream to keep them creamy. Stir often to prevent sticking. You can also microwave them in short intervals, stirring in between. Buttery Herb Garlic Mashed Potatoes pair well with many sides. Try them with roasted chicken or beef stew. They also go great with grilled vegetables or a fresh salad. For a holiday meal, serve them alongside turkey and gravy. These mashed potatoes complement almost any main dish. Yes, you can substitute Yukon Gold potatoes. Russet potatoes are a good choice, too. They are starchy and fluffy when mashed. However, they may lack some creaminess. Red potatoes can also work, but they are waxy and may yield a thicker mash. Experiment with different types to find your favorite flavor and texture! Buttery herb garlic mashed potatoes bring comfort to any meal. We detailed key ingredients like Yukon Gold potatoes, garlic, and herbs. We shared step-by-step instructions for perfect preparation. You learned tips for texture, flavor, and presentation. In conclusion, this dish is easy to customize. Enjoy experimenting with different herbs or cream options. With these techniques, your mashed potatoes will shine at every dinner.

Buttery Herb Garlic Mashed Potatoes Irresistible Recipe

You need 1 pound of fresh asparagus. Look for bright green spears. They should feel firm and snap easily. Trim the ends so they cook evenly. Fresh asparagus gives the best taste. Use 3 tablespoons of high-quality olive oil. It adds a rich flavor to the dish. Next, take 3 cloves of garlic and mince them finely. Garlic gives the dish a nice kick. Mix them together to create a tasty base for the asparagus. You will need the zest and juice from 1 medium lemon. This adds a fresh, zesty taste. If you want a hint of sweetness, add 1 teaspoon of honey or maple syrup. This step is optional, but it can balance the flavors nicely. {{ingredient_image_2}} First, preheat your oven to 400°F (200°C). This step is key for roasting. Next, grab a large mixing bowl. Pour in 3 tablespoons of high-quality olive oil. Add 3 cloves of finely minced garlic. Then, zest one fresh lemon and add that too. Squeeze the juice from one medium lemon into the bowl. If you want some sweetness, a teaspoon of honey or maple syrup works well. Whisk these ingredients until they blend nicely. Now, take 1 pound of trimmed asparagus spears. Add them to your bowl with the lemon-garlic mix. Gently toss them around. Make sure each spear gets a good coat of flavor. This step really helps the asparagus absorb all those tasty notes. Prepare a large baking sheet by lining it with parchment paper. Spread the coated asparagus in one even layer. Ensure none of the spears overlap; this helps them roast evenly. Season with a pinch of sea salt and freshly cracked black pepper for added flavor. Place the baking sheet in your preheated oven. Roast for about 12 to 15 minutes. You want the asparagus to become tender and slightly caramelized. If you like, sprinkle 2 tablespoons of finely grated Parmesan cheese over the asparagus during the last 3 minutes. This gives a nice cheesy finish. When they’re done, transfer the asparagus to a serving platter. Garnish with lemon wedges for a bright touch. When picking asparagus, look for bright green color. The tips should be tightly closed. Avoid spears that are limp or brown. Fresh asparagus is firm and crisp. You want spears around the same thickness. This helps them cook evenly. If they are too thin, they may overcook. To get that lovely caramelization, keep space between the spears. They should not touch each other on the baking sheet. This allows hot air to flow around them. Roast at 400°F for 12 to 15 minutes. Check for tenderness with a fork. If they are bright green and tender, they're ready. Use sea salt and freshly cracked black pepper for the best taste. They bring out the natural flavors of the asparagus. If you like a bit of sweetness, add honey or maple syrup. This adds a nice balance to the dish. For extra depth, sprinkle Parmesan cheese in the last few minutes of roasting. It adds a rich, savory touch. Pro Tips Choose Fresh Asparagus: Select bright green asparagus with firm stems and closed tips for the best flavor and texture. Adjust Roasting Time: Depending on the thickness of your asparagus, you may need to adjust the roasting time for perfect tenderness. Enhance Flavors: Experiment with adding a pinch of red pepper flakes for a spicy kick or a splash of balsamic vinegar for depth. Serve Immediately: Asparagus is best served right after roasting when it's at its peak crispness and flavor. {{image_4}} Cheese can elevate the taste of lemon garlic asparagus. I love using Parmesan, which adds a nutty flavor. Just sprinkle it on during the last few minutes of roasting. For a creamier twist, try goat cheese. Its tanginess pairs well with the lemon. You can also use feta for a salty kick. Each cheese brings a new taste to the dish. Mixing in other veggies can create a colorful and tasty dish. Consider adding cherry tomatoes for a burst of sweetness. Baby carrots add crunch and vibrant color. Bell peppers can bring a sweet flavor and a pop of color. You can roast these veggies alongside the asparagus. Just adjust the cooking time if needed, so everything cooks evenly. Herbs and spices can turn this dish into something special. Fresh herbs like thyme or basil add a fresh taste. You can sprinkle them on before serving for a bright finish. If you want some heat, add a pinch of red pepper flakes. A dash of smoked paprika can give a warm flavor. Experiment with your favorites to make this dish your own! If you have leftover lemon garlic asparagus, store it in the fridge. Place it in an airtight container. This keeps the asparagus fresh for up to three days. Avoid leaving it out at room temperature, as this can spoil the dish. To reheat the asparagus, use the oven or stovetop. Preheat your oven to 350°F (175°C). Spread the asparagus on a baking sheet and heat for about 5-10 minutes. On the stovetop, add a splash of olive oil to a pan. Heat over medium heat, then add the asparagus. Stir it gently for 3-5 minutes until warmed through. Freezing lemon garlic asparagus is an option, but it may change the texture. To freeze, blanch the asparagus first. Boil it for 2-3 minutes, then plunge it into ice water. Drain and dry the spears. Place them in a freezer bag, removing as much air as possible. They can last for up to 3 months in the freezer. When ready to use, thaw in the fridge overnight before reheating. Yes, you can use frozen asparagus. It is a great option when fresh is not available. Just keep in mind that frozen asparagus can be softer after cooking. You may need to adjust the roasting time. Check for tenderness around the 8-10 minute mark. This way, you avoid overcooking. You can tell when asparagus is done by its color and feel. Look for a bright green color. The asparagus should be tender but still crisp. You can test it by piercing a spear with a fork. If it goes through easily, it is ready. Usually, roasting for 12-15 minutes at 400°F works well. Lemon garlic asparagus pairs well with many dishes. Here are some ideas: - Grilled chicken or fish - Quinoa or rice - Pasta with light sauce - A fresh salad - Steak or pork chops These options create a balanced meal that everyone will enjoy. Roasting asparagus is simple and fun. We covered fresh ingredients like asparagus, olive oil, garlic, and lemon. You learned step-by-step methods for preparing and cooking it perfectly. Tips on picking fresh asparagus and creative variations add flavor joy. Remember, store leftovers well and reheat them easily. Don’t hesitate to try frozen asparagus if fresh is out of reach. This dish pairs nicely with many meals. Enjoy every tasty bite!

Lemon Garlic Asparagus Flavorful Side Dish Recipe

- 1.5 lbs boneless, skinless chicken breasts - 1 medium onion, finely diced - 3 cloves garlic, minced - 1 red bell pepper, finely diced - 1 can (14 oz) diced tomatoes with green chilies - 1 can (15 oz) black beans, drained and rinsed - 4 cups chicken broth - 1 cup corn (frozen or canned) - 2 teaspoons ground cumin - 1 teaspoon chili powder - 1 teaspoon smoked paprika - Salt and pepper to taste - 2 tablespoons olive oil - Fresh cilantro, roughly chopped - Crispy tortilla strips - 1 ripe avocado, sliced - Lime wedges If you don’t have chicken breasts, use thighs. They stay juicy and tender. You can swap black beans for pinto beans or chickpeas. Both work well. If you want a milder soup, leave out the chili powder. Use bell peppers instead. For a fresh twist, try adding lime juice or fresh herbs like parsley. If you want to skip the broth, water works too. Just add more spices for flavor. {{ingredient_image_2}} First, get your Instant Pot ready. Press the Sauté button. When it shows "Hot," add 2 tablespoons of olive oil. Let it heat for a moment. This step is key to building flavor. Next, add 1 medium diced onion and 1 finely diced red bell pepper. Sauté for about 3 to 4 minutes. Stir occasionally until they soften. Then, add 3 minced garlic cloves. Cook for another minute. You want the garlic to smell great and turn golden. Now, it’s time for the chicken. Place 1.5 lbs of boneless, skinless chicken breasts in the pot. Sprinkle in 2 teaspoons of ground cumin, 1 teaspoon of chili powder, 1 teaspoon of smoked paprika, and some salt and pepper. Stir well to coat the chicken and veggies in those spices. Pour in 1 can of diced tomatoes with green chilies, 1 can of black beans (drained and rinsed), 1 cup of corn, and 4 cups of chicken broth. Mix everything together. Now, secure the lid. Set the steam release valve to sealing. Choose the Manual or Pressure Cook setting, and set the timer for 10 minutes. When the timer goes off, let the pressure release naturally for 10 minutes. After that, carefully turn the valve to venting to release any remaining pressure. Remove the lid. Take the chicken out and place it on a cutting board. Use two forks to shred the chicken into bite-sized pieces. Return the chicken to the pot and stir well. Ladle the warm soup into bowls. Top each bowl with crispy tortilla strips, a handful of fresh cilantro, and slices of avocado. Squeeze some fresh lime juice over the top to brighten the flavors. Enjoy your spicy chicken tortilla soup! To boost flavor, always start with fresh ingredients. Fresh onions, peppers, and garlic make a big difference. Sauté them well to release their natural sweetness. Add spices like cumin and smoked paprika early. This helps their flavors bloom. Don't forget to use good-quality chicken broth. It adds depth and richness. Garnish your soup with fresh cilantro and lime. This adds brightness and freshness to every bowl. If you want a milder soup, use less chili powder. You can leave out the diced tomatoes with green chilies too. For a spicier kick, add jalapeños or more chili powder. Taste as you go. This way, you can find the perfect spice level for your family. Remember, you can always add more heat, but it’s hard to take it away! To make your soup creamy, add a splash of heavy cream or coconut milk. Stir it in just before serving. You can also blend some of the soup with an immersion blender. This will give it a smooth texture. Another option is to top it with sour cream or Greek yogurt. These toppings add creaminess and a nice tang. Pro Tips Perfectly Shredded Chicken: For the best texture, let the chicken cool for a few minutes before shredding. This makes it easier to handle and prevents it from becoming too stringy. Customize the Heat: Adjust the spice level by adding more chili powder or diced jalapeños if you prefer a spicier soup. You can also offer sliced jalapeños as a garnish for guests to add to their bowls. Fresh Ingredients Matter: Using fresh herbs and high-quality broth can significantly enhance the flavor of your soup. Consider homemade chicken broth for a richer taste. Make-Ahead Tips: This soup stores well in the refrigerator for up to 3 days. You can also freeze it for up to 2 months. Just be sure to add the crispy tortilla strips fresh when serving. {{image_4}} If you want a meat-free soup, swap the chicken for beans. Use extra black beans or add pinto beans. You can also use tofu for protein and texture. Just be sure to press and cube the tofu before adding. This will give you a hearty soup that is still packed with flavor. You can boost the nutrition by adding more veggies. Consider carrots, zucchini, or spinach. Dice them small so they cook well in the Instant Pot. Add them when you combine the broth and beans. This way, they will cook evenly and soak up all the spices. Want more heat? Add fresh jalapeños or serrano peppers. Dice them finely and sauté them with the onions. You can also include a dash of cayenne pepper or hot sauce if you like. Just keep tasting as you go to find the right level of spice for you. To keep your chicken tortilla soup fresh, let it cool first. Once cool, use an airtight container to store the soup. This helps prevent spills and keeps it tasty. You can store it in the fridge for up to three days. If you want to save it longer, freezing is a great option. When you're ready to enjoy the soup again, heat it on the stove or in the microwave. If using the stove, pour the soup into a pot and heat it over medium heat. Stir often until hot. For the microwave, place the soup in a microwave-safe bowl and heat for one to two minutes. Stir, then check the temperature. Make sure it is hot throughout before serving. To freeze your chicken tortilla soup, use freezer-safe containers or zip-top bags. If using bags, lay them flat in the freezer for easy storage. The soup will be good for up to three months in the freezer. When ready to eat, thaw it in the fridge overnight before reheating. This way, you can enjoy a warm bowl of soup anytime! Yes, you can use frozen chicken. Just add a few extra minutes to the cook time. This method keeps the chicken moist and tender. When using frozen chicken, ensure to place it in the pot without thawing. To reduce the spice, use mild diced tomatoes without green chilies. You can also cut back on chili powder and smoked paprika. Adding more corn or a dollop of sour cream helps balance the heat too. This soup pairs well with various sides. Here are some ideas: - Warm tortilla chips - Mexican rice - Fresh salad - Creamy guacamole - Sliced jalapeños for those who want extra spice Yes, you can adapt this for a slow cooker. Cook on low for 6-8 hours or high for 3-4 hours. Sauté the veggies and spices in a pan first for better flavor. Add everything else to the slow cooker, and enjoy the slow-cooked goodness! In this article, we explored making Instant Pot Chicken Tortilla Soup. We covered key ingredients and optional toppings for a great flavor. We shared easy steps to prepare the soup and tips to enhance its taste. You can even find variations to suit your needs, plus storage tips for leftovers. Keep these ideas in mind for your next meal. Enjoy a warm bowl and make it your own. Your kitchen will love this recipe as much as you do!

Instant Pot Chicken Tortilla Soup Simple and Fast

To make these tasty bagel chips, you need: - 2 everything bagels (fresh or slightly stale) - 2 tablespoons extra-virgin olive oil - 1 teaspoon garlic powder - 1 teaspoon onion powder - 1 teaspoon poppy seeds - 1 teaspoon sesame seeds - 1 teaspoon dried oregano - 1 teaspoon coarse sea salt Each ingredient plays a role in flavor. The everything bagels give the chips their signature taste. Olive oil adds richness and helps the spices stick. Garlic and onion powders bring a savory note. You can switch things up! Here are some ideas: - Use flavored olive oils, like chili or herb-infused. - Add crushed red pepper for heat. - Try different herbs, like thyme or basil. - Swap sea salt for smoked salt for a unique twist. These options let you customize your chips. Experimenting adds fun to the cooking process! Not all bagels are the same. Here are my top picks: - New York-style bagels: They have the perfect chew and crust. - Local bakeries: Fresh bagels from local shops often taste better. - Whole grain bagels: For a healthier option, try these. Choosing quality bagels makes a big difference. Go for brands that focus on fresh ingredients and traditional methods. This will give you the best flavor for your chips! {{ingredient_image_2}} Set your air fryer to 300°F (150°C) to preheat. Preheating helps your bagel chips cook evenly. This step is key for achieving the right crunch. Grab two everything bagels. Use a sharp knife to slice each bagel into thin rounds. Aim for slices about 1/4 inch thick. Keeping the thickness uniform helps them cook at the same rate. In a medium bowl, mix together 2 tablespoons of olive oil, 1 teaspoon of garlic powder, 1 teaspoon of onion powder, 1 teaspoon of poppy seeds, 1 teaspoon of sesame seeds, 1 teaspoon of dried oregano, and 1 teaspoon of coarse sea salt. Whisk until well blended. This mix gives the chips a tasty flavor. Add the sliced bagels to your bowl of oil mix. Toss them gently but thoroughly. Make sure every slice gets an even coating. This ensures each chip is packed with flavor. Place the bagel slices in a single layer in the air fryer basket. Avoid overcrowding; this lets air flow freely. If needed, cook in batches. This ensures they crisp up nicely. Cook the bagel chips for about 8-10 minutes. At the halfway mark, pause and shake the basket. Flip the chips to help them cook evenly. This step is important for that perfect crunch. Once the chips are golden brown, carefully remove them from the air fryer. Place them on a wire rack to cool completely. This cooling step is crucial for extra crispiness. If you have more bagel slices, repeat the last steps until all are cooked. Serve your Everything Bagel Chips as a tasty snack. Pair them with your favorite dip for an even better treat! To get the best crunch, follow a few simple steps. First, slice the bagels thin, about 1/4 inch thick. This helps them cook evenly. Next, preheat your air fryer to 300°F (150°C). Preheating lets the chips crisp up right away. Lastly, let the chips cool on a wire rack after cooking. This step keeps them crispy longer. Avoid overcrowding the air fryer basket. If you pile the bagel slices, they won’t cook evenly. Cook in batches if needed. Another mistake is skipping the shaking step. Shaking the basket halfway through helps to brown both sides. Lastly, don’t skip the cooling process. This final step makes all the difference in crunchiness. You can change the flavors to suit your taste. Add more garlic or onion powder for a bolder taste. If you love heat, sprinkle in some red pepper flakes. For a twist, try adding herbs like thyme or rosemary. You can also experiment with different seeds, such as flaxseeds or chia seeds. Mix and match to find your perfect flavor! Pro Tips Slice Evenly: Ensure that your bagel slices are uniform in thickness to promote even cooking and crispiness throughout. Experiment with Seasonings: Feel free to customize the seasoning blend by adding other spices or herbs that you enjoy, such as smoked paprika or Italian seasoning. Monitor Cooking Time: Keep an eye on the chips as they cook, as the air fryer can vary in temperature. Adjust the cooking time as needed for your desired level of crunch. Storage Tips: Store any leftovers in an airtight container to maintain their crispness, but they are best enjoyed fresh. {{image_4}} You can make your bagel chips sweet too! Try adding cinnamon and sugar. Mix one tablespoon of sugar with a teaspoon of cinnamon. Coat your bagel slices with this blend instead of the savory mix. The sweet chips taste great with cream cheese or yogurt. Savory chips work well with dips like hummus or guacamole. If you need gluten-free bagel chips, use gluten-free bagels. Many stores offer gluten-free varieties now. Look for ones made with almond or coconut flour. Just follow the same steps with your gluten-free bagels. You still get the crunch and flavor without the gluten. Don’t limit yourself to just everything bagels. Experiment with different flavors! Onion, garlic, or sesame bagels make great chips. You can even try a cheddar bagel for a cheesy twist. Each flavor gives the chips a new taste. Mix and match flavors to find your favorite! To keep your bagel chips fresh and crunchy, store them in an airtight container. This helps prevent moisture from making them soft. You can use a glass jar or a resealable plastic bag. If you have a lot, consider layering them with parchment paper. This keeps them from sticking together. If your bagel chips lose their crispness, you can easily revive them. Preheat your air fryer to 300°F (150°C). Place the chips in the basket in a single layer. Heat for about 2-3 minutes. This quick method restores their crunch without drying them out. Homemade bagel chips can last about one week when stored properly. After that, they may start to lose their texture and flavor. If you want to keep them longer, consider freezing them. Place them in a freezer-safe container or bag. They can last up to three months in the freezer. When ready to eat, just reheat them in the air fryer. The best temperature is 300°F. This low heat allows the bagel chips to cook evenly. It helps them get crispy without burning. These bagel chips last about one week when stored in an airtight container. Keep them in a cool, dry place. For the best taste, eat them sooner. Yes, you can. Preheat your oven to 350°F. Spread the bagel slices on a baking sheet. Bake for 10 to 12 minutes, flipping halfway through. Not at all! Fresh bagels work fine. Stale bagels might be crispier, but fresh ones taste great too. Just slice them thinly for best results. These chips go well with many dips. Try creamy spinach-artichoke dip, tzatziki, or hummus. Each dip adds a nice flavor contrast to the crunchy chips. Enjoy exploring different pairings! You now know how to make delicious air fryer everything bagel chips. We covered key ingredients, step-by-step instructions, and tips for crispy results. You can even try sweet or savory variations. Remember, proper storage helps maintain freshness. Feel free to customize your seasonings to match your taste. Enjoy dipping your bagel chips in your favorite spreads. With this guide, you can create tasty snacks anytime. Happy cooking!

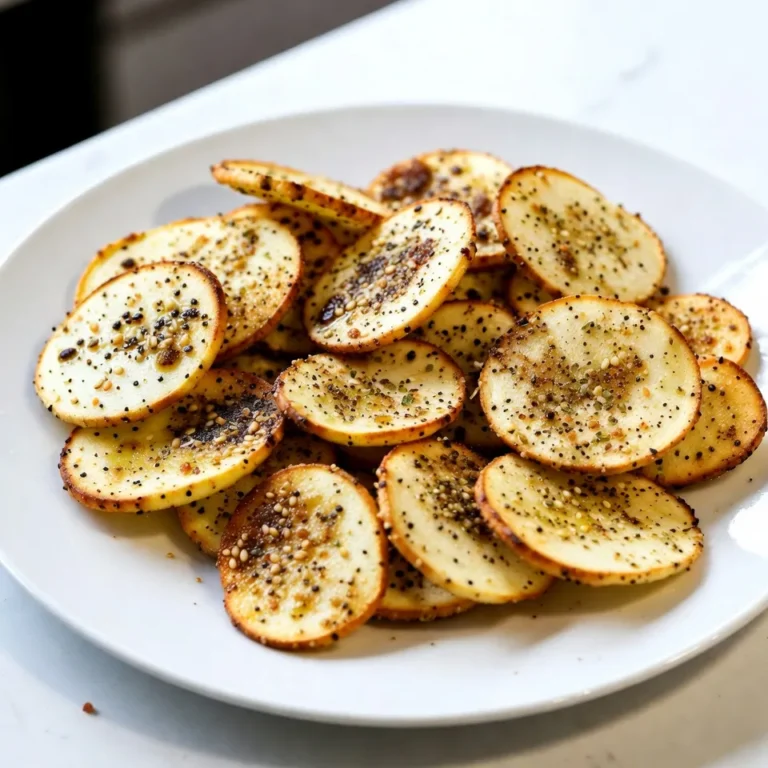
Air Fryer Everything Bagel Chips Crunchy Snack Recipe

- 2 cans (15 oz each) chickpeas, drained and rinsed - 1 medium onion, diced - 2 cloves garlic, minced - 2 carrots, chopped into bite-sized pieces - 2 celery stalks, chopped - 1 can (14 oz) diced tomatoes, including their juice - 4 cups vegetable broth - 1 teaspoon dried oregano - 1 teaspoon dried thyme - 1 teaspoon smoked paprika - 1 bay leaf - 2 cups fresh spinach, roughly chopped - 2 tablespoons extra virgin olive oil - Salt and black pepper to taste - Fresh parsley, finely chopped (for garnish) The main ingredients in Tuscan Chickpea Soup pack a punch. Canned chickpeas offer protein and fiber. Fresh vegetables like onions, carrots, and celery add crunch and flavor. Diced tomatoes bring acidity and depth. Spices and herbs, like oregano and thyme, make it aromatic. Smoked paprika gives a warm, smoky touch. Spinach adds color and nutrition. - Large pot - Wooden spoon - Measuring cups and spoons To cook this soup, you need a few tools. A large pot lets you sauté and simmer. A wooden spoon helps stir without scratching your pot. Measuring cups and spoons ensure the right amounts. Having these tools makes cooking easy and fun! {{ingredient_image_2}} To start, heat 2 tablespoons of extra virgin olive oil in a large pot over medium heat. Once the oil is warm, add 1 medium diced onion. Sauté for about 5 minutes. You want the onion soft and translucent. Next, add 2 minced garlic cloves to the pot. Cook for about 1 minute. The garlic will give off a wonderful aroma. Now, add 2 chopped carrots and 2 chopped celery stalks. Stir them occasionally for 5 to 7 minutes. The veggies should be tender but still have some crunch. Once your veggies are ready, it's time to bring in the stars of the dish. Add 2 cans of rinsed chickpeas and 1 can of diced tomatoes (with their juice) to the pot. This is where the magic begins! Pour in 4 cups of vegetable broth. Then, add 1 teaspoon each of dried oregano, dried thyme, and smoked paprika. Don’t forget 1 bay leaf for extra flavor. Stir everything together until well mixed. Next, increase the heat to a gentle boil. Once boiling, reduce the heat to low. Cover the pot and let it simmer for 20 minutes. This allows the flavors to mix and become delicious! After 20 minutes, stir in 2 cups of roughly chopped fresh spinach. Cook for another 5 minutes until the spinach is wilted and bright green. Finally, remove the bay leaf and season your soup with salt and black pepper to taste. Enjoy your warm, nourishing Tuscan Chickpea Soup! To boost the taste of your Tuscan chickpea soup, adjust the seasoning. Add more salt or pepper as needed. You can also sprinkle in a bit of lemon juice for brightness. Simmering is key to melding flavors. Cook the soup longer if the taste feels flat. Let it bubble gently for at least 20 minutes. To keep your veggies from getting mushy, cut them into even pieces. This helps them cook at the same rate. Stir the soup gently but often. This ensures all ingredients heat evenly. If you want a thicker soup, mash some chickpeas with a fork. This adds body without losing texture. Pro Tips Use Fresh Herbs: Fresh herbs like basil or thyme can elevate the flavor profile of the soup. Add them just before serving for a burst of freshness. Adjust Seasoning: Always taste your dish before serving. Adjust salt and pepper to match your preference, as different broths can vary in sodium levels. Blend for Creaminess: For a creamier texture, blend a portion of the soup with an immersion blender and mix it back in. This adds richness without needing cream. Make it Hearty: Feel free to add other vegetables such as zucchini or potatoes to make the soup even heartier. Just adjust the cooking time accordingly. {{image_4}} You can change up the beans in this soup. If you want, use black beans or white beans. Both add great taste and texture. You can even try lentils for a twist. Next, consider different vegetables. Zucchini adds a nice crunch. You can also use bell peppers or kale. Think of what you have in your fridge. This soup is flexible and fun! If you're vegan, this soup is perfect! It’s already plant-based. Just ensure your broth is vegan too. You can also add more veggies for extra nutrients. For gluten-free options, check your broth label. Most vegetable broths are gluten-free. This soup is naturally gluten-free, so you can enjoy it worry-free. Just make sure to use gluten-free bread if you serve it with a side. Enjoy your meal without any worries! To keep your Tuscan Chickpea Soup fresh, use airtight containers. Glass or plastic containers work well. Store the soup in the fridge for up to five days. Make sure it cools before sealing the container. This helps keep the soup tasty and safe. To freeze your soup, let it cool completely. Then, pour it into freezer-safe bags or containers. Leave some space at the top for expansion. The soup freezes well for up to three months. When you want to eat it, take it out of the freezer. Thaw it in the fridge overnight or use the microwave. To reheat, warm it on the stove over low heat. Stir it often to keep it from sticking. Enjoy your soup again with all its great flavors! To make this soup vegan, simply choose vegetable broth. All the other ingredients are already plant-based. Use olive oil for cooking instead of butter. This way, you keep it tasty and vegan-friendly. You can enjoy a warm bowl without any animal products. Yes, you can use dried chickpeas. Start by soaking them overnight. This helps them soften. Cook them in water until they are tender. It may take 1 to 2 hours. Once cooked, you can add them to the soup. This adds extra texture and flavor. Tuscan Chickpea Soup pairs well with crusty bread. You can also serve it with a fresh salad. A sprinkle of lemon juice adds brightness. For a special touch, drizzle olive oil on top. This makes your meal feel extra special. Enjoy every bite! This blog post covered how to make a tasty Tuscan chickpea soup. We discussed key ingredients like canned chickpeas, fresh veggies, and flavorful spices. You learned essential cooking tools and step-by-step cooking methods, from sautéing to simmering. I shared helpful tips to enhance flavor and avoid mushy veggies. You can even explore ingredient substitutions for different diets. Remember to store your soup properly to keep it fresh. Try this recipe for a warm, satisfying dish on any day. Enjoy your cooking adventure!

Tuscan Chickpea Soup Flavorful and Nourishing Dish

PREV 1 … 37 38 39 … 47 NEXT
snack joy kitchen

explore

DessertsDinnerAppetizersDrinks

Our Policies

  • Cookie Policy
  • Copyright Policy
  • Disclaimer
  • GDPR Policy
  • Terms Of Use
Back to Top
  • About
  • Contact Us
  • Privacy Policy
© 2026 snack joy kitchen