FREE DINNER EBOOK! Get your copy!
  • Cookie Policy
  • GDPR Policy
  • Disclaimer
  • Terms Of Use
  • Visit my other site: Fun Cookie Recipes
snack joy kitchen
  • Home
  • Dinner
  • Desserts
  • Drinks
  • Appetizers
  • Contact
  • About
  • Privacy Policy
  • Home
  • Dinner
  • Desserts
  • Drinks
  • Appetizers
  • Contact
  • About
  • Privacy Policy
  • Cookie Policy
  • GDPR Policy
  • Disclaimer
  • Terms Of Use
Visit my other site: Fun Cookie Recipes

HOME / CATEGORIES /

Latest

To craft the perfect Hocus Pocus Latte, gather these simple, fresh ingredients: - 1 cup freshly brewed espresso or strong coffee - 1 cup milk (choose dairy or a dairy-free option like almond, oat, or coconut milk) - 2 tablespoons pumpkin puree (make sure it is pure pumpkin, not pie filling) - 1 tablespoon maple syrup or honey (adjust to fit your sweetness level) - 1/2 teaspoon pumpkin pie spice (plus extra for garnish) - Whipped cream (use homemade or store-bought for topping) - A pinch of extra pumpkin pie spice (for garnish) Each ingredient plays a key role in making this drink cozy and delightful. Freshly brewed coffee gives it a strong base. Choose your milk wisely, as it will add creaminess. Pumpkin puree provides that essential fall flavor. Sweeteners balance the flavors, while pumpkin pie spice brings warmth and spice. Finally, whipped cream and a sprinkle of extra spice make the drink look inviting. {{ingredient_image_2}} Start by pouring one cup of milk into a small saucepan. I like to use almond milk for a nutty taste. Add two tablespoons of pumpkin puree. Whisk the mix over medium heat. Heat until it blends smoothly in about 2-3 minutes. Be careful not to boil it. Once your milk and pumpkin are well mixed, it’s time to add flavor! Stir in one tablespoon of maple syrup. Use honey if you prefer that taste. Next, add half a teaspoon of pumpkin pie spice. This spice gives a warm kick. Heat it for another minute while stirring. This helps the flavors blend completely. While your pumpkin milk warms, brew one cup of espresso or strong coffee. I suggest using a good quality coffee for the best flavor. Brew it right into a large mug. This will be the base for your latte. After heating, froth the pumpkin milk mixture. You can use an electric frother or a whisk. Froth until it feels creamy and fluffy. This should take about 1-2 minutes. The froth adds a nice texture to your latte. Now, it’s time to bring it all together. Slowly pour the frothy pumpkin milk over your brewed coffee. Pour gently to show off the layers. This makes your drink look extra special. Top your latte with a generous dollop of whipped cream. This adds a rich layer of flavor. Next, sprinkle a pinch of extra pumpkin pie spice on top. For a fun detail, add a colorful straw or a cinnamon stick. These little touches make it more festive. When making a Hocus Pocus Latte, I prefer using freshly brewed espresso. Strong coffee works well too. The rich flavor of espresso pairs best with the creamy pumpkin milk. Choose a coffee that you enjoy, as it will shine through in your drink. A medium or dark roast gives a bold taste that balances the spices. You can use any milk you like. Almond, oat, and coconut milk are great choices. Almond milk has a nice nutty flavor. Oat milk is creamy and froths well. Coconut milk adds a subtle sweetness. If you want a richer taste, try whole milk. Always heat the milk gently to prevent burning. Sweetness can vary based on your taste. I recommend starting with one tablespoon of maple syrup or honey. You can add more if you like it sweeter. For the spice, half a teaspoon of pumpkin pie spice gives a nice kick. If you love spices, feel free to add more. Taste as you go to find the right balance. A well-presented latte can impress anyone. Pour the frothy pumpkin milk slowly to create a layered effect. Top it with a generous swirl of whipped cream. A sprinkle of pumpkin pie spice adds a lovely touch. For extra flair, use a colorful straw or a cinnamon stick. These small details make your latte feel special. Pro Tips Choose Your Coffee Wisely: A good quality espresso or strong coffee will significantly enhance the flavor of your latte. Opt for freshly brewed coffee for the best results. Perfect Pumpkin Puree: Use pure pumpkin puree instead of pumpkin pie filling to avoid unwanted sugars and spices. This ensures that the flavor is rich and authentic. Frothing Techniques: If you don’t have a frother, you can froth milk by shaking it in a jar or using a whisk. Just make sure to warm the milk first for the best froth. Garnish for Impact: Don't skip the whipped cream and pumpkin pie spice garnish. They not only add flavor but also make your drink visually appealing and festive. {{image_4}} You can easily make a vegan version. Use almond, oat, or coconut milk instead of dairy milk. This option still tastes creamy and rich. The pumpkin flavor shines through just as well. You will enjoy the same cozy feel without animal products. When sweetening, stick to maple syrup or agave. Both are great vegan choices. Want to cool down? Try an iced version! Brew your espresso or coffee and let it chill. Prepare the pumpkin milk mixture as before, but serve it cold. Pour the pumpkin milk over ice. This drink is perfect for warm fall days. You can add whipped cream on top for a special touch. For a kick, make a spicy version. Add a pinch of cayenne pepper to your pumpkin milk mixture. This will give it a warm, spicy twist. You can also use cinnamon for extra flavor. Just a dash will add warmth without overpowering the pumpkin. This version is great for those who love bold flavors. You might have leftover pumpkin puree after making your latte. To store it, place the unused puree in an airtight container. Keep it in the fridge. It will stay fresh for up to a week. For longer storage, freeze it in small portions. Use ice cube trays for easy measuring later. Label the container with the date. This way, you’ll know how long it’s been stored. If you have leftover Hocus Pocus Latte, let it cool first. Pour the latte into a clean, airtight container. Store it in the fridge and drink it within two days. The flavors will stay nice, but the whipped cream may lose its fluff. If you want to enjoy it later, consider skipping the whipped cream until you reheat it. To reheat your latte, pour it into a pot over low heat. Stir gently to warm it evenly. Avoid boiling to keep the flavors intact. If you prefer, you can use a microwave too. Heat it in short bursts of 30 seconds. Stir in between each burst for the best results. After reheating, feel free to add fresh whipped cream and a dash of pumpkin pie spice for that extra charm! A Hocus Pocus Latte is a tasty drink that mixes coffee with pumpkin flavors. It has warm spices like pumpkin pie spice and a creamy texture from milk. The drink is perfect for fall and gives off cozy vibes. It feels like a hug in a cup and is great for chilly days. You can find a Hocus Pocus Latte at many coffee shops during fall. Some cafes create special seasonal menus that feature this drink. You can also check local bakeries, as they might serve it with treats. If you want to enjoy it at home, you can easily make it using simple ingredients. Yes! You can make a Hocus Pocus Latte without coffee. Just replace the coffee with hot chocolate or warm milk. This way, you still get the pumpkin flavor and spices. It becomes a lovely treat for kids or anyone who prefers no caffeine. To make a dairy-free Hocus Pocus Latte, use non-dairy milk. Options include almond, coconut, or oat milk. These alternatives froth well and add a nice flavor. Just follow the same steps in the recipe, and you will have a delicious dairy-free drink. If you can't find pumpkin puree, you can use sweet potato puree. It has a similar texture and flavor. You could also use butternut squash puree if you prefer. Just ensure it's not pie filling, as that has added sugar and spices. This blog post covered everything you need to make a delicious Hocus Pocus Latte. We discussed the ingredients, from coffee to toppings. I shared step-by-step instructions for preparation and tips for the best flavors. You learned about fun variations and proper storage too. Whether you want a warm drink or a cool treat, you can enjoy this fall favorite. Dive into the process, experiment with flavors, and create your perfect latte. Enjoy your cozy moments with this fun drink!

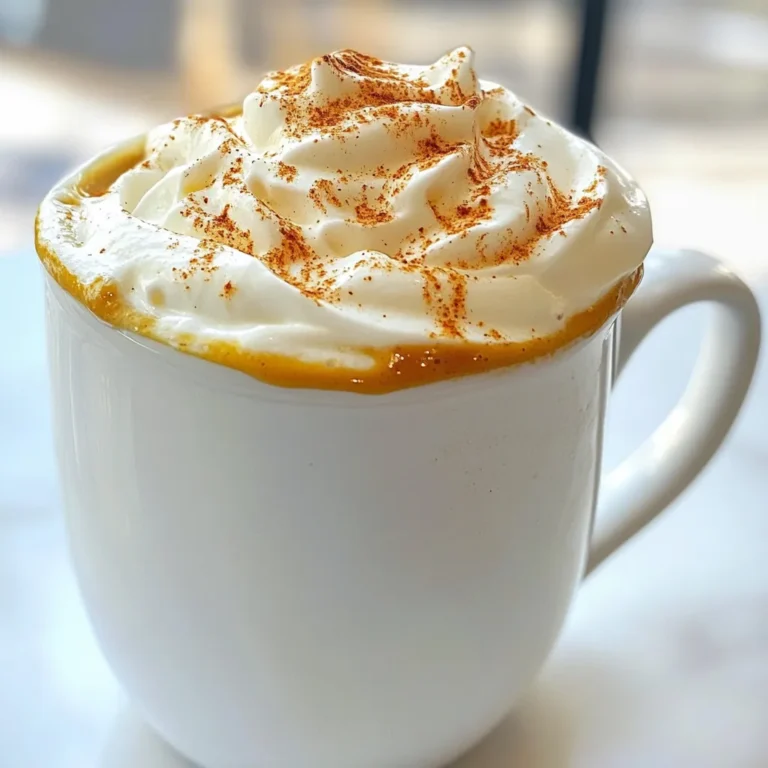
Hocus Pocus Latte Irresistible Fall Flavor Treat

For this tasty treat, gather these simple ingredients: - 12 Hawaiian rolls - 1/2 cup unsalted butter, softened - 4 garlic cloves, minced finely - 1 teaspoon dried parsley flakes - 1 teaspoon dried oregano - 1/2 teaspoon salt - 1 cup shredded mozzarella cheese - 1/4 cup grated Parmesan cheese - 2 tablespoons fresh cilantro, finely chopped (for garnish) You can swap some ingredients if needed: - Use salted butter instead of unsalted for extra flavor. - Any type of bread roll can work, though Hawaiian rolls are the best. - If you don’t have fresh garlic, garlic powder works too. Use about 1 teaspoon. - For a different cheese taste, try cheddar or gouda in place of mozzarella. To make this garlic bread, have these tools handy: - A medium-sized mixing bowl for combining the garlic butter. - A spatula or butter knife for spreading the butter mix. - Aluminum foil to wrap the rolls for baking. - A baking sheet to catch any drips while baking. - An oven to get everything warm and cheesy! {{ingredient_image_2}} First, set your oven to 350°F (175°C). This warm heat helps the bread bake evenly. Gather all your ingredients. You will need 12 Hawaiian rolls, butter, garlic, parsley, oregano, salt, mozzarella cheese, and Parmesan cheese. Having everything ready makes cooking easy. In a medium bowl, add 1/2 cup of softened butter. Then, add 4 minced garlic cloves, 1 teaspoon of dried parsley, 1 teaspoon of dried oregano, and 1/2 teaspoon of salt. Mix these well until you have a smooth garlic butter. This blend gives the bread its tasty kick. Carefully slice each Hawaiian roll in half from left to right. Keep them connected at the bottom. Use a spatula to spread the garlic butter on both halves. Make sure every part gets some butter. Next, sprinkle 1 cup of shredded mozzarella cheese on the bottom half. Top it off with 1/4 cup of grated Parmesan cheese. Finally, place the top half back on and wrap the loaf in aluminum foil. This keeps it moist while baking. Bake for 15 minutes, then remove the foil and bake for another 10 minutes. Look for that golden cheese on top. After baking, let it cool a bit, then add chopped fresh cilantro for a nice touch. Enjoy your delicious creation! To get the best melt, use fresh cheese. Shredded mozzarella melts better than blocks. Mix mozzarella with grated Parmesan for a tasty blend. Make sure to cover the bottom half of the rolls fully with cheese. This helps it melt evenly. Bake it wrapped in foil for 15 minutes. This keeps the cheese warm and gooey. After that, remove the foil and bake a bit longer. This gives you a nice golden top. To kick up the flavor, add more garlic! Use six cloves if you love garlic. You can also mix in some red pepper flakes for heat. Fresh herbs like basil or thyme add a nice touch too. Try using garlic powder in the butter mix for a stronger flavor. For a twist, add a drizzle of balsamic glaze before serving. This adds a sweet tang that pairs well with the cheese. One big mistake is not spreading the butter well. Make sure every inch of the rolls gets garlic butter. Another mistake is overbaking. Keep an eye on the bread after removing the foil. You want it bubbly, not burnt. Also, don’t skip the cooling step. Letting it cool for a few minutes helps the cheese set a bit. This makes serving easier and keeps it from falling apart. Pro Tips Tip: Use Fresh Garlic: Freshly minced garlic enhances the flavor profile significantly compared to pre-minced options. Tip: Don’t Overbake: Keep an eye on the bread during the final minutes to prevent the cheese from burning; a golden top is perfect! Tip: Customize Your Cheese: Feel free to mix and match cheeses like cheddar or gouda for a unique flavor twist. Tip: Serve Warm: For the best experience, serve the garlic bread immediately after baking while it's still warm and gooey. {{image_4}} You can change the taste of this garlic bread by using different cheeses. Try using cheddar for a sharp flavor. Gouda adds a smoky touch, while fontina melts smoothly and tastes rich. Mix cheeses for more depth. Just make sure to keep the total amount at about 1.5 cups to ensure a perfect melt. Herbs and spices can elevate the flavor of your garlic bread. Add fresh basil or thyme for a burst of freshness. A pinch of red pepper flakes can give it a nice kick. You can also sprinkle some Italian seasoning for a classic twist. Experiment with your favorites and make it your own! To make this recipe vegan, swap the butter with a plant-based alternative. Use vegan cheeses like cashew cheese or almond cheese to keep it dairy-free. Look for brands that melt well so you still get that gooey texture. This way, everyone can enjoy the tasty garlic bread! To keep your cheesy Hawaiian roll garlic bread fresh, let it cool first. Wrap it tightly in plastic wrap or aluminum foil. Store it in the fridge for up to three days. This helps to keep the rolls soft and the cheese creamy. Make sure to keep it away from strong-smelling foods to avoid flavor changes. When you’re ready to enjoy your leftovers, preheat your oven to 350°F (175°C). Remove the garlic bread from the fridge. Wrap it in foil to prevent it from drying out. Heat for about 10-15 minutes until warm. If you want the cheese to bubble, unwrap it for the last few minutes. This adds a nice crisp to the top. If you have more than you can eat, freezing is a great option. Wrap the garlic bread tightly in plastic wrap and then in foil. Label it with the date. You can freeze it for up to three months. When you’re ready to eat it, thaw it in the fridge overnight. Then, reheat it in the oven as mentioned above. This keeps the taste and texture intact. Yes, you can use other rolls. I often use soft dinner rolls or brioche. These rolls will give a different taste but still work well. Just pick rolls that are soft and slightly sweet. You can prepare it a day in advance. Just make the garlic butter and spread it on the rolls. Then, wrap them in foil and store them in the fridge. When you’re ready, bake them as usual. This saves time on a busy day. This garlic bread goes great with many dishes. Serve it alongside pasta, soups, or salads. It also makes a tasty snack on its own. You can even pair it with dips like marinara or spinach dip. Enjoy it however you like! This post covered how to make Cheesy Hawaiian Roll Garlic Bread. We started with a list of needed ingredients and substitutes. Then, we looked at simple steps to prepare and bake. Tips helped you avoid common mistakes and added flavor. I shared variations to suit different tastes and storage ideas for leftovers. In conclusion, you can create this dish in many fun ways. Enjoy your cooking and make it your own!

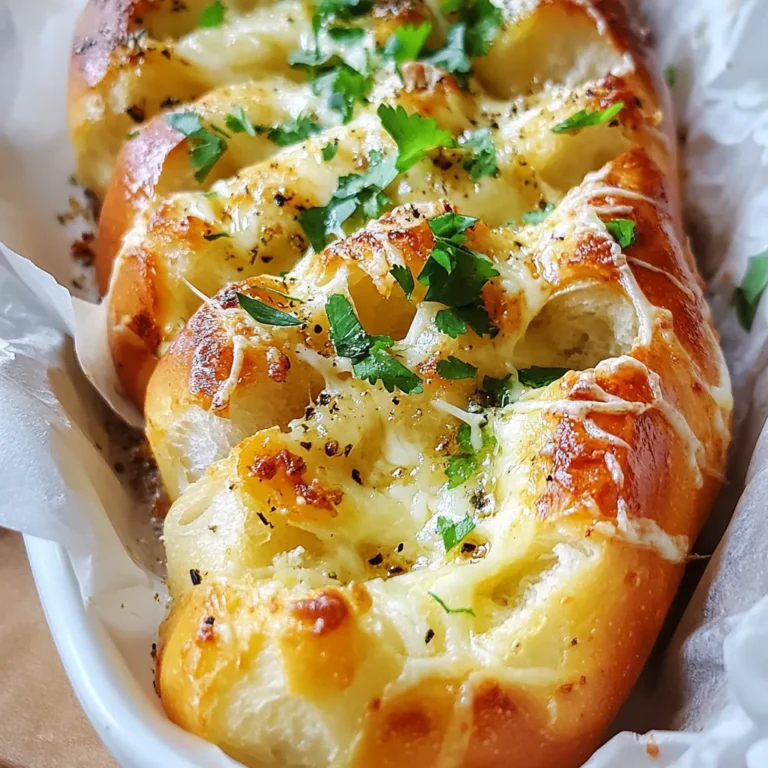
Cheesy Hawaiian Roll Garlic Bread Irresistible Treat

- 1 tablespoon olive oil - 1 medium onion, diced - 2 cloves garlic, minced - 2 medium carrots, diced - 2 celery stalks, diced - 1 medium zucchini, diced - 1 cup whole grain pasta (such as farro or whole wheat) - 6 cups vegetable broth - 1 can (14 oz) diced tomatoes, undrained - 1 cup kale, chopped - 1 teaspoon dried oregano - 1 teaspoon dried basil - Salt and pepper to taste - Fresh parsley, chopped for garnish - A squeeze of fresh lemon juice Gathering the right ingredients is key for Italian Penicillin Soup. I love the vibrant colors. The fresh taste comes from veggies like onion, garlic, carrots, and celery. They form a solid base. Zucchini adds a nice texture. Whole grain pasta makes the soup filling and hearty. Vegetable broth gives a rich flavor. I use canned diced tomatoes for ease. Kale brings nutrients and adds a lovely green touch. Oregano and basil create a classic Italian taste. A pinch of salt and pepper boosts the overall flavor. Don't forget the fresh lemon juice; it brightens the soup right up. I love to finish the dish with parsley. It adds a pop of color and freshness. Each bite feels like a warm hug. This soup is not just food; it’s comfort in a bowl. {{ingredient_image_2}} 1. Heat 1 tablespoon of olive oil in a large pot over medium heat. 2. Add 1 medium onion, diced, and sauté for about 3-4 minutes. The onion should become soft and clear. 3. Next, add 2 cloves of minced garlic. Cook it briefly for just 1 minute. 4. Incorporate 2 medium carrots and 2 celery stalks, both diced. Cook for about 5 minutes, stirring often. 1. Now, add 1 medium zucchini, diced. Cook it for 3 minutes until it begins to soften. 2. Pour in 6 cups of vegetable broth and 1 can of diced tomatoes, undrained. Raise the heat and bring the mix to a gentle boil. 3. Once it boils, mix in 1 cup of whole grain pasta, 1 teaspoon of dried oregano, and 1 teaspoon of dried basil. Season with salt and pepper. 4. Reduce the heat and let it simmer for 10-12 minutes. The pasta should be al dente. 5. Stir in 1 cup of chopped kale and let it cook for another 2 minutes until it wilts. 6. Add a squeeze of fresh lemon juice just before serving. This brightens the flavor. 7. Ladle the soup into bowls and top with chopped parsley for a fresh touch. - Choosing the right pasta I recommend using whole grain pasta, like farro or whole wheat. This pasta holds up well in soup and adds more taste and nutrition. - Adjusting seasoning to taste Taste your soup as it cooks. Add salt and pepper in small amounts. Start with a pinch, then adjust until it tastes just right. - Timing for adding kale Add the kale near the end of cooking. It only needs two minutes to wilt. This keeps the kale vibrant and full of nutrients. - What to serve with Italian Penicillin Soup Crusty bread pairs wonderfully with this soup. It soaks up the broth and adds a delightful crunch to your meal. - How to make it a complete meal You can add a side salad for freshness. Toss together greens, tomatoes, and a light vinaigrette. This balances the warmth of the soup with a crisp bite. Pro Tips Use Seasonal Vegetables: Incorporating seasonal vegetables not only enhances the flavor but also adds a nutritional boost to your soup. Adjust the Pasta Cooking Time: If you plan to store leftovers, cook the pasta separately and add it to the soup when serving to prevent it from becoming mushy. Add Protein: For a heartier meal, consider adding cooked beans or shredded chicken to the soup for extra protein and texture. Enhance Flavor with Herbs: Fresh herbs like basil or parsley can elevate the soup's flavor profile. Add them right before serving for the best taste. {{image_4}} You can swap out veggies in this soup. Try using: - Bell peppers for a sweet crunch - Spinach instead of kale - Sweet potatoes for a hint of sweetness For gluten-free options, you can use: - Brown rice pasta - Quinoa pasta - Lentil pasta These changes keep the soup tasty and fun. To boost flavor, consider adding: - Fresh thyme or rosemary for an earthy touch - A pinch of red pepper flakes for heat - A dash of smoked paprika for depth Adding protein makes the soup heartier. You can include: - Canned beans like chickpeas or cannellini - Shredded rotisserie chicken for a savory bite These enhancements make every bowl of soup unique! To store your Italian Penicillin Soup, let it cool first. This helps keep the soup fresh. Use an airtight container to keep out air and moisture. You can store it in the fridge for up to three days. If you want to keep it longer, freezing is a great option. Freezing your soup is simple. First, let it cool completely. Then, pour it into freezer-safe bags or containers. Make sure to leave some space at the top, as soup expands when frozen. When you are ready to eat, thaw it in the fridge overnight. Reheat it on the stove over low heat. Stir often to keep it from sticking. To keep the flavor and texture, avoid boiling it after thawing. A splash of fresh lemon juice can brighten the taste again. Enjoy your comforting bowl of Italian Penicillin Soup! Italian Penicillin Soup is known for its comforting taste and healthy ingredients. It combines rich flavors from the veggies, herbs, and pasta. This soup warms the soul and is perfect for chilly days. Many call it "Italian penicillin" because it feels like a hug in a bowl, especially when you're under the weather. Yes, you can easily make this soup vegetarian! The recipe already uses vegetable broth and lots of fresh veggies. Just make sure the pasta you choose is also vegetarian. This soup stays hearty without any meat. To reheat the soup, place it in a pot over low heat. Stir it often to warm it evenly. You can also use the microwave. Heat it in short bursts, stirring in between. This helps keep the flavors fresh and vibrant. Absolutely! Italian Penicillin Soup is great for meal prep. You can make a big batch and store it in the fridge. It stays good for about four days. Just portion it out for easy lunches or dinners all week. Yes, feel free to add more ingredients! You can include different veggies like bell peppers or spinach. If you like protein, try adding beans or cooked chicken. Adjusting the recipe to your taste makes it even more enjoyable. This article covered the key ingredients, steps, and tips for making Italian Penicillin Soup. I shared ways to customize the recipe to your taste and how to store leftovers properly. Remember, you can switch up the veggies or add protein for variety. This soup is not only tasty but also great for meal prep. So, gather your ingredients, follow the steps, and enjoy a warm bowl today!

Italian Penicillin Soup Flavorful Comfort in a Bowl

To make lemon blueberry ricotta pancakes, gather these main ingredients: - 1 cup ricotta cheese - 1 cup all-purpose flour - 2 tablespoons granulated sugar - 2 teaspoons baking powder - ½ teaspoon baking soda - ¼ teaspoon sea salt - 1 cup buttermilk (or substitute with regular milk mixed with 1 tablespoon fresh lemon juice) - 2 large eggs - Zest of 1 lemon - 1 cup fresh blueberries (plus extra for serving) - Butter or neutral oil for cooking Each of these ingredients plays a key role. The ricotta cheese adds creaminess and richness. The flour provides structure. The sugar gives a touch of sweetness. Baking powder and baking soda help the pancakes rise. The buttermilk makes the pancakes tender. Eggs bind it all together. Lemon zest adds a bright flavor, and blueberries give a burst of freshness. You can customize your pancakes with optional ingredients. Consider adding: - Vanilla extract for extra flavor - Lemon juice for a tangy kick - Other berries like strawberries or raspberries If you don’t have ricotta, try cottage cheese or Greek yogurt. You can also use almond milk or oat milk as a dairy-free option. These substitutions keep the spirit of the pancakes while allowing you to use what you have on hand. Gather these tools to make the process easier: - Large mixing bowl - Whisk for blending - Sifter for dry ingredients - Spatula for folding - Non-stick skillet or griddle - Measuring cups and spoons Having the right tools makes cooking fun. A non-stick skillet ensures your pancakes cook evenly and don’t stick. A good spatula helps you flip them without breaking. These simple tools will help you create perfect pancakes every time. {{ingredient_image_2}} Start by getting a large mixing bowl. Add the ricotta cheese, buttermilk, and eggs. Use a whisk to mix these well. Make sure the mixture is smooth and combined. This step adds creaminess to your pancakes. In another bowl, sift together the flour, sugar, baking powder, baking soda, and sea salt. Mix them well with a spoon. This helps to evenly spread the leavening agents. It is key for fluffy pancakes. Next, slowly add the dry mix to the wet ricotta mixture. Use a spatula to gently fold them together. Be careful not to overmix. A lumpy batter gives you fluffier pancakes. Heat a non-stick skillet over medium heat. Add some butter or oil to the pan. Once hot, pour about ¼ cup of batter for each pancake. Cook until you see bubbles on top, about 3-4 minutes. Flip gently and cook for another 2-3 minutes until golden brown. Serve warm pancakes on a plate. Drizzle with maple syrup and add fresh blueberries on top. A light dusting of powdered sugar makes them look extra special. Enjoy this delightful breakfast with family or friends! To get fluffy pancakes, use fresh ingredients. Make sure your baking powder isn't expired. Mix your wet and dry ingredients separately first. When you blend them, stop mixing as soon as they come together. A few lumps in the batter are okay. This helps keep your pancakes light and airy. Use a non-stick skillet or griddle for easy flipping. Heat your skillet to medium before adding butter or oil. Make sure to coat the skillet well. If you notice sticking, add a bit more butter. Always check if the skillet is hot enough before pouring in the batter. A quick splash of water should sizzle if it's ready. For a burst of flavor, add more lemon zest or even a splash of vanilla extract. You can mix in other fruits like raspberries or strawberries. For an extra twist, sprinkle in some cinnamon or nutmeg. These flavors blend well with lemon and blueberries. Don't shy away from experimenting! Pro Tips Use Room Temperature Ingredients: For the best texture, ensure your ricotta cheese, eggs, and buttermilk are at room temperature before mixing. This helps create a smoother batter and fluffier pancakes. Don't Overmix the Batter: Gently fold the dry ingredients into the wet mixture until just combined. Overmixing can lead to dense pancakes, so a few lumps are perfectly fine! Adjust Heat as Needed: If your pancakes are browning too quickly, lower the heat slightly. Cooking them at medium to low heat allows them to cook through without burning the outside. Keep Pancakes Warm: If making a large batch, keep finished pancakes warm in a low oven (around 200°F/93°C) while you cook the rest. This ensures they stay warm and fluffy for serving. {{image_4}} You can make these pancakes gluten-free. Use a gluten-free flour blend instead of all-purpose flour. Many blends work well in pancake recipes. Just check for ones with a good mix of starches and flours. This change keeps the flavor while making it safe for gluten-free diets. Want to mix it up? Try adding different flavors! For a lemon poppy seed twist, add 2 tablespoons of poppy seeds to the batter. This adds a nice crunch and a fun look. You can also experiment with other fruits like raspberries or strawberries. Each fruit brings a unique taste to the pancakes. Serving these pancakes can be a treat! Top them with fresh fruit like extra blueberries, bananas, or sliced peaches. A drizzle of honey or maple syrup enhances the flavor. You can add whipped cream or a sprinkle of nuts for extra texture. Each topping adds a new layer of delight. Store leftover pancakes in an airtight container. Make sure they cool completely first. You can keep them in the fridge for up to three days. If you want to enjoy them later, stack the pancakes with parchment paper in between. This helps prevent them from sticking together. To reheat pancakes, use a microwave or a skillet. In the microwave, heat for about 20-30 seconds. Check if they are warm enough. If using a skillet, heat on low for a few minutes until warm. Flip them halfway to heat both sides evenly. You can freeze pancakes for longer storage. Place the cooled pancakes in a single layer on a baking sheet. Freeze them for about an hour until they are firm. Then, stack them in a freezer-safe bag or container. They can last up to two months in the freezer. To enjoy them later, just reheat directly from the freezer. Yes, you can make the batter ahead. Store it in the fridge for up to 24 hours. Just mix it gently before cooking. This saves time on busy mornings. However, the batter may thicken. Add a splash of milk to loosen it up as needed. If you don't have ricotta, use cottage cheese or cream cheese. Blend them until smooth for a similar texture. Greek yogurt is another option. It adds creaminess but may change the taste slightly. Choose what you like best! To make these pancakes fluffier, don't overmix the batter. A few lumps are okay. This keeps air in. Also, make sure your baking powder is fresh. It helps the pancakes rise well. Yes, these pancakes are great for meal prep. You can cook them ahead of time and store them. Place them in an airtight container. When ready to eat, just reheat in the microwave or on a skillet. They taste just as good! In this blog post, I covered how to make lemon blueberry ricotta pancakes. We discussed key ingredients, tools needed, and step-by-step cooking instructions. I shared tips for perfect texture and ways to add extra flavor. You also learned about variations, storage information, and answers to common questions. These pancakes can delight breakfast lovers. Enjoy the cooking process. Have fun experimenting with flavors and toppings. Happy cooking!

Lemon Blueberry Ricotta Pancakes Delightful Breakfast

To make red velvet crinkle cookies, gather these key ingredients: - 2 cups all-purpose flour - 1 tablespoon unsweetened cocoa powder - 1 teaspoon baking powder - 1/2 teaspoon baking soda - 1/4 teaspoon fine salt - 1 cup granulated sugar - 1/2 cup vegetable oil - 2 large eggs - 1 tablespoon red food coloring - 1 teaspoon pure vanilla extract - 1 cup powdered sugar (for coating) Each ingredient plays an important role. The flour provides structure, while cocoa adds a hint of chocolate. Baking powder and baking soda help the cookies rise. Sugar sweetens and contributes to the crinkle effect. Vegetable oil keeps the cookies moist and soft. Eggs bind the mixture, and red food coloring gives them that signature hue. Finally, powdered sugar creates a lovely coating for a sweet finish. With these ingredients, you can create a delightful batch of red velvet crinkle cookies that will impress anyone! {{ingredient_image_2}} First, set your oven to 350°F (175°C). This temperature helps the cookies bake evenly. Next, prepare your baking sheet by lining it with parchment paper. This step keeps the cookies from sticking. In a medium bowl, whisk together 2 cups of all-purpose flour and 1 tablespoon of cocoa powder. Then, add 1 teaspoon of baking powder, 1/2 teaspoon of baking soda, and 1/4 teaspoon of fine salt. Mix well and set this aside for later. In a larger bowl, combine 1 cup of granulated sugar and 1/2 cup of vegetable oil. Whisk them together until smooth. Then, add 2 large eggs one at a time. Next, stir in 1 tablespoon of red food coloring and 1 teaspoon of pure vanilla extract. Mix until the batter is smooth and vibrant. Gradually add the dry flour mixture to the wet ingredients. Stir gently until the dough is fully mixed. You want a sticky dough that holds together well. Chilling the dough is important. It helps the cookies hold their shape. Place the dough in the fridge for about 30 minutes. This makes it easier to handle. After chilling, use a tablespoon or cookie scoop to portion the dough. Roll each piece into a ball. Coat each ball in powdered sugar, making sure they get a nice layer. Place the coated balls on the baking sheet, leaving about 2 inches of space between them. Bake the cookies for 10-12 minutes. The edges should be set, and the centers should look slightly underbaked. Once baked, take the sheet out and let the cookies cool for 5 minutes. Then, transfer them to a wire rack to cool completely. To bake the best red velvet crinkle cookies, focus on time and temperature. Preheat your oven to 350°F (175°C). Bake the cookies for 10 to 12 minutes. The edges should be set, while the centers look slightly underbaked. This gives you a chewy texture. Prevent cookies from sticking by using parchment paper on your baking sheet. This helps with easy removal after baking. You can also let them cool on the sheet for a few minutes before moving them to a wire rack. You can add fun flavors to your cookies. Try different extracts like almond or coconut. Just a few drops can change the taste. You can also mix in chocolate chips for a sweet surprise. Use semi-sweet or white chocolate chips for a nice twist. For a beautiful display, serve your cookies on a decorative platter. Dust them lightly with powdered sugar. You can also add fresh berries or a scoop of vanilla ice cream on the side. This makes for a fancy dessert that looks great and tastes even better. Pro Tips Chill the Dough: Refrigerating the dough for at least 30 minutes helps the cookies maintain their shape and results in a chewier texture. Proper Measuring: Ensure you measure the flour accurately by spooning it into the measuring cup and leveling it off, as too much flour can lead to dry cookies. Baking Time: Keep a close eye on the cookies in the oven; they should look slightly underbaked in the center for that perfect chewy texture. Storage Tips: Store the cooled cookies in an airtight container at room temperature to keep them fresh and soft for several days. {{image_4}} For classic red velvet crinkle cookies, you need simple ingredients. These include all-purpose flour, cocoa powder, baking powder, baking soda, and salt. You also need sugar, vegetable oil, eggs, red food coloring, and vanilla extract. To keep the bright red color, use high-quality red food coloring. This helps the cookies stand out. You can add chocolate chips for a twist. Mix in about one cup of semi-sweet chocolate chips. This adds a rich flavor that complements the red velvet base. Balance the sweetness by slightly reducing the granulated sugar. This makes each bite a lovely mix of chocolate and red velvet. If you want a gluten-free version, use almond flour or a gluten-free all-purpose flour blend. These substitutes work well while keeping the cookies soft. You may also need to adjust the baking powder. Start with less and add more if needed. This helps maintain the right texture without gluten. Store your Red Velvet Crinkle Cookies in an airtight container. This keeps them fresh. You can keep them at room temperature for up to a week. If you want them to last longer, refrigerate them. This will keep them moist and tasty. To freeze these cookies, first let them cool completely. Then, place them in a single layer on a baking sheet. Freeze for about an hour. Once frozen, transfer them to a freezer bag. This helps save space. When you want to eat them, you can thaw them overnight in the fridge. You can also warm them in the microwave for a few seconds. These cookies can last about a week at room temperature. In the fridge, they can stay fresh for up to two weeks. Look for signs of spoilage like a hard texture or off smell. If they lose their soft, chewy feel, it’s best to toss them. Keep an eye on your cookies, so you enjoy them at their best! Red velvet cookies have a unique flavor. They balance chocolate and vanilla. The cocoa powder adds depth. The red food coloring gives them a vibrant look. This makes them stand out on any dessert table. Their soft texture also adds to the charm. You will enjoy the fun twist on a classic cookie. You can use unsweetened cocoa powder. It changes the taste and color a bit. The cookies may not be as rich. For a better flavor, consider Dutch-processed cocoa. This type adds a smoother taste. It also enhances the red color. If you prefer, you can skip cocoa entirely for a pure red velvet flavor. To make cookies chewier, adjust the baking time. Bake them for less time, around 10 minutes. The centers should stay soft. You can also add more oil for moisture. Another option is to include an extra egg yolk. This helps keep the cookies soft and chewy. Red velvet cookies are a delightful treat that combines rich flavors and vibrant color. We covered the key ingredients, step-by-step instructions, and tips for perfect results. Don’t forget to experiment with flavors or try gluten-free options. Proper storage will keep your cookies fresh, while the right serving ideas will impress everyone. Enjoy making these tasty cookies, and let your creativity shine!

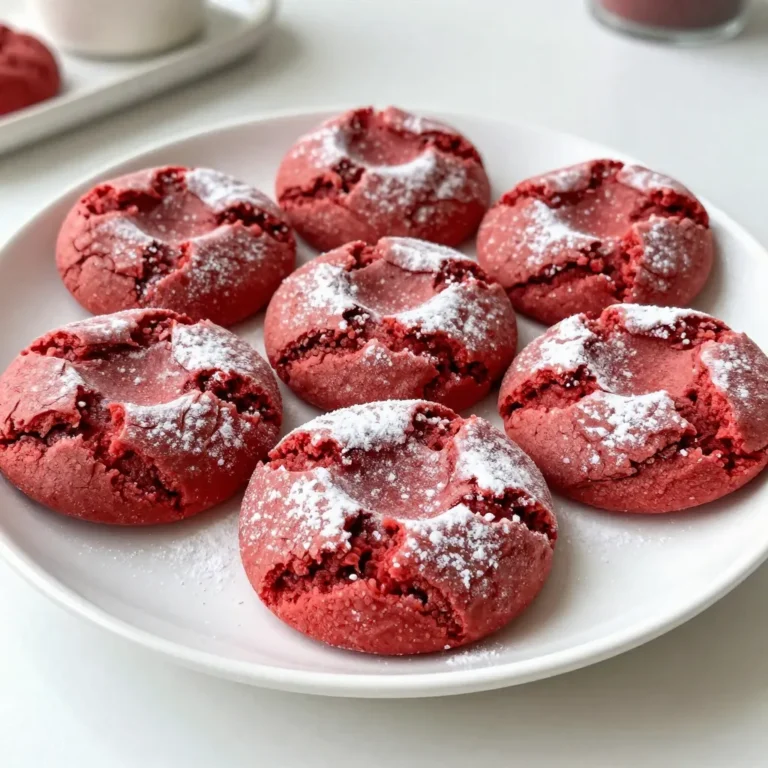
Red Velvet Crinkle Cookies Delightfully Sweet Treat

To make this fudge, gather these key ingredients: - 2 cups dark chocolate chips - 1 can (14 oz) sweetened condensed milk - 1 teaspoon pure vanilla extract - 2 cups freeze-dried strawberries, crushed - 1 cup fresh strawberries, hulled and halved - Sea salt, for garnish These ingredients work together to create a rich and creamy fudge that bursts with strawberry flavor. For a beautiful presentation, you can use: - Additional fresh strawberries, for serving These extra strawberries add color and make the fudge look even more inviting on your platter. When making fudge, the quality of your ingredients matters. Use high-quality dark chocolate chips for a better taste. If you prefer a sweeter fudge, you can swap dark chocolate for milk chocolate. For the freeze-dried strawberries, make sure they are fresh and not too old. They should give a nice crunch and vibrant flavor. If you cannot find freeze-dried strawberries, you can use regular fresh strawberries, but the texture will differ slightly. Remember, the sweetened condensed milk gives the fudge its creaminess. Don't try to substitute it with regular milk; it won't work well. Stick to these tips for a successful treat! {{ingredient_image_2}} Start by getting an 8x8 inch baking dish. Line it with parchment paper. Make sure the paper hangs over the edges. This makes it easy to lift out the fudge later. A good lining helps keep the fudge from sticking. Grab a medium-sized saucepan. Add 2 cups of dark chocolate chips and the 14 oz can of sweetened condensed milk. Place the saucepan on low heat. Stir the mix constantly. You want the chocolate to melt smoothly and look shiny. Once it’s melted, take it off the heat. Now, stir in 1 teaspoon of pure vanilla extract. This gives the fudge a nice, rich flavor. Now it’s time to add the fun stuff. Gently mix in 2 cups of crushed freeze-dried strawberries. Be careful not to overmix. Next, pour half of the chocolate-strawberry mix into your baking dish. Spread it evenly with a spatula. Take the halved fresh strawberries and place them on top of the first layer, cut side facing up. Make sure to space them out. Cover these with the rest of the chocolate-strawberry mixture. Smooth it out with your spatula. For a tasty finish, sprinkle a pinch of sea salt on top. This adds a nice touch. Now, put the dish in the fridge. Let it chill for at least 2 hours until it sets. When it’s firm, lift the fudge out using the parchment paper. Cut it into squares with a sharp knife. Enjoy your delicious chocolate covered strawberry fudge! To get smooth fudge, start with good chocolate. Use dark chocolate chips for the best taste. Melt them slowly over low heat. Stir constantly to avoid burning. When mixing in the sweetened condensed milk, keep stirring. This ensures a creamy blend. Once melted, add vanilla extract for extra flavor. The key is to mix gently when adding the freeze-dried strawberries. Overmixing can make the fudge grainy instead of smooth. Freeze-dried strawberries add great flavor and texture. Crush them before adding to the chocolate mix. This helps them blend in better. Use a zip-lock bag and a rolling pin for easy crushing. Make sure they are evenly distributed in the fudge. This prevents clumps and creates a balanced taste. If you notice any large pieces, break them down further. This allows for a more uniform fudge. Avoid rushing the melting process. Cooking chocolate too fast leads to a burnt taste. Also, don’t skip lining the baking dish. It makes removing the fudge easier. Be careful with the amount of freeze-dried strawberries. Too many can make the fudge too dry. Lastly, don’t forget to chill the fudge long enough. If it’s not set properly, cutting will be messy. Follow these tips to make your fudge a hit! Pro Tips Choose Quality Chocolate: Opt for high-quality dark chocolate chips for a richer flavor and smoother texture in your fudge. Even Layering: When pouring the chocolate mixture, ensure an even layer on the bottom before adding the fresh strawberries to prevent sinking. Chill Properly: Allow the fudge to chill for the full recommended time to ensure it sets properly and holds its shape when sliced. Garnish Creatively: Enhance the presentation by garnishing with mint leaves or drizzles of melted chocolate on top of the fudge before serving. {{image_4}} You can change the flavor of your fudge easily. For a mint twist, add 1 teaspoon of mint extract to the melted chocolate. This gives it a fresh taste. If you love white chocolate, swap dark chocolate chips for white ones. You can also mix in a bit of green food coloring. This makes it fun and eye-catching. Adding nuts and fruits can make your fudge unique. Try adding chopped nuts like almonds or walnuts. They give a nice crunch. You can also mix in dried fruits like cranberries or cherries for extra flavor. If you want a fun texture, sprinkle some crushed nuts on top before it sets. This adds a great look and taste. You can easily adapt this fudge for different diets. To make it vegan, use dairy-free chocolate chips and coconut milk instead of sweetened condensed milk. This keeps the fudge creamy and delicious. If you're gluten-free, check the chocolate label. Most chocolate chips are gluten-free, but it's always good to verify. These small changes let everyone enjoy your fudge! To keep your chocolate covered strawberry fudge fresh, store it in an airtight container. This helps prevent it from drying out. Place a piece of parchment paper in between layers. It will stop them from sticking together. Keep the fudge in a cool, dry place. The pantry works well, but avoid heat sources. Freezing fudge is a great option if you want to save some for later. Cut the fudge into squares before freezing. Wrap each piece in plastic wrap tightly. Then place them in a freezer-safe bag. When you're ready to eat, pull out a piece. Let it thaw in the fridge for a few hours. This keeps the texture nice and smooth. When stored correctly, chocolate covered strawberry fudge can last up to two weeks at room temperature. If you keep it in the fridge, it can last up to a month. Freezing can extend its life to three months. Just remember to check for any signs of spoilage before you enjoy it! Yes, you can use milk chocolate instead of dark chocolate. Milk chocolate adds a sweeter taste. This change can make the fudge creamier. If you like sweet treats, milk chocolate is a great choice. Just remember, it will change the flavor a bit. Dark chocolate gives a richer taste, while milk chocolate is milder. To cut fudge well, start with a sharp knife. Chill the fudge in the fridge for at least two hours. Once firm, lift it from the dish using parchment paper. Place it on a flat surface. Cut the fudge into squares with smooth, even strokes. Clean the knife between cuts for neat edges. This will help each piece look nice and tidy. If your fudge won't set, don’t worry! You can try to reheat it gently. Put the fudge back in a saucepan over low heat. Add a bit more sweetened condensed milk if it seems too dry. Stir until it melts again. Then, pour it back into the dish and chill. If it still won't set, consider adding a little cornstarch. This can help thicken the fudge and make it firm. Just remember to stir well! In this blog post, we explored how to make chocolate-covered strawberry fudge, emphasizing key ingredients and techniques. I shared step-by-step instructions and tips for a smooth texture. You learned about variations and how to adapt the recipe to fit different diets. With proper storage methods, your fudge can last longer. Remember, quality ingredients matter. Whether you stick to the classic or experiment with flavors, you have all the tools you need to create delicious fudge. Enjoy every bite and share your tasty treats with others!

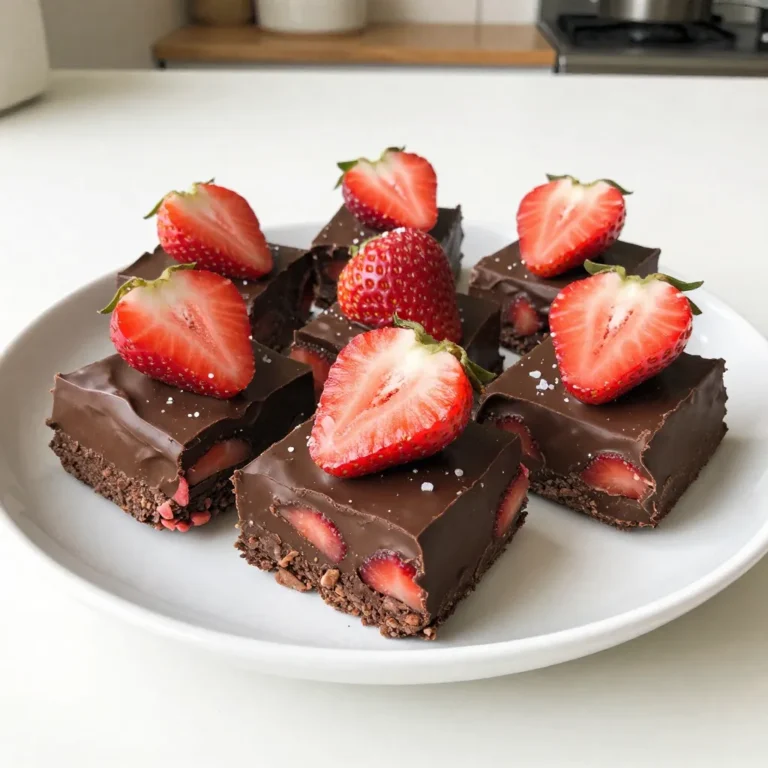
Chocolate Covered Strawberry Fudge Easy and Delicious

- 8 oz soba noodles - 2 tablespoons sesame oil - 1 tablespoon fresh ginger, minced - 2 tablespoons soy sauce or tamari - 1 tablespoon rice vinegar - 1 tablespoon honey or maple syrup - 1 cup cucumber, finely julienned - 1 cup carrots, shredded - 1 red bell pepper, thinly sliced - 2 green onions, chopped - 1/4 cup fresh cilantro, roughly chopped - A pinch of red pepper flakes - 1 tablespoon sesame seeds Gather these ingredients before starting. Each one plays a key role in bringing the salad to life. Soba noodles are the heart of this dish. Their nutty flavor and chewy texture make them perfect for salads. Sesame oil adds depth and richness. The fresh ginger brings a zing that wakes up your taste buds. Soy sauce or tamari brings saltiness, while rice vinegar adds a nice tang. Honey or maple syrup balances the flavors with sweetness. Fresh vegetables give crunch and color. Cucumber and carrots add a refreshing crispness. The red bell pepper adds sweetness, while green onions and cilantro provide vibrant flavors. If you want a bit of heat, include red pepper flakes. For extra crunch, sprinkle sesame seeds on top. These ingredients make this salad a fun and tasty dish to enjoy. {{ingredient_image_2}} To cook soba noodles, follow the package instructions. Boil water in a pot and add the noodles. Cook them for about 4 to 5 minutes. Once done, drain the noodles in a colander. Rinse them under cold running water. This stops the cooking and cools the noodles quickly. In a large mixing bowl, combine the sesame oil, minced fresh ginger, soy sauce, rice vinegar, and honey. Whisk these ingredients together until smooth. This dressing brings all the flavors together in the salad. First, add the cooled soba noodles to the mixing bowl with the dressing. Toss gently to coat each noodle strand. Next, fold in the julienned cucumber, shredded carrots, sliced red bell pepper, chopped green onions, and fresh cilantro. This mix adds crunch and color to your salad. Taste your salad and adjust the flavors. You may want a bit more soy sauce for saltiness. If you like it sweeter, add more honey. For some heat, sprinkle in red pepper flakes. Let the salad rest for about 10 minutes. This helps the flavors blend better. When ready to serve, sprinkle sesame seeds on top for a nice crunch. Enjoy your fresh and flavorful Sesame Ginger Noodle Salad! To make your soba noodles just right, rinse them well. After cooking, drain the noodles and put them under cold water. This stops the cooking and keeps them from sticking. You want each noodle to be separate and springy. Balancing flavors is key. The sweet from honey or maple syrup needs to mix well with the salty soy sauce. Taste as you go. If the salad feels bland, add a bit more soy sauce. If it’s too salty, a touch of honey can help. For a great presentation, use a large, colorful bowl. This makes your salad look fresh and inviting. You can also serve it in individual bowls. Top it with extra cilantro or sesame seeds for a nice touch. This salad tastes best chilled or at room temperature. Let it sit for about ten minutes before serving. This resting time helps all the flavors mix together nicely. You can customize this salad with spices. If you want some heat, add a pinch of red pepper flakes. This gives your dish a nice kick without overpowering it. Fresh herbs can change the game too! While cilantro is great, you could try using mint or basil for a different twist. Each herb adds its own flavor, making the salad unique. Pro Tips Tip Title: Cook Noodles Al Dente: For the best texture, cook the soba noodles until they are al dente, as they will continue to soften slightly when mixed with the dressing. Tip Title: Customize Your Veggies: Feel free to substitute or add other vegetables like bell peppers, snap peas, or edamame for even more color and crunch. Tip Title: Make It Ahead: This salad can be made a few hours in advance. Just keep it refrigerated until serving, but add sesame seeds right before you serve to maintain their crunch. Tip Title: Perfect Your Dressing: Adjust the sweetness and saltiness of the dressing to your liking. Start with less soy sauce and honey, and taste before adding more. {{image_4}} You can add grilled chicken for extra protein. It brings a nice smoky flavor. Simply slice it and toss it in with the noodles. Tofu or tempeh are great plant-based options. Both soak up flavors well. Just cube them and mix in for a satisfying meal. Feel free to swap in other fresh veggies. You can use zucchini or shredded cabbage instead of bell pepper. Seasonal vegetables work well too. Try using snap peas in the spring or roasted butternut squash in the fall. Each swap adds a unique twist. You can change the oil for a different taste. Peanut oil gives a rich, nutty flavor. If you want a sweeter touch, swap honey for agave syrup. Maple syrup is another great option. Each change can make the salad feel fresh and new. To store leftover salad, place it in an airtight container. This keeps it fresh. You can use plastic wrap or a lid to seal the container. Make sure to chill it in the fridge right away. This helps keep the flavors and crunch intact. The salad stays fresh for about three days in the fridge. After that, the veggies may lose their crispness. To maintain its quality, eat it within this time frame. If you want to keep the salad longer, consider storing the dressing separately. Combine them just before serving for the best taste. This salad is best served cold, but you can enjoy it at room temperature. If you prefer to warm it up, do so gently. Use a microwave on low heat for short bursts. Be careful not to overheat it, or the veggies will become soft. Enjoy your leftovers the next day for a quick and tasty meal! If you need a gluten-free option, you can use rice noodles. They cook quickly and have a nice texture. Another great choice is zucchini noodles. You can spiralize zucchini for a fresh twist. Yes, you can prep this salad in advance. Make the dressing and cook the noodles a day ahead. Just store them in separate containers. Mix them just before serving for the best taste. This recipe is almost vegan. To make it fully vegan, swap honey for maple syrup. Check your soy sauce; some brands are vegan. This way, everyone can enjoy this tasty dish! This recipe for Sesame Ginger Noodle Salad covers all you need. You learned about important ingredients like soba noodles and fresh veggies. We discussed easy steps to cook the noodles and make a tasty dressing. You also got tips for texture, flavor, and how to store leftovers. Incorporate these ideas into your cooking. Experiment with variations and enjoy a fresh meal. Eating well can be simple and fun. Trust me, you will love this salad!

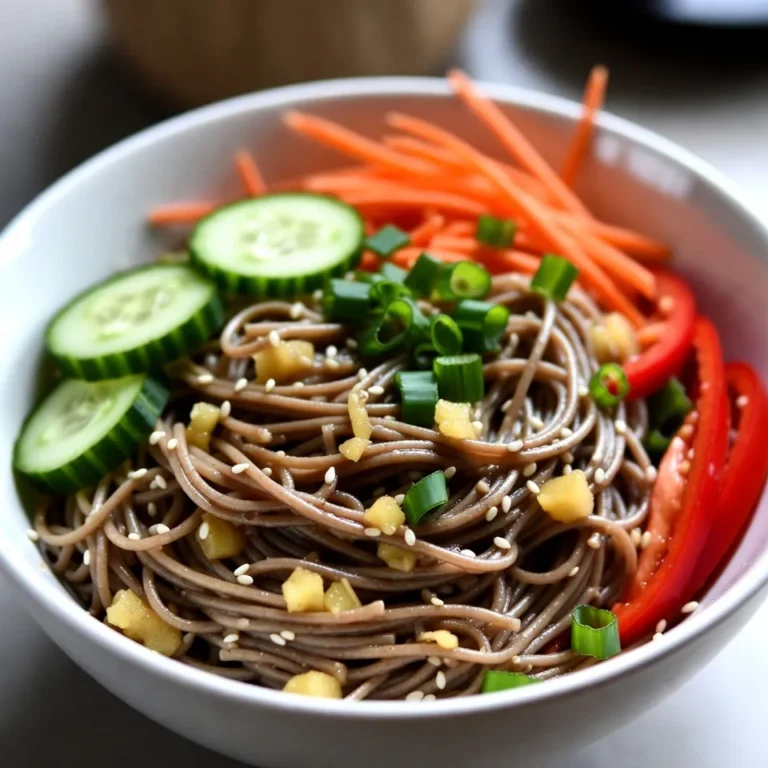
Sesame Ginger Noodle Salad Fresh and Flavorful Dish

To make the Lemon Blueberry Yogurt Loaf, gather these items: - 1 cup plain Greek yogurt - 1/2 cup granulated sugar - 1/3 cup vegetable oil - 3 large eggs - 1 teaspoon pure vanilla extract - Zest of 1 lemon - 1/4 cup freshly squeezed lemon juice - 1 1/2 cups all-purpose flour - 1/2 teaspoon baking powder - 1 teaspoon baking soda - 1/4 teaspoon salt - 1 cup fresh blueberries (you can also use thawed frozen blueberries) You can swap some ingredients if needed: - Plain Greek yogurt can be replaced with regular yogurt or a dairy-free option. - Granulated sugar can be switched for brown sugar or honey, but adjust moisture. - Vegetable oil can be changed for melted butter or coconut oil. - Fresh blueberries can be replaced with any seasonal berry you like. Feel free to add a twist to your loaf: - Chopped nuts like walnuts or pecans add crunch. - A sprinkle of poppy seeds gives a fun texture. - A touch of cinnamon or cardamom adds warmth and spice. - You can also mix in some lemon zest for extra zing. {{ingredient_image_2}} Start by preheating your oven to 350°F (175°C). This helps your loaf cook evenly. While the oven heats, prepare a 9x5 inch loaf pan. You can grease it with butter or oil. Dust it lightly with flour. Alternatively, line it with parchment paper. This makes it easy to remove the loaf later. In a large bowl, add 1 cup of plain Greek yogurt, 1/2 cup of granulated sugar, and 1/3 cup of vegetable oil. Use a whisk to mix these until they are smooth. Next, add 3 large eggs, 1 teaspoon of pure vanilla extract, the zest of 1 lemon, and 1/4 cup of freshly squeezed lemon juice. Whisk again until everything is blended well. This mixture should be velvety and shiny. In another bowl, sift together 1 1/2 cups of all-purpose flour, 1/2 teaspoon of baking powder, 1 teaspoon of baking soda, and 1/4 teaspoon of salt. Sifting helps mix the leavening agents with the flour. This step makes your loaf light and fluffy. Now, it’s time to bring everything together. Gradually add the dry mix into the wet mix. Use a spatula to fold them together gently. Mix until just combined; do not overmix. Overmixing can make your loaf dense. Finally, fold in 1 cup of fresh blueberries. Be gentle to keep the blueberries whole. Transfer the batter into your prepared loaf pan. Smooth the top with a spatula. Place the pan in the oven and bake for 50-60 minutes. The loaf is ready when a toothpick comes out clean, with a few moist crumbs. Once baked, let it cool in the pan for about 10 minutes. Then, move it to a wire rack to cool completely before slicing. Enjoy fresh flavors in every bite! To make your Lemon Blueberry Yogurt Loaf soft and fluffy, follow these steps: - Use fresh ingredients. Fresh eggs and yogurt give the best results. - Don't overmix the batter. Mix until just combined to keep it light. - Make sure your oven is preheated. This ensures even baking from the start. - Let the loaf cool in the pan for a short time. This helps it set better. Here are some mistakes to watch out for: - Skipping the sifting step can lead to lumps. Always sift your dry ingredients. - Using too much flour will make the loaf dense. Measure carefully! - Forgetting to grease the pan can cause sticking. Grease or line your pan well. - Not checking for doneness can leave you with a soggy center. Use a toothpick to test! To keep your loaf fresh: - Wait until it is completely cool before storing. This prevents condensation. - Wrap it tightly in plastic wrap or foil. This keeps it moist. - Store it in the fridge for up to a week. You can also freeze it for longer storage. - When freezing, slice the loaf first. This makes it easy to grab a piece later. Pro Tips Use Room Temperature Ingredients: Let your eggs and yogurt sit at room temperature for about 30 minutes before mixing. This helps create a smoother batter and a lighter loaf. Don't Overmix: When combining the wet and dry ingredients, mix just until combined. Overmixing can lead to a dense loaf. A few lumps are perfectly fine! Fresh vs. Frozen Blueberries: If using frozen blueberries, do not thaw them beforehand. Adding them directly to the batter will prevent them from bleeding and turning the loaf blue. Check for Doneness: Insert a toothpick into the center of the loaf; it should come out clean or with a few moist crumbs. If it comes out wet, bake for a few more minutes. {{image_4}} You can change the blueberries to other fruits. Raspberries, strawberries, or blackberries work well. They add a fresh twist to the loaf. Just make sure to use the same amount as blueberries, about one cup. You can also try mixing fruits. A combo of blueberries and raspberries makes a tasty treat! If you want a gluten-free loaf, swap all-purpose flour for a gluten-free blend. Look for a mix that has xanthan gum in it. This helps the loaf rise and stay moist. Use the same amount, one and a half cups. You will enjoy the same soft texture with this swap! To make the loaf even more exciting, try adding spices. A teaspoon of cinnamon or a pinch of nutmeg can add warmth. You can also mix in a tablespoon of poppy seeds for a nice crunch. For a citrus kick, add some orange zest along with the lemon zest. These small changes will create new flavor layers in your loaf! To keep your lemon blueberry yogurt loaf fresh, wrap it tightly in plastic wrap. This helps to seal in moisture. You can also place it in an airtight container. Store it at room temperature for up to three days. If you want to keep it longer, refrigeration is an option. Just remember, cold storage may dry it out slightly. Freezing is a great way to save the loaf for later. To freeze, first ensure the loaf is completely cool. Wrap it securely in plastic wrap, then in aluminum foil. This double layer helps prevent freezer burn. You can freeze the loaf for up to three months. When ready to eat, let it thaw in the fridge overnight. To reheat, slice the loaf as needed. Place the slices in a toaster or oven at 350°F (175°C) for about 5-10 minutes. This warms the loaf nicely without drying it out. You can also microwave a slice for about 15-20 seconds. Enjoy your warm, tasty treat! Yes, you can use frozen blueberries. Just thaw them first, then drain any excess liquid. This helps keep your loaf from becoming too wet. Frozen blueberries work well and save time. They may break apart more than fresh ones, but they still taste great. To make this recipe vegan, you can replace the eggs. Use 1/4 cup of unsweetened applesauce for each egg. You can also substitute Greek yogurt with a plant-based yogurt. Look for one that has a similar texture. Use a vegetable oil that you like, and make sure to check the sugar for any animal-based additives. The best way to serve this loaf is fresh and warm. Slice it and place it on a nice platter. You can sprinkle powdered sugar on top for some sweetness. Adding lemon zest and a few blueberries makes it look pretty too. Serve it with tea or coffee for a delightful treat. In this blog post, we covered how to make a delicious lemon blueberry yogurt loaf. We explored key ingredients, substitutions, and how to enhance flavors. I shared step-by-step instructions for mixing and baking. You learned tips for perfect texture and common mistakes to avoid. We discussed storing leftovers and answered common questions. With these easy methods, you can bake a treat that impresses. Enjoy your baking journey!

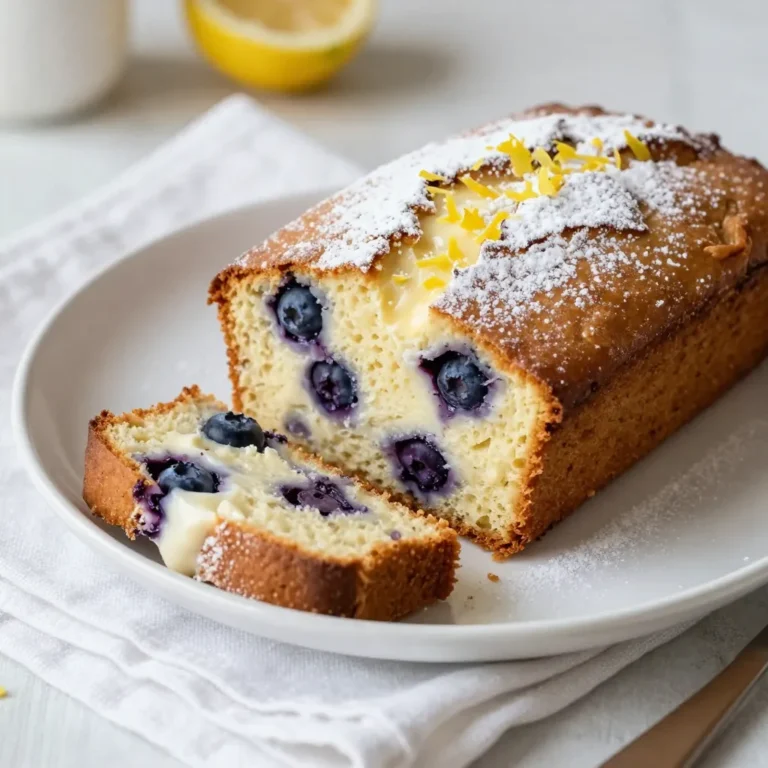
Lemon Blueberry Yogurt Loaf Fresh and Tasty Recipe

- 1 ripe mango, diced into small cubes - 2 ripe avocados, diced into bite-sized pieces - 1 red bell pepper, finely diced - 1 small red onion, finely chopped - 1 jalapeño, deseeded and minced (optional for added heat) - 2 tablespoons freshly squeezed lime juice - 1 tablespoon extra virgin olive oil - 1/4 cup fresh cilantro, roughly chopped - Salt and freshly ground pepper to taste When I create mango avocado salsa, I focus on fresh, vibrant ingredients. Each item adds its own flavor. The ripe mango brings sweetness. The avocado adds creaminess. The red bell pepper gives a nice crunch. I pick a ripe mango by looking for a slight give when I press it gently. It should smell sweet. For avocados, I choose ones that yield slightly under pressure. They should feel soft but not mushy. I also enjoy adding red onion for a sharp kick. The jalapeño is optional. If you want heat, keep it. If not, leave it out. Fresh lime juice brightens the dish and balances the flavors. Olive oil adds richness. I love using extra virgin for its fruity taste. Cilantro offers a fresh herbal note. Finally, I season with salt and pepper to enhance all the flavors. Each ingredient plays a role in making this salsa a fresh and flavorful delight. {{ingredient_image_2}} Start by prepping all your ingredients. First, peel and dice the ripe mango into small cubes. Make sure to keep the mango pieces separate so they stay pretty. Next, take two ripe avocados. Cut them in half, remove the pit, and scoop the flesh out. Dice the avocado into bite-sized pieces. Now, let’s chop the red bell pepper. Slice it in half and remove the seeds. Finely chop it into small pieces. Then, take a small red onion. Peel it and chop it finely as well. If you like heat, you can also prep a jalapeño. Just slice it, remove the seeds, and mince it up. If you want less spice, skip the jalapeño. In a large mixing bowl, combine the diced mango, avocado, red bell pepper, chopped red onion, and minced jalapeño. Look at the colors! They are bright and inviting. Next, drizzle 2 tablespoons of freshly squeezed lime juice over the mixture. Add 1 tablespoon of extra virgin olive oil too. This will make the salsa fresh and tasty. Gently toss all the ingredients together with a spatula. Be careful not to mash the avocado. You want it to stay chunky and delicious. Now, it’s time to season your salsa. Add salt and freshly ground pepper to taste. You can adjust the lime juice or other seasonings based on your preference. This is your salsa, after all! Let your salsa rest at room temperature for about 10-15 minutes. This step is key. It helps the flavors blend beautifully. The longer they sit, the better your salsa will taste! How to choose ripe mangoes To pick a ripe mango, gently squeeze it. A ripe mango feels slightly soft. Look for a mango with a rich color. The skin may have some wrinkles, which is a good sign. Avoid mangoes with large dark spots or hard areas. Picking the right avocados When choosing avocados, feel them for ripeness. They should yield slightly to gentle pressure. A dark green or black skin often means it’s ripe. If it feels too soft, it may be overripe. If it’s hard, it needs more time to ripen. Tips for maintaining chunky salsa To keep your salsa chunky, handle the ingredients gently. Dice the mango and avocado carefully. Mix everything slowly in the bowl. Avoid mashing the avocados to keep that nice texture. Adjusting heat levels with jalapeño If you like heat, add jalapeño to your salsa. For less heat, remove the seeds. You can skip it altogether if you prefer no spice. Always taste your salsa as you go, adjusting the heat to your liking. Serving ideas with tortilla chips Serve your salsa in a rustic bowl. Surround it with crispy tortilla chips. This makes a colorful and inviting display. Guests will love to dig in! Garnishing options for visual appeal Add a sprig of fresh cilantro on top. A lime wedge adds bright color, too. These small touches make your salsa look even more delicious. Enjoy the compliments! Pro Tips Choose Ripe Fruits: Ensure your mango and avocados are perfectly ripe for the best flavor and texture. A ripe mango should yield slightly to pressure, while avocados should also feel soft but not mushy. Customize Heat Level: Adjust the amount of jalapeño according to your heat preference. For a milder salsa, you can omit the jalapeño altogether or use a smaller portion. Let It Rest: Allowing the salsa to sit for 10-15 minutes before serving helps the flavors to meld together, resulting in a more delicious and harmonious dish. Experiment with Add-Ins: Feel free to add other ingredients like diced tomatoes, corn, or black beans to create a unique twist on this salsa that suits your taste. {{image_4}} You can switch up the fruit for fun. Try using pineapple or peach instead of mango. These fruits add a sweet twist to your salsa. You can also add black beans for a protein boost. This makes the salsa heartier and adds fiber. Want to deepen the flavor? Adding garlic or ginger can work wonders. A small amount goes a long way. You can also try different herbs. Mint can give your salsa a fresh taste that surprises the palate. This salsa is great for many diets. It’s naturally gluten-free and vegan, making it a safe choice. If you want to lower the calories, skip the olive oil. This keeps all the fresh flavors without adding extra fat. Enjoy your healthy and bright mango avocado salsa! To keep your mango avocado salsa fresh, store leftovers in an airtight container. This helps keep out air and moisture. Salsa stays good in the fridge for about three days. After that, the avocado may brown and the flavors fade. You can freeze mango avocado salsa, but it may change texture. To freeze, put it in a freezer-safe container. Leave some space at the top for expansion. When ready to use, thaw it in the fridge overnight. Stir gently to mix before serving. Check for signs of spoilage before eating. If the salsa smells sour or has an off-color, it's best to discard it. Also, if you see mold, throw it away. Practice good food handling by washing your hands and using clean utensils. This keeps your food safe and tasty! Mango avocado salsa offers many health benefits. First, mangoes are rich in vitamins A and C. These vitamins help boost your immune system and improve skin health. Avocados add healthy fats, which are good for your heart. They also provide fiber, which aids digestion. Together, these ingredients create a tasty and nutritious dish. You can prepare this salsa a few hours before serving. Start by chopping all the ingredients but keep the avocado separate until just before serving. This helps prevent browning. Store the salsa in an airtight container in the fridge. When you are ready to serve, mix in the avocado and season to taste. Yes, you can use canned ingredients if fresh ones are not available. Canned mango can work well, but it may taste sweeter. Canned peppers can replace fresh bell peppers. However, using fresh ingredients tends to give the salsa better flavor and texture. Keep this in mind when making your choice. Mango avocado salsa is fresh, flavorful, and fun to make. We've covered key ingredients like mangoes, avocados, and red bell peppers, plus helpful tips for selecting the best produce. Remember, mixing flavors and textures can elevate your dish. Whether you serve it with chips or add protein, feel free to experiment. Proper storage ensures freshness, and knowing when to throw away salsa helps keep you safe. Enjoy creating this versatile salsa that fits any meal or occasion.

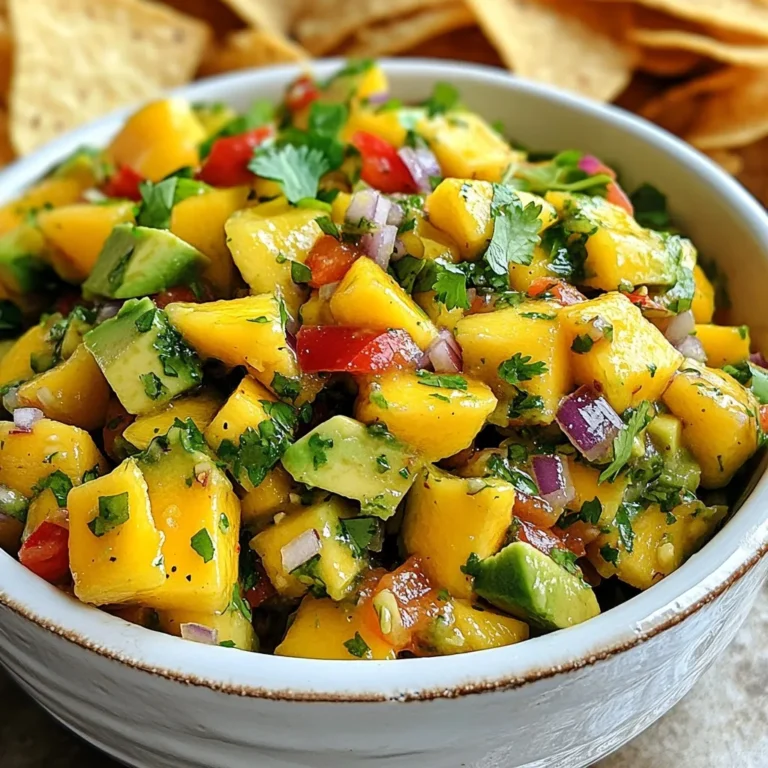
Mango Avocado Salsa Fresh and Flavorful Delight

- 1 lb carrots, peeled and chopped - 1 tablespoon fresh ginger, finely grated - 1 tablespoon fresh turmeric, finely grated - 1 medium onion, chopped - 3 cloves garlic, minced In this soup, carrots bring a sweet and earthy flavor. Fresh ginger adds warmth, while turmeric gives it a bright color and health boost. Onion and garlic provide a strong foundation for the soup’s taste. - 4 cups vegetable broth (low-sodium if preferred) - 1 can (13.5 oz) coconut milk Vegetable broth is the main liquid. It adds depth and richness. Coconut milk makes the soup creamy and smooth. Together, they create a velvety texture you will love. - Salt, freshly ground black pepper, to taste - 1 tablespoon freshly squeezed lemon juice - Fresh cilantro or parsley leaves, for garnish Seasoning is key. Salt and pepper enhance all the flavors. A splash of lemon juice adds brightness. Finally, fresh herbs give a pop of color and freshness on top. {{ingredient_image_2}} First, heat the olive oil in a large pot over medium heat. I like to use a heavy-bottomed pot for even cooking. Once the oil is hot, add the chopped onion. Sauté the onion for about five minutes. You want it to become soft and translucent. Next, add the minced garlic, finely grated ginger, and grated turmeric. Stir everything well and cook for two more minutes. Keep stirring to avoid burning the garlic. Now it’s time to add the chopped carrots. Toss them in with the onion and spices. Sauté the carrots for three to four minutes. This helps them soak up all that great flavor. You want them to soften just a bit before the next step. Pour in the vegetable broth to the pot. Bring the mixture to a rolling boil. Once boiling, reduce the heat to low and cover the pot. Let it simmer for about 20 to 25 minutes. Check the carrots with a fork. They should be tender. After simmering, remove the pot from the heat. Allow it to cool for a few minutes. Then, use an immersion blender to blend the soup until smooth and creamy. If you don’t have one, carefully transfer the soup in batches to a standard blender. Return the blended soup to the pot. Stir in the coconut milk and freshly squeezed lemon juice. Warm the soup over low heat. Taste the soup and adjust the seasoning. Add salt and freshly ground black pepper as needed. Serve the soup hot in bowls, garnishing with fresh cilantro or parsley for a burst of color and freshness. Enjoy! To make your soup smooth, use an immersion blender. It blends right in the pot. If you use a standard blender, cool the soup first. Blend it in small batches to avoid spills. For cooking carrots, cut them into equal-sized pieces. This helps them cook evenly. Sauté them for a few minutes before adding the broth. It brings out their natural sweetness. To boost the flavor, add spices like cumin or coriander. A pinch of chili powder adds warmth too. You can also try a dash of cinnamon for a unique twist. Serve the soup with crusty bread or a fresh salad. These sides add texture and balance to the meal. A sprinkle of feta cheese or a dollop of yogurt can elevate the dish. Ginger helps with digestion and fights inflammation. Turmeric contains curcumin, known for its anti-inflammatory properties. Carrots are rich in beta-carotene, good for your eyes. Together, these ingredients create a powerhouse of nutrients. Each bowl offers comfort and wellness in every spoonful. Enjoy this soup not just for its taste but also for its health perks. Pro Tips Fresh Ingredients: Using fresh ginger and turmeric will enhance the flavor and health benefits of the soup, giving it a vibrant taste and color. Adjusting Consistency: If you prefer a thicker soup, blend less; for a thinner soup, add more vegetable broth or coconut milk until you reach your desired consistency. Flavor Boost: For an extra depth of flavor, consider adding a pinch of cumin or coriander during the sautéing step with the garlic and onions. Garnishing: Fresh herbs like cilantro or parsley not only add a pop of color but also introduce a fresh, aromatic element that complements the soup beautifully. {{image_4}} For a creamy texture without dairy, use plant-based milk. Almond milk, oat milk, or cashew milk work well. Each type brings its own flavor. You can adjust the amount to suit your taste. If you want it richer, add more plant milk. You can also skip the coconut milk for a lighter soup. You can enhance this soup by adding other veggies. Sweet potatoes, bell peppers, and peas blend well. For seasonal twists, try butternut squash in the fall. In summer, fresh zucchini adds a nice touch. Consider adding greens like spinach or kale for a nutrient boost. Just chop them small and add them towards the end. If you like heat, add some chili or pepper. Fresh jalapeños or red pepper flakes can spice it up. Adjust the amount based on your heat tolerance. Start small and taste as you go. For a milder version, skip the spices. Instead, focus on the ginger and turmeric for warmth. After making your ginger turmeric carrot soup, let it cool down. Transfer it to an airtight container. This keeps the soup fresh and tasty. You can store it in the fridge for up to 5 days. Always check for any signs of spoilage before eating. If the soup smells off or has mold, it’s best to throw it away. Freezing this soup is a great way to save it for later. Use a freezer-safe container or a heavy-duty freezer bag. Make sure to leave some space at the top, as soup expands when frozen. You can store it in the freezer for up to 3 months. When you’re ready to eat it, thaw it overnight in the fridge. If you're short on time, place the container in cold water for a faster thaw. You have two good options for reheating your soup: stovetop or microwave. For the stovetop, pour the soup into a pot. Heat it over medium-low, stirring often until it's hot. This helps keep the texture nice. For the microwave, place the soup in a microwave-safe bowl. Cover it loosely and heat in 1-minute intervals, stirring in between. This method is quick and easy, but be careful not to overheat. Enjoy your warm soup again! Yes, you can make this soup ahead of time. It keeps well in the fridge. Here are some tips: - Let the soup cool before storing it. - Place it in an airtight container. - You can store it for up to 3 days. - To reheat, warm it on the stove over low heat. Stir well as it heats. If you need an alternative to coconut milk, try these options: - Almond milk gives a nutty flavor. - Cashew milk adds creaminess. - Soy milk is another option, but it has a different taste. - You can also use vegetable broth for a lighter soup. Adjust the seasoning as needed. To add some heat to your soup, consider these ideas: - Add a pinch of cayenne pepper for a quick kick. - Mix in diced jalapeños for a fresh spice. - Try red pepper flakes for a slow burn. - Just remember to taste as you go, so you don’t overpower the flavors. This blog post showed you how to make a tasty carrot soup. We covered the key ingredients like carrots, ginger, and coconut milk. The soup's steps included preparing the base, blending it smoothly, and adding final touches. I shared tips for perfect texture, flavor, and health benefits. You also learned about variations, including vegan options and spicy additions. Lastly, we discussed storage and reheating methods for leftovers. Enjoy making this soup, and feel free to get creative as you experiment with flavors!

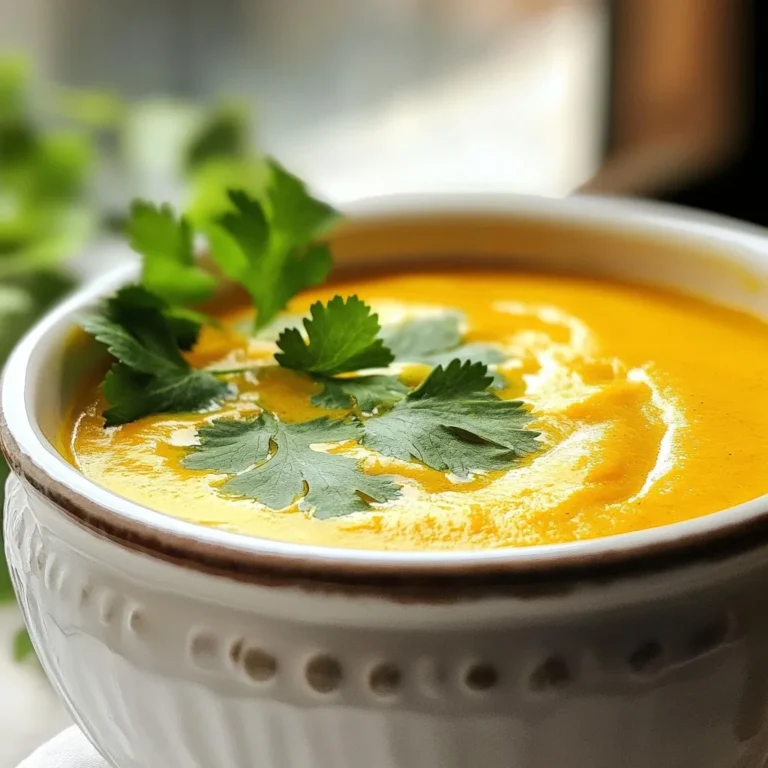
Ginger Turmeric Carrot Soup Rich in Flavor and Health

PREV 1 … 35 36 37 … 47 NEXT
snack joy kitchen

explore

DessertsDinnerAppetizersDrinks

Our Policies

  • Cookie Policy
  • Copyright Policy
  • Disclaimer
  • GDPR Policy
  • Terms Of Use
Back to Top
  • About
  • Contact Us
  • Privacy Policy
© 2026 snack joy kitchen