FREE DINNER EBOOK! Get your copy!
  • Cookie Policy
  • GDPR Policy
  • Disclaimer
  • Terms Of Use
  • Visit my other site: Fun Cookie Recipes
snack joy kitchen
  • Home
  • Dinner
  • Desserts
  • Drinks
  • Appetizers
  • Contact
  • About
  • Privacy Policy
  • Home
  • Dinner
  • Desserts
  • Drinks
  • Appetizers
  • Contact
  • About
  • Privacy Policy
  • Cookie Policy
  • GDPR Policy
  • Disclaimer
  • Terms Of Use
Visit my other site: Fun Cookie Recipes

HOME / CATEGORIES /

Latest

- 1 ½ cups all-purpose flour - 1 teaspoon baking powder - ½ teaspoon baking soda - ½ teaspoon salt - ¾ cup granulated sugar - ½ cup plain Greek yogurt - 3 large eggs - ¼ cup vegetable oil - 2 tablespoons freshly squeezed lemon juice - Zest of 1 lemon - 1 cup fresh blueberries (plus extra for topping) - 1 teaspoon vanilla extract Each slice of this Lemon Blueberry Yogurt Loaf has about: - Calories: 180 - Total Fat: 7g - Saturated Fat: 1g - Cholesterol: 50mg - Sodium: 130mg - Total Carbohydrates: 26g - Dietary Fiber: 1g - Sugars: 10g - Protein: 4g This loaf is a great treat without too many calories. It gives you a nice balance of protein and carbs, perfect for a snack or breakfast. You can swap some ingredients if you want. Here are a few ideas: - Use almond flour for a gluten-free option. - Substitute Greek yogurt with sour cream for a creamier texture. - Try honey instead of granulated sugar for a natural sweetener. - Use coconut oil instead of vegetable oil for a different flavor. - If you can't find fresh blueberries, frozen ones work too. Just add them directly to the batter without thawing. These swaps can help you meet your dietary needs while keeping the loaf delicious! {{ingredient_image_2}} Start by heating your oven to 350°F (175°C). While it warms up, grab a 9x5-inch loaf pan. Lightly grease it with oil or butter. For an easy release, consider lining it with parchment paper. This step makes it simple to take the loaf out later. In a medium bowl, combine 1 ½ cups of all-purpose flour, 1 teaspoon of baking powder, ½ teaspoon of baking soda, and ½ teaspoon of salt. Whisk them together until they blend well. This ensures the loaf rises evenly. Set this dry mix aside for now. In a large bowl, mix ¾ cup of granulated sugar, ½ cup of plain Greek yogurt, and 3 large eggs. Add ¼ cup of vegetable oil, 2 tablespoons of freshly squeezed lemon juice, the zest of 1 lemon, and 1 teaspoon of vanilla extract. Whisk until the mixture is smooth and well combined. Slowly add the dry ingredients into the wet mix. Use a spatula or wooden spoon to fold them together gently. Stop mixing as soon as you don’t see any dry flour. Then, carefully fold in 1 cup of fresh blueberries. Make sure to keep the blueberries whole for a delightful burst of flavor. Pour the batter into your prepared loaf pan. Use a spatula to smooth the top so it looks nice. If you want, sprinkle some extra blueberries on top for a pretty finish. Place the pan in the oven and bake for 50-60 minutes. Check if it's done by inserting a toothpick into the center. It should come out clean. Once baked, take the loaf out of the oven. Let it cool in the pan for about 10 minutes. Then, move it to a wire rack to cool completely. For a stunning presentation, slice the loaf and arrange the pieces on a nice platter. Dust the top with powdered sugar and add fresh lemon slices and blueberries for a bright touch. To get a great loaf, use fresh ingredients. Make sure your baking powder and baking soda are not expired. This helps the loaf rise well. Mix the dry and wet ingredients just enough. Stop when you no longer see dry flour. Overmixing can make the loaf dense. Gently fold in the blueberries to keep them whole. This adds bursts of flavor in every bite. One mistake is not measuring ingredients properly. Use measuring cups for accuracy. Another common error is baking the loaf for too long or too short. Always check with a toothpick to see if it’s done. If you open the oven too early, the loaf may sink. Avoid this by waiting until the last 15 minutes to peek. Lastly, don’t skip the cooling step. Letting it cool helps the loaf set properly. Want to mix things up? Try adding nuts like walnuts or almonds for crunch. You can also swap lemon zest for orange zest for a different twist. For a sweeter treat, fold in some white chocolate chips. If you like spice, add a pinch of cinnamon or nutmeg to the batter. These small changes can take your loaf to the next level! Pro Tips Use Room Temperature Ingredients: For the best results, ensure your eggs and yogurt are at room temperature before mixing. This helps create a smoother batter and a more even bake. Don't Overmix: When combining the wet and dry ingredients, mix just until incorporated. Overmixing can lead to a dense loaf instead of a light and fluffy texture. Fresh vs. Frozen Blueberries: While fresh blueberries are recommended for the best flavor and texture, if using frozen, do not thaw them beforehand to prevent the batter from turning purple. Check for Doneness: Ovens can vary, so start checking your loaf at the 50-minute mark. A toothpick should come out clean or with a few moist crumbs, but not wet batter. {{image_4}} You can make a gluten-free version of this loaf easily. Use 1 ½ cups of gluten-free flour blend instead of all-purpose flour. Make sure the blend contains xanthan gum. This will help the loaf hold together. Follow the same steps in the recipe, and you will enjoy a gluten-free treat that still tastes great. To make this loaf vegan, swap the eggs for flax eggs. Mix 1 tablespoon of ground flaxseed with 2.5 tablespoons of water for each egg. Let it sit for 5 minutes until it gets thick. Use almond milk or any plant-based yogurt instead of Greek yogurt. This keeps the loaf moist and tasty while being completely vegan. Feel free to change the blueberries for other fruits. You might like raspberries, strawberries, or peaches. Just make sure to chop larger fruits into smaller pieces. This way, they mix well and cook evenly. Each fruit adds a new flavor and twist to your loaf. Enjoy experimenting with what’s in season! To store your Lemon Blueberry Yogurt Loaf, first let it cool completely. Wrap it tightly in plastic wrap or store it in an airtight container. This keeps it fresh and moist. You can keep it at room temperature for up to three days. If you live in a warm place, the fridge is a better option. Just remember to bring it back to room temperature before serving for the best taste. You can freeze the loaf for longer storage. Wrap it well in plastic wrap, then foil, to prevent freezer burn. Label the wrap with the date. It can stay in the freezer for up to three months. To enjoy later, move the loaf to the fridge overnight to thaw. You can also thaw it at room temperature for a few hours. To reheat the loaf, slice it first. You can use a microwave or an oven. If using the microwave, warm each slice for about 15-20 seconds. For the oven, preheat it to 350°F (175°C). Place the slices on a baking sheet and heat for about 10 minutes. This way, you keep the loaf soft and fresh. Enjoy it warm for a cozy treat! Yes, you can use frozen blueberries. Just remember to add them straight from the freezer. This helps keep the batter cold and stops them from breaking. You may want to dust them with flour first. This helps them stay suspended in the batter. To reduce sweetness, cut back on sugar. You can use half a cup of sugar instead of three-quarters. You can also add a pinch of salt to balance the flavors. Another option is to use unsweetened yogurt. This choice helps lower the overall sugar in the loaf. You can serve this loaf with fresh fruit, like strawberries or raspberries. A dollop of whipped cream or Greek yogurt works great too. Adding a drizzle of honey or a sprinkle of lemon zest can enhance the taste. It makes for a lovely breakfast or snack. The lemon blueberry yogurt loaf lasts about three days on the counter. Make sure to store it in an airtight container. If you want it to last longer, consider refrigerating it. This can extend its freshness for up to a week. This blog post covers everything you need for a delicious blueberry loaf. We discussed key ingredients, preparation steps, and baking tips. You now have ways to customize the recipe to fit your needs, like gluten-free or vegan options. Remember to store leftovers properly so they stay fresh. I hope you try this recipe and enjoy a tasty treat that’s easy to make!

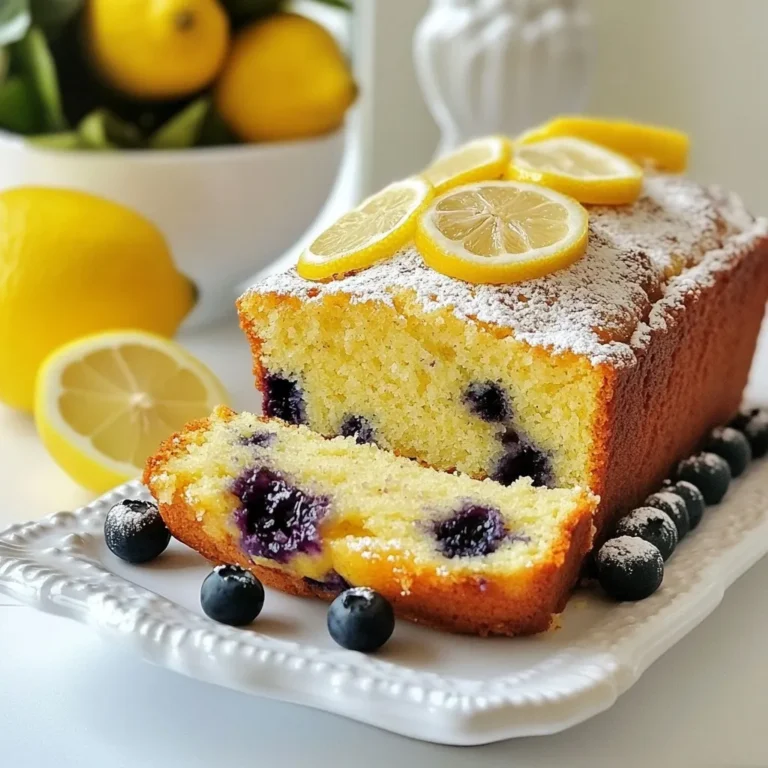
Lemon Blueberry Yogurt Loaf Fresh and Tasty Recipe

To make sticky orange chicken, gather these key ingredients: - 1 lb (450g) boneless chicken thighs, cut into bite-sized pieces - 1/2 cup cornstarch - 1/4 cup vegetable oil (for frying) - 1/4 cup honey - 1/2 cup fresh orange juice - Zest of 1 orange - 3 tablespoons low-sodium soy sauce - 1 tablespoon rice vinegar - 2 cloves garlic, minced - 1 inch piece fresh ginger, minced - 1 teaspoon sesame oil - 1 tablespoon sliced green onions, for garnish - Sesame seeds, for garnish Each ingredient plays an important role. The chicken thighs stay juicy and tender. Cornstarch gives a nice crunch. Honey and orange juice add sweetness and tang. For the best results, use high-quality products: - Organic chicken thighs: They taste better and are healthier. - Fresh oranges: Squeezing your juice gives the best flavor. - Low-sodium soy sauce: This keeps the dish balanced without too much salt. - Pure honey: Look for raw honey for a richer taste. These products enhance your dish's flavor and quality. If you need to switch ingredients, here are some easy swaps: - Chicken: Use chicken breasts for a leaner option. - Cornstarch: Try using flour for dredging, but it won't be as crispy. - Honey: Maple syrup works well for a different sweetness. - Soy sauce: Tamari is a great gluten-free choice. - Rice vinegar: Apple cider vinegar can serve as a substitute. These substitutions keep your dish tasty while meeting dietary needs. {{ingredient_image_2}} First, gather your ingredients. Cut the boneless chicken thighs into bite-sized pieces. Place them in a large mixing bowl. Sprinkle the cornstarch evenly over the chicken. Toss the chicken until each piece is fully coated. This step is key for a crispy texture when frying. Next, heat a large skillet or wok over medium-high heat. Add the vegetable oil and let it shimmer. Carefully add the coated chicken pieces to the hot oil, but do this in batches. Fry each piece for about 4-5 minutes on each side. Look for a golden brown color and a crispy exterior. Once cooked, remove the chicken and let it drain on paper towels. In a separate bowl, mix honey, fresh orange juice, orange zest, soy sauce, rice vinegar, minced garlic, and minced ginger. Whisk this mixture until well combined. Now, in the same skillet, pour the sauce over any leftover oil. Bring it to a gentle simmer. Add the fried chicken pieces, stirring gently to coat them. Allow the chicken to cook in the sauce for 2-3 minutes. This helps thicken the sauce. Finally, drizzle sesame oil over the chicken and toss to mix in the flavor. To get that crispy chicken, start with cornstarch. Coat each piece well. This helps create a crunchy outer layer. Make sure the oil is hot before frying. If it’s not hot enough, the chicken will soak up the oil and turn soggy. Fry in small batches so the temperature stays even. Cook each side for 4-5 minutes. You want a golden brown color for the best texture. Marinades add depth to your dish. For this recipe, use fresh orange juice and zest. They give a bright, sweet flavor. Add soy sauce and rice vinegar for a savory touch. Minced garlic and ginger bring warmth and spice. Mix these ingredients and let the chicken marinate for 30 minutes or more. This short wait lets the flavors soak in nicely. Sticky orange chicken pairs well with many sides. Serve it over fluffy rice for a filling meal. You can also add steamed veggies for some crunch. Try it with a fresh salad to balance the sweetness. For an extra kick, serve with chili flakes or hot sauce. This dish looks great with a sprinkle of green onions and sesame seeds. It makes for a beautiful presentation and a tasty meal! Pro Tips Use Fresh Ingredients: Freshly squeezed orange juice and zest will elevate the flavor of your sticky orange chicken, making it more vibrant and aromatic. Don't Overcrowd the Pan: Fry the chicken in batches to ensure each piece gets crispy. Overcrowding can cause the temperature to drop, resulting in soggy chicken. Adjust the Sweetness: Depending on your preference, you can adjust the amount of honey in the sauce. Try using less if you prefer a tangier flavor. Garnish for Presentation: For a beautiful finish, garnish with sliced green onions and sesame seeds just before serving to add color and texture. {{image_4}} You can easily turn this dish into a spicy delight. Add red pepper flakes or Sriracha to the sauce for heat. Start with one teaspoon, then taste and adjust. This small change can bring a whole new level to the orange chicken. Spicy orange chicken blends sweet and heat perfectly. To make a healthier version, consider using air frying instead of deep frying. Coat the chicken with cornstarch and spray with cooking oil. This method cuts down on fat while keeping the chicken crispy. You can also swap honey for maple syrup or agave nectar. Both options give a similar sweetness with fewer calories. For a vegetarian or vegan twist, try using tofu or tempeh. Press and cube the tofu, then coat it with cornstarch. Fry until golden and crispy. Use the same sauce recipe to keep those great flavors. A mix of vegetables like bell peppers and broccoli can also add color and nutrition to your dish. After you enjoy your sticky orange chicken, store leftovers in an airtight container. This keeps it fresh. Let the chicken cool down first. Place it in the fridge. It can stay good for up to three days. Make sure to separate the chicken from the sauce if you want extra crispiness later. To reheat, use a skillet on medium heat. Add a little oil to help it crisp up. Heat the chicken for about 5-7 minutes. Stir often so it warms evenly. You can also use a microwave. If you do, heat it in short bursts of 30 seconds. This way, it won't dry out. If you want to save it for later, freezing is a great option. Place the cooled chicken in a freezer-safe bag or container. Be sure to remove as much air as possible. This helps prevent freezer burn. The chicken will last for about two months in the freezer. When you're ready to eat, thaw it in the fridge overnight before reheating. To reduce the sweetness, cut back on honey. You can also add more soy sauce. This adds saltiness and balances the flavors. Another option is to increase the orange juice. Fresh juice adds bright flavor without added sweetness. Try mixing in some vinegar too. Rice vinegar enhances the tang and makes it less sweet. Yes, you can use chicken breast. Just remember, chicken breasts may dry out faster. Cook them for a shorter time to keep them juicy. Cut the breast into bite-sized pieces, just like thighs. This helps with even cooking and crispiness. Sticky Orange Chicken pairs well with steamed rice. White rice or brown rice works great. You can also serve it with fried rice for extra flavor. Add some stir-fried veggies on the side. Broccoli, bell peppers, or snap peas add color and nutrients. To make Sticky Orange Chicken gluten-free, switch to gluten-free soy sauce. Look for brands labeled "gluten-free" at the store. You can also use tamari, which is a great soy sauce alternative. Make sure to check other ingredients too. Rice vinegar is usually gluten-free, but always double-check the label. In this blog, we covered how to make sticky orange chicken from start to finish. We discussed the key ingredients and gave tips for achieving that perfect crispy chicken. You also learned about fun variations, like spicy or vegetarian options. Remember, practice makes perfect with this dish. Whether you prefer to fry or bake, have fun and get creative in the kitchen. Enjoy your delicious orange chicken!

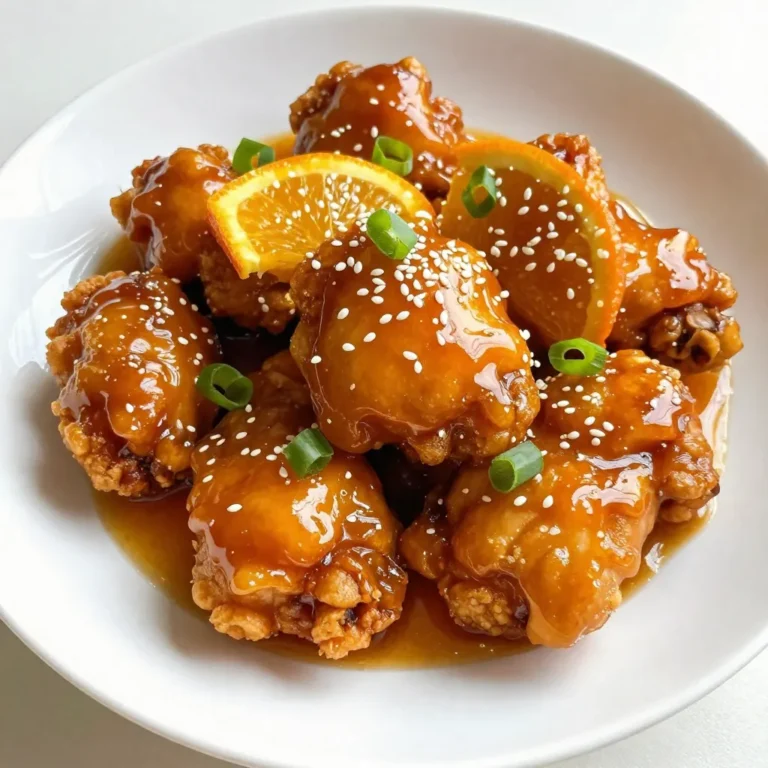
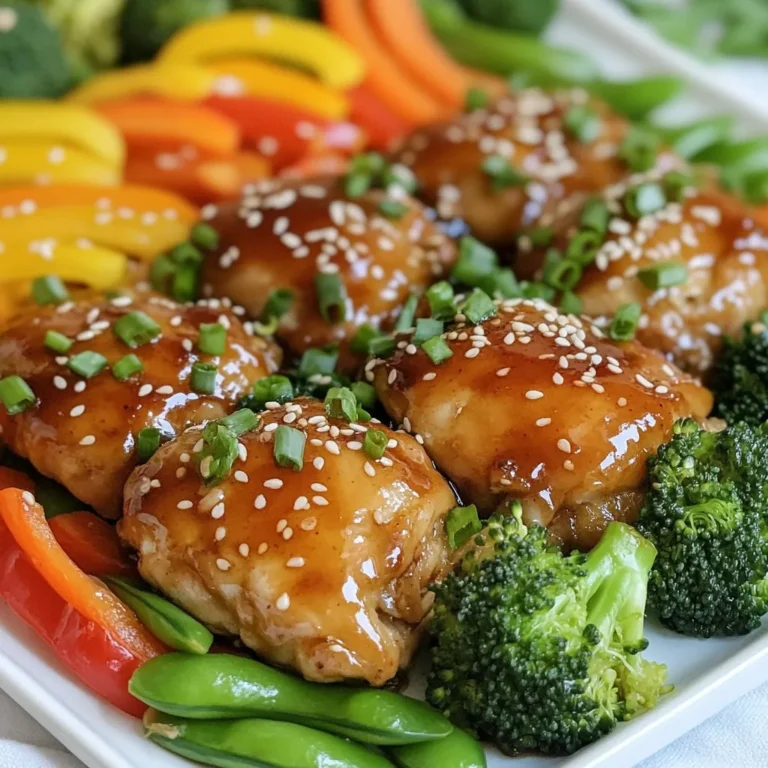
Sticky Orange Chicken Flavorful and Easy Recipe

To make the best sweetcorn chowder, gather these ingredients: - 4 cups fresh sweet corn kernels (about 6 ears of corn) or 2 cans of sweet corn, drained - 1 medium onion, finely diced - 2 cloves garlic, minced - 1 medium potato, peeled and cut into small cubes - 4 cups vegetable broth - 1 cup heavy cream (substitute with coconut milk for a dairy-free version) - 2 tablespoons olive oil - 1 teaspoon smoked paprika - 1 teaspoon dried thyme (or 1 tablespoon fresh thyme, chopped) - Salt and black pepper to taste - Fresh chives or parsley, finely chopped for garnish You can easily swap some ingredients to fit your needs. If you want a dairy-free chowder, use coconut milk instead of heavy cream. For a heartier texture, you may add cooked bacon or chicken. If you do not have fresh corn, canned corn works too. You can also replace thyme with other herbs like rosemary or oregano for a different flavor. Using fresh corn gives the chowder a bright, sweet taste. The crunch of fresh kernels adds texture, making each bite delightful. Fresh corn is often more flavorful than canned corn. However, canned corn is a great option for convenience. If you choose canned corn, make sure to drain it well. This helps prevent the chowder from becoming too watery. {{ingredient_image_2}} To make the best sweetcorn chowder, start with fresh ingredients. First, heat 2 tablespoons of olive oil in a large pot over medium heat. Add 1 medium onion, finely diced. Sauté for about 5 minutes. You want the onion to be soft and see-through. Next, add 2 cloves of minced garlic. Cook for 1-2 minutes until it smells great. Now, add 1 medium potato, peeled and cut into small cubes, along with 4 cups of sweet corn kernels. If you use canned corn, drain it first. Pour in 4 cups of vegetable broth, and sprinkle in 1 teaspoon of smoked paprika and 1 teaspoon of dried thyme. Season with salt and black pepper to taste. Mix all these together. Turn the heat up to bring the chowder to a boil. Once it bubbles, lower the heat and let it simmer for 15-20 minutes. The potatoes should be tender after this time. You can check by piercing them with a fork. When the potatoes are done, remove half of the chowder and blend it until smooth. If you have an immersion blender, this is easy. If not, use a regular blender. Just blend in batches. Pour the blended chowder back into the pot. Finally, stir in 1 cup of heavy cream or coconut milk. Taste and add more salt and pepper if needed. Let the chowder simmer for another 5 minutes to warm it all up. Serve it hot with a sprinkle of fresh chives or parsley on top. Using an immersion blender is quick and easy. You can blend right in the pot. This saves time and means less mess. Just be careful not to splash. A regular blender requires more steps. You need to transfer the chowder in batches. Be careful not to fill the blender too full. Hot soup can expand and spill. Always cover the lid with a towel. This helps prevent burns. For the best texture, cook the chowder for 15-20 minutes. This allows the potatoes to soften. If you want even softer potatoes, let it simmer a bit longer. Just keep an eye on it. When you blend half the chowder, it adds creaminess. This makes the soup rich and smooth. You will love the balance of textures. Enjoy your tasty sweetcorn chowder! To make the best sweetcorn chowder, start with fresh corn. It has the sweetest flavor. If fresh corn is not available, canned corn works fine too. Make sure to drain the canned corn well. When cooking, sauté the onion until soft. This builds a great base for your chowder. Use a blend of both smooth and chunky textures. It adds interest to each spoonful. Blend only half the chowder for creaminess, then stir in the cream for richness. One common mistake is overcooking the garlic. This can make it bitter. Always add garlic after the onion has softened. Another mistake is skipping the seasoning. Salt and pepper enhance the flavors of the chowder. Don’t forget to taste as you go. Also, avoid boiling the chowder too long after adding cream. This keeps the chowder from curdling. Lastly, remember to garnish. Fresh herbs like chives or parsley add color and freshness. You can boost flavor with add-ins like smoked paprika. It gives a lovely depth to the chowder. Fresh thyme adds a nice herbal note. If you like heat, a pinch of cayenne or crushed red pepper works great. For a twist, try adding a splash of lime juice. This brightens the flavor. For extra richness, stir in a dollop of sour cream just before serving. Always experiment with flavors that you love! Pro Tips Fresh Corn Matters: Using fresh sweet corn will enhance the flavor and sweetness of your chowder. If it's corn season, opt for the freshest ears you can find! Texture Balance: For a creamier texture, blend half the chowder as instructed, but feel free to adjust the amount based on your preference for chunkiness versus creaminess. Spice It Up: If you enjoy a bit of heat, consider adding a pinch of cayenne pepper or a dash of hot sauce to the chowder for a spicy kick. Garnish with Flair: Not only do fresh herbs like chives or parsley add color, but they also provide a burst of fresh flavor. Experiment with other herbs like dill for a unique twist. {{image_4}} You can easily make this chowder dairy-free or vegan. Simply swap the heavy cream for coconut milk. This gives a rich and creamy texture. The sweetness of the corn blends well with the coconut. It’s a perfect choice for those who avoid dairy. You can also use vegetable broth to keep it fully plant-based. If you enjoy a kick, add some heat to your chowder. You can mix in diced jalapeños or red pepper flakes. Start with a small amount, then taste and adjust. This way, you find the right balance for your taste. You can also use a dash of hot sauce just before serving. It adds flavor without overpowering the dish. To make the chowder heartier, consider adding protein. Cooked chicken breast or crispy bacon adds great flavor. For a vegetarian option, try black beans or chickpeas. Simply stir them in when you add the corn. This gives the chowder more texture and makes it a complete meal. To store leftover sweetcorn chowder, place it in an airtight container. Make sure it cools to room temperature first. Once cooled, seal the container tightly. You can keep it in the fridge for up to three days. Label the container with the date to track freshness. When reheating chowder, use a pot on the stove. Heat it over low to medium heat. Stir often to prevent sticking or burning. If the chowder seems too thick, add a splash of broth or water. This keeps the texture creamy and smooth. Taste it after reheating and adjust the salt or pepper if needed. To freeze sweetcorn chowder, wait until it cools completely. Portion it into freezer-safe bags or containers. Remove as much air as possible before sealing. Label each bag with the date. You can freeze it for up to three months. When ready to eat, thaw it overnight in the fridge. Reheat it on the stove for the best taste and texture. To thicken sweetcorn chowder, you have a few easy options. First, you can blend part of the chowder. This method gives it a creamy texture. Another way is to add a slurry. Mix equal parts of cornstarch and cold water, then stir it into the hot chowder. Let it cook for a few minutes until thickened. You can also add more potatoes. They break down as they cook and help thicken the soup naturally. Yes, you can make sweetcorn chowder ahead of time. In fact, making it a day early can enhance the flavors. Just cool the chowder after cooking and store it in the fridge. When you're ready to eat, reheat it gently on the stove. If it seems too thick, add a splash of broth or water to loosen it. Stir well as it heats to ensure even warmth. Sweetcorn chowder pairs well with many sides. You can serve it with warm crusty bread. This adds a nice crunch and soaks up the soup. A simple salad makes a great side dish, too. Try a mixed green salad with a light vinaigrette. For a heartier option, serve it with grilled cheese sandwiches. They complement the chowder’s creaminess perfectly. You now have a guide to making tasty sweetcorn chowder. We covered key ingredients, cooking steps, and helpful tips. Remember to use fresh corn for the best flavor. Don't forget about fun variations, like dairy-free options or adding spices. Proper storage keeps leftovers tasting great. Enjoy crafting your perfect chowder! With these tips, you will impress anyone who tries it. Happy cooking!

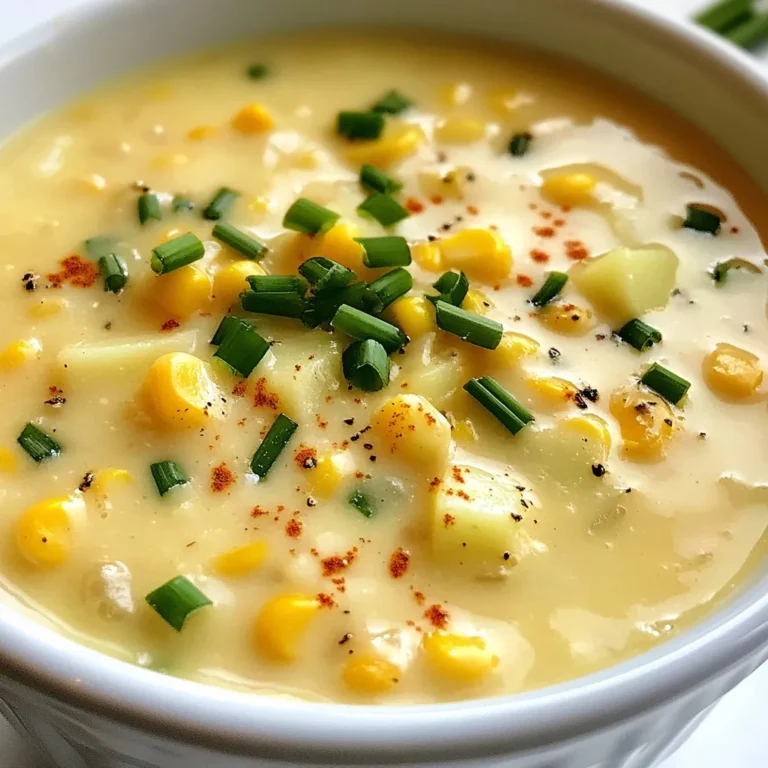
Best Sweetcorn Chowder Tasty and Comforting Recipe

- 1 cup rolled oats - 1 cup almond milk (or any milk of your choice) - 1 tablespoon chia seeds - 2 tablespoons maple syrup (adjust sweetness to taste) - 1 teaspoon vanilla extract - 1/2 teaspoon ground cinnamon - 1 shot of espresso or 1/2 cup strong brewed coffee, cooled completely - 2 tablespoons caramel sauce (store-bought or homemade) - Optional toppings: whipped cream, additional caramel sauce, chocolate shavings To make Caramel Macchiato Overnight Oats, gather your ingredients first. You will need rolled oats for a hearty base. Almond milk makes this dish creamy, but feel free to use any milk you like. Chia seeds add a nice texture and boost nutrition. Maple syrup sweetens the oats, while vanilla extract gives it a warm flavor. Ground cinnamon adds a hint of spice. Next, you’ll need espresso or strong brewed coffee. This gives your oats that classic coffee taste. Caramel sauce adds sweetness and a touch of indulgence. Finally, choose some optional toppings. Whipped cream, extra caramel, or chocolate shavings can elevate your dish. Each ingredient plays a key role in building flavors. When combined, they create a delicious and satisfying meal that is perfect for busy mornings. {{ingredient_image_2}} 1. First, grab a medium mixing bowl. 2. Add 1 cup of rolled oats, 1 tablespoon of chia seeds, and 1 cup of almond milk. 3. Pour in 2 tablespoons of maple syrup, 1 teaspoon of vanilla extract, and 1/2 teaspoon of ground cinnamon. 4. Mix everything well. Stir until the oats are coated evenly. 5. Next, carefully divide the mixture into two jars. Leave some space at the top. 6. After that, pour a layer of cooled espresso or strong coffee over the oats in each jar. 1. Now, drizzle 1 tablespoon of caramel sauce on top of each jar. 2. Watch how it cascades down through the oats and coffee. This looks great! 3. The caramel adds sweetness and richness to your oats. 1. Seal the jars tightly with their lids. 2. Place them in the refrigerator. Let your oats chill overnight or for at least 4 hours. 3. Overnight soaking is key. It helps the oats absorb the flavors. 4. When you’re ready, stir the jars to mix everything. Add more almond milk if you want it creamier. To get the best texture, you can adjust the liquid. If you want creamier oats, add a bit more almond milk. Start with a splash and mix it in. This will help make each bite smooth and tasty. Before serving, stir the oats well. This mixes the coffee and caramel throughout. You want every spoonful to have that sweet coffee flavor. A good stir brings all the wonderful tastes together. Serving your oats in mason jars looks great. It adds charm and makes breakfast fun. You can also layer the oats and coffee for a pretty effect. Add fresh fruit or nuts on top for a nice crunch. Blueberries or sliced bananas work well. Chopped nuts give extra flavor and texture. This makes your oats not just tasty but also beautiful. You can change how sweet your oats are by adjusting the maple syrup. If you like less sweetness, use a bit less. Taste it before you pour it into the jars. If you want alternatives for sweeteners, try honey or agave syrup. They can give a different taste. You can even use stevia or monk fruit for a low-calorie option. These choices help make your oats just right for you. Pro Tips Use Fresh Coffee: For the best flavor, use freshly brewed coffee or espresso. Avoid using coffee that has been sitting for too long to maintain the rich taste. Customize Sweetness: Adjust the amount of maple syrup based on your preference. Taste the mixture before refrigerating to find the perfect balance for your palate. Layering Effect: When adding the coffee, pour it slowly over the back of a spoon to create a beautiful layered effect. This not only looks impressive but also enhances the flavor experience. Make Ahead: These overnight oats can be prepared up to 3 days in advance. Just store them in the refrigerator, making busy mornings a breeze! {{image_4}} You can easily change the flavor of your caramel macchiato overnight oats. Adding cocoa powder gives a nice chocolate taste. Just mix in one to two tablespoons of unsweetened cocoa powder with the oats. This twist makes it rich and fun. You can also use nut butters like almond or peanut. They add creaminess and a nutty flavor. Just stir in a tablespoon to your mixture for a tasty upgrade. If you need a dairy-free choice, almond milk works great. You can also try oat milk or coconut milk. These options keep your oats creamy and tasty. For sweetness, use maple syrup or agave nectar. These vegan options add flavor without dairy. They mix well with the oats and enhance the dish. Toppings can make your oats even better. Try whipped cream for a sweet touch. Extra caramel sauce drizzled on top is always a hit. You might also like chocolate shavings for a fun crunch. For healthier choices, consider fresh fruit like berries or banana slices. Nuts or seeds add texture and nutrients, making your meal more balanced. To keep your caramel macchiato overnight oats fresh, store them in an airtight container. Mason jars work great for this. They seal tight and are easy to grab. Make sure to fill the jars, leaving some space at the top. This helps avoid spills when you add your coffee or toppings. If you make a big batch, separate them into individual jars. This way, you can enjoy them all week long. Your overnight oats can last up to five days in the refrigerator. Always check for signs of spoilage before you eat. If you see any mold or the oats smell sour, it’s time to toss them. Freshness is key for taste and safety. Enjoy your delicious oats while they are still at their best! Yes, you can use quick oats. They will cook faster than rolled oats. This means your oats will be softer. If you prefer a chewier texture, stick with rolled oats. Quick oats are great for a quick meal, but they might not provide the same flavor depth. To make this recipe gluten-free, choose certified gluten-free oats. Many brands offer oats that are processed in gluten-free facilities. Also, check the labels on your almond milk and caramel sauce. Some may have hidden gluten ingredients. The best way to reheat overnight oats is in the microwave. Place your jar in the microwave for about 30 seconds. Stir halfway through to heat evenly. If it's too thick, add a splash of milk. You can also enjoy them cold for a refreshing breakfast. Yes, you can make a larger batch! Simply double or triple the ingredients. Mix everything in a big bowl, then divide into jars. Store them in the fridge for up to five days. This makes breakfast easy and fast during a busy week. You now have a simple and fun way to make overnight oats. We covered the key ingredients like rolled oats, almond milk, and coffee. You learned to layer flavors and add caramel. Remember, chilling overnight is key for the best taste. Don't be afraid to experiment with different flavors and toppings. Adjust sweetness to suit your taste. Store your creations properly to keep them fresh. Now, it’s time to enjoy your tasty, healthy breakfast.

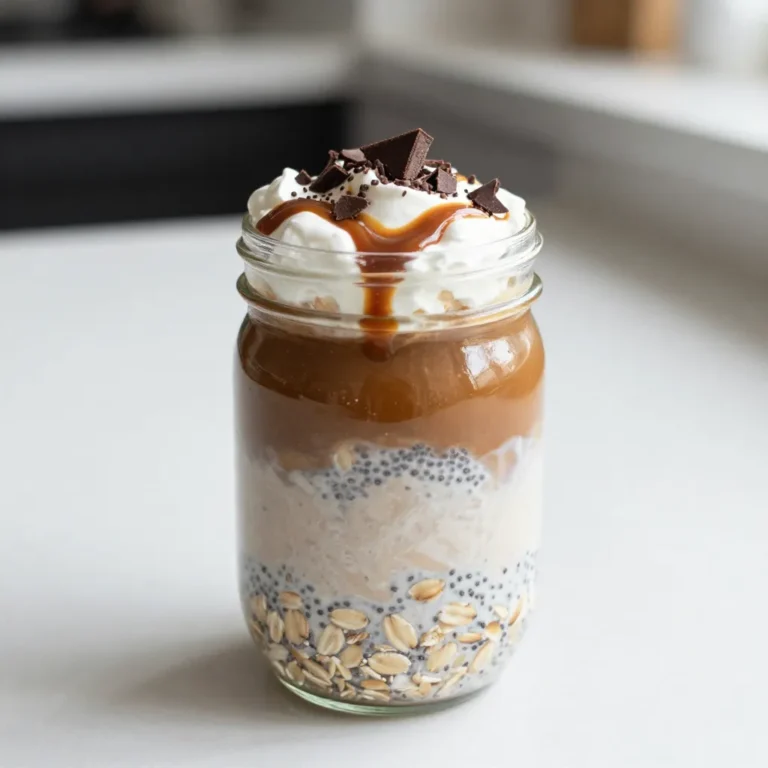
Caramel Macchiato Overnight Oats Delicious Recipe

- 4 boneless, skinless chicken thighs - 1 cup broccoli florets - 1 cup assorted bell peppers (red, yellow, and green), thinly sliced - 1 cup snap peas - 1 medium carrot, cut into thin rounds - 1/4 cup low-sodium soy sauce - 1/4 cup honey - 2 tablespoons rice vinegar - 2 cloves garlic, finely minced - 1 tablespoon fresh ginger, grated - 1 tablespoon cornstarch - 1 tablespoon sesame oil - Sesame seeds - Chopped green onions When I make Sheet Pan Teriyaki Chicken and Vegetables, I always choose fresh ingredients. The chicken thighs are tender and juicy. Broccoli and bell peppers add crunch and color. Snap peas bring a sweet snap, while carrots add a nice touch. Now, let's talk about the teriyaki sauce. I love that it balances sweet and salty. The soy sauce gives it depth. Honey adds sweetness, while rice vinegar adds a zing. Fresh garlic and ginger bring warmth and aroma. Cornstarch thickens the sauce just right, and sesame oil adds a nutty flavor. For garnishes, I always sprinkle sesame seeds and chopped green onions. They add a lovely finish and extra flavor. This dish looks great and tastes even better, making it a hit at my table. {{ingredient_image_2}} - Preheat your oven to 425°F (220°C). - Line a large baking sheet with parchment paper. - Whisk together soy sauce, honey, rice vinegar, garlic, ginger, sesame oil, and cornstarch. This sauce is the heart of the dish. It blends sweet, salty, and tangy flavors. The soy sauce adds depth, while honey brings sweetness. Rice vinegar lifts the taste, and garlic and ginger add warmth. Cornstarch helps thicken the sauce. - Place chicken thighs and coat with teriyaki sauce. - Add vegetables and drizzle remaining sauce. Lay the chicken flat on the sheet. Pour half the sauce over it. Make sure each piece is well-coated. Then, arrange broccoli, bell peppers, snap peas, and carrot around the chicken. Drizzle the rest of the sauce on top. This allows the veggies to soak in the flavor. - Bake for 25-30 minutes until chicken reaches 165°F (75°C). The chicken should be juicy and tender. Use a meat thermometer to check the temperature. The veggies should be bright and crisp, adding color and crunch. - Let it rest and garnish before serving. After baking, let the dish rest for a few minutes. This helps the juices settle. Garnish with sesame seeds and chopped green onions. These add a fresh touch and make the dish pop. To balance sweetness and saltiness, start with low-sodium soy sauce. This keeps the sauce from being too salty. Add honey a little at a time. Taste as you mix. You want it sweet but not overpowering. If it's too sweet, add more soy sauce. If it’s too salty, add honey to balance it. To smooth out your sauce, whisk well. Make sure the cornstarch fully dissolves to avoid lumps. You can also heat the sauce over low heat. This helps blend the flavors. Let it cool slightly before using it on chicken and veggies. Choosing fresh vegetables is key. Look for bright colors and firm texture. For broccoli, pick florets that are tight and green. When selecting bell peppers, choose ones that feel heavy for their size. Snap peas should snap when bent. Carrots should be crisp and not bend easily. To add more color or flavor, try using different veggies. Red cabbage adds crunch and color. Zucchini can add a nice texture too. You can also toss in fresh herbs like cilantro for extra taste. For even cooking, spread the chicken and veggies in a single layer on the pan. This helps them cook evenly. Avoid crowding the pan; it can cause steaming instead of roasting. To check for doneness, use a meat thermometer. The chicken should reach 165°F (75°C). For veggies, they should be tender but still crisp. A fork should easily pierce them without falling apart. Pro Tips Marinate for More Flavor: For an even more flavorful dish, consider marinating the chicken thighs in the teriyaki sauce for at least 30 minutes or up to overnight in the refrigerator. Veggie Variations: Feel free to mix and match your favorite vegetables. Zucchini, asparagus, or even mushrooms can add great taste and texture to your dish. Check for Doneness: Always use a meat thermometer to ensure your chicken reaches an internal temperature of 165°F (75°C) for safe eating. Serving Suggestions: Serve this dish over steamed rice or cooked quinoa to soak up the delicious teriyaki sauce, making it a complete meal. {{image_4}} You can mix things up by using different proteins in this dish. Chicken thighs are juicy and tasty, but chicken breast works too. If you want a plant-based option, try tofu. Just press and cube it first. Shrimp also makes a great choice. They cook quickly and soak up the teriyaki sauce well. Adjust the cooking time if you use shrimp. They only need about 10-15 minutes to cook through. Feel free to switch out vegetables based on what you have. Seasonal veggies can add fun flavors, too. Think about using zucchini, asparagus, or even mushrooms. If you have leftover veggies in your fridge, toss them in! Just cut them into similar sizes for even cooking. Mixing colors makes the dish look even more appealing. You can easily make this dish gluten-free. Swap out the low-sodium soy sauce for a gluten-free variety, like tamari. This keeps the same great taste without the gluten. Check the labels on your honey and other sauces to ensure they are gluten-free too. Enjoy a delicious meal that everyone can enjoy! To store leftovers, place the chicken and vegetables in an airtight container. Make sure to cover them well to keep fresh air out. This will help maintain their taste. You can keep the dish in the fridge for up to four days. After that, the quality may drop. You can freeze this meal for future dinners. First, let the dish cool down completely. Then, transfer it to a freezer-safe bag or container. Remove as much air as possible to avoid freezer burn. It is best to use it within three months for the best flavor. To reheat, take the frozen meal out and let it thaw in the fridge overnight. For quick reheating, place it in the microwave for about 5-7 minutes or until warm. You can also reheat it in the oven at 350°F (175°C) for 15-20 minutes. Make sure it reaches an internal temperature of 165°F (75°C) before serving. Yes, you can prep ingredients in advance. Here are some tips: - Marinate Chicken: Combine the chicken with teriyaki sauce. Store it in the fridge for up to 24 hours. - Chop Vegetables: Cut your veggies a day before. Keep them in an airtight container. - Make Sauce: Prepare the teriyaki sauce early. Store it in the fridge for fresh flavor. This way, dinner will be quick and easy! Pair this dish with great sides. Here are some ideas: - Rice: White, brown, or jasmine rice works well. - Noodles: Try soba or rice noodles for a twist. - Salad: A fresh green salad adds crunch. - Bread: Serve with warm bread to soak up sauce. These sides will complement the dish beautifully. Ovens can vary in performance. Here’s how to adjust: - Convection Ovens: Reduce cooking time by about 5-10 minutes. - Older Ovens: Check chicken and veggies a few minutes earlier. - Temperature Variance: Use a meat thermometer to ensure chicken reaches 165°F (75°C). Monitoring closely helps achieve perfect results! In this blog post, we explored a delicious sheet pan teriyaki chicken recipe. We broke down the main ingredients, from chicken thighs to fresh veggies. I shared how to make the teriyaki sauce and step-by-step baking instructions. We also covered tips for perfecting the sauce, choosing veggies, and adjusting cooking times. As you try this dish, have fun with your ingredients and enjoy the flavors. This recipe is simple, healthy, and full of joy. Cooking at home can be easy and rewarding!

Sheet Pan Teriyaki Chicken and Vegetables Delight

To make Teriyaki Tofu Rice Bowls, you need some key ingredients. Here is what you will need: - 1 block (14 oz) firm tofu, pressed and cubed - 1 cup jasmine rice - 2 cups vegetable broth (or water) - 1/4 cup low sodium soy sauce - 2 tablespoons maple syrup - 1 tablespoon rice vinegar - 1 tablespoon fresh ginger, grated - 2 cloves garlic, minced - 1 tablespoon cornstarch - 2 tablespoons sesame oil - 1 cup broccoli florets - 1 cup bell pepper, sliced (choose any color) - 1 carrot, julienned These ingredients create a tasty and filling meal. You can add some fun toppings to your rice bowls for extra flavor. Consider these: - 2 green onions, sliced (for garnish) - Sesame seeds (for garnish) These garnishes add a nice crunch and a burst of flavor. Each serving of this dish is packed with good nutrients. Here’s what you can expect per serving: - Calories: Approximately 350 - Protein: About 15 grams - Carbohydrates: Roughly 50 grams - Fat: Around 12 grams This meal is not just tasty, but also nutritious. It offers a great balance of protein, carbs, and healthy fats. Enjoy your cooking! {{ingredient_image_2}} Start by pressing the tofu. Use a clean kitchen towel to soak up extra water. Press it for at least 15 minutes. This step helps the tofu absorb flavors better. Cut the tofu into 1-inch cubes after pressing. In a mixing bowl, combine low sodium soy sauce, maple syrup, rice vinegar, grated ginger, and minced garlic. Whisk these ingredients together until they blend well. Add the tofu cubes to the marinade. Let them soak for 15 to 20 minutes. This allows the tofu to soak up the tasty flavors. Rinse 1 cup of jasmine rice under cold water. Keep rinsing until the water runs clear. In a pot, add the rinsed rice with 2 cups of vegetable broth or water. Bring the mixture to a boil. Once boiling, lower the heat, cover, and let it cook for about 15 minutes. The rice should be fluffy and absorb all the liquid. While the rice cooks, heat 2 tablespoons of sesame oil in a pan over medium heat. Add 1 cup of broccoli florets, 1 cup of sliced bell pepper, and 1 julienned carrot. Stir-fry the vegetables for 5 to 7 minutes. You want them tender but still crunchy for the best texture. In another pan, add the marinated tofu along with the leftover marinade. Cook over medium heat for about 7 to 10 minutes. Stir occasionally until the tofu turns golden brown. In a small bowl, mix 1 tablespoon of cornstarch with 2 tablespoons of water. Add this mixture to the tofu and let it cook for 2 to 3 more minutes. This will thicken the sauce. Once the rice is ready, fluff it with a fork. Divide the rice into four bowls. Top each bowl with the sautéed vegetables and the glazed tofu. For a final touch, sprinkle sliced green onions and sesame seeds on top. This adds color and crunch to your dish. Tofu holds a lot of water. Pressing it helps it soak up flavor. Start by wrapping the tofu in a clean kitchen towel. Place a heavy pan on top. Let it sit for about 15 minutes. This step is key. It makes your tofu firmer and better for cooking. For fluffy jasmine rice, rinse it well. This helps remove excess starch. Use a ratio of 1 cup rice to 2 cups broth or water. Bring it to a boil, then lower the heat. Cover it and let it simmer for about 15 minutes. Don't lift the lid while it cooks. This keeps the steam in. You can add more flavor to your teriyaki tofu rice bowls. Consider adding sliced mushrooms or snap peas. Fresh herbs like cilantro or basil add a bright touch. You can also sprinkle chili flakes for a kick. Experiment with these ingredients to find your favorite mix. Pro Tips Press the Tofu Well: Ensure you press the tofu thoroughly for at least 15 minutes to remove excess moisture. This helps the tofu absorb the marinade better and results in a firmer texture when cooked. Customize Your Vegetables: Feel free to add or substitute other vegetables based on your preference or what's in season. Snap peas, zucchini, or baby corn can add different flavors and textures. Marinate Longer for More Flavor: If time allows, marinate the tofu for 30-60 minutes to enhance the flavor even more. You can also marinate it overnight in the refrigerator for a deeper taste. Serve Hot: For the best experience, serve the rice bowls hot. You can reheat the tofu and vegetables gently in a pan to maintain their texture before serving. {{image_4}} You can easily change the veggies in your Teriyaki Tofu Rice Bowls. If you like different flavors or textures, mix it up! Here are some great options: - Snap peas for a crunchy bite - Baby corn for sweetness - Spinach for a leafy texture - Zucchini for a mild taste Feel free to add or swap veggies based on what you have. This recipe is flexible, and you can use any fresh vegetables you enjoy! If you need a gluten-free option, swap regular soy sauce for tamari. Tamari has a similar taste, but it’s made without wheat. You can also use coconut aminos. This option is lighter and sweeter. Both substitutes work well in the marinade and will keep your dish tasty. If tofu isn’t your thing, don’t worry! There are other great vegan proteins you can use. Consider these options: - Chickpeas for a hearty texture - Edamame for a fresh taste - Tempeh for a nutty flavor Each of these choices brings its own unique taste and texture. They’ll all pair well with the teriyaki sauce and rice. Enjoy experimenting with your favorite plant-based proteins! To store your Teriyaki Tofu Rice Bowls, let them cool first. Place leftovers in an airtight container. Keep them in the fridge. They stay fresh for up to three days. Make sure to separate the tofu and rice from the veggies if possible. This helps keep everything crisp and tasty. When you reheat, do it gently. Use a microwave or a pan on low heat. If using a microwave, cover the bowl with a damp paper towel. This keeps moisture in. Stir occasionally for even heating. If using a pan, add a splash of water. This helps steam the rice and keeps it soft. Avoid high heat, as it can make the tofu tough. You can freeze these bowls for later meals. Pack them in freezer-safe containers. Make sure to leave some space at the top for expansion. They last for up to three months in the freezer. To use, thaw overnight in the fridge. Reheat as mentioned above. This is a great way to have a quick, nutritious meal ready when you need it! Yes, you can make Teriyaki Tofu Rice Bowls ahead of time. Prepare the rice and tofu, then store them separately. This keeps the rice fluffy and the tofu crispy. When you're ready to eat, just reheat everything. Add fresh veggies right before serving for a crisp bite. You can try different sauces for Teriyaki Tofu Rice Bowls. Here are a few ideas: - Hoisin Sauce: Adds a sweet and tangy flavor. - Peanut Sauce: Gives a nutty taste and creaminess. - Chili Garlic Sauce: For a spicy kick. - Sweet and Sour Sauce: Adds a nice contrast. Mix and match to find what you like best! To lower the calories in your Teriyaki Tofu Rice Bowls, try these tips: - Use less sesame oil during cooking. - Swap jasmine rice for cauliflower rice. - Reduce the amount of maple syrup in the sauce. - Load up on more fresh veggies, which are low in calories. These changes make the dish lighter without losing flavor! Teriyaki Tofu Rice Bowls blend flavor with nutrition. We explored key ingredients like tofu, rice, and tasty toppings. I shared step-by-step instructions for prep and cooking. You learned tips for perfect tofu and rice. We also discussed how to customize this dish and store leftovers. For a nutritious meal, this recipe is hard to beat. Enjoy making and sharing your rice bowls!

Teriyaki Tofu Rice Bowls Flavorful and Nutritious Meal

- 1 ¾ cups pumpkin puree - 1 cup heavy cream - 3 large eggs - ¾ cup packed brown sugar - ½ cup granulated sugar - 1 teaspoon pure vanilla extract - 2 teaspoons ground cinnamon - 1 teaspoon ground ginger - ½ teaspoon ground nutmeg - ¼ teaspoon ground cloves - ½ teaspoon salt - 1 pre-made 9-inch pie crust These ingredients make a classic pumpkin pie. You can use canned or fresh pumpkin puree. Heavy cream gives the pie a rich taste. Three large eggs help bind everything. The sugars add sweetness, while the spices create warmth and flavor. You can find pre-made pie crust at most stores. It saves time and effort. If you prefer, you can make your own crust. Just remember that a good pie crust can elevate your dessert. For the spices, you can adjust the amounts to your taste. If you love cinnamon, add a bit more. Each ingredient plays a role in creating the perfect balance. They blend together to give your pumpkin pie that warm, cozy flavor we all love. {{ingredient_image_2}} - First, preheat your oven to 425°F (220°C). This step is key for a nice crust. - Next, take a large bowl and whisk together 1 ¾ cups pumpkin puree, 1 cup heavy cream, and 3 large eggs. Mix until it's smooth and creamy. This blend gives your pie its rich flavor. - Now, add ¾ cup packed brown sugar, ½ cup granulated sugar, and 1 teaspoon pure vanilla extract to your pumpkin mix. Stir well until the sugars blend in nicely. - In another small bowl, combine 2 teaspoons ground cinnamon, 1 teaspoon ground ginger, ½ teaspoon ground nutmeg, ¼ teaspoon ground cloves, and ½ teaspoon salt. Mix these spices together. Then, add this spice mix to the pumpkin filling. Stir until the spices are evenly mixed in. - Carefully place your pre-made 9-inch pie crust into a pie dish. Pour the smooth pumpkin filling into the crust. Use a spatula to spread it evenly. - Bake the pie in your hot oven for 15 minutes at 425°F (220°C). This helps the crust get crispy. - After 15 minutes, lower the oven temperature to 350°F (175°C) and bake for another 35-40 minutes. The pie is done when a knife inserted into the center comes out clean. To make the best pumpkin pie filling, you want a smooth mixture. Start by whisking the pumpkin puree, heavy cream, and eggs well. This helps combine all the flavors. If you have room temperature ingredients, they mix better. Take your eggs and cream out a bit early. This step makes a big difference in texture. How do you know when the pie is done? Look for a firm filling. The center should not jiggle much when you shake the pie. Use a knife to test; it should come out clean. Once baked, let the pie cool for at least one hour. Cooling helps the flavors develop and the filling firm up. Serving your pie well makes it even better. Add a big dollop of whipped cream on each slice. A sprinkle of cinnamon adds warmth. For a fun touch, garnish with toasted pumpkin seeds or a slice of fresh pumpkin. This adds color and crunch to your pie. Pro Tips Choose the Right Pumpkin Puree: Using high-quality pumpkin puree, whether canned or homemade, will significantly impact the flavor of your pie. Look for 100% pumpkin without additives for the best results. Don’t Overmix the Filling: When combining the ingredients, mix just until everything is incorporated. Overmixing can incorporate too much air, leading to cracks in the filling as it bakes. Check for Doneness with Care: When testing the pie for doneness, insert a knife into the center; it should come out clean or with a few moist crumbs. If it's still wet, give it a few more minutes in the oven. Cool Completely Before Slicing: Allow the pie to cool completely on a wire rack before slicing. This helps the filling set and makes for cleaner, more attractive slices. {{image_4}} You can easily add new flavors to your classic pumpkin pie. Here are a few ideas: - Adding chocolate or caramel: You can swirl in some melted chocolate or caramel. This adds a rich taste and makes the pie even more special. Just drizzle it in before baking or serve it on top after slicing. - Incorporating nuts or seeds: Chopped pecans or walnuts can give a nice crunch. Sprinkle them on top of the filling before baking. You can also mix in pumpkin seeds for extra flavor and texture. If you or your guests have dietary needs, there are simple swaps you can make: - Gluten-free pie crust options: You can use a gluten-free pie crust. Many brands offer pre-made options that taste great. You can also make your own using almond flour or oat flour. - Dairy-free alternatives for cream: If you want a dairy-free pie, swap heavy cream for coconut cream or almond milk. Both will work well and keep the pie creamy and delicious. To keep your pumpkin pie fresh, store it in the fridge. First, cover it tightly with plastic wrap or aluminum foil. This will help keep it moist and tasty. You can store it for up to four days. If you want to keep it longer, freezing is a great option. To freeze your pie, wrap it well in plastic wrap, then in aluminum foil. This double layer helps prevent freezer burn. You can freeze it for up to three months. When ready to eat, let it thaw overnight in the fridge. To reheat slices of pumpkin pie, use the oven for best results. Preheat your oven to 350°F (175°C). Place the pie slice on a baking sheet. Heat it for about 10 to 15 minutes. This method warms the pie evenly and keeps the crust nice. If you’re in a hurry, you can use the microwave. Heat it on medium power for about 30 seconds. Check to see if it's warm enough. Repeat in short bursts until it's heated through. To keep the crust crisp when reheating, avoid the microwave if you can. The oven helps keep that perfect crunch that makes pumpkin pie so good. Can I use fresh pumpkin instead of puree? Yes, you can use fresh pumpkin. Start by roasting the pumpkin until soft. Then, scoop out the flesh and blend it until smooth. This gives a great taste and texture to your pie. How long can I store pumpkin pie? You can keep pumpkin pie in the fridge for about 3 to 4 days. Just cover it well to keep it fresh. If you want to store it longer, freeze it for up to 2 months. What should I do if my pie filling is too runny? If your filling is runny, add a bit more pumpkin puree or cornstarch. Mix it well and bake again. This helps thicken the filling so it sets nicely. Can I make pumpkin pie ahead of time? Yes, you can make pumpkin pie a day or two ahead. Just let it cool, cover it, and store it in the fridge. This way, the flavors will blend, and you can enjoy it later. This blog post outlined the key ingredients and steps to make a perfect pumpkin pie. I shared tips to ensure your filling is smooth and flavorful and gave suggestions for storage and reheating. You can even add variations for unique flavors. Remember, practice makes perfect. Enjoy your baking and savor every slice! Your homemade pumpkin pie can become a fall favorite.

Classic Homemade Pumpkin Pie Deliciously Simple Recipe

- 8 oz rice noodles - 1 can (13.5 oz) coconut milk - 2 tablespoons red curry paste - 1 tablespoon soy sauce - 1 tablespoon fresh lime juice - 1 tablespoon brown sugar - 1 cup bell peppers (sliced, a mix of red and yellow for vibrant color) - 1 cup snap peas (trimmed) - 1 cup bean sprouts (fresh) - 2 tablespoons vegetable oil - 3 green onions (sliced, for garnish) - Fresh cilantro (a handful, for garnish) - Crushed peanuts (for garnish) - Sea salt (to taste) The main ingredients in spicy coconut noodles create a rich and flavorful dish. Rice noodles serve as the base, soaking up all the tasty sauce. Coconut milk adds a creamy texture, while red curry paste brings heat and depth. Soy sauce and lime juice balance the flavors perfectly. Brown sugar adds a hint of sweetness, which is great for the overall taste. Bell peppers and snap peas add crunch and color. Fresh bean sprouts give the dish a nice, light feel. For cooking, vegetable oil is key to sautéing the curry paste, which enhances the dish's aroma and flavor. For garnishing, I like to use sliced green onions, fresh cilantro, and crushed peanuts. They add freshness and a delightful crunch. Finally, a sprinkle of sea salt helps tie all the flavors together. Enjoy this simple yet vibrant recipe! {{ingredient_image_2}} How do I prepare rice noodles? Start by boiling water in a large pot. Once it boils, add the rice noodles. Cook them based on the package instructions, usually around 4-6 minutes. Make sure to stir gently to avoid sticking. How do I achieve an al dente texture? To get the perfect texture, taste the noodles a minute before the time is up. They should be firm but not hard. Once ready, drain them well and set aside. How do I sauté the red curry paste? In a large, non-stick pan, add vegetable oil and heat it over medium. Once the oil is hot, add the red curry paste. Stir it for 1-2 minutes. This step wakes up the spice, making your dish flavorful. How do I add coconut milk and seasoning? Next, pour in the coconut milk. Add soy sauce, lime juice, and brown sugar. Stir everything well and bring it to a gentle simmer. This creates a creamy sauce full of flavor. How do I incorporate the vegetables? Now, add the sliced bell peppers and snap peas into your simmering sauce. Cook them for about 3-4 minutes. They should soften just a bit but still keep their crunch. How do I mix in noodles and bean sprouts? Carefully add the drained noodles and fresh bean sprouts to the pan. Toss everything together gently. You want the noodles and veggies coated in the rich sauce. Cook for another 2-3 minutes until all is hot. To get the best taste from your spicy coconut noodles, focus on seasoning. Start with a little sea salt and taste as you go. If it needs more flavor, add a touch of soy sauce. You can also balance the spice with sweetness. If the dish is too spicy, mix in more brown sugar or a splash of lime juice to calm it down. This balance creates a rich, tasty dish. Sautéing is key to building flavor. When you heat the vegetable oil, let it shimmer before adding the curry paste. This step brings out the aroma and taste. For quick cooking, have everything ready before you start. Chop your veggies and cook the noodles first. This way, you can throw everything together fast. It helps keep the veggies bright and crunchy. Serving your noodles in deep bowls makes a big difference. Spread the noodles evenly so every bite has color. Garnish with green onions, cilantro, and crushed peanuts. This adds texture and a fresh look. You can also add lime slices on the side for a pop of color. It makes the dish more inviting and fun to eat. Pro Tips Perfect Noodle Texture: Cook the rice noodles just until al dente, as they will continue to soak up the sauce and soften once combined with the vegetables. Customize the Spice: Adjust the amount of red curry paste according to your heat preference. Start with less if you are sensitive to spice and add more as desired. Fresh Ingredients Matter: Use fresh vegetables and herbs for the best flavor and texture. Crisp snap peas and vibrant bell peppers enhance both the taste and presentation. Garnish for Flavor: Don't skip the garnishes! Crushed peanuts, cilantro, and green onions add not only flavor but also a delightful crunch and visual appeal to the dish. {{image_4}} You can easily change the veggies in your spicy coconut noodles. Try using broccoli, carrots, or zucchini. These vegetables add different textures and flavors. They work well in the creamy sauce. Seasonal ingredients also make a big difference. In summer, you can add fresh corn or cherry tomatoes. In fall, consider using butternut squash or kale. Each season offers tasty new options! Adding protein can make this dish more filling. Tofu is a great choice for a vegetarian option. Simply cube the tofu and sauté it in the pan before adding the sauce. If you prefer meat, chicken or shrimp works well. Cook the chicken strips in the pan until they are golden. For shrimp, just sauté them until they turn pink. Both options blend nicely with the sauce. If you need gluten-free options, use rice noodles. They are naturally gluten-free and perfect for this dish. Check the soy sauce label too. Some brands offer gluten-free versions. For a vegan twist, skip the chicken or shrimp. You can also replace brown sugar with maple syrup or coconut sugar. This keeps the dish tasty and plant-based! To keep your spicy coconut noodles fresh, store them in an airtight container. Place them in the refrigerator right after they cool down. Make sure to eat them within three days for the best taste. When reheating, use a pan over low heat. Add a splash of water or coconut milk to help revive the dish. Stir often to heat evenly. You can also use the microwave. Heat in 30-second bursts, stirring between each until warm. If you want to freeze the noodles, make sure they cool completely. Place them in a freezer-safe container. You can freeze them for up to two months. When you are ready to eat, take them out and let them thaw in the fridge overnight. For reheating, use the stovetop or microwave as mentioned above. Make sure to add a bit of liquid for moisture. This helps keep the noodles tasty and not dry. You can easily change the spice levels in this dish. If you want less heat, use less red curry paste. For more heat, add more paste or some chili flakes. You can also substitute the coconut milk. If you want a lighter option, use low-fat coconut milk. For a nutty flavor, try almond milk or oat milk. Just remember, these will change the taste a bit. Yes, you can use many noodle types! Rice noodles are great, but you can swap them with egg noodles or soba noodles. Each type has a different taste and texture. Cooking times will vary. Rice noodles cook fast, usually in about 5 minutes. Egg noodles take about 7-9 minutes, while soba noodles need about 4-5 minutes. Always check package instructions for the best results. To increase the spice level, add more red curry paste. You can also include fresh chopped chili peppers or hot sauce. Sriracha works well for extra heat! Another tasty option is to sprinkle in some crushed red pepper flakes. Just a little will bring a nice kick without overpowering the dish. In this blog post, we explored how to make delicious Spicy Coconut Noodles. We looked at the main ingredients, such as rice noodles and coconut milk, and how to prepare the sauce and noodles. You learned tips for flavor balance and cooking techniques. I shared how to customize the dish based on your taste. Proper storage for leftovers ensures you enjoy this meal again. With these insights, you can create a tasty and unique dish on your own. Enjoy your cooking journey and try new flavors!

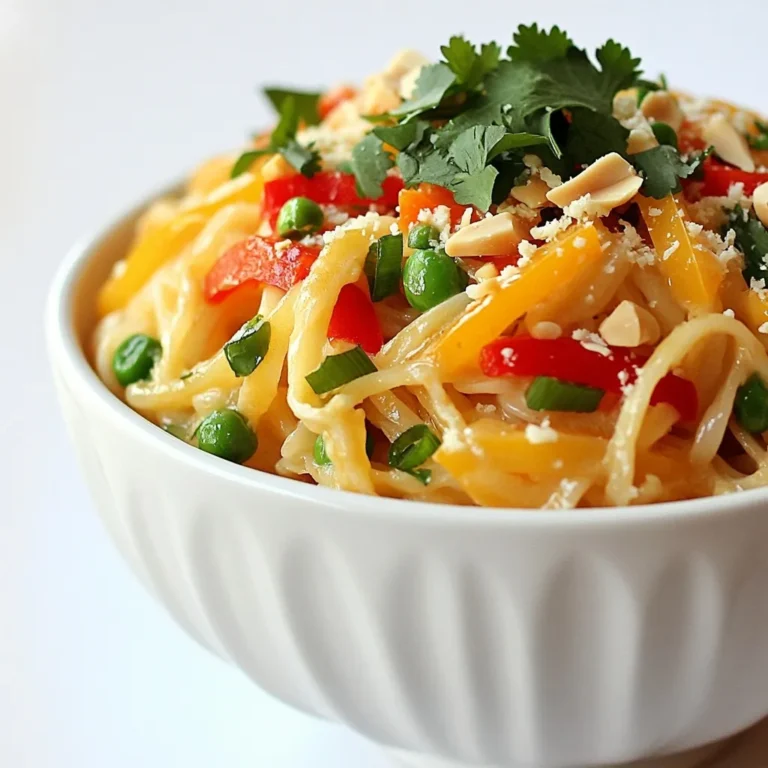
Spicy Coconut Noodles Flavorful and Easy Recipe

To make funfetti sugar cookie bars, you need some simple ingredients. Each one plays a key role in creating the perfect treat. Here’s the list of what you’ll need: - 2 ½ cups all-purpose flour - 1 teaspoon baking powder - ½ teaspoon baking soda - ½ teaspoon salt - ¾ cup unsalted butter, softened to room temperature - 1 cup granulated sugar - ½ cup brown sugar, packed tightly - 2 large eggs, at room temperature - 2 teaspoons pure vanilla extract - ½ cup rainbow sprinkles (plus extra for topping) - 1 cup royal icing or cream cheese frosting (optional for topping) Each ingredient adds flavor, texture, and fun. The flour gives the bars structure. Baking powder and baking soda help them rise. Salt enhances the sweetness. Butter creates a rich taste and soft texture. The sugars add sweetness and moisture. Eggs bind everything together. Vanilla adds a warm flavor. Rainbow sprinkles bring joy and color. Frosting is optional but makes your bars extra special! {{ingredient_image_2}} - Preheat oven to 350°F (175°C). - Prepare the baking pan with parchment paper. Start by preheating your oven. This ensures even baking. Next, grab a 9x13 inch baking pan. Line it with parchment paper. Leave some paper hanging over the sides. This will help you lift the bars out later. - Combine flour, baking powder, baking soda, and salt. In a medium bowl, mix all-purpose flour, baking powder, baking soda, and salt. Use a whisk to blend everything well. Set this bowl aside while you work on the wet ingredients. - Beat butter and sugars until light and fluffy. In a larger bowl, take softened unsalted butter. Add granulated sugar and brown sugar. Use a hand mixer to beat this mixture until it’s light and fluffy. This step takes about 2-3 minutes. The fluffiness makes your bars soft and chewy. - Add eggs one at a time. - Mix in vanilla extract. Now, crack the eggs into the butter-sugar mix. Add them one at a time. Make sure each egg is mixed in well before adding the next. Then, pour in the pure vanilla extract. This adds a lovely flavor to your bars. - Gradually mix dry ingredients into wet. Take the bowl with your dry ingredients. Gradually mix it into the wet ingredients. Do this at low speed with your mixer. Stop mixing when everything is just combined. Overmixing can make your bars tough. - Fold in rainbow sprinkles. - Pour batter into prepared pan. Now for the fun part! Carefully fold in the rainbow sprinkles. Use a spatula or wooden spoon to mix them in evenly. Then, pour the batter into your lined baking pan. Use a spatula to spread it out evenly. - Bake and check for doneness. - Cool on wire rack. Bake the cookie bars in your preheated oven. Check them after about 20 minutes. They should be lightly golden on the edges. Insert a toothpick into the center. If it comes out clean, they are done! Remove them from the oven and let them cool for about 10 minutes in the pan. Then, lift them out using the parchment paper and let them cool completely on a wire rack. - Apply frosting and extra sprinkles. - Cut into bars for serving. Once the bars are cool, it’s time to frost. Spread royal icing or cream cheese frosting on top. For extra fun, add more rainbow sprinkles on the frosting. Finally, use a sharp knife to cut the bars into squares or rectangles. Enjoy your sweet treats! For the best cookie bars, start with mixing the butter and sugars well. Use a hand mixer or stand mixer to beat them until fluffy. This step adds air, making the bars soft and chewy. When adding the eggs, do it one at a time. This helps mix well. Avoid overmixing once you add the dry ingredients. Mix just until everything is combined. This keeps your bars from being tough. If you see any flour pockets, gently fold the batter with a spatula. To kick up the flavor, you can add a splash of almond extract. It gives a sweet, nutty flavor that pairs well with the cookie. You can also try adding lemon zest for a bright twist. Both options bring a fun change to the classic funfetti taste. For serving, arrange the cookie bars on a colorful platter. Stack them slightly to create a fun display. This adds height and makes them eye-catching. Don’t forget to sprinkle extra rainbow sprinkles on top. It adds a joyful touch that everyone loves. Pro Tips Butter Temperature: Ensure your butter is softened to room temperature for optimal creaming with the sugars, which will help achieve that light and fluffy texture. Don’t Overmix: When combining the dry ingredients with the wet, mix just until incorporated. Overmixing can lead to tough cookie bars. Cooling Time: Allow the cookie bars to cool completely before frosting. This prevents the frosting from melting and ensures a beautiful finish. Sprinkle Management: For an extra pop of color, reserve some sprinkles to add on top after frosting. This keeps them vibrant and prevents them from bleeding into the batter. {{image_4}} You can easily change the flavor of your Funfetti sugar cookie bars. Adding lemon zest gives a bright, fresh taste. Just a teaspoon will do! If you prefer a nutty flavor, try almond extract instead of vanilla. It adds a lovely twist. You can also play with the sprinkles. Use chocolate or seasonal sprinkles for fun themes. Frosting can make your cookie bars even more special. Instead of royal icing or cream cheese, try chocolate ganache. It’s rich and smooth, perfect for chocolate lovers. Whipped cream is another great choice. It’s light and airy, adding a nice touch. You can also serve them plain for a simpler treat. If you need gluten-free options, use a gluten-free flour blend. This works well without changing the taste much. For a vegan version, swap eggs for flax eggs. Use plant-based butter and dairy-free frosting. These changes keep the fun while meeting your dietary needs. You can store your Funfetti sugar cookie bars in two ways: at room temperature or in the fridge. - Room Temperature: Keep them in an airtight container. This works well if you plan to eat them in a few days. - Refrigerator: Place them in the fridge if you want them to last longer. The cold keeps them fresh, but they may get a bit firmer. Freezing cookie bars is easy. Here’s how: 1. Cool Completely: Let the bars cool down fully after baking. 2. Cut Bars: Slice the bars into squares or rectangles. 3. Wrap: Wrap each piece in plastic wrap tightly. 4. Place in Bag: Put the wrapped bars in a freezer bag. Try to remove as much air as you can. 5. Label: Mark the date on the bag for reference. 6. Freeze: Store them in the freezer for up to three months. Thawing: To thaw, take out the bars and leave them at room temperature for about 30 minutes. You can also heat them in the microwave for a few seconds. When stored properly, the cookie bars can last: - At Room Temperature: About 4-5 days. - In the Refrigerator: Up to a week. - In the Freezer: Up to three months. Enjoy the sweet treats whenever you want! Yes, you can make these cookie bars ahead of time. Bake them and let them cool completely. Then, wrap them tightly in plastic wrap or store them in an airtight container. They will stay fresh for up to three days at room temperature. You can also freeze them for longer storage. You can tell the cookie bars are done when the edges turn lightly golden. Insert a toothpick in the center; if it comes out clean, they are ready. Make sure not to overbake them, or they may become dry. If you don't have rainbow sprinkles, you can use mini chocolate chips or chopped nuts. You can also use themed sprinkles for holidays or special events. The key is to keep the fun and color in your cookie bars. Yes, you can use a different size pan. If you use a smaller pan, the bars may take longer to bake. If you use a larger pan, they may bake faster. Keep an eye on them while they bake. If your cookie bars are crumbly, you may have overmixed the batter or used too much flour. To fix this, try adding a little melted butter to the mixture. This will help bind the ingredients together better. You now have all the steps to make delicious cookie bars. Remember the key ingredients: flour, sugar, eggs, and sprinkles. The process is simple, from mixing to baking. Experiment with flavors and toppings to make it your own. Store them right to keep your treats fresh. With these tips, you’ll bake perfect cookie bars every time. So gather your ingredients, and start baking today!

Funfetti Sugar Cookie Bars Flavorful Sweet Treats

- 4 boneless, skinless chicken thighs - 1 cup buttermilk - 1 tablespoon fish sauce - 1 tablespoon lime juice - 1 tablespoon red curry paste - 1 cup all-purpose flour - 1/2 cup cornstarch - 1 teaspoon baking powder - 1 teaspoon garlic powder - 1 teaspoon onion powder - Salt and freshly ground pepper to taste - Oil for frying - 4 soft brioche buns - 1 cup shredded cabbage (green or purple for color) - 1/4 cup fresh cilantro, finely chopped - 1/4 cup Thai sweet chili sauce - Lime wedges, for serving 1. Boneless, Skinless Chicken Thighs: I prefer thighs for their rich flavor and juiciness. They stay tender during frying. 2. Buttermilk: This helps to tenderize the chicken. It adds a nice tangy flavor too. 3. Fish Sauce: This gives a deep umami taste. A little goes a long way in adding complexity. 4. Red Curry Paste: This adds a warm spice and vibrant flavor. It’s essential for that Thai twist. 5. Flour and Cornstarch: This mixture creates the perfect crispy coating. Cornstarch helps the crust stay light. 6. Thai Sweet Chili Sauce: This sauce adds sweetness and heat. It’s perfect for drizzling on the sandwich. - Chicken Thighs: You can use chicken breasts, but they might be less juicy. - Buttermilk: If you don’t have buttermilk, mix milk and lemon juice. Let it sit for a few minutes. - Fish Sauce: Soy sauce can work as a substitute, but it won’t have the same flavor. - Red Curry Paste: You can use yellow curry paste for a milder taste. - Brioche Buns: Any soft sandwich bun will work. Look for something that holds up well. {{ingredient_image_2}} Start by gathering your buttermilk, fish sauce, lime juice, and red curry paste. In a large bowl, whisk these together until smooth. This marinade gives the chicken great flavor. Next, add the chicken thighs to the bowl. Make sure they are fully covered in the marinade. Cover the bowl with plastic wrap and place it in the fridge. Let the chicken soak for at least one hour. For even better flavor, let it sit overnight. Now, it's time to fry! Grab another bowl for the dry coating. Mix together the flour, cornstarch, baking powder, garlic powder, onion powder, salt, and pepper. Stir well to combine. Heat oil in a deep pan or fryer to 350°F (175°C). This temperature is key for crispy chicken. Take the marinated chicken out of the fridge. Let any extra marinade drip off. Then, dredge each piece in the flour mix. Press the coating onto the chicken so it sticks well. Carefully place the chicken in the hot oil. Fry for 5 to 7 minutes on each side. The chicken should turn golden brown and be cooked through. Use a meat thermometer to check if it’s 165°F (75°C) inside. Once done, put the fried chicken on a wire rack with paper towels. This helps soak up extra oil. To build your sandwich, start with the brioche buns. Spread a good amount of Thai sweet chili sauce on the bottom half. This adds a sweet and spicy kick. Next, place a crispy fried chicken thigh on the sauce. Top it with a heap of shredded cabbage for crunch. Finish with a sprinkle of fresh cilantro for a burst of flavor. Finally, put the top half of the bun over everything. Serve your sandwich with lime wedges on the side for a zesty touch. Enjoy your delicious Thai Fried Chicken Sandwich! Marinating chicken is key to great flavor. Use buttermilk for a tender texture. It helps the chicken soak up all those tasty flavors. Mix buttermilk, fish sauce, lime juice, and red curry paste in a bowl. Make sure it’s well blended. - Time: Marinate for at least 1 hour. For deeper flavor, let it sit overnight. - Cover: Always cover the bowl to prevent contamination. This step ensures your chicken is juicy and flavorful. Frying can be tricky, but I have some tips for you. Heat your oil to 350°F (175°C). Use a thermometer to check the temperature. This helps cook the chicken evenly. - Dredge: After marinating, coat the chicken in the flour mix. Press down to make sure it sticks. - Fry: Place the chicken gently in the oil. Fry for 5-7 minutes on each side. Look for a golden brown color. - Check Temp: Make sure the chicken reaches 165°F (75°C) inside. This keeps it safe to eat. Let the chicken drain on a wire rack to stay crispy. Presentation makes a big difference! Here are some great tips to serve your Thai fried chicken sandwich. - Buns: Use soft brioche buns for a nice touch. - Sauce: Spread Thai sweet chili sauce on the bottom bun. This adds a sweet and spicy kick. - Toppings: Add crispy fried chicken, shredded cabbage, and fresh cilantro. Serve with lime wedges for a zesty pop. Wrap the sandwiches in parchment paper for a fun street-food vibe. You can also add pickled veggies for color and crunch. Enjoy! Pro Tips Marinate Longer for Flavor: For the most flavorful chicken, allow it to marinate overnight in the buttermilk mixture. This not only enhances the taste but also helps to tenderize the meat. Perfect Frying Temperature: Use a thermometer to maintain the oil temperature at 350°F (175°C). If the oil is too hot, the coating will burn before the chicken cooks through; too cool, and the chicken will absorb excess oil. Double Dredge for Extra Crunch: For an extra crispy coating, consider double dredging the chicken. After the first coat of flour mixture, dip it back into buttermilk and then dredge again in the flour mixture before frying. Keep Chicken Warm: If you're frying in batches, keep the cooked chicken warm in an oven set to low (about 200°F or 93°C) while you finish frying the rest. This ensures all pieces are warm when served. {{image_4}} You can turn up the heat with a spicy Thai fried chicken sandwich. To make this version, add extra red curry paste to the marinade. You can also sprinkle some cayenne pepper into the flour mixture. This gives your chicken a fiery kick. Pair it with a creamy avocado spread to balance the heat. If you want a vegetarian twist, try using tofu instead of chicken. Press firm tofu to remove excess water, then cut it into thick slices. Marinate the tofu in the same buttermilk mixture as the chicken. Coat it in the flour mix, just like you would with chicken. Fry until golden. This gives you a crispy, flavorful sandwich without meat. You can switch up the buns for a fun twist. Try soft pretzel buns or whole grain rolls for added flavor. For toppings, think beyond cabbage. You can use pickled carrots for a tangy crunch or add sliced jalapeños for heat. Fresh herbs like mint or Thai basil can add a nice touch. Each change can make your sandwich unique and exciting. To store leftover sandwiches, wrap each one in plastic wrap or foil. Place them in an airtight container. Keep the sandwiches in the fridge for up to three days. This will help them stay fresh and tasty. To reheat your fried chicken, use the oven for best results. Preheat your oven to 375°F (190°C). Place the chicken on a baking sheet lined with parchment paper. Heat for about 10-15 minutes or until warmed through. This method keeps the chicken crispy. You can also use an air fryer for a quick reheating option. If you want to freeze the sandwiches, wrap them tightly in plastic wrap, then place them in a freezer bag. They can last up to three months in the freezer. To thaw, move the sandwich to the fridge overnight. When ready to eat, reheat as mentioned above. This keeps your chicken flavorful and fresh even after freezing. A Thai Fried Chicken Sandwich stands out due to its bold flavors. The marinade includes fish sauce, lime juice, and red curry paste. These ingredients add depth and a touch of heat. The crispy chicken contrasts nicely with fresh toppings like cabbage and cilantro. The sweet chili sauce brings in a sweet and spicy kick. This combination creates a sandwich that delights your taste buds. Yes, you can use chicken breasts if you prefer. However, thighs offer more flavor and juiciness. Breasts can dry out more easily when frying. If you use breasts, marinate them for extra moisture. Cut them into thinner pieces for quicker cooking. Adjust frying time to ensure they cook through without drying out. To keep the chicken crunchy, follow a few key steps. First, use a mix of flour and cornstarch for coating. Cornstarch helps create a lighter, crispier texture. Second, ensure the oil is hot enough before frying—around 350°F (175°C). Fry the chicken in small batches to avoid lowering the oil temperature. Finally, let the fried chicken rest on a wire rack. This allows air to circulate, keeping it crispy. In this blog post, we explored the tasty world of fried chicken sandwiches. We looked at essential ingredients, shared step-by-step cooking tips, and detailed fun variations. You now know how to make, serve, and store the sandwich, too. Remember, small changes can bring big flavor. With practice, you can impress anyone who takes a bite. Enjoy experimenting with these ideas, and make this sandwich your own. Your fried chicken adventure starts today!

Thai Fried Chicken Sandwich Irresistible Recipe Guide

PREV 1 … 34 35 36 … 47 NEXT
snack joy kitchen

explore

DessertsDinnerAppetizersDrinks

Our Policies

  • Cookie Policy
  • Copyright Policy
  • Disclaimer
  • GDPR Policy
  • Terms Of Use
Back to Top
  • About
  • Contact Us
  • Privacy Policy
© 2026 snack joy kitchen