FREE DINNER EBOOK! Get your copy!
  • Cookie Policy
  • GDPR Policy
  • Disclaimer
  • Terms Of Use
  • Visit my other site: Fun Cookie Recipes
snack joy kitchen
  • Home
  • Dinner
  • Desserts
  • Drinks
  • Appetizers
  • Contact
  • About
  • Privacy Policy
  • Home
  • Dinner
  • Desserts
  • Drinks
  • Appetizers
  • Contact
  • About
  • Privacy Policy
  • Cookie Policy
  • GDPR Policy
  • Disclaimer
  • Terms Of Use
Visit my other site: Fun Cookie Recipes

HOME / CATEGORIES /

Latest

- 1 pound ground turkey - 1 cup fresh spinach, finely chopped - 1/2 cup feta cheese, crumbled - 1/4 cup plain breadcrumbs - 1/4 cup grated Parmesan cheese - 1 large egg - 2 cloves garlic, minced The main ingredients for spinach feta turkey meatballs start with ground turkey. This meat keeps the dish lean and juicy. Fresh spinach adds a burst of color and nutrients. Feta cheese brings a salty, creamy taste that pairs well with the turkey. Breadcrumbs help bind the mixture together. Grated Parmesan cheese adds depth and richness. An egg acts as a binder, ensuring the meatballs hold their shape. Finally, minced garlic gives a fragrant kick that enhances the flavor. - 1 teaspoon dried oregano - 1 teaspoon dried basil - Salt and freshly ground black pepper to taste For spices, dried oregano and basil add earthy notes to the meatballs. Salt and pepper balance the flavors, making every bite pop. You can adjust these spices to match your taste. - Olive oil, for pan frying - Optional garnishes For cooking, olive oil is key. It helps to brown the meatballs and adds flavor. You can also use optional garnishes. Crumbled feta or fresh spinach leaves make a lovely presentation. {{ingredient_image_2}} To start, grab a large mixing bowl. Place 1 pound of ground turkey in it. Add in 1 cup of finely chopped fresh spinach. Next, crumble in 1/2 cup of feta cheese. This cheese gives the meatballs a nice tang. Now, pour in 1/4 cup of plain breadcrumbs and 1/4 cup of grated Parmesan cheese. Then, break 1 large egg into the mix, which helps bind everything. Now, add 2 cloves of minced garlic. Sprinkle in 1 teaspoon each of dried oregano and dried basil. Don’t forget to add a pinch of salt and freshly ground black pepper. Use clean hands to mix everything well. Make sure the spices and cheese are spread evenly throughout the turkey mixture. Once your mixture is ready, it’s time to shape the meatballs. Take a scoop of the mixture and mold it into a ball about the size of a golf ball. This size cooks evenly and stays juicy. Place the formed meatballs on a plate as you go. For consistent meatballs, keep your hands slightly wet. This prevents the mixture from sticking to your hands. If the mixture feels too wet, add a bit more breadcrumbs to help. Preheat a large skillet over medium heat. Drizzle in a thin layer of olive oil so the meatballs do not stick. Wait until the oil shimmers, then gently add the meatballs. Don’t crowd the skillet. This helps them cook evenly. Cook the meatballs for about 8-10 minutes. Turn them occasionally with tongs. You want them golden brown and fully cooked. Check that the internal temperature reaches 165°F. Once done, remove them from the skillet. Let them rest on a paper towel-lined plate to soak up extra oil. To make great meatballs, keep the meat mixture cool. Warm meat can lead to tough balls. Use cold hands when mixing. This helps keep the texture nice. When cooking, avoid overcrowding the skillet. This can trap steam and make them soggy. Cook in batches if needed. This way, they will brown evenly. To boost the taste, consider adding spices. Try red pepper flakes for heat or smoked paprika for depth. Fresh herbs like parsley or dill can also brighten the flavor. Using fresh spinach gives a nice touch. You can also try adding finely chopped sun-dried tomatoes for a sweet kick. These meatballs pair well with many sides. Serve them with a fresh salad or roasted veggies. Pasta and marinara sauce make a classic combo. For presentation, arrange the meatballs on a colorful platter. Top with extra crumbled feta and fresh herbs. This adds color and makes your dish pop. A creamy dip, like tzatziki, is also a great addition. Pro Tips Keep it Moist: Adding a bit of Greek yogurt or ricotta cheese to the mixture can enhance the moisture and tenderness of the meatballs. Flavor Boost: Consider adding finely chopped onions or bell peppers to the mix for extra flavor and nutrition. Batch Cooking: These meatballs freeze beautifully! Make a double batch and freeze half for a quick meal later. Pan-Frying Tips: For an even browning, allow the meatballs to sear undisturbed for a few minutes before turning them. {{image_4}} You can switch up the protein in your meatballs. Ground chicken or even beef works great. Each meat adds its own unique taste. If you want dairy-free meatballs, try nutritional yeast instead of feta. This option keeps the flavor while making it safe for dairy-free diets. Want to spice things up? Add red pepper flakes for heat. You can also mix in other veggies. Chopped bell peppers or zucchini will add color and nutrition. Experimenting with flavors can make each batch of meatballs unique! You can bake your meatballs for a healthier option. Just arrange them on a baking sheet and bake at 400°F for about 20 minutes. If you prefer pan frying, keep an eye on the heat and turn them often. For a hands-off approach, use a slow cooker. Cook on low for 4-5 hours for juicy meatballs with great flavor. To keep your spinach feta turkey meatballs fresh, follow these tips. First, let the meatballs cool completely. Then, place them in an airtight container. Store them in the refrigerator for up to three days. If you want to save them longer, freezing is a great option. To freeze, arrange the meatballs on a baking sheet in a single layer. Freeze them for about two hours until firm. Once frozen, transfer them to a freezer-safe bag. Label the bag with the date. You can freeze them for up to three months. When you're ready to enjoy your leftovers, you have a few options for reheating. The best method is using the oven. Preheat your oven to 350°F. Place the meatballs on a baking sheet and heat for about 15 minutes. This keeps them juicy and warm. You can also use a microwave for quick reheating. Place the meatballs on a microwave-safe plate and cover them with a damp paper towel. Heat them in short bursts of 30 seconds. Check the temperature to avoid drying them out. For both methods, adding a little broth or water can help maintain moisture and flavor. Enjoy your delicious meatballs again! Yes, you can use frozen spinach. Just make sure to thaw it first. Once thawed, squeeze out the excess water. This step is key to avoid soggy meatballs. You want your meat mixture to stay firm. To check if the meatballs are done, use a meat thermometer. They should reach an internal temperature of 165°F. This ensures they are safe to eat. If you don't have a thermometer, cut one in half. The meat should no longer be pink inside. These meatballs pair well with many sides. Consider serving them with: - Rice or quinoa - Pasta with marinara sauce - Roasted vegetables - A fresh salad For sauces, you might enjoy: - Tomato sauce for a classic touch - Tzatziki dip for a cool contrast - Yogurt sauce to enhance flavor Feel free to mix and match sides and dips to make your meal fun! This blog post guides you to make delicious spinach feta turkey meatballs. You learned about key ingredients like ground turkey, spinach, and cheeses. I shared step-by-step instructions and tips for perfecting your meatballs. Variations let you customize flavors and proteins to suit your taste. Whether you store leftovers or serve them fresh, these meatballs are a treat. Enjoy using different spices and methods to keep things exciting! Now, it’s time to gather your ingredients and start cooking. Enjoy your tasty creation!

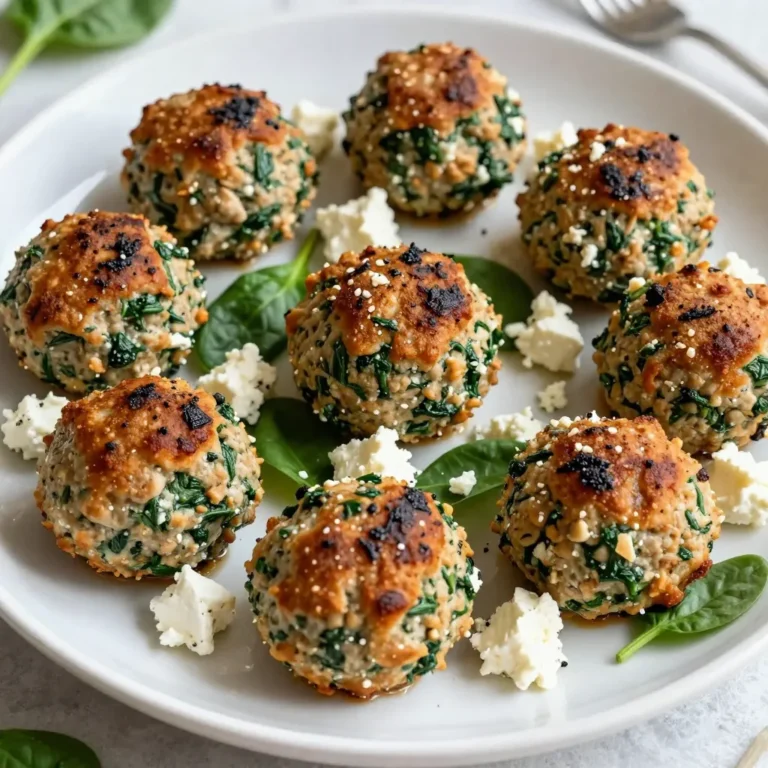
Spinach Feta Turkey Meatballs Tasty and Easy Recipe

- 2 lbs beef chuck, cut into 1-inch cubes - 4 dried ancho chilies, stemmed and seeds removed - 2 dried guajillo chilies, stemmed and seeds removed - 1 teaspoon ground cumin - 1 teaspoon smoked paprika - 1 teaspoon dried oregano - 2 cups beef broth - 1 large onion, chopped - 4 garlic cloves, minced - 2 tablespoons olive oil - Salt and pepper, to taste When making Beef Chile Colorado, the right ingredients make a big difference. First, you need beef chuck. This cut is perfect for stewing. It becomes tender and absorbs flavors well. Next, dried chilies bring the heat and depth to the dish. Ancho and guajillo chilies add rich, smoky flavors. Soak them to soften and blend them into a smooth paste. This paste is the heart of your sauce. Spices like ground cumin, smoked paprika, and oregano add warmth and complexity. They enhance the taste of the beef and chilies. Onion and garlic are essential. They add sweetness and depth to the dish. Use fresh ingredients for the best flavor. Beef broth gives the stew its base. It adds richness and helps create a hearty sauce. Finally, don’t forget to season with salt and pepper. These simple ingredients are key to bringing everything together. Enjoy the journey of making this flavorful dish! {{ingredient_image_2}} - Soak the dried chilies. Start by placing the dried ancho and guajillo chilies in a bowl. Cover them with hot water for 15-20 minutes. This softens the chilies and makes them easier to blend. - Blend the ingredients for the paste. Once the chilies are soft, drain them. Place them in a blender. Add one cup of beef broth, the chopped onion, and the minced garlic. Blend until smooth. This creates a rich chili paste that gives the dish its flavor. - Season and brown the beef cubes. Take two pounds of beef chuck and cut it into one-inch cubes. Season these cubes with salt and pepper. Once seasoned, heat olive oil in a large pot over medium-high heat. - Importance of not overcrowding the pot. Add the beef in batches. If you add too much at once, it will steam instead of sear. Brown each batch for about 5-7 minutes until they are deep golden brown. Remove the beef from the pot and set it aside on a plate. - Add the chili paste and spices. In the same pot, add the chili paste. Cook it for about five minutes until it becomes fragrant. Mix in the ground cumin, smoked paprika, and dried oregano. Stir until the spices are well combined. - Returning beef and simmering. Place the seared beef back into the pot. Pour in the remaining beef broth and bring it to a gentle boil. Once it boils, lower the heat to a simmer. Cover the pot and let it cook for 1.5 to 2 hours. This slow cooking allows the beef to become tender. Stir occasionally to prevent sticking. To create a great chili paste, focus on consistency. Soak the dried ancho and guajillo chilies in hot water for 15-20 minutes. This softens them. After soaking, blend them with beef broth, onion, and garlic. Aim for a smooth texture. If it's too thick, add more broth to loosen it. For flavor variations, try adding roasted tomatoes or a touch of brown sugar. Roasting the tomatoes brings a sweet depth. The sugar balances the heat from the chilies. This can add a unique twist to your dish. To ensure your beef is tender, timing is key. Cook the beef for 1.5 to 2 hours on low heat. This slow cooking allows the meat to break down. It becomes fork-tender and flavorful. Stir occasionally while it cooks. This helps prevent sticking and allows the meat to absorb more flavor. Stirring also keeps the sauce from burning on the bottom of the pot. When serving Beef Chile Colorado, consider garnishing options. Fresh cilantro adds a nice touch. Lime wedges can brighten up the flavors. Squeeze some lime juice on top for a zesty kick. For the best sides, warm corn tortillas are a must. They pair well with the rich beef and sauce. You can also serve rice or beans on the side for a complete meal. Pro Tips Choose Quality Beef: Opt for well-marbled beef chuck for the best flavor and tenderness in your dish. Adjust Spice Levels: If you prefer a milder sauce, remove some of the seeds from the chilies or reduce the amount of guajillo chilies. Make Ahead: This dish tastes even better the next day, so consider making it in advance and reheating it for a richer flavor. Serve with Sides: Pair with rice and beans for a complete meal, or add a side of avocado slices for creaminess. {{image_4}} You can make a tasty vegetarian or vegan version of Beef Chile Colorado. Instead of beef, use beans or jackfruit. Beans like black beans or pinto beans add protein and flavor. Jackfruit has a meaty texture and soaks up spices well. To make this dish, prepare the chili paste as usual. Then, cook your beans or jackfruit with the paste and broth. This method creates a satisfying meal without meat. Beef Chile Colorado varies across Mexico. Each region adds its twist. In Northern Mexico, they often use more dried chilies and spices. In contrast, Southern regions may include local vegetables or different meats. You can try different chilies like pasilla or chipotle for unique flavors. Also, consider using local herbs and spices to make your dish special. Adjusting the spice level is easy. If you prefer a milder dish, remove the seeds from the chilies. You can also mix in a little sour cream or yogurt to cool the heat. For a hotter version, add more dried chilies or include fresh jalapeños. Just remember to taste as you go. This way, you can find your perfect balance of flavor and heat. To keep your Beef Chile Colorado fresh, store it in the fridge right away. Use airtight containers to lock in the flavor. Glass or plastic containers work well. Make sure to let it cool before sealing. This helps to avoid moisture buildup. Freezing Beef Chile Colorado is easy and keeps it tasty. First, let it cool completely. Then, transfer it to freezer-safe containers or bags. Remove as much air as possible to prevent freezer burn. When ready to eat, thaw it overnight in the fridge. Reheat gently on the stove or in the microwave. Add a splash of beef broth if needed to restore moisture. For the best taste, eat your leftovers within 3 to 4 days if stored in the fridge. In the freezer, it stays good for up to 3 months. Mark your containers with the date you made it. This helps you keep track and enjoy every bite! Beef Chile Colorado is a rich, flavorful stew. It comes from Mexican cuisine. The dish features tender beef in a spicy red sauce made from dried chilies. Traditionally, we use ancho and guajillo chilies for their deep flavors. The beef simmers until it’s fork-tender, soaking up all the spices. This dish is full of history and warmth, often served at family gatherings. Yes, you can definitely use a slow cooker. First, prepare the chili paste as usual. Then, sear the beef in a pan. This step adds great flavor. After that, transfer everything to your slow cooker. Add the chili paste, beef broth, and spices. Cook on low for 6-8 hours or high for 3-4 hours. The result is just as delicious! This dish pairs well with many sides. Here are some great options: - Warm corn tortillas - Rice - Refried beans - Mexican street corn - Fresh cilantro for garnish - Lime wedges for a zesty kick These sides enhance the meal and add more flavor. Enjoy your hearty Beef Chile Colorado with these delicious additions! In this blog post, we explored how to make Beef Chile Colorado. We discussed the key ingredients, like beef chuck and dried chilies, and the spices that create its rich flavor. I shared step-by-step instructions for preparing the chili paste, searing the beef, and cooking the dish. You learned handy tips for getting the best flavor and tenderness. We also looked at variations for different diets and storage tips. For a hearty, comforting meal, Beef Chile Colorado is hard to beat. Enjoy your cooking adventure!

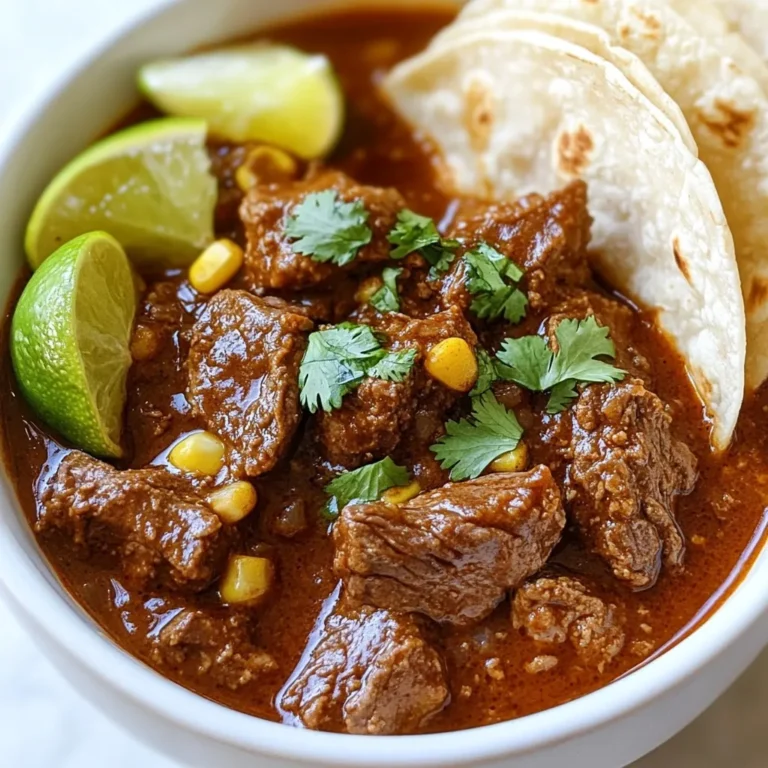
Beef Chile Colorado Flavorful and Hearty Recipe

- 1 block (14 oz) firm tofu - ½ cup cornstarch - 1 teaspoon garlic powder - 1 teaspoon onion powder - 1 teaspoon smoked paprika - ½ teaspoon salt - ½ teaspoon black pepper - 1 tablespoon soy sauce (or tamari for gluten-free) - 1 tablespoon olive oil - Fresh parsley for garnish - Dipping sauces (sweet chili, sriracha, tahini) The main ingredient in this recipe is firm tofu. It gives the nuggets a great texture. You want to press it well so it can soak up the flavors. Cornstarch is key for that crispy coating. The seasonings—garlic powder, onion powder, smoked paprika, salt, and black pepper—add a burst of flavor. Soy sauce or tamari gives a salty kick and helps the coating stick. Olive oil keeps everything moist. For a fun touch, you can add fresh parsley for garnish. It looks nice and adds a little freshness. Dipping sauces make everything better. Sweet chili, sriracha, or tahini work well. They add a tasty twist to your crispy tofu nuggets. {{ingredient_image_2}} To start, you need to press and drain the tofu. Pressing removes excess water. This helps the tofu become crispy. Wrap the block in a clean kitchen towel and place a heavy object on top. Let it sit for about 15 minutes. After pressing, cut the tofu into nugget shapes. Aim for bite-sized pieces. This helps them cook evenly. Next, mix the coatings for flavor. In a large bowl, combine the dry ingredients. Use ½ cup cornstarch, 1 teaspoon garlic powder, 1 teaspoon onion powder, 1 teaspoon smoked paprika, ½ teaspoon salt, and ½ teaspoon black pepper. Whisk them until they blend well. In a small bowl, prepare the wet mixture. Combine 1 tablespoon soy sauce and 1 tablespoon olive oil. Stir until mixed. This will help the dry coating stick. Now, it’s time to coat the tofu nuggets. Toss the tofu pieces in the soy sauce mixture. Make sure every piece is coated. Next, sprinkle the cornstarch mixture over the tofu. Toss gently to cover all sides. You want each nugget to have a good amount of seasoning. Preheat your air fryer to 400°F (200°C). This step is key for crispy nuggets. Arrange the coated tofu in the basket in a single layer. Leave space between each nugget for air circulation. Cook the nuggets for 15-20 minutes. Halfway through, shake the basket gently. This ensures even cooking and crispiness. When they are golden brown, they are ready to enjoy! To get crispy tofu, pressing is key. Pressing removes excess water, allowing better texture. Wrap the tofu in a clean towel, then place a weight on top. Let it sit for at least 15 minutes. This step really matters. After pressing, coat the tofu in cornstarch. This gives it a nice crunch. Make sure every piece is evenly covered. Toss the tofu gently in cornstarch. This helps achieve that perfect crispiness. To add more flavor, consider extra spices. Try adding cayenne for heat or thyme for earthiness. You can also mix in some nutritional yeast for a cheesy taste. These small changes can make a big difference. Using seasoned soy sauce is another great option. You can find many varieties at the store. These sauces add depth and umami, boosting the overall flavor profile. Cooking time can change based on the size of your nuggets. Smaller pieces will cook faster, so keep an eye on them. Your air fryer’s model may also affect cooking time. Check for doneness by looking for a golden color. The nuggets should be crispy on all sides. If they look pale, give them a few more minutes. Trust your eyes; they will guide you to perfection. Pro Tips Press Tofu Thoroughly: Ensure the tofu is pressed well to remove excess moisture. This helps the nuggets achieve maximum crispiness in the air fryer. Uniform Size Matters: Cut the tofu into uniform pieces for even cooking. This way, all nuggets will be perfectly crispy and golden brown. Use a Dipping Sauce: Pair these nuggets with your favorite dipping sauce. Sweet chili, sriracha, or tahini add an extra layer of flavor that complements the tofu beautifully. Shake for Crispiness: Don’t forget to shake the air fryer basket halfway through cooking. This ensures that every side of the nuggets gets a chance to crisp up! {{image_4}} You can use extra-firm or firm tofu for this recipe. Extra-firm tofu gives a crunchier bite. Firm tofu works well too but may be slightly softer. Both options yield tasty nuggets. You might also find pre-marinated tofu in stores. This can add an extra layer of flavor. Just remember to adjust your seasonings if it's already flavored. To change up the taste, consider Asian-inspired seasonings. Add sesame oil or five-spice powder for a unique twist. You can also make them spicy. Try adding cayenne pepper or chili flakes to the coating. For a herby version, mix in dried herbs like oregano or thyme. These small changes can elevate your nuggets to new heights. If you don't have an air fryer, you can still enjoy crispy tofu. Baking is a great option. Preheat your oven to 425°F (220°C). Spread the coated tofu on a baking sheet. Bake for 25-30 minutes, flipping halfway through. For pan-frying, heat oil in a skillet. Fry the nuggets until golden brown on all sides. Both methods give you a delicious snack! To store your crispy tofu nuggets, follow these steps: - Place the leftovers in an airtight container. - Keep them in the fridge for up to three days. - Avoid stacking the nuggets to keep them crispy. For best results, use glass or BPA-free plastic containers. These materials help keep your nuggets fresh. To enjoy your tofu nuggets again, you can reheat them easily. Here are the best methods: - Air Fryer: Preheat to 375°F (190°C). Cook for 5-7 minutes. - Oven: Set to 400°F (200°C). Bake for about 10 minutes. - Skillet: Heat on medium. Cook for about 3-4 minutes on each side. To maintain crispiness, avoid microwaving. The air fryer or oven helps keep the texture crunchy. No, I do not recommend using soft tofu. Soft tofu is too watery and fragile. It will not hold its shape during cooking. Firm tofu gives crispy nuggets that are easy to handle. You want a nice bite without mushiness. Stick with firm tofu for the best results. You can easily make this recipe gluten-free. Replace soy sauce with tamari. Tamari is a gluten-free soy sauce option. Make sure to check labels on cornstarch too. Most brands are gluten-free, but it's good to verify. This way, you can enjoy tasty nuggets without worry. Many sauces complement tofu nuggets perfectly. Here are some popular choices: - Sweet chili sauce - Sriracha for a spicy kick - Tahini for a creamy option Try different sauces to find your favorite or mix them for new flavors! Crispy tofu nuggets last about 3 to 5 days in the fridge. Store them in an airtight container. Look for signs of spoilage, like a sour smell or change in color. If they seem off, it’s best to toss them. Enjoy them fresh for the best taste! In this recipe, we explored how to make delicious crispy tofu nuggets. We covered the key ingredients and step-by-step instructions for perfecting your dish. The tips for enhancing flavor and achieving that ideal crisp are essential. Don’t forget to try different methods and variations. These nuggets are versatile and easy to store. With the right techniques, you can enjoy these bites anytime. Dive into this tasty plant-based option and impress your friends and family!

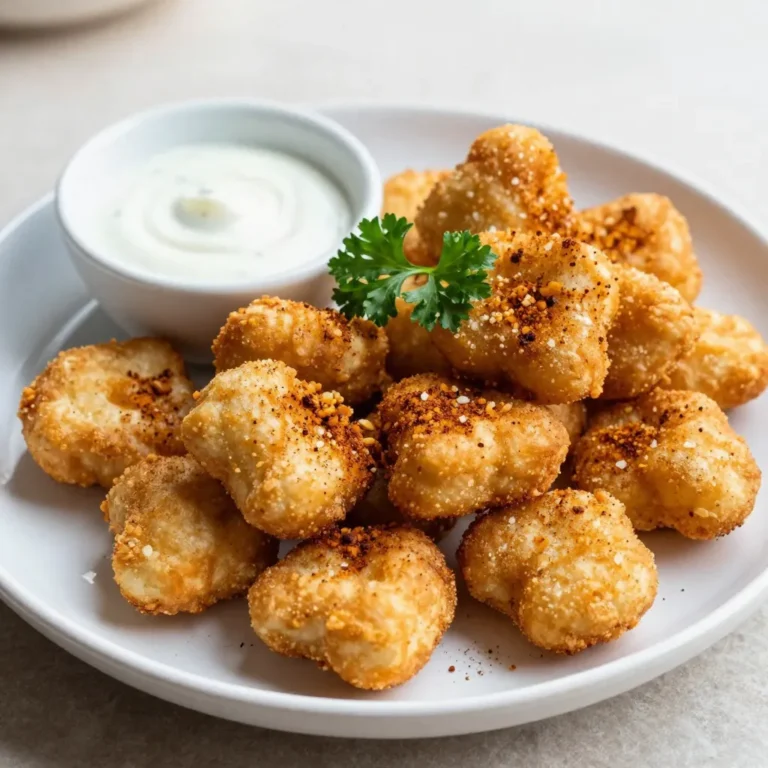
Crispy Air Fryer Tofu Nuggets Simple and Flavorful Snacks

- 1 pound large shrimp, peeled and deveined - 1 ripe mango, diced into small cubes - 1/2 red bell pepper, finely diced - 1/4 red onion, finely chopped - 1 fresh jalapeño, deseeded and minced - 2 tablespoons freshly squeezed lime juice - 1 tablespoon honey (adjust for sweetness preference) - 2 tablespoons fresh cilantro, finely chopped - Salt and pepper to taste - 12 small tortilla cups (store-bought or homemade) - Olive oil for cooking You can swap the shrimp for crab or scallops. If you want less heat, skip the jalapeño. For a sweeter kick, add diced pineapple. You can also use lemon juice instead of lime. - Medium mixing bowl for salsa - Small bowl for dressing - Whisk for mixing - Skillet for cooking shrimp - Spatula for turning shrimp - Serving platter for presentation {{ingredient_image_2}} First, grab a medium bowl. Add the diced mango, red bell pepper, chopped red onion, and minced jalapeño. Mix gently until everything is combined. This salsa brings a fresh and zesty taste to the shrimp cups. Let it sit. This helps the flavors blend well together. Next, take a smaller bowl. Whisk the lime juice, honey, and chopped cilantro until mixed well. Pour this dressing over the mango salsa. Toss gently to coat all the pieces. Add salt and pepper to taste. This dressing adds a sweet and tangy kick. Now, heat a drizzle of olive oil in a skillet over medium heat. When the oil shimmers, add the shrimp in a single layer. Make sure not to overcrowd the pan. Season with salt and pepper. Cook for about 2-3 minutes on each side. The shrimp should turn pink and opaque. Remove from heat and let them cool a bit. Take your tortilla cups. Fill each one with a few cooked shrimp pieces. Top them generously with the mango salsa. Make sure each cup is full of flavor. This is where you get that beautiful mix of shrimp and salsa. Arrange the filled shrimp cups on a platter. This makes for a fun and eye-catching display. You can garnish with extra cilantro or lime wedges for more color. Enjoy these cups right away for the best taste! To cook shrimp just right, choose fresh shrimp. Look for ones that smell clean. Peel and devein them before cooking. Heat olive oil in your skillet until it shimmers. Cook the shrimp in a single layer. This helps them cook evenly. Season with salt and pepper. Cook for about 2-3 minutes on each side. They should turn pink and opaque. If they curl up, they are done! You can boost the flavor of your mango salsa shrimp cups. Try adding lime zest for extra zing. A little garlic can bring depth to your shrimp. For a sweet touch, add more honey to the salsa. You can also mix in diced avocado for creaminess. If you want it spicier, add more jalapeño or even some hot sauce. Each tweak can create a new taste experience! Presentation makes food more exciting. Arrange the shrimp cups on a bright platter. Garnish with extra cilantro leaves. This adds color and freshness. You can add lime wedges around the cups. This invites guests to squeeze fresh juice on top. For a fun twist, use colorful tortilla cups. They will make each bite a visual treat. Remember, we eat with our eyes first! Pro Tips Fresh Ingredients: Use the ripest mango you can find for the best flavor. A ripe mango will be fragrant and slightly soft to the touch. Customize the Heat: Adjust the amount of jalapeño to your spice preference. For a milder salsa, remove the seeds and membranes. Perfectly Cooked Shrimp: Avoid overcooking the shrimp; they should be just pink and opaque. Remove them from heat as soon as they reach this point. Make Ahead: You can prepare the mango salsa a few hours in advance. Just wait to assemble the cups until you’re ready to serve for the freshest taste. {{image_4}} You can swap shrimp for other seafood. Scallops offer a sweet, tender bite. Crab meat adds a rich flavor. Lobster brings a gourmet touch. Simply cook these options the same way as shrimp. This keeps the recipe easy and delicious. If you want a vegetarian option, use beans or tofu. Black beans provide protein and texture. Diced avocado adds creaminess and healthy fats. Grilled corn offers a sweet crunch. Toss them with the mango salsa for a fresh taste. These swaps keep the cups vibrant and tasty. Feel free to mix in other fruits for a twist. Pineapple adds a zesty kick and pairs well with shrimp. Papaya gives a sweet, buttery flavor. Kiwi brings a tangy contrast. Just make sure to balance the flavors with lime juice and cilantro. The more fruit, the merrier! To keep your shrimp cups fresh, store them in an airtight container. Place the shrimp and salsa in separate containers. This helps prevent the tortilla cups from getting soggy. You can store them in the fridge for up to two days. Reheat the shrimp on the stove over low heat. This warms them gently without drying them out. Avoid microwaving, as it can make the shrimp rubbery. If you prefer to reheat the salsa, do so on low heat as well. I don’t recommend freezing the assembled shrimp cups. The tortilla cups will lose their crunch. However, you can freeze the shrimp and salsa separately. Place them in freezer-safe bags. They can last up to three months in the freezer. When you're ready to eat them, thaw in the fridge overnight. Then reheat the shrimp and enjoy your tasty treat! Yes, you can prepare the mango salsa a few hours ahead. Just store it in the fridge. However, I suggest assembling the shrimp cups just before serving. This keeps the tortilla cups crisp and fresh. These shrimp cups work well with many sides. Try serving them with simple mixed greens or tortilla chips. You can also pair them with a light avocado salad for extra flavor. Yes, this recipe is gluten-free if you use gluten-free tortilla cups. Always check the package to be sure. Most fresh ingredients are naturally gluten-free, making this dish safe for those with gluten allergies. Absolutely! Frozen shrimp work great for this recipe. Just thaw them in the fridge overnight before cooking. Ensure they are fully defrosted for even cooking and flavor. The spice level depends on the jalapeño. If you want it mild, remove the seeds and membranes. For more heat, add extra jalapeños or try a spicier pepper. Adjust to suit your taste! In this post, I shared how to make tasty shrimp cups with mango salsa. You learned about the key ingredients, step-by-step methods, and helpful tips. I also covered variations and storage options. Cooking can be fun and easy when you have the right guide. Try these ideas in your kitchen. You'll impress your friends and family with these flavorful dishes. Let your creativity shine while you cook! Enjoy every bite, and don’t hesitate to experiment!

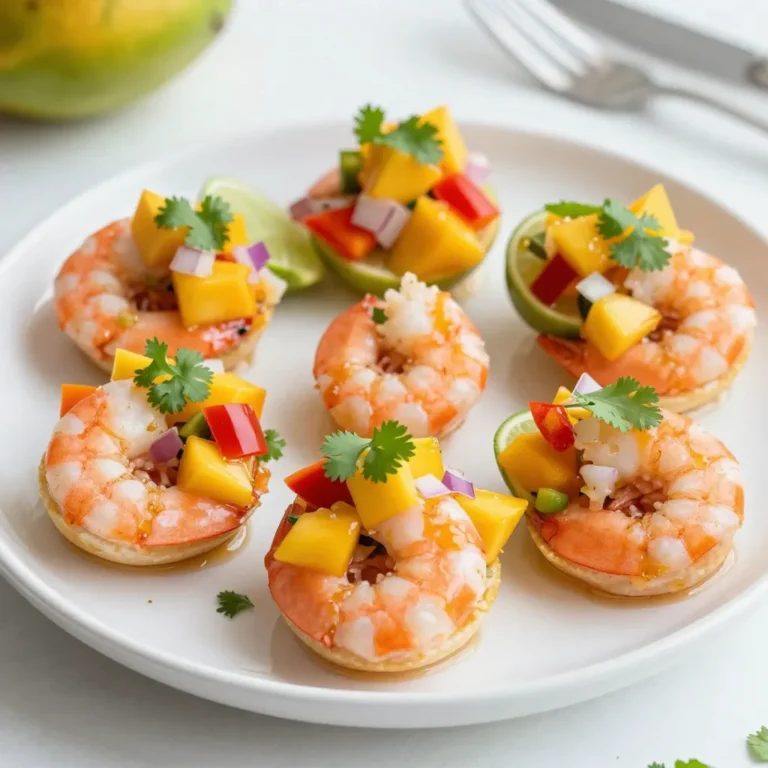
Mango Salsa Shrimp Cups Flavorful Appetizer Delight

- 2 pounds Yukon Gold potatoes, peeled and cut into even-sized cubes - 1 whole head of garlic - 4 tablespoons unsalted butter, at room temperature - 1 cup heavy cream (or milk, for a lighter alternative) - Salt, to taste - Freshly ground black pepper, to taste - 1 tablespoon fresh chives, finely chopped (for garnish) I love using Yukon Gold potatoes for this dish. They are creamy and buttery. Their texture makes for the best mashed potatoes. You will also need a whole head of garlic. Roasting the garlic adds a sweet and rich flavor. You'll need unsalted butter too. It helps create that smooth, creamy base. Heavy cream is my go-to for richness, but milk works well too. Use it if you want a lighter dish. Don’t forget to add salt and freshly ground black pepper for flavor. Finally, the fresh chives add a pop of color and taste. They make the dish look gourmet and fresh. This mix of ingredients makes roasted garlic mashed potatoes a favorite in my kitchen. You can adjust the salt and pepper to suit your taste. Enjoy crafting this creamy and flavorful dish! {{ingredient_image_2}} - Preheat your oven to 400°F (200°C). - Take a whole head of garlic and slice off the top. This exposes the cloves. - Drizzle a little olive oil over the cloves and wrap the garlic in aluminum foil. - Place it in the oven and roast for 30-35 minutes. The cloves should become soft and caramelized. - Once done, let it cool for a bit. Squeeze the roasted cloves into a bowl and set aside. - Peel and cut 2 pounds of Yukon Gold potatoes into even cubes. - Put the cubed potatoes in a large pot and cover them with cold water. - Add salt to the water to help flavor the potatoes. - Bring the pot to a rolling boil over medium-high heat. - Lower the heat to a gentle simmer and cook for 15-20 minutes. The potatoes should be fork-tender when done. - Drain the cooked potatoes well and return them to the pot. - Use a potato masher to mash the potatoes until they are smooth and free of lumps. - Add the roasted garlic, 4 tablespoons of softened butter, and 1 cup of heavy cream to the mashed potatoes. - Stir everything together until the mixture is creamy and well combined. Adjust the texture by adding more cream if needed. - Taste the mashed potatoes and add salt and freshly ground black pepper to your liking. - Stir again to make sure the seasoning is even. - Spoon the creamy mashed potatoes into a warm serving bowl. - For a final touch, sprinkle chopped chives on top for color and flavor. - Choosing the right potato variety: I love using Yukon Gold potatoes. They have a creamy texture and rich flavor. They mash well and add a buttery taste without needing extra butter. - Achieving the desired creamy texture: To get that smooth texture, mash the potatoes while they are hot. Use a potato masher for a rustic feel or a ricer for an ultra-smooth finish. Add warm heavy cream or milk gradually to reach your perfect creaminess. - Additional seasoning options: Besides salt and pepper, you can try garlic powder or onion powder. For a pop of flavor, add a splash of lemon juice. A pinch of nutmeg also gives a warm, spicy note. - Alternative ingredients for variations: You can mix in sour cream for tang. Cream cheese adds richness. For a vegan version, use olive oil and coconut milk to keep it creamy and delicious. - Serving style: When serving, use a warm bowl. Create a well in the center and fill it with a drizzle of olive oil or melted butter. This makes the dish look inviting. - Garnishing ideas: Fresh chives add color and a mild onion flavor. You can also sprinkle some crispy bacon bits or fried onions for crunch. A few sprigs of parsley can brighten the dish. Pro Tips Use Yukon Gold Potatoes: Their creamy texture and buttery flavor make them ideal for mashed potatoes. Don't Over-Mash: Over-mashing can make potatoes gummy. Mash just until smooth for the best texture. Warm Your Cream: Heating the cream or milk before adding it to the potatoes helps maintain the temperature and creates a creamier consistency. Adjust Seasoning Gradually: Always taste and adjust the salt and pepper in small increments to achieve the perfect balance. {{image_4}} If you want to make roasted garlic mashed potatoes vegan, you can swap out a few key ingredients. - Use 2 cups of unsweetened almond milk instead of heavy cream. - Replace the butter with 4 tablespoons of vegan butter. This change keeps the dish creamy without dairy. You can also explore dairy-free cream options made from nuts or coconut. These alternatives provide a rich flavor and smooth texture. To make your mashed potatoes even more exciting, consider adding herbs and spices. - For a fresh twist, mix in chopped parsley or thyme. - You can also add a pinch of smoked paprika for a subtle heat. Mixing in other vegetables can create a new taste too. - Try adding roasted cauliflower or carrots for added color and flavor. - Sweet potatoes also work well if you want a sweeter note. Roasted garlic mashed potatoes pair wonderfully with many meats. - Serve them alongside roast chicken or grilled steak for a hearty meal. - They also complement pork chops and lamb beautifully. For side dishes, these mashed potatoes shine next to green beans or a fresh salad. - Consider a simple cucumber salad for a refreshing contrast. - A hearty vegetable medley adds color and nutrition to your plate. These variations and pairings will make your roasted garlic mashed potatoes a hit at every meal! To store leftover mashed potatoes, place them in an airtight container. Make sure to cool them first. This helps keep them fresh. The shelf life in the fridge is about 3 days. If you want to enjoy them later, use the freezer. For the best results, freeze mashed potatoes in a freezer-safe container. Leave some space at the top for expansion. Label the container with the date. Mashed potatoes can last up to 2 months in the freezer. When you’re ready to eat, thaw them overnight in the fridge. Reheat in a pot over low heat, adding a splash of cream or milk to restore creaminess. Stir often for even heating. Enjoy your tasty dish again! To make mashed potatoes from scratch, follow these basic steps: 1. Prepare the potatoes: Peel and cut them into even cubes. 2. Boil: Place the potatoes in cold water and bring to a boil. 3. Cook: Boil until fork-tender, about 15-20 minutes. 4. Drain: Drain the potatoes well and return them to the pot. 5. Mash: Use a potato masher to mash the potatoes until smooth. 6. Mix: Add in your ingredients, like butter and cream, and stir. 7. Season: Taste and add salt and pepper to your liking. Yes, you can use other types of potatoes. - Russet potatoes: They create a fluffier texture. - Red potatoes: They have a waxy texture and stay moist. - Sweet potatoes: They will add a sweet flavor and a beautiful color. Each type brings its own taste and texture. Yukon Gold gives a creamy, buttery flavor, which is why I love using them! If you want a lighter option, you can use: - Milk: Whole milk or 2% work well. - Greek yogurt: It adds creaminess and tang. - Sour cream: This gives a rich flavor and a bit of tang. These substitutes can still keep your mashed potatoes creamy and delicious. Gummy mashed potatoes can happen if you overmix or use the wrong type of potato. - Avoid overmixing: Mix just until smooth. - Use the right potatoes: Choose starchy potatoes like Yukon Gold. - Don’t add too much liquid: Start with less and add more as needed. Following these tips will help you create the perfect creamy texture without the gumminess. Mashed potatoes can be simple yet delicious. We covered key ingredients like Yukon Gold potatoes and roasted garlic. I shared step-by-step instructions and useful tips for the perfect texture. You can customize flavors and even try dietary alternatives. Storing leftovers is easy with proper tips. Enjoy this classic dish, whether for a family meal or a special occasion. With this guide, you’re set for mashed potato success!

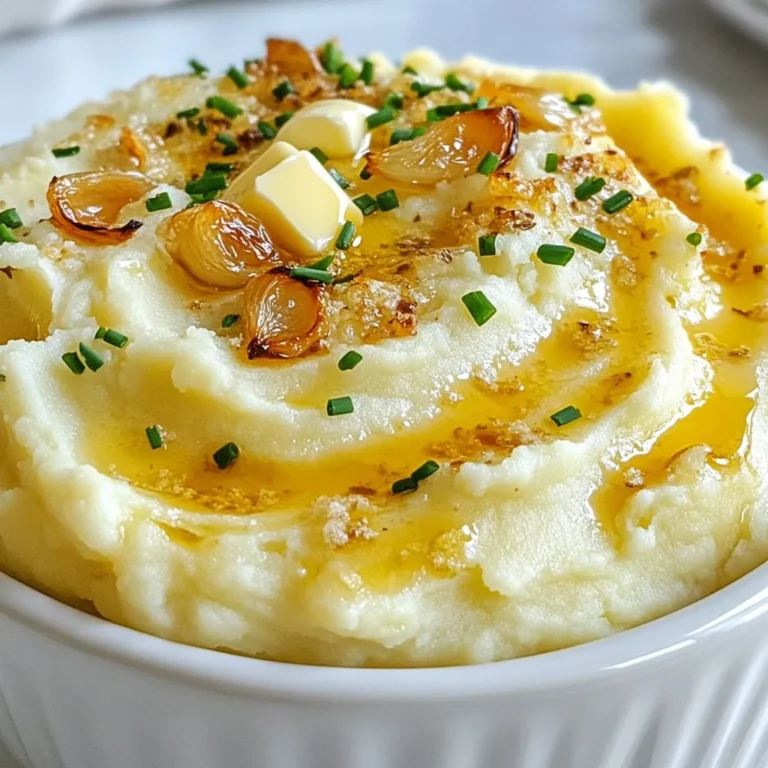
Roasted Garlic Mashed Potatoes Creamy and Flavorful Dish

To make Witches Brew Lemonade, you will need the following ingredients: - 4 cups water - 1 cup freshly squeezed lemon juice (from about 4-5 lemons) - 1 cup granulated sugar (adjust based on your taste) - 1/2 teaspoon activated charcoal powder (for a spooky look) - 1 teaspoon pure vanilla extract - 1 cup green grape juice - Fresh mint leaves for garnish - Lemon slices for garnish - Edible glitter or purple sugar for a magical touch (optional) Each ingredient plays a role in making this drink both tasty and fun. You might not have all these ingredients on hand. Here are some easy swaps: - Lemon Juice: Use bottled lemon juice if you don’t have fresh lemons. - Granulated Sugar: You can use honey or agave syrup as a sweetener. - Green Grape Juice: Substitute with apple juice or any light-colored fruit juice. - Activated Charcoal: If you prefer a lighter drink, you can skip this ingredient. - Vanilla Extract: Almond extract works well too for a different flavor twist. These swaps still keep the drink delicious and enchanting. Witches Brew Lemonade is not just fun; it has some health perks! - Lemon Juice: Rich in vitamin C, it helps boost your immune system. - Activated Charcoal: Known for detoxifying properties, it can help with digestion. - Mint Leaves: They soothe your stomach and add a refreshing taste. - Grape Juice: Packed with antioxidants, it may help support heart health. By using these ingredients, you add a bit of health to your spooky drink! {{ingredient_image_2}} 1. Combine the Base: Start by pouring 4 cups of water into a large pitcher. Next, squeeze about 4 to 5 lemons to get 1 cup of fresh lemon juice. Make sure to remove any seeds. 2. Sweeten the Potion: Add 1 cup of granulated sugar to your mix. Stir well until all the sugar dissolves completely. It should feel smooth with no grainy bits. 3. Add the Charcoal: Carefully sprinkle in 1/2 teaspoon of activated charcoal powder. Mix it in thoroughly. This gives the lemonade a spooky dark color. 4. Infuse with Flavor: Pour in 1 cup of green grape juice. Then add 1 teaspoon of pure vanilla extract. Stir gently to blend all the flavors. 5. Taste and Adjust: Take a small taste. If you want it sweeter, add more sugar a little at a time. Stir until it dissolves. 6. Chill the Brew: Put the pitcher in the fridge for at least 1 hour. This step allows all the flavors to mix well. 7. Serve Over Ice: When you’re ready to serve, fill each glass with ice. Pour the chilled lemonade over the ice. 8. Add the Final Touch: Garnish each glass with fresh mint leaves and a lemon slice. For extra magic, add a pinch of edible glitter or purple sugar on top. - Always taste your lemonade before serving. This way, you can adjust flavors to your liking. - Use clear glassware to show off the unique dark color of the lemonade. - Consider themed straws or cups for a fun touch. - If you like tart flavors, try adding less sugar. You can always add more later. - For a fruity twist, mix in other juices like apple or cranberry. - If you want a herbal hint, add fresh herbs like basil or rosemary. For a spooky touch, use clear glassware. It shows off the dark color of your Witches Brew Lemonade. You can also add themed straws or cups. Look for designs with bats, ghosts, or pumpkins. This adds fun to your drink station. Arrange the glasses on a dark tablecloth for a dramatic effect. Dim the lights for a true Halloween vibe! Garnishes make your lemonade pop! Fresh mint leaves add a bright green touch. Lemon slices give a fresh look and flavor. For a magical finish, sprinkle edible glitter on top. You can also use purple sugar around the rim of the glass. This gives a fun, festive look for your guests. Get creative! Use gummy worms or spider candies as unique stirrers. Choose glassware that fits the theme. Tall, clear glasses work well for showing the brew’s color. Mason jars are perfect for a rustic feel. If you want something fun, try skull-shaped cups. They’ll surely grab attention. Don’t forget to chill your glasses in the fridge. This keeps the drink cold and refreshing. Remember, the right glassware makes your Witches Brew Lemonade more inviting! Pro Tips Chill Your Ingredients: For an extra refreshing lemonade, chill your water and grape juice in advance. This will help keep the drink cold longer without diluting it with too much ice. Adjust the Sweetness: Remember that the sweetness of your lemonade can be adjusted to your taste. Start with less sugar, then add more if desired, to find the perfect balance for your palate. Make it Sparkling: For a fizzy twist, substitute half of the water with sparkling water. This will give your Witches Brew a delightful effervescence perfect for a festive gathering. Add Seasonal Flavors: Feel free to experiment with seasonal flavors by adding herbs like basil or fruits like raspberries. This can create unique variations of your Witches Brew Lemonade! {{image_4}} You can change the flavor of Witches Brew Lemonade by adding other fruit juices. Instead of green grape juice, try using: - Orange juice for a bright citrus twist - Pineapple juice for a tropical vibe - Cranberry juice for a tart kick Mix and match these juices to create your own special brew. Each juice adds a unique taste and color. This makes your drink fun and exciting for guests. If you want to make an adult version, consider adding alcohol. Vodka is a great choice. It blends well without changing the taste much. Here's how to do it: - Add 1 to 2 ounces of vodka per glass. - Stir gently after adding the vodka. This gives your Witches Brew a spooky edge for Halloween parties. Just be sure to serve it to guests who are of age. Not everyone likes a sweet drink. If you want to skip the sugar, try these options: - Use a sugar substitute like stevia or monk fruit. - Add fresh herbs like basil or rosemary for a savory touch. - Use sparkling water instead of regular water for a bubbly finish. These options keep the drink tasty without added sugar. They also add more depth to the flavor. Enjoy creating your perfect potion! To keep your Witches Brew Lemonade fresh, store it in the fridge. Use a clean pitcher or a jar with a tight lid. This helps keep the flavors strong. If you have leftovers, make sure to chill them within two hours of serving. This keeps the lemonade safe and tasty for later. You can freeze Witches Brew Lemonade if you want to enjoy it later. Pour the lemonade into ice cube trays or freezer-safe bags. Leave some space in the container for expansion. When you are ready to drink, thaw the lemonade in the fridge overnight. You can also blend the cubes into a slushy treat! The prepared Witches Brew can last up to five days in the fridge. However, it tastes best within the first three days. Always check for changes in smell or color before drinking. If it looks or smells off, it is best to toss it out. Enjoy your spooky drink fresh for the best flavor! Yes, you can use bottled lemon juice. However, freshly squeezed juice tastes better. It gives a bright, fresh flavor that bottled juice lacks. Fresh juice also has more nutrients. If you use bottled juice, check for additives. Pure lemon juice is best for this recipe. Activated charcoal is safe in small amounts. It is used in some foods and drinks. It helps with detox and may relieve gas. However, too much can cause issues. It may reduce the absorption of some medications. Always consult a doctor if unsure about using it. To make the lemonade less sweet, reduce the sugar. Start with half a cup instead of a full cup. You can also add more lemon juice for tartness. Taste the mix and adjust as needed. Adding more water can help balance the sweetness too. Witches Brew Lemonade is a fun, tasty drink for any occasion. We covered ingredients, how to make it, and cool tips for serving. You learned about ingredient swaps and health benefits, too. Try different flavors and presentation ideas to impress your guests. Remember, you can always adjust sweetness to fit your taste. Enjoy making this fun drink and let your creativity shine!

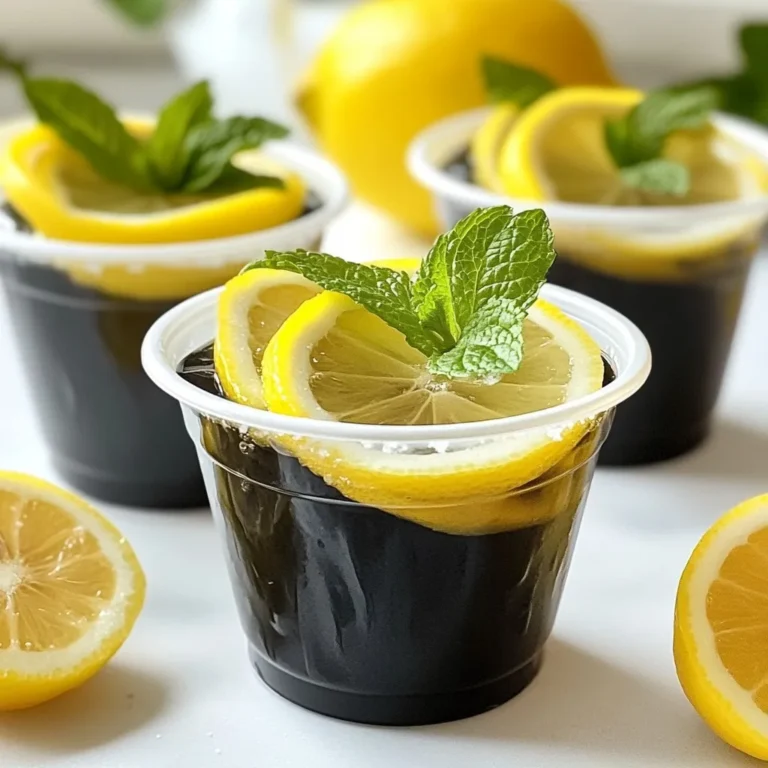
Witches Brew Lemonade Tasty and Spooky Drink Recipe

To make Almond Joy Energy Bars, you need a few key ingredients. Here’s what you’ll need: - 1 cup creamy almond butter - 1/2 cup honey or maple syrup - 1 1/2 cups rolled oats - 1/2 cup unsweetened shredded coconut - 1/2 cup dark chocolate chips - 1/2 cup chopped almonds - 1/4 teaspoon sea salt - 1 teaspoon pure vanilla extract These ingredients create a yummy, chewy bar that tastes like a treat. The almond butter gives a rich flavor, while the oats add texture. The chocolate chips and coconut offer that classic Almond Joy taste. If you have allergies, you can still enjoy these bars. Here are some swaps: - Use sunflower seed butter instead of almond butter for nut-free options. - Swap honey for agave syrup if you want a vegan option. - Use gluten-free oats if you need to avoid gluten. - Dark chocolate chips can be replaced with carob chips for a different flavor. These swaps help you make the bars safe for everyone. Choosing fresh ingredients makes a big difference in taste. Here are some tips: - Look for almond butter that has no added sugar or oils. - Check oats for freshness; they should smell nutty, not stale. - Choose coconut that is unsweetened to keep it healthy. - For chocolate chips, pick high-quality brands for better flavor. - When buying almonds, select roasted ones for extra crunch. Fresh ingredients not only taste better but also keep your bars nutritious. Enjoy making these tasty snacks! {{ingredient_image_2}} Start by taking a large mixing bowl. Combine 1 cup of creamy almond butter with 1/2 cup of honey or maple syrup. Mix them well until you have a smooth and creamy blend. Next, add 1 teaspoon of pure vanilla extract and 1/4 teaspoon of sea salt. Stir until everything is well combined. This mixture will be the tasty base for your energy bars. Now, it’s time to add the dry ingredients. Gradually mix in 1 1/2 cups of rolled oats, 1/2 cup of unsweetened shredded coconut, 1/2 cup of chopped almonds, and 1/2 cup of dark chocolate chips. Make sure to mix thoroughly. You want all the ingredients to blend well. The mixture should feel thick and sticky. This texture helps the bars hold together when cut. Prepare an 8x8 inch square baking dish by lining it with parchment paper. Leave some paper hanging over the sides for easy removal later. Transfer your mixture into the dish. Use a spatula or your hands to press it down tightly. This step is key for a good texture. Once packed, cover the dish with plastic wrap and place it in the fridge. Chill for at least 1 hour. This helps the bars firm up. After chilling, lift the bars out using the parchment paper. Cut them into squares or rectangles. Now, you have tasty and nutritious Almond Joy Energy Bars ready to enjoy! To get the best texture in your Almond Joy Energy Bars, press the mixture firmly. This helps the bars hold together well. Use a spatula or your hands to pack it tightly in the pan. If you want a softer bar, reduce the oats slightly. If you like it crunchier, add more chopped almonds. Chilling the bars for at least one hour is key. This step firms them up for easy slicing. Store your energy bars in an airtight container. Keeping them in the refrigerator helps them stay fresh for up to two weeks. If you want them to last longer, freeze them. Wrap each bar in plastic wrap, then place them in a sealed bag. This keeps them from drying out. Always label the bag with the date you made them. You can customize these energy bars easily. Try adding dried fruits like cranberries or apricots for extra sweetness. For a nut-free option, use sunflower seed butter instead of almond butter. Want more protein? Mix in some protein powder or chia seeds. You can also swap the dark chocolate chips for white chocolate or even carob chips. The choice is yours! Pro Tips Use Fresh Ingredients: Always opt for fresh almond butter and high-quality chocolate chips to enhance the flavor of your energy bars. Customize Your Nuts: Feel free to experiment with different nuts, like pecans or walnuts, to add variety to your energy bars. Toast the Coconut: Toasting the shredded coconut before adding it to the mixture can intensify its flavor and add a delightful crunch. Chill for Perfect Texture: Make sure to chill the bars for at least an hour to achieve the right firmness, making them easier to cut and handle. {{image_4}} You can change the flavors of your Almond Joy Energy Bars easily. For a richer taste, try adding more dark chocolate chips. You can also use a mix of dark and milk chocolate for a sweeter treat. If you want a stronger coconut flavor, use more shredded coconut. Toast it lightly for an extra burst of flavor. You might even sprinkle some cocoa powder into the mix for a deeper chocolate taste. If you want to boost the protein in your bars, add protein powder. A scoop of chocolate protein powder works well. You can also use seeds like chia or hemp for added nutrition. These small seeds pack a big punch. They add protein, fiber, and healthy fats. You can mix in nut butter for a creamier texture and more protein too. For those with nut allergies, you can still enjoy these bars. Use sunflower seed butter instead of almond butter. It has a similar creamy texture. Replace the chopped almonds with pumpkin seeds or sunflower seeds. These seeds add crunch and a nutty flavor without the nuts. You can still use chocolate chips, but check to make sure they are nut-free. This way, everyone can enjoy the tasty energy bars. To keep your Almond Joy Energy Bars fresh, store them in an airtight container. Place the container in your fridge. This helps maintain their taste and texture. You can enjoy the bars for up to two weeks when refrigerated. Make sure to check for any moisture inside the container to avoid sogginess. If you want to store the bars for a longer time, freezing is a great option. Wrap the bars tightly in plastic wrap before placing them in a sealed bag. This keeps them safe from freezer burn. Frozen Almond Joy Energy Bars can last for up to three months. When you’re ready to eat, thaw them in the fridge overnight. Always check your bars before eating. If they look dry or have any odd smell, it’s best to discard them. Mold is another clear sign of spoilage. If you notice any changes, especially after a while, trust your senses. Safe eating is always the best choice. Almond Joy Energy Bars can last up to two weeks in the fridge. Store them in an airtight container to keep them fresh. If you want to save them longer, freeze them in a sealed bag. They can stay good for up to three months in the freezer. Yes, you can use other nut butters! Peanut butter, cashew butter, or sunflower seed butter all work well. Each nut butter will change the flavor a bit, so choose what you like best. Just make sure your nut butter is creamy for easy mixing. Absolutely! These energy bars are perfect for meal prep. You can make a big batch ahead of time. Store them in portions for easy snacks throughout the week. They are great for busy days when you need a quick energy boost. In this article, we explored how to make Almond Joy Energy Bars. We covered the main and substitute ingredients, plus tips for choosing fresh items. I shared step-by-step instructions for mixing and chilling the bars. You also learned how to get the best texture and store them well. These energy bars are easy to customize with your favorite flavors. Remember to check for spoilage to enjoy them longer. With these tips, making delicious energy bars at home is simple and fun. Enjoy your snacks!

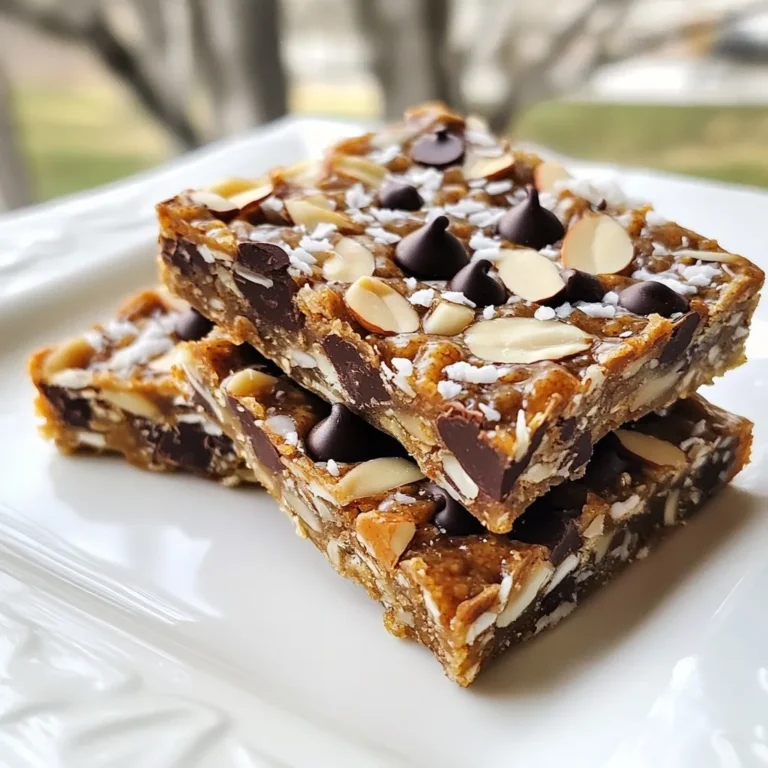
Almond Joy Energy Bars Tasty and Nutritious Snack

To make Sriracha Honey Chicken Lettuce Wraps, gather these simple items: - 1 lb ground chicken - 1 tablespoon olive oil - 3 cloves garlic, minced - 1 inch fresh ginger, grated - 3 tablespoons Sriracha sauce - 2 tablespoons honey - 2 tablespoons soy sauce (or tamari for a gluten-free option) - 1 tablespoon rice vinegar - 1 cup bell peppers, finely chopped (a vibrant mix of red and green) - 1/4 cup green onions, thinly sliced - 1 head of butter or iceberg lettuce, leaves gently separated - Salt and pepper to taste - Sesame seeds for garnish (optional) To enhance your wraps, consider these garnishes: - Sesame seeds add a crunchy touch. - Extra green onions bring freshness. - A drizzle of Sriracha gives extra heat. You can swap some ingredients based on your needs: - Use turkey or tofu instead of chicken for different flavors. - Replace soy sauce with coconut aminos for a soy-free option. - Honey can be swapped with maple syrup for a vegan choice. - Any peppers work, so use what you have on hand. {{ingredient_image_2}} To make Sriracha honey chicken lettuce wraps, start by gathering all your ingredients. This makes cooking easier. You will need ground chicken, olive oil, garlic, ginger, and more. Measure out your sauces, honey, and veggies. This helps you stay organized as you cook. 1. Heat the Oil: Pour olive oil into a large skillet. Turn the heat to medium. Add minced garlic and grated ginger. Cook for about one minute until fragrant. Be careful not to burn the garlic. 2. Cook the Chicken: Add the ground chicken to the skillet. Use a spatula to stir and break it apart. Cook for 5-7 minutes. The chicken should be brown and fully cooked. Stir occasionally to avoid sticking. 3. Create the Sauce: In a small bowl, mix Sriracha, honey, soy sauce, and rice vinegar. Whisk until smooth. Pour this mix over the cooked chicken in the skillet. Stir well to coat the chicken. Let it simmer for 2-3 minutes, allowing the flavors to blend. 4. Incorporate the Peppers: Add the chopped bell peppers to the skillet. Cook for another 2-3 minutes. The peppers should be slightly soft but still crunchy. Season with salt and pepper to taste. 5. Finish Up: Remove the skillet from heat. Add sliced green onions to the chicken mix. This adds a fresh taste and a nice crunch. To serve, take a leaf of lettuce. Spoon a generous amount of the chicken mixture into the center. Fold the lettuce around the filling like a wrap. Arrange your wraps on a platter for a beautiful presentation. Optionally, sprinkle sesame seeds on top. For extra heat, serve with more Sriracha sauce on the side. Enjoy! To make the chicken filling just right, start with fresh ground chicken. This gives a tender texture. Heat olive oil in a skillet. Add minced garlic and grated ginger for flavor. Sauté them until fragrant but not burnt. Then, add the ground chicken. Break it apart with a spatula as it cooks. Cook until browned, about 5 to 7 minutes. Stir often for even cooking. Once done, mix in the sauce made of Sriracha, honey, soy sauce, and rice vinegar. This adds a sweet and spicy kick. Finally, fold in chopped bell peppers and green onions for crunch. If you have leftover filling, store it in an airtight container. Let it cool before sealing. It stays fresh in the fridge for up to three days. To reheat, use a microwave-safe dish. Heat it for a minute, then stir. Check to see if it’s warm. You can also heat it in a skillet over medium heat. Just add a splash of water to keep it moist. This way, you enjoy a quick meal any day! To change the spice level, adjust the Sriracha. Add more for a hotter dish or less for a milder taste. You can mix in other sauces too. Try adding chili paste for extra heat or hoisin sauce for sweetness. If you want a tangy twist, add a bit of lime juice. Feel free to experiment with different bell peppers. Use yellow or orange for a sweeter taste. Each change makes the dish unique and tasty! Pro Tips Use Fresh Ingredients: Fresh garlic and ginger will enhance the flavor of your dish significantly compared to dried or powdered versions. Adjust Spice Level: Feel free to increase or decrease the amount of Sriracha based on your spice preference. Start with less if you are unsure! Mix and Match Veggies: Add other vegetables like carrots or cucumbers for extra crunch and nutrition in your wraps. Meal Prep Friendly: The chicken filling can be made ahead of time and stored in the fridge for up to 3 days, making it perfect for quick lunches or dinners. {{image_4}} You can swap out ground chicken for other meats. Try ground turkey for a lighter option. If you want beef, use lean ground beef for a richer taste. Ground pork also works well and adds a nice flavor. Each protein gives a unique twist to the dish, so feel free to experiment. For a plant-based twist, use crumbled tofu or tempeh. These options soak up flavors like chicken. You can also try lentils or chickpeas for added protein. Simply cook them the same way as chicken. Use the Sriracha honey sauce to make them delicious and inviting. Adding extra veggies boosts the flavor and texture. Try adding shredded carrots or zucchini for crunch. You can also mix in diced mushrooms for an earthy taste. For more heat, toss in some chopped jalapeños. This adds a spicy kick and brightens the wraps. Don't forget to season with fresh herbs like cilantro or mint for added freshness. After you enjoy your Sriracha honey chicken lettuce wraps, store leftovers properly. Keep the chicken filling separate from the lettuce leaves. Place the filling in an airtight container. Ensure it cools down first. The lettuce can be stored in a plastic bag or container. Use a paper towel to absorb moisture. This helps keep them crisp. When it's time to eat leftovers, reheat the chicken filling. Use a skillet over medium heat. Stir it often until it’s hot. You can also use a microwave. Heat in short bursts to avoid overcooking. Always check the temperature. Make sure it reaches at least 165°F. This keeps your meal safe. Want to save some for later? You can freeze the chicken filling. Use a freezer-safe container or bag. Remove as much air as possible. Label it with the date. For thawing, move it to the fridge overnight. If you're in a hurry, use the microwave. Once thawed, reheat it before serving. Yes, you can prepare Sriracha honey chicken ahead of time. Cook the chicken mix, then store it in the fridge. When you are ready to eat, just reheat the filling. This makes it quick and easy for busy nights. Just remember to keep the lettuce fresh until serving. The best lettuce for wraps is either butter or iceberg lettuce. Both types have soft, flexible leaves. They hold the filling well and provide a nice crunch. Avoid thick or tough leaves, as they can tear easily. A good wrap should be easy to fold and bite into. To make Sriracha honey chicken gluten-free, use tamari instead of soy sauce. Tamari is a great substitute. It has a similar taste but is made without wheat. Always check the labels on Sriracha and other sauces. They can sometimes contain gluten, so choose brands that are gluten-free. This blog post covered all you need for Sriracha Honey Chicken Lettuce Wraps. We outlined key ingredients and provided optional garnishes. You learned how to prepare, cook, and assemble the wraps. The tips offered ways to perfect your filling and store leftovers. We explored variations, like using different proteins or making it vegan. Finally, you got storage info, reheating tips, and answers to common questions. Now, you're ready to try these delicious wraps. Enjoy creating and sharing this tasty dish!

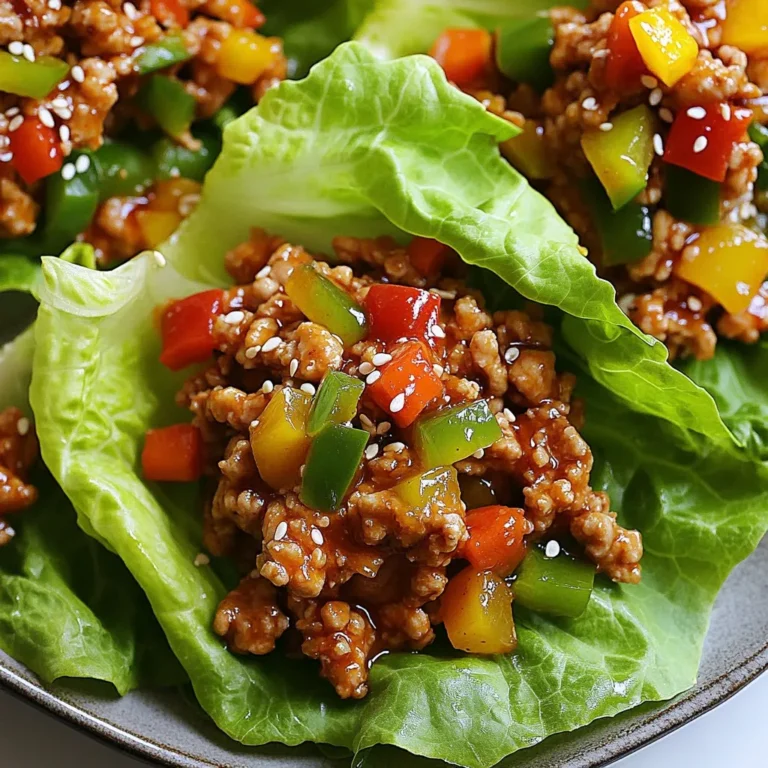
Sriracha Honey Chicken Lettuce Wraps Flavor Boost

- 1 pound baby carrots, peeled - 2 tablespoons extra virgin olive oil - 1/4 cup freshly grated Parmesan cheese - 2 teaspoons dried thyme - 2 teaspoons dried rosemary - 1 teaspoon garlic powder - Sea salt and freshly cracked black pepper, to taste - Fresh parsley, finely chopped (for garnish) The first step to making Parmesan Herb Roasted Carrots is gathering your ingredients. You need one pound of baby carrots. These are sweet and tender, perfect for roasting. Peel them for a smooth texture. Next, grab two tablespoons of extra virgin olive oil. This oil adds flavor and helps the carrots roast nicely. You will also need a quarter cup of freshly grated Parmesan cheese. This gives the carrots a rich, cheesy taste. The herbs are key, too. Gather two teaspoons each of dried thyme and dried rosemary. These herbs add warmth and depth. One teaspoon of garlic powder brings a savory punch. Finally, have sea salt and freshly cracked black pepper on hand. These will enhance the flavors. For garnish, finely chop some fresh parsley. This adds color and freshness to your dish. Having these ingredients ready makes cooking easier and more fun! {{ingredient_image_2}} Set your oven to 425°F (220°C). Preheating is key for perfect roasting. A hot oven helps the carrots cook quickly and brown nicely. This step makes sure your carrots get that lovely caramelized flavor. In a large bowl, add 1 pound of peeled baby carrots. Drizzle 2 tablespoons of extra virgin olive oil over the top. Toss the carrots well. Make sure each carrot gets a nice coat of oil. This helps them roast evenly and taste great. Now it’s time to add flavor! Sprinkle 1/4 cup of freshly grated Parmesan cheese, 2 teaspoons of dried thyme, 2 teaspoons of dried rosemary, and 1 teaspoon of garlic powder on the carrots. Add sea salt and freshly cracked black pepper to taste. Toss everything again until each carrot is covered in seasoning. Next, line a baking sheet with parchment paper. Spread the seasoned carrots in a single layer. Don’t overcrowd the baking sheet; this helps each carrot roast well. Place the baking sheet in the preheated oven. Roast the carrots for 25 to 30 minutes. Stir them halfway through cooking. This ensures they cook evenly and get that beautiful golden-brown color. Keep an eye on them. You want them tender and nicely caramelized. To make sure your carrots roast well, check for doneness after 25 minutes. They should be tender and golden brown. If you use larger carrots, they may need a bit more time. Avoid overcrowding on the baking sheet. If the carrots sit too close, they will steam instead of roast. Spread them out in a single layer to get that perfect caramelized finish. Try adding fresh herbs like basil or dill for a new twist. These herbs can boost the taste and bring out the flavors of the carrots. A squeeze of lemon juice before serving can brighten the dish. It adds a nice zing that pairs well with the Parmesan. Serve the roasted carrots on a colorful platter to catch the eye. You can arrange them in a fan shape for a fun look. Garnish with finely chopped parsley. This adds a fresh touch and makes the dish more appealing. The green color contrasts nicely with the orange carrots. Pro Tips Quality Carrots: Use fresh, vibrant baby carrots for the best flavor and texture. Look for carrots with a smooth surface and bright color. Cheese Alternatives: If you're looking for a lower-calorie option, try substituting Parmesan with nutritional yeast for a similar cheesy flavor without the dairy. Herb Variations: Feel free to experiment with fresh herbs like dill or basil instead of dried thyme and rosemary for a different flavor profile. Roasting Technique: For extra caramelization, consider giving the carrots a quick broil for the last 2-3 minutes of cooking. Just watch closely to prevent burning! {{image_4}} Adding honey brings a sweet touch to your roasted carrots. Use about one tablespoon of honey for each pound of carrots. Drizzle it over the carrots after tossing them in oil and spices. The honey will caramelize during roasting. This sweetness balances well with garlic flavor. The garlic enhances the dish, making it even more delicious. If you like heat, try adding red pepper flakes. Start with a pinch and increase to suit your taste. Mix the flakes in with the Parmesan and herbs. This adds a nice kick to the dish. You can also adjust the salt and pepper to balance the flavors. Feel free to swap dried herbs for fresh ones. Fresh thyme and rosemary can bring a brighter taste. Simply use three times the amount of fresh herbs as dried. You can also try other cheese options. Gruyère or cheddar can add a different flavor profile. Experiment with what you like best! To keep your roasted carrots fresh, let them cool first. Place them in an airtight container. Glass or plastic containers work well for this. Store them in the fridge for up to five days. Make sure to label the container with the date to track freshness. When you want to enjoy your leftovers, reheating is key to keeping them tasty. The oven is the best choice. Preheat it to 350°F (175°C). Spread the carrots on a baking sheet. Heat them for about 10-15 minutes. This method helps maintain their texture and flavor. You can also use the microwave, but they may lose some crunch. Yes, you can freeze roasted carrots. First, let them cool completely. Then, spread them on a baking sheet in a single layer. Freeze them for about an hour. After that, transfer them to a freezer-safe container or bag. They can last for up to three months in the freezer. To thaw, place them in the fridge overnight, then reheat as described above. Yes, you can use regular carrots. They have a thicker skin and need more prep. You should peel and cut them into smaller pieces. This helps them cook evenly. Cooking time may change. Regular carrots can take a bit longer to roast. Aim for 30 to 35 minutes instead of 25 to 30 minutes. Check for tenderness with a fork. Yes! To make it vegan, swap the Parmesan cheese. Use a plant-based cheese or nutritional yeast. Nutritional yeast adds a cheesy flavor without dairy. For the olive oil, you can stick with it or use avocado oil. Both will give good results. Just make sure to adjust the amount if needed. These roasted carrots last about 3 to 5 days in the fridge. Store them in an airtight container to keep them fresh. Always check for signs of spoilage before eating. Look for any weird smells or slimy texture. If they seem off, it’s best to toss them. Roasting baby carrots is simple and tasty. We covered ingredients, step-by-step instructions, tips, variations, and storage. You can enhance flavor and presentation or adapt the recipe to your tastes. Remember, perfecting the roast brings out the best in these veggies. Whether you stick with Parmesan or try new herbs, you'll enjoy great results. With proper storage, leftovers can last for up to a week in your fridge. Try making these roasted carrots tonight for an easy and delicious side dish!

Parmesan Herb Roasted Carrots Flavorful Side Dish

- 2 cups fresh corn kernels (sweet and bright; frozen is an acceptable alternative) - 1 cup cherry tomatoes, halved - 1 bell pepper (your choice of color for a vibrant dish), diced - ½ red onion, finely chopped - 1 jalapeño pepper, seeds removed and diced - ½ cup fresh cilantro, chopped - Juice of 2 limes (freshly squeezed for best flavor) - 2 tablespoons high-quality olive oil - Salt and black pepper to taste - ½ teaspoon ground cumin - ¼ teaspoon smoked paprika (adds depth) - ½ cup crumbled feta cheese (optional, for a creamy finish) The heart of this Fiesta Corn Salad lies in its fresh ingredients and zesty dressing. First, the corn kernels create a sweet base, making the salad lively. You can choose fresh corn for a bright taste or use frozen corn for ease. The cherry tomatoes add a juicy burst, while the bell pepper brings vibrant color and crunch. Next, the finely chopped red onion gives a nice bite and the diced jalapeño adds just the right heat. Don't forget the fresh cilantro; it brightens everything up with its herbaceous notes. Now, let's talk dressing. The freshly squeezed lime juice and high-quality olive oil create a tangy base. Season it with salt, black pepper, cumin, and smoked paprika for that extra depth of flavor. If you want a creamy finish, sprinkle in some crumbled feta cheese. This dressing will tie all the ingredients together and make your salad shine! {{ingredient_image_2}} Start with your fresh ingredients. In a large bowl, combine the corn, halved cherry tomatoes, diced bell pepper, finely chopped red onion, and diced jalapeño pepper. This colorful mix forms the base of your salad. Next, gently fold in the chopped cilantro using a spatula. This helps spread the fresh cilantro flavor evenly throughout the salad. Now, let’s make the dressing. In a separate small bowl, whisk together the freshly squeezed lime juice and high-quality olive oil. Add a pinch of salt and black pepper. Then, mix in the ground cumin and smoked paprika. This dressing adds a zesty kick to your salad. Pour the dressing over the vegetable mixture in the large bowl. Toss everything together until all the ingredients are coated in the dressing. This step ensures that the fresh flavors blend well. If you like, sprinkle crumbled feta cheese on top just before serving. This adds a creamy finish that pairs well with the other flavors. Enjoy your beautiful Fiesta Corn Salad! For the best taste, let your Fiesta Corn Salad rest for 15-20 minutes. This time allows the flavors to mix well. If you skip this step, the salad may taste bland. Freshly squeezed lime juice is key. It brings a bright, zesty kick that bottled juice can’t match. The juice enhances the fresh ingredients, making every bite pop. Serve your salad in a large, colorful bowl. This showcases the bright corn, red tomatoes, and green peppers. It makes the dish inviting and fun. For garnishing, add a handful of fresh cilantro on top. A lime wedge on the side adds a nice touch. These small details make your salad look even more delicious. Pro Tips Fresh Ingredients Make a Difference: Use the freshest corn and vegetables available to enhance the flavor and texture of your salad. Customize Your Heat Level: Adjust the amount of jalapeño according to your spice preference. You can also substitute it with a milder pepper if desired. Chill for Better Flavor: For an even more refreshing taste, chill the salad in the refrigerator for about 30 minutes after mixing, allowing the flavors to meld. Experiment with Add-Ins: Try adding black beans, avocado, or corn chips for added texture and flavor to your Fiesta Corn Salad. {{image_4}} You can make Fiesta Corn Salad your own by adding different ingredients. Here are a few ideas: - Beans or Avocado: Adding black beans or diced avocado gives your salad more texture. Beans add protein, while avocado adds creaminess. Both enhance the flavor and make the salad more filling. - Changing Peppers: Try different bell peppers to add color and taste. Yellow or orange peppers brighten the dish. They can also bring a sweet flavor that contrasts well with the other ingredients. You can easily adjust this salad to fit different diets. Here are two common adjustments: - Vegan Option: To make it vegan, simply leave out the feta cheese. The salad remains fresh and vibrant without it. You can also add more avocado or nuts for creaminess. - Gluten-Free: The Fiesta Corn Salad is naturally gluten-free. Just be sure all your ingredients, like spices, are gluten-free. This makes it perfect for anyone with gluten sensitivities. To keep your Fiesta Corn Salad fresh, use an airtight container. Glass or plastic containers work well. Make sure the container seals tightly to keep air out. This helps prevent spoiling. Place the salad in the fridge right away. The fresh ingredients need cool temperatures to last longer. If you don’t eat it all, this method keeps it tasty for your next meal. Your Fiesta Corn Salad lasts about 3 to 5 days in the refrigerator. Store it properly, and it will stay fresh. Check for signs of spoilage, like changes in color or smell. If the salad looks slimy or smells off, it has gone bad. It is best to toss it out to avoid any stomach issues. Enjoy your salad while it’s fresh for the best taste! You can use other sweet vegetables. Try diced zucchini or peas. Both add nice color. You might also like using cooked quinoa for a grainy texture. Yes, you can make this salad a day ahead. Prepare all the veggies and store them in the fridge. Mix the dressing separately and add it when you're ready to serve. This keeps everything fresh and crunchy. Fiesta Corn Salad pairs well with grilled chicken or fish. It also goes great with tacos or burgers. Add it to a summer barbecue for a fresh touch. This blog post shared a simple, tasty Fiesta Corn Salad recipe. You learned about fresh ingredients and dressing components. I provided clear steps for preparation, making the dressing, and assembling the salad. We also explored tips to enhance flavor and ways to customize the dish. Proper storage methods help keep your salad fresh. Enjoy this vibrant salad as a side or a main dish. Take your time to experiment with flavors and textures. Your taste buds will thank you!

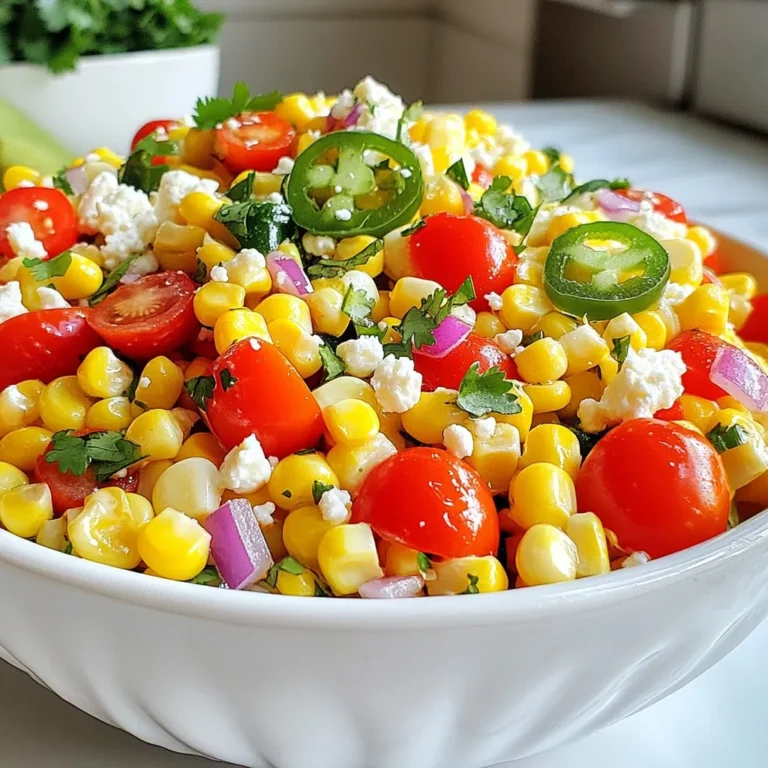
Fiesta Corn Salad Flavorful and Fresh Side Dish

PREV 1 … 32 33 34 … 47 NEXT
snack joy kitchen

explore

DessertsDinnerAppetizersDrinks

Our Policies

  • Cookie Policy
  • Copyright Policy
  • Disclaimer
  • GDPR Policy
  • Terms Of Use
Back to Top
  • About
  • Contact Us
  • Privacy Policy
© 2026 snack joy kitchen