FREE DINNER EBOOK! Get your copy!
  • Cookie Policy
  • GDPR Policy
  • Disclaimer
  • Terms Of Use
  • Visit my other site: Fun Cookie Recipes
snack joy kitchen
  • Home
  • Dinner
  • Desserts
  • Drinks
  • Appetizers
  • Contact
  • About
  • Privacy Policy
  • Home
  • Dinner
  • Desserts
  • Drinks
  • Appetizers
  • Contact
  • About
  • Privacy Policy
  • Cookie Policy
  • GDPR Policy
  • Disclaimer
  • Terms Of Use
Visit my other site: Fun Cookie Recipes

HOME / CATEGORIES /

Latest

To make Chili Lime Grilled Corn Ribs, you need a few simple ingredients. Here’s the list: - Fresh corn: 4 ears - Olive oil: 2 tablespoons - Spices: chili powder, smoked paprika, garlic powder - Fresh produce: lime zest and lime juice - Seasoning: sea salt and black pepper - Garnish: chopped cilantro and lime wedges Each ingredient plays a key role in creating that bold flavor. Fresh corn gives a sweet crunch. Olive oil adds richness and helps with grilling. The spices bring heat and depth. Lime zest and juice give a bright, zesty flavor. Sea salt and black pepper enhance everything. Finally, cilantro and lime wedges brighten the dish when served. Using fresh, high-quality ingredients makes a big difference. It helps create a dish that is not only tasty but also visually appealing. Enjoy the process of gathering these ingredients. Each one adds a unique touch to your summer treat. {{ingredient_image_2}} Start by turning on your grill. Set it to medium-high heat. This step helps get a nice sear on the corn. A hot grill will give you that perfect char. Grab 4 ears of fresh corn. Stand each ear upright on a cutting board. Use a sharp knife to cut each ear into quarters. You want the pieces to look like ribs. This shape makes them fun to eat and easy to grill. In a large mixing bowl, add 2 tablespoons of extra virgin olive oil. Then, mix in 1 teaspoon of chili powder, 1 teaspoon of smoked paprika, and 1/2 teaspoon of garlic powder. Next, add the zest of 1 lime and the juice of 2 limes. Season with sea salt and freshly cracked black pepper. Whisk until everything blends well. This marinade is key for flavor. Now, add the corn ribs to the bowl with the marinade. Gently toss them so every piece gets coated. Let the corn sit for at least 15 minutes. This helps the flavors soak into the corn. Carefully place the marinated corn ribs on the hot grill. Grill for about 5-7 minutes per side. Flip them only once to get nice grill marks. Keep an eye on them; you want them tender but still crunchy. When the corn ribs are done, take them off the grill. Arrange them on a serving platter. Sprinkle fresh chopped cilantro over the top for a burst of color. Serve with lime wedges on the side for an extra kick of citrus. Enjoy your tasty chili lime grilled corn ribs! To make the best chili lime grilled corn ribs, start with fresh corn. Look for ears with bright green husks. The kernels should feel plump and firm. Sweet corn is ideal for its juicy flavor. Avoid corn with dry or brown spots. Freshness makes a big difference in taste. Getting perfect grill marks is key for both looks and taste. Preheat your grill to medium-high heat before cooking. Place the corn ribs on the hot grill, and don’t move them for 5 to 7 minutes. This helps develop those beautiful char marks. Flip only once to keep the ribs intact. You can adjust the spice to suit your taste. For milder corn ribs, use less chili powder. If you love heat, add cayenne pepper or more chili powder. You can even mix in fresh chopped jalapeños for an extra kick. Remember to taste the marinade before you add the corn to find your perfect balance. Pro Tips Choose Fresh Corn: Select ears of corn that have bright green husks and plump kernels for the best flavor and texture. Let the Marinade Soak: Allow the corn ribs to marinate for at least 15 minutes to enhance the flavor; longer for a more intense taste. Control the Grill Temperature: Maintain a medium-high heat while grilling to achieve a perfect char without burning the corn. Experiment with Spices: Don't hesitate to adjust the spice levels or add your favorite seasonings for a personalized flavor twist. {{image_4}} You can add cheese to your corn ribs for a tasty twist. Cotija cheese has a salty flavor that pairs well with the chili and lime. To use Cotija, crumble it over the grilled corn before serving. Parmesan cheese also works great if you prefer a richer taste. Just sprinkle it on right after grilling. The cheese melts slightly and adds a creamy touch. If you love heat, add jalapeños to your corn ribs. You can slice fresh jalapeños and mix them into the marinade. This adds a nice spicy kick to the dish. For a milder flavor, you can remove the seeds before adding them. Grilling the jalapeños alongside the corn will enhance their smoky taste, making your dish even more flavorful. For a vegan version, you can easily change the marinade. Instead of using olive oil, try avocado oil. It has a similar taste and works well with the spices. You can also add some maple syrup for a hint of sweetness. This plant-based option keeps the dish tasty while being completely vegan-friendly. Enjoy your corn ribs guilt-free! After enjoying your chili lime grilled corn ribs, let them cool. Place the corn ribs in an airtight container. They will stay fresh in the fridge for up to three days. If you want to keep them longer, consider freezing. To reheat the corn ribs, use a grill or an oven. Preheat your grill to medium heat. Grill for about 3 to 4 minutes until warm. If using an oven, set it to 350°F (175°C). Place the corn on a baking sheet and heat for about 10 minutes. This will help revive the flavors and keep the texture nice. To freeze, wrap each corn rib tightly in plastic wrap. Then, place them in a freezer bag. Remove as much air as possible. They can stay frozen for up to three months. When ready to eat, thaw in the fridge overnight before reheating. This method helps maintain the taste and texture. Yes, you can use frozen corn. However, fresh corn tastes better. If you use frozen corn, thaw it first. Cut the thawed corn into rib-like sections. Follow the rest of the recipe as usual. The key is to ensure the corn is well marinated and grilled. Corn ribs are done when they are tender and have nice grill marks. Grill them for about 5-7 minutes on each side. Check them often to avoid burning. You can use a fork to test tenderness. If the corn gives a little when you poke it, it’s ready to eat! You can mix things up with different spices. Try adding cumin for warmth. You could also use cayenne pepper for heat. For a sweet twist, add some brown sugar. Feel free to play with flavors to make it your own. The chili lime base works well with many spices. You now have a clear guide to making grilled corn ribs. We covered the best ingredients, step-by-step grilling, and handy tips for perfect results. Don’t forget about fun variations that add flair. Store your leftovers wisely, so nothing goes to waste. Enjoy experimenting with spices and flavors! Your next barbecue will surely impress. Let's get cooking and create something delicious!

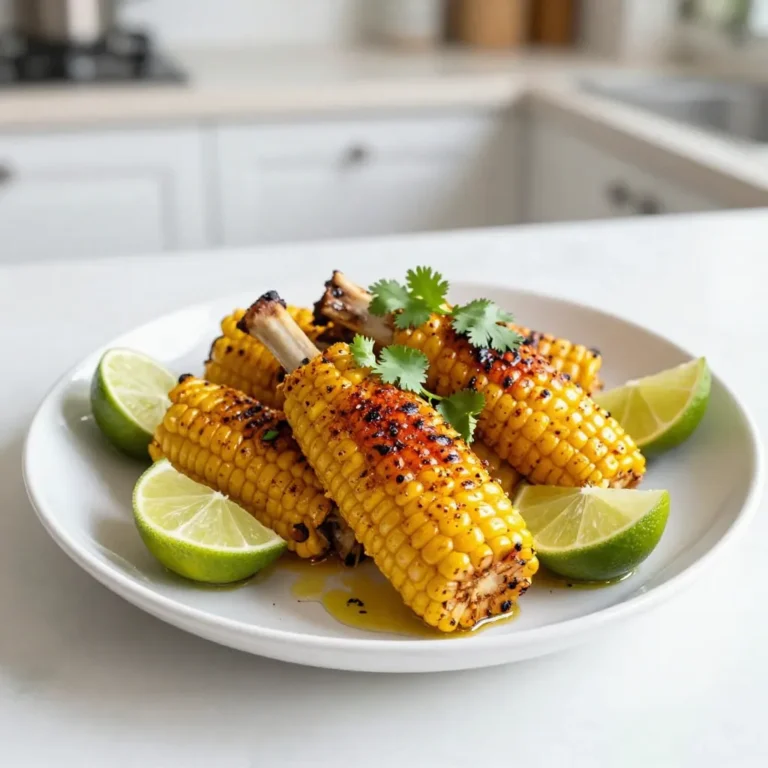
Chili Lime Grilled Corn Ribs Flavorful Summer Treat

To make Teriyaki Chicken Stir Fry, you need a few fresh items. Here’s what to gather: - Chicken - 1 lb boneless, skinless chicken thighs, sliced into thin strips - Vegetables - 1 cup broccoli florets - 1 bell pepper, sliced (red or yellow for sweetness) - 1 medium carrot, julienned - 1 cup sugar snap peas - 3 green onions, chopped - Sauce Ingredients - 2 cloves garlic, minced - 1 tablespoon fresh ginger, grated - 1/4 cup low-sodium soy sauce - 2 tablespoons honey - 1 tablespoon rice vinegar - 1 teaspoon sesame oil - 1 tablespoon cornstarch mixed with 2 tablespoons of water (slurry for thickening) - Garnishes - Sesame seeds for garnish This list helps you prepare a tasty meal. Each ingredient adds flavor and nutrition. The chicken gives protein, while the veggies add crunch and color. The sauce brings all the flavors together in a sweet and savory blend. Enjoy the cooking process as you gather everything! {{ingredient_image_2}} 1. Heating the skillet Start by heating 1 tablespoon of vegetable oil in a large non-stick skillet. Set the heat to medium-high. Wait until the oil shimmers before moving on. 2. Cooking the chicken Add the sliced chicken thighs to the skillet. Spread them in a single layer. Cook for about 5-7 minutes. Stir occasionally. Look for a golden brown color and ensure the chicken is fully cooked. Once done, take the chicken out and place it on a plate. 3. Cooking the vegetables In the same skillet, pour in the remaining tablespoon of vegetable oil. When it’s hot, add minced garlic and grated ginger. Stir-fry them for about 30 seconds. You want to smell their wonderful aroma. Next, toss in broccoli florets, sliced bell pepper, julienned carrot, and sugar snap peas. Stir-fry these veggies for 3 minutes. They should be tender yet still crunchy. 1. Adding sauce Return the cooked chicken to the skillet. Mix it well with the veggies. In a small bowl, whisk together soy sauce, honey, rice vinegar, sesame oil, and the cornstarch slurry. Pour this sauce over the chicken and vegetables. 2. Final cooking steps Stir everything together to coat all pieces in the sauce. Keep cooking for 2-3 minutes. This helps the sauce thicken and bind the ingredients. Before serving, fold in the chopped green onions. Sprinkle sesame seeds over the dish for that perfect finishing touch. - Optimal cooking temperature: Heat your skillet or wok on medium-high. This helps the chicken cook evenly and brown nicely. - Best practices for cutting ingredients: Slice chicken against the grain for tenderness. Chop vegetables into uniform sizes for even cooking. - Optional spices or additions: Add red pepper flakes for heat or a squeeze of lime for brightness. You could mix in mushrooms or baby corn for extra texture. - Suggestions for adjusting sweetness or saltiness: If it’s too sweet, add a splash of soy sauce. If it’s too salty, balance it with more honey or a bit of water. Pro Tips Use High Heat: Cooking over medium-high heat helps to achieve a nice sear on the chicken and keeps the vegetables crisp. Prep Ingredients Ahead: Have all your ingredients chopped and measured before starting to cook, ensuring a smooth stir-frying process. Customize Your Veggies: Feel free to swap out the vegetables for your favorites or whatever you have on hand, like snap peas or zucchini. Thickening Tips: If you prefer a thicker sauce, you can add more cornstarch slurry gradually until you reach your desired consistency. {{image_4}} You can swap chicken for other proteins. Tofu works well for a vegan option. It absorbs flavors nicely. Beef is another choice if you want a richer taste. Just slice it thinly and cook similarly. For vegetables, use what you have on hand. Seasonal options like bell peppers, snap peas, or zucchini can change the dish. You can also add mushrooms or bok choy for more flavor and texture. Experiment with colors and crunch. To make this dish gluten-free, use tamari instead of soy sauce. It tastes great and keeps the flavor intact. For a low-carb option, skip the honey. You can use a sugar substitute if needed. Also, replace sugar snap peas with green beans or bell peppers, which are lower in carbs. Enjoy the flexibility of this tasty stir fry! To store leftovers, let the Teriyaki Chicken Stir Fry cool down. Place it in an airtight container. This keeps the flavors fresh and prevents spills in your fridge. You can store it in the fridge for up to three days. If you want to freeze the dish, use a freezer-safe container. This way, it stays safe from freezer burn. The stir fry can last up to three months in the freezer. When you're ready to eat, thaw it overnight in the fridge. For reheating, use the stove for best results. Heat it on medium until it's hot. You can also use the microwave, but stir it halfway through to heat evenly. Enjoy your flavorful meal anytime! What can I serve with Teriyaki Chicken Stir Fry? You can serve this dish with steamed rice or noodles. Both options soak up the sauce well. You might also enjoy it with a side of salad or spring rolls. These sides bring more colors and flavors to your meal. How do I know when the chicken is fully cooked? The chicken is fully cooked when it reaches an internal temperature of 165°F. It should also look golden brown and no longer be pink inside. If you cut into a piece, the juices should run clear. Always double-check for safety. Can I cook this recipe in advance? Yes, you can cook this dish in advance. Just store it in an airtight container in the fridge. It stays fresh for about 3 days. When you're ready to eat, just reheat it on the stove or in the microwave. Is Teriyaki Chicken Stir Fry healthy? Yes, Teriyaki Chicken Stir Fry can be healthy. It uses lean chicken and lots of fresh vegetables. The dish is low in fat and high in protein. Just watch the soy sauce for sodium if you are on a low-salt diet. What are the nutrition facts for this dish? Each serving of Teriyaki Chicken Stir Fry has about 300 calories. It includes around 25 grams of protein, 10 grams of fat, and 30 grams of carbs. You also get vitamins and minerals from the veggies, making it a balanced meal. This post covered how to make a tasty Teriyaki Chicken Stir Fry from start to finish. I shared key ingredients, step-by-step cooking instructions, and helpful tips to boost flavor. You can also try variations or dietary swaps to fit your needs. Plus, I explained how to store and reheat leftovers. In the kitchen, this dish shines with its ease and flavor. Enjoy exploring this fun recipe as you cook and make it your own!

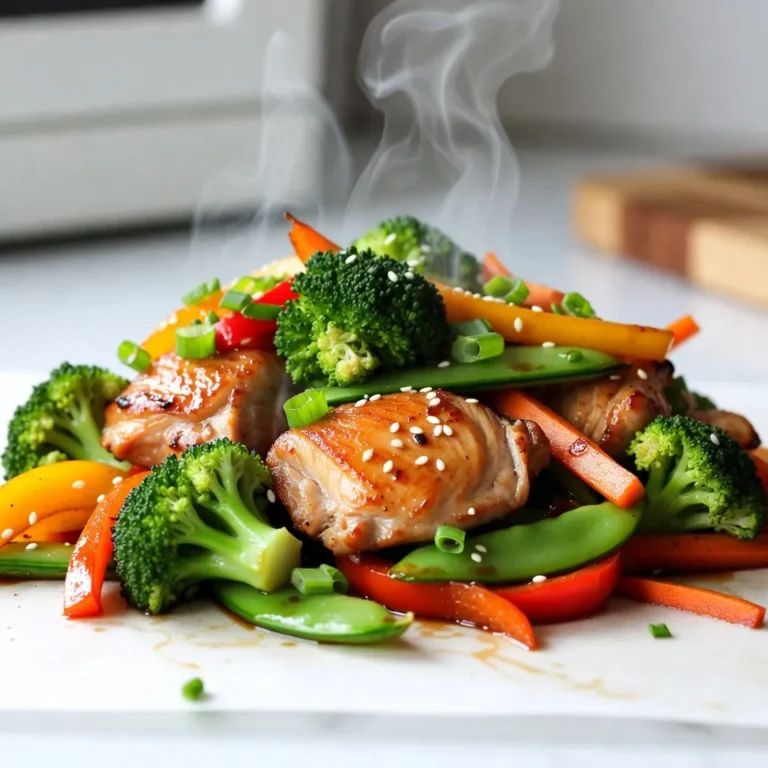
Teriyaki Chicken Stir Fry Easy and Flavorful Recipe

- 1 cup extra virgin olive oil - 2 tablespoons balsamic vinegar - 1 teaspoon garlic powder - 1 teaspoon onion powder - 1 teaspoon red pepper flakes - 1 tablespoon fresh rosemary, finely chopped - 1 tablespoon fresh parsley, finely chopped - 1 tablespoon sun-dried tomatoes, finely chopped - 1 teaspoon sea salt - Freshly cracked black pepper to taste To make a flavorful dipping oil, gather these simple ingredients. Each one adds a unique taste. The base is a cup of extra virgin olive oil. This oil gives a rich, fruity flavor. Next, you need two tablespoons of balsamic vinegar. This adds sweetness and depth. For some warmth, use one teaspoon of garlic powder and one teaspoon of onion powder. These will bring a savory note. Add one teaspoon of red pepper flakes for a little kick. If you like herbs, use one tablespoon each of fresh rosemary and fresh parsley. These herbs add freshness and brightness. Don’t forget about the sun-dried tomatoes! One tablespoon, finely chopped, will add a lovely tang. To finish, you’ll need one teaspoon of sea salt and freshly cracked black pepper to taste. Adjust these to suit your preference. With these ingredients ready, you can create a dipping oil that will impress everyone. This simple blend of flavors will make your bread dipping experience truly special. {{ingredient_image_2}} Start by pouring 1 cup of extra virgin olive oil into a medium bowl. Next, add 2 tablespoons of balsamic vinegar. Take a whisk and blend these two until they form a smooth mixture. This step creates a rich, flavorful base for your oil. Now, sprinkle in 1 teaspoon of garlic powder and 1 teaspoon of onion powder. Stir well to mix these spices into the oil blend. These powders bring a nice depth of flavor and aroma to your dipping oil. Next, add 1 teaspoon of red pepper flakes for a hint of heat. Then, fold in 1 tablespoon each of freshly chopped rosemary and parsley. These herbs add freshness and color. Carefully mix in 1 tablespoon of finely chopped sun-dried tomatoes. This step ensures every bite is packed with flavor. Finally, season with 1 teaspoon of sea salt and freshly cracked black pepper to taste. Adjust the seasoning to suit your preference. Let the mixture rest at room temperature for 30 minutes. This resting time allows the flavors to meld together, enhancing the overall taste. After this, your loaded bread dipping oil is ready to serve. Enjoy it with warm, crusty bread for the best experience. To make your loaded bread dipping oil shine, adjust the spices to match your taste. Maybe you like it spicier? Add more red pepper flakes for a kick. If you enjoy a milder flavor, cut back on the garlic powder or onion powder. Letting the oil sit for at least 30 minutes is key. This time allows the flavors to mix well. The longer it sits, the stronger the taste becomes. Try it and see how much you enjoy that depth of flavor. Serve your oil in rustic pottery or fun decorative bowls. These choices add charm to your table. To make it even fancier, drizzle a little extra olive oil on top. This adds a glossy look that is sure to impress your guests. You can also place a small dish of fresh herbs or olives alongside the oil. This enhances the visual appeal and gives more flavor options for dipping. The best bread for dipping includes crusty baguettes, ciabatta, or focaccia. These breads soak up the oil well and add a great texture. You can also serve it with warm pita or sourdough for a twist. For toppings, consider adding fresh basil leaves, grated cheese, or roasted garlic. These choices complement the oil nicely and create a full flavor experience. Mix and match to find your perfect pairing! Pro Tips Use Fresh Herbs: Fresh herbs elevate the flavor profile of your dipping oil. Try experimenting with different herbs like thyme or basil for a unique twist. Let It Rest: Allowing the oil to sit for at least 30 minutes helps the flavors to meld together, resulting in a more robust and harmonious taste. Adjust the Heat: Customize the level of spiciness by varying the amount of red pepper flakes according to your preference. Presentation Matters: Serve the dipping oil in a beautiful bowl and consider adding some whole olives or a sprig of fresh herb for an appealing presentation. {{image_4}} You can change the herbs in this recipe. Try using thyme for a warm flavor. Basil gives a fresh taste that brightens the dish. Chives add a mild onion flavor too. Fresh herbs make your dipping oil unique and fun. Don't be afraid to mix and match! Adding cheese can make your dipping oil richer. Parmesan brings a nutty taste, while feta adds creaminess. Just crumble some into the mix and stir. You can also bring in zesty citrus flavors. Lemon zest wakes up the oil with a burst of freshness. Just a little can go a long way! The base oil can change the whole taste. Extra virgin olive oil is great, but you can explore others. Try flavored oils like garlic or chili oil for extra punch. Infused oils can add depth, too. Each type gives a new twist to your loaded dipping oil! To keep your loaded bread dipping oil fresh, use a glass jar with a tight lid. Glass jars do not absorb flavors, so they work best. You can also use an airtight container. Store it in the fridge to keep it safe and tasty. In the fridge, this oil lasts up to two weeks. After that, its taste and quality may fade. Look for signs of spoilage. If you see any mold or it smells off, it’s time to toss it. Always trust your senses; they guide you well. Crusty bread is the best choice for this dish. Here are some great options: - Baguette: Its crunchy crust holds up well. - Ciabatta: This Italian bread has a soft inside and a nice chew. - Focaccia: With its airy texture, it soaks up the oil beautifully. - Sourdough: The tangy flavor adds depth to each bite. These breads not only taste great but also make for a fun dipping experience. Absolutely! You can use flavored olive oils for extra taste. Here are some ideas: - Garlic-infused oil: Adds a strong garlic flavor. - Chili oil: Great for a spicy kick. - Herb-infused oil: Enhances the herbal notes in your dish. Just remember to adjust the seasoning in your recipe. Flavored oils can change the taste, so taste as you go! Making the dipping oil vegan is simple. Follow these tips: - Use extra virgin olive oil: It’s already vegan-friendly. - Skip the cheese: If you want a cheesy flavor, try nutritional yeast. - Check your balsamic vinegar: Most are vegan, but some may contain additives. With these changes, you can enjoy this tasty treat without any animal products! This blog post covers a simple and tasty recipe for bread dipping oil. We explored the ingredients, mixing methods, and tips for the best flavor. You can even customize and store this oil easily. Remember, it's all about fresh herbs and quality oil. Experiment with flavors and have fun with presentation. Enjoy this easy recipe with your favorite bread. It’s a great way to share good food with friends or family.

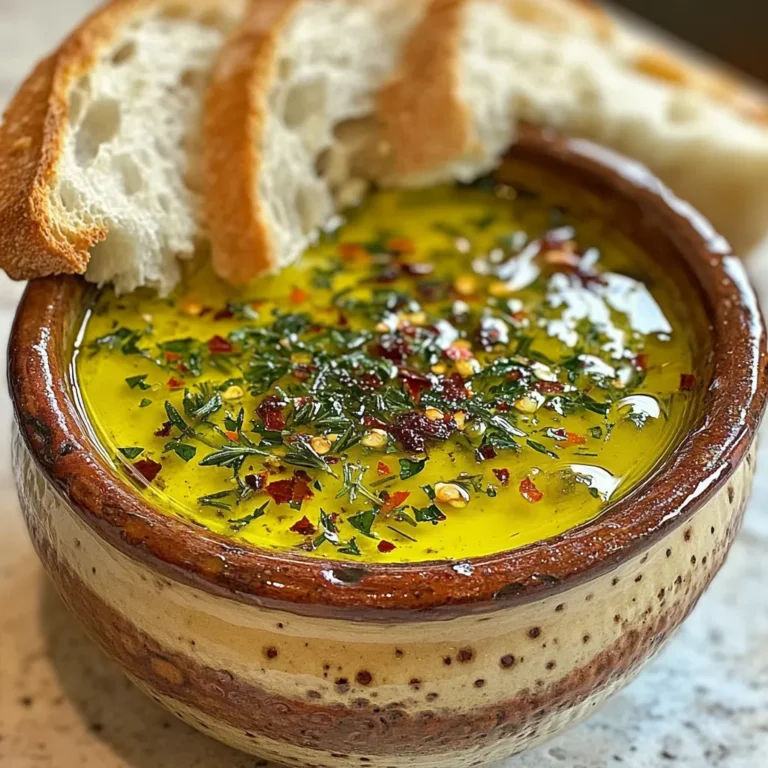
Loaded Bread Dipping Oil Flavorful and Easy Recipe

To make this soup, you need simple yet flavorful ingredients. Here’s a list of what you’ll need: - 1 tablespoon coconut oil - 1 onion, finely chopped - 3 cloves garlic, minced - 1 tablespoon fresh ginger, minced - 2 tablespoons red curry paste - 1 can (400ml) full-fat coconut milk - 4 cups vegetable broth - 1 tablespoon soy sauce (or tamari for a gluten-free option) - 1 tablespoon fresh lime juice - 1 medium sweet potato, peeled and diced into bite-sized cubes - 1 cup broccoli florets - 1 cup snap peas, trimmed - 1 red bell pepper, sliced into thin strips - Fresh cilantro, finely chopped, for garnish - Lime wedges, for serving - Sea salt and freshly ground black pepper, to taste Each ingredient brings its own unique flavor. Coconut oil adds richness, while ginger and garlic provide warmth. The red curry paste gives the soup a spicy kick. When picking your veggies, look for bright colors and firm textures. For sweet potatoes, choose ones that feel heavy for their size. They should have smooth skin without any blemishes. Fresh broccoli should have a vibrant green color and tight florets. Snap peas should be crisp, with a tender feel. For bell peppers, look for ones without wrinkles or soft spots. If you have allergies or preferences, there are easy swaps. For coconut milk, you can use almond milk or cashew cream for a lighter option. If you are allergic to soy, try using coconut aminos instead of soy sauce. For a different protein, you can add tofu or chickpeas. If you prefer different vegetables, zucchini or spinach can work well in this soup. {{ingredient_image_2}} 1. Gather all your ingredients first. This makes cooking easy and fun. 2. Chop the onion finely. Mince the garlic and ginger. This prep helps the flavors blend. 3. Peel and dice the sweet potato into small cubes. This ensures even cooking. 4. Cut the broccoli into florets, trim the snap peas, and slice the red bell pepper into thin strips. Having them ready makes cooking smooth. 1. Heat 1 tablespoon of coconut oil in a large pot over medium heat. 2. Add the chopped onion and sauté for about 5 minutes. You want it soft and clear. 3. Stir in the minced garlic and ginger. Cook for about 1 minute until fragrant. 4. Mix in 2 tablespoons of red curry paste. Stir well and cook for another minute. 5. Pour in 1 can of full-fat coconut milk and 4 cups of vegetable broth. Stir to combine. 6. Bring the mixture to a gentle boil. Once boiling, add the diced sweet potato. 7. Reduce the heat to low and simmer for about 10 minutes. The sweet potato should be soft. 8. Add the broccoli florets, snap peas, and red bell pepper. Cook for another 5 minutes. They should stay bright and crunchy. 9. Stir in 1 tablespoon of soy sauce and 1 tablespoon of fresh lime juice. Season with salt and pepper to taste. 10. Remove the pot from heat. Let it sit for a few minutes to mix the flavors. - Keep an eye on the cooking time. Overcooked veggies lose their crunch. - Taste as you cook. Adjust salt and lime juice for your liking. - Use fresh spices. They add a much richer flavor to your soup. - Let the soup rest before serving. This helps the flavors blend well. Enjoy making this soup! It’s simple and packed with flavor. To make the best vegan Thai coconut curry soup, follow these key tips: - Use fresh ingredients. Fresh produce enhances the soup’s taste. Look for bright and firm veggies. - Don’t rush the sauté. Cook the onion, garlic, and ginger slowly. This builds flavor and aroma. - Balance flavors. Taste as you go. Adjust lime juice, salt, and soy sauce for your liking. - Watch the cooking time. Keep an eye on the sweet potatoes. They should be tender but not mushy. Presenting your soup well makes it even more enjoyable. Here are some ideas: - Garnish with cilantro. Fresh cilantro adds color and a burst of flavor. - Serve with lime wedges. A squeeze of lime brightens the soup and balances the richness. - Use deep bowls. These help keep your soup hot and look inviting on the table. Pair your soup with these tasty options: - Serve with rice. Jasmine or brown rice complements the soup’s creaminess. - Add crusty bread. A side of bread is perfect for dipping and soaking up the soup. - Enjoy with a salad. A fresh salad adds crunch and contrasts the soup's warmth. These tips will help you create a delicious and visually appealing vegan Thai coconut curry soup every time. Pro Tips Use Fresh Ingredients: Opt for fresh vegetables and herbs to enhance the flavor and nutritional value of your soup. Adjust Spice Levels: If you prefer a milder soup, start with a smaller amount of red curry paste and gradually increase to taste. Texture Variation: For added texture, consider including some cooked chickpeas or lentils for protein and heartiness. Make it Ahead: This soup keeps well in the fridge for a few days, making it a perfect meal prep option for the week. {{image_4}} To make this soup gluten-free, swap soy sauce for tamari. Tamari tastes great and works well in this recipe. You can also check labels on vegetable broth to ensure no gluten sneaks in. Most brands are safe, but some may add gluten. Want to boost nutrition? Add chickpeas or tofu. Both options add protein and keep the soup hearty. If you prefer a firmer texture, try baked tofu cubes. They hold up well in soups. For an extra kick, toss in some edamame. Just cook them for a few minutes in the soup. Feel free to mix up the veggies! Carrots, zucchini, or spinach make great additions. If you like a bit of heat, add sliced jalapeños. They add a nice spicy kick. You can also use frozen veggies if you're in a hurry. Just toss them in when you add the fresh ones. This soup is all about your taste! After enjoying your Vegan Thai Coconut Curry Soup, you might have some leftovers. To store them, let the soup cool down first. This helps avoid condensation in the container. Transfer the soup into an airtight container. Make sure to leave some space at the top, as the soup may expand when frozen. Store it in the fridge if you plan to eat it within 3–4 days. For longer storage, freezing is a great option. If you want to keep the soup for longer, freezing is the way to go! Pour the cooled soup into freezer-safe containers or heavy-duty freezer bags. Remove as much air as possible before sealing. This keeps the soup fresh and prevents freezer burn. Label the containers with the date. You can freeze it for up to 3 months. When you're ready to eat, just take it out and let it thaw in the fridge overnight. When it's time to enjoy your soup again, reheating it properly is key. Pour the soup into a pot and heat it on low to medium heat. Stir it gently to keep the texture nice. You can also add a splash of vegetable broth or water if it seems too thick. Heat until it's hot, but do not boil it. This keeps the flavors fresh and the veggies crisp. For an extra touch, garnish with fresh cilantro before serving! Coconut curry soup comes from Southeast Asia, especially Thailand. It merges local flavors with coconut milk, a key ingredient. The soup often uses fresh herbs and spices, creating a warm, rich dish. Many cultures in the region have their own versions, each with unique twists. The use of coconut milk adds creaminess and a hint of sweetness, making it a favorite for many. Yes, you can make this soup ahead of time. Store it in the fridge for up to three days. Just let it cool before putting it in an airtight container. You can also freeze it for longer storage, up to three months. When you’re ready to eat, thaw it overnight in the fridge. Reheat it on the stove until hot. To adjust the spice level, start with less red curry paste. You can always add more later. Taste the soup as it cooks. If you want it spicier, add more paste or a pinch of red pepper flakes. For less heat, try adding more coconut milk to balance the spice. Always remember to taste as you go! This blog covered everything you need for a tasty Vegan Thai Coconut Curry Soup. We explored key ingredients, tips for fresh produce, and substitutions for allergies. I shared step-by-step instructions for cooking, with methods to ensure great texture and flavor. You learned best practices and serving ideas to elevate your dish. Remember, customize the soup to fit your diet. Store leftovers properly and enjoy them later. Whether you're a novice or a pro, this recipe is a crowd-pleaser. Get ready to make your kitchen smell amazing!

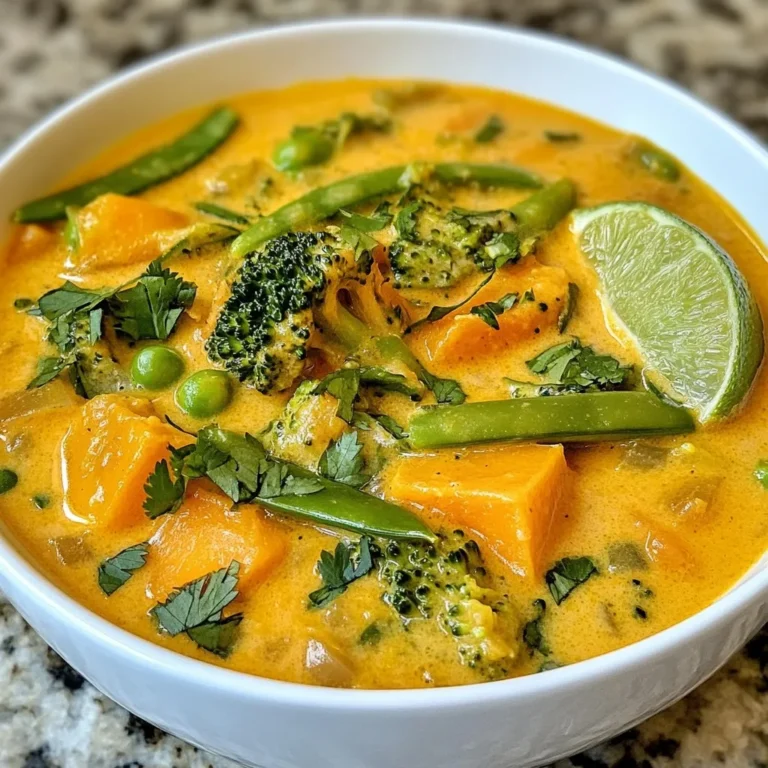
Vegan Thai Coconut Curry Soup Flavorful and Simple

To make delicious cinnamon sugar pretzel bites, gather these ingredients: - 1 ½ cups warm water (between 110°F and 115°F) - 1 packet (2 ¼ teaspoons) active dry yeast - 1 tablespoon granulated sugar (for activating yeast) - 4 cups all-purpose flour - 1 teaspoon salt - ½ cup baking soda (for boiling solution) - 1 large egg, beaten (for egg wash) - ½ cup unsalted butter, melted (for brushing) - ½ cup granulated sugar (for coating) - 2 teaspoons ground cinnamon (for coating) If you need alternatives, try these substitutions: - All-purpose flour: Use bread flour for a chewier bite. - Granulated sugar: Brown sugar adds a deeper flavor. - Unsalted butter: Use coconut oil for a dairy-free option. - Active dry yeast: Instant yeast works with no need for proofing. To ensure the best flavors and textures, pick fresh ingredients: - Yeast: Check the expiration date on the packet. Fresh yeast bubbles when mixed with warm water. - Flour: Look for a clean, dry package. Avoid any signs of moisture or pests. - Butter: Choose high-quality unsalted butter for the best taste. - Cinnamon: Smell the spice to check freshness. It should have a strong aroma. These tips help you make the best pretzel bites. Enjoy the process and the tasty results! {{ingredient_image_2}} First, get a small bowl. Add 1 ½ cups of warm water. The water should feel warm, not hot, around 110°F to 115°F. Sprinkle in 2 ¼ teaspoons of active dry yeast and 1 tablespoon of sugar. Stir it gently. Let this sit for about 5 minutes. You want it to foam up. This foam means the yeast is alive and ready to work. Next, grab a big bowl. In it, mix 4 cups of all-purpose flour with 1 teaspoon of salt. Pour in the frothy yeast mixture. Use a wooden spoon or spatula to mix until a shaggy dough forms. Now, turn the dough onto a floured surface. Knead it for about 5 to 7 minutes. The dough should feel smooth and stretchy. Once you’re done, place it in a greased bowl. Cover it with a damp cloth. Let it rise in a warm spot for about 1 hour. It needs to double in size. While the dough rises, preheat your oven to 425°F (220°C). Line a baking sheet with parchment paper. In a large pot, boil 10 cups of water. Carefully stir in ½ cup of baking soda. This will create a pretzel bath. After the dough has risen, punch it down to release air. Divide it into 8 equal pieces. Roll each piece into a rope, about 10-12 inches long. Cut the ropes into 1-inch pieces. Now, drop the pretzel bites into the boiling water for 30 seconds. Use a slotted spoon to take them out and place them on the baking sheet. Brush the tops with a beaten egg for shine. Bake them for 8 to 10 minutes until golden brown. Once they are out, brush them with melted butter. Mix ½ cup of sugar with 2 teaspoons of cinnamon. Roll the warm pretzel bites in this mix until coated. Enjoy the sweet and soft goodness! To get those perfect golden pretzel bites, start with the right boiling solution. Use ½ cup of baking soda in 10 cups of water. This helps create that classic pretzel crust. Boil the bites for about 30 seconds. This step locks in moisture and gives them a nice color. After boiling, brush them with a beaten egg. This gives them a shiny finish when baked. Bake them at 425°F for 8 to 10 minutes. Watch closely; they should be golden brown and puffy. One common mistake is not letting the dough rise enough. Make sure it doubles in size. If the dough is too wet, your bites may turn out dense. Add flour gradually while kneading to avoid this. Another mistake is boiling them for too long. Stick to 30 seconds for the best texture. Lastly, don’t skip the cinnamon sugar coating. It adds the sweet touch that makes these bites special. To boost flavor, try adding a pinch of nutmeg to the cinnamon sugar mixture. This subtle spice adds depth. For a fun twist, mix in some vanilla extract into the melted butter before brushing. You can also explore different toppings. Consider a sprinkle of sea salt after baking for a sweet-salty snack. Don't forget dipping sauces! Cream cheese or chocolate sauce pairs well with these bites. Pro Tips Use Fresh Yeast: Make sure your yeast is fresh and within its expiration date for the best rise and texture of your pretzel bites. Perfect Boiling Time: Do not exceed the 30 seconds boiling time; this helps to achieve that signature chewy texture without overcooking. Cooling on a Rack: Allow the pretzel bites to cool on a wire rack to prevent them from becoming soggy as they cool. Customize Your Coating: Experiment with different spices or flavored sugars for the coating to create unique variations of pretzel bites. {{image_4}} You can twist the classic cinnamon sugar pretzel bites into a sweet and savory delight. Try adding a pinch of sea salt for a contrast to the sweetness. You can also sprinkle in some grated cheese before baking. This gives a cheesy richness that pairs well with the sweet cinnamon flavor. For a spicy kick, add a dash of cayenne pepper to the cinnamon sugar mix. It creates a fun flavor contrast and wakes up your taste buds. If you need a gluten-free option, substitute all-purpose flour with a gluten-free blend. Look for one that works well for baking, and make sure it contains xanthan gum. This helps mimic the elasticity of regular dough. You can also use almond flour or coconut flour, but keep in mind they may change the texture. Experiment to find the right mix that works for you. Just be careful with the amounts, as gluten-free flours can absorb more moisture. Consider adding more fun toppings. Try rolling your warm pretzel bites in crushed nuts or sprinkles. This adds crunch and color. You might also enjoy drizzling melted chocolate or caramel over the top. For a more herbal twist, sprinkle some dried herbs like rosemary or thyme after baking. Each topping gives a new twist to your pretzel bites and makes them even more special. After you enjoy your pretzel bites, store any leftovers in an airtight container. This keeps them soft and fresh. Place them at room temperature for up to two days. If you want to keep them longer, consider freezing them. To reheat, preheat your oven to 350°F (175°C). Place the pretzel bites on a baking sheet. Heat for about 5 to 7 minutes. This makes them warm and fluffy again. You can also use the microwave, but they might lose some of their texture. To freeze pretzel bites, let them cool completely first. Then, place them in a single layer on a baking sheet. Freeze until solid, then transfer them to a freezer bag. They can last for up to three months in the freezer. When ready to eat, thaw in the fridge overnight and reheat as mentioned above. Yes, you can use instant yeast. Instant yeast works faster than active dry yeast. You do not need to activate it in warm water. Just mix it directly with the flour. This makes the process quicker, but the taste remains great! Cinnamon sugar pretzel bites taste amazing with different dips. Here are some great options: - Cream cheese dip: Smooth and rich, it balances the sweetness. - Chocolate sauce: Perfect for chocolate lovers, it adds a sweet twist. - Caramel sauce: This adds a buttery flavor that matches well with cinnamon. These pretzel bites stay fresh for 2-3 days at room temperature. Store them in an airtight container. For longer storage, freeze them. They can last up to 3 months in the freezer. Just reheat them in the oven when you want to enjoy them again! We covered a lot on making pretzel bites. We looked at key ingredients and how to pick the best ones. You now have step-by-step instructions to make them. I shared tips for a golden finish and common mistakes to avoid. You learned about fun variations and how to store leftover bites. With this knowledge, you can create tasty pretzel bites at home. Enjoy the process and share your results!

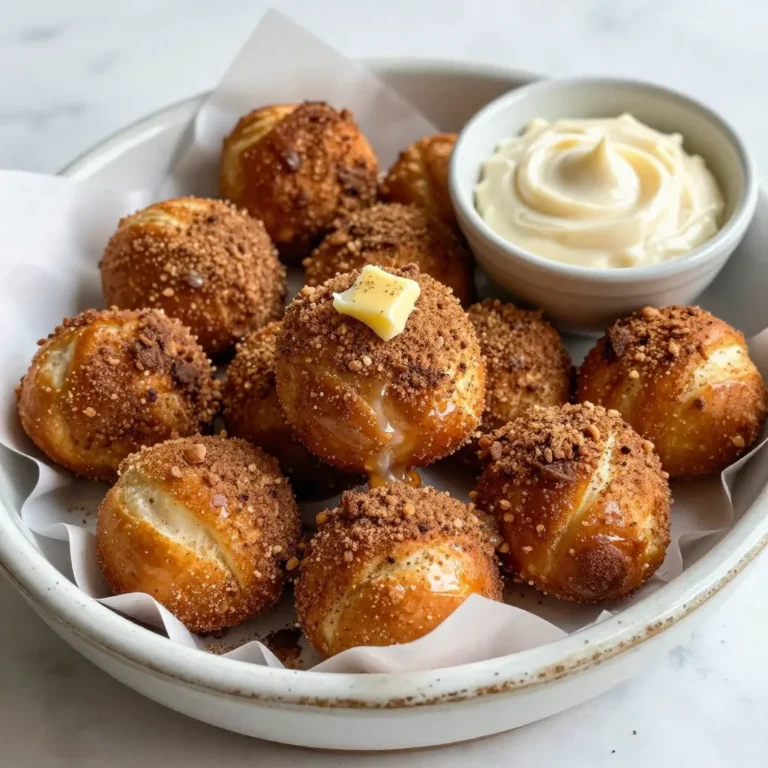
Cinnamon Sugar Pretzel Bites Soft and Sweet Snack

- 4 bone-in, skin-on chicken thighs - 4 cloves garlic, finely minced - 2 tablespoons fresh thyme, finely chopped (or 1 tablespoon dried thyme) - 2 tablespoons fresh rosemary, finely chopped (or 1 tablespoon dried rosemary) - 1 tablespoon extra virgin olive oil - Zest and juice of 1 large lemon - Sea salt and freshly ground black pepper to taste - 1 teaspoon smoked paprika To make garlic herb roasted chicken thighs, you need bone-in, skin-on chicken. This type of chicken stays juicy during cooking. The skin crisps up nicely, adding flavor. For herbs, we use fresh thyme and rosemary. They provide a savory taste. If you don’t have fresh herbs, dried ones work too. Garlic adds a strong and fragrant kick. Extra virgin olive oil helps the herbs stick. It also keeps the chicken moist. The lemon juice and zest brighten the dish. They add a zesty flavor that cuts through the richness of the chicken. Lastly, season with sea salt, black pepper, and smoked paprika. These ingredients enhance the overall taste and give it a warm color. - Fresh parsley - Lemon wedges for serving For garnish, fresh parsley adds a pop of color. It also gives a fresh taste. Lemon wedges are great for serving on the side. You can squeeze them over the chicken before eating. This adds a bright flavor that makes the meal more delicious. {{ingredient_image_2}} To start, you want to dry your chicken thighs well. Use paper towels to gently pat them. This helps the skin become crispy when cooked. Seasoning and marinating are key steps. By adding salt and pepper, you enhance the taste. Letting the chicken sit in the marinade allows the flavors to soak in. Next, I mix my herbs and spices. In a bowl, combine garlic, thyme, rosemary, olive oil, lemon zest, lemon juice, salt, black pepper, and smoked paprika. Stir until well blended. To maximize flavor, coat the chicken thighs thoroughly. Use your hands to massage the marinade into the meat. This ensures every bite is packed with flavor. Preheat the oven to 400°F (200°C). This temperature helps the skin get crispy. Roast the chicken for 35-40 minutes. To check for doneness, use a meat thermometer. The internal temperature should reach 165°F (74°C). For a crispy skin, place the chicken skin-side up on the baking sheet. Once done, let the chicken rest for 5 minutes. This allows the juices to settle. Enjoy the delicious, flavorful chicken! To get the best crispy skin, start by drying the chicken thighs. Use paper towels to pat them dry. This step helps remove moisture and allows the skin to crisp up nicely. Next, marinate the chicken well. Use a mix of garlic, herbs, and oil to coat the thighs. Massage the marinade in for a few minutes. This helps the flavors seep into the meat. You can swap out herbs to fit your taste. If you don’t have thyme, use oregano or basil instead. For rosemary, sage works great too. Want more flavor? Add a pinch of crushed red pepper for heat or a splash of balsamic vinegar for sweetness. You can even try citrus zest from oranges or limes for a twist. Pair your chicken thighs with vibrant sides. Roasted seasonal vegetables like carrots and broccoli work well. A simple salad with greens and a light vinaigrette complements the dish nicely. For a stunning presentation, arrange the chicken on a large platter. Surround it with colorful veggies and drizzle with pan juices. Add lemon wedges for a fresh touch. Pro Tips Pat Dry for Crispiness: Make sure to pat the chicken thighs dry with paper towels before applying the marinade. This step helps achieve perfectly crispy skin during roasting. Marinate Overnight: For an even more intense flavor, consider marinating the chicken thighs overnight in the refrigerator. This allows the herbs and garlic to penetrate the meat more deeply. Use a Meat Thermometer: To ensure your chicken is cooked perfectly, use a meat thermometer to check that the internal temperature reaches 165°F (74°C) at the thickest part of the thigh. Let it Rest: Allow the chicken to rest for about 5 minutes after roasting. This resting period helps retain the juices, making the meat more tender and flavorful. {{image_4}} You can cook garlic herb roasted chicken thighs in different ways. Grilling adds a smoky touch. It seals in flavor while giving the meat a nice char. Just marinate the thighs as usual. Place them on a hot grill for about 10-12 minutes on each side. The key is to check that the inside reaches 165°F (74°C). Roasting is my favorite method. It keeps the skin crispy and the meat juicy. Set your oven to 400°F (200°C) and roast for 35-40 minutes. The skin will turn golden brown while the seasonings seep into the meat. Both methods yield delicious results, so choose what fits your mood. If you have a slow cooker, you can adapt the recipe. Just use the same marinade. Place the chicken thighs in the slow cooker and cook on low for 6-8 hours. This method makes the chicken very tender. You won’t get crispy skin, but the flavors will still shine. You can change the flavor by mixing different herbs and spices. Try basil, oregano, or dill instead of thyme and rosemary. Each herb gives a unique taste. For a spicy kick, add crushed red pepper flakes. To explore global flavors, use cumin or coriander for a Middle Eastern twist. Marinating can also change the taste. Let the chicken sit in the marinade for a few hours or overnight. The longer it sits, the stronger the flavor. Combine citrus juices like lime or orange for a fresh twist. You can also add honey for a sweet touch. If you are gluten-free, this recipe is already safe! All the ingredients fit within gluten-free diets. Just ensure your spices don’t contain hidden gluten. For those on a low-carb diet, skip the honey and focus on herbs and spices. Use olive oil for cooking and pair the chicken with non-starchy veggies like broccoli or zucchini. For vegetarian options, consider using cauliflower or portobello mushrooms. Marinate them with the same herbs and roast until tender. This gives a similar flavor profile without meat. Enjoy experimenting with these variations for a delicious meal! After enjoying your garlic herb roasted chicken thighs, store any leftovers right away. Place the chicken in an airtight container. This keeps the moisture in and prevents drying. You can refrigerate the chicken for up to 3 days. When you want to reheat, use a low oven setting. Preheat your oven to 350°F (175°C). Place the chicken thighs on a baking sheet. Cover them with foil to keep the heat in. Heat for about 15-20 minutes. This way, the chicken stays juicy and warm. Freezing is a great option if you have extra chicken. To freeze, wrap each thigh in plastic wrap and then place them in a freezer bag. This keeps out air and helps prevent freezer burn. You can freeze the chicken for up to 3 months. When you're ready to use frozen chicken, move it to the fridge. Let it thaw overnight. For quicker thawing, place the sealed bag in cold water. After thawing, cook the chicken as usual. Enjoy the same great flavors! To get the best results, cook chicken thighs for 35-40 minutes at 400°F (200°C). Check the internal temperature. It should reach 165°F (74°C) to ensure they are safe to eat. This time allows the skin to become crispy and the meat to stay juicy. Yes, you can use boneless chicken thighs. They will cook faster, so reduce the cooking time to about 25-30 minutes. Always check the internal temperature to ensure they reach 165°F (74°C). Boneless thighs can be just as tasty with the same marinade. Pair garlic herb roasted chicken thighs with a variety of sides. Here are some great options: - Roasted seasonal vegetables like carrots, zucchini, or bell peppers - A light, zesty salad with greens and lemon vinaigrette - Mashed potatoes or creamy polenta for a comforting touch - Quinoa or rice for a healthy grain option These sides will balance the flavors and make a complete meal. In this post, I shared how to make delicious garlic herb roasted chicken thighs. We covered key ingredients, prepping techniques, and cooking methods. I shared tips for achieving crispy skin and enhancing flavors. You can even adapt recipes for different diets and preferences. As you cook and experiment, remember that practice makes perfect. Use fresh herbs and don’t rush the marinating process. With these tips, you can create a meal that impresses everyone at your table. Enjoy the cooking journey!

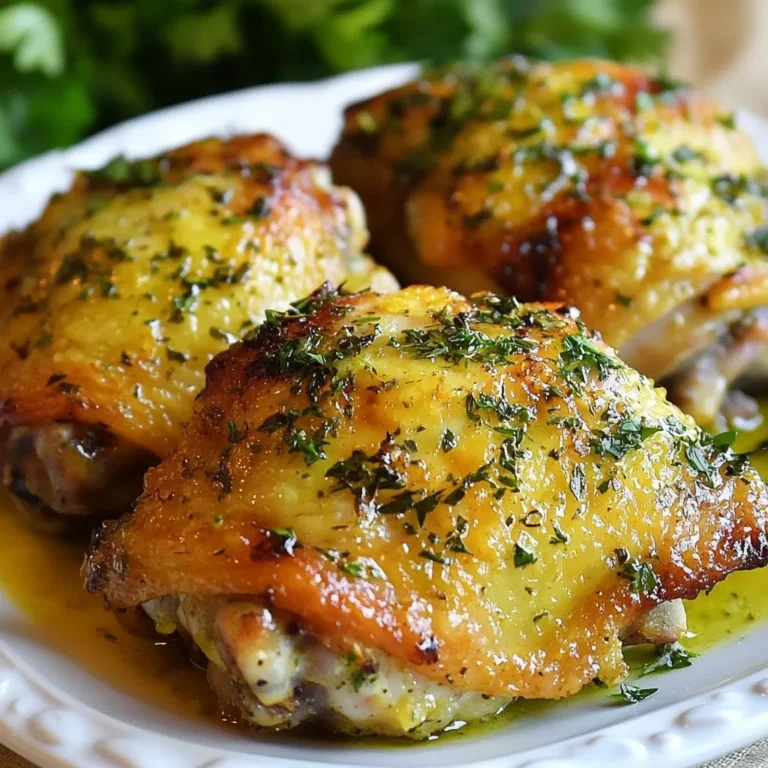
Garlic Herb Roasted Chicken Thighs Flavorful Delight

- 1 pre-made pizza crust - 1 cup cooked chicken breast, shredded - 1 cup cucumber, finely diced - 1/2 cup plain Greek yogurt - 2 tablespoons fresh dill, chopped - 2 tablespoons lemon juice - 1 clove garlic, minced - 1 cup shredded mozzarella cheese - 1/4 cup red onion, thinly sliced - Salt and pepper to taste - Olive oil for brushing For this recipe, you need one crust. You can buy it or make one. You will use one cup of chicken that is already cooked. One cup of cucumber needs to be diced very small. The yogurt should be plain and in half a cup. You will want two tablespoons each of dill and lemon juice. One clove of garlic should be minced. Grab one cup of mozzarella cheese, and a quarter cup of red onion. Use salt and pepper as you like. Finally, keep some olive oil for brushing the crust. If you don’t have a pizza crust, you can use pita bread or flatbread. You can swap the chicken for cooked turkey or even plant-based chicken for a vegetarian twist. Instead of Greek yogurt, you could use sour cream. For dill, fresh mint or parsley adds a nice touch. If you don’t like red onion, try green onions or skip it altogether. Feel free to mix the cheese with feta for a tangy kick. This recipe is flexible, so make it your own! {{ingredient_image_2}} First, preheat your oven to 475°F (245°C). This high heat helps the crust get nice and crispy. A hot oven makes a big difference for the best pizza. Next, let’s make the tzatziki sauce. In a medium bowl, mix one cup of plain Greek yogurt, one cup of finely diced cucumber, and two tablespoons of fresh dill. Add two tablespoons of lemon juice and one minced garlic clove. Season with salt and pepper. Stir until it's smooth. This sauce adds a fresh taste to your pizza. Now, prepare the pizza crust. Roll out your pre-made crust on a floured surface. It should be uniform in thickness. Place it on a baking sheet or pizza stone. Spread the shredded chicken evenly on the crust. Then, dollop your tzatziki sauce on top. Spread it gently, but leave some chicken visible. Next, sprinkle one cup of shredded mozzarella cheese over the sauce. Add thin red onion slices on top for crunch. Lightly brush the edges of the crust with olive oil for a golden finish. Place the pizza in the preheated oven. Bake for about 12 to 15 minutes. Look for a golden-brown crust and bubbling cheese. Once done, take it out and let it cool for a few minutes. Slice it into wedges and serve hot. For extra flavor, garnish with more fresh dill. Enjoy your tasty Tzatziki Chicken Pizza! To get a great crust, start with a hot oven. Preheat it to 475°F (245°C). This helps the crust rise and turn golden. If using a stone, place it in the oven while it heats. Roll out the crust evenly, about ¼ inch thick. Lightly flour your surface to prevent sticking. Brush the edges with olive oil for a nice color. You can add more taste to your pizza. Try mixing in some feta cheese with the mozzarella for a tangy kick. For extra crunch, consider adding bell peppers or olives. A sprinkle of paprika or cayenne can add heat. You can also toss in some spinach or arugula after baking for a fresh touch. Serve your Tzatziki Chicken Pizza with a side salad. A simple mix of greens, tomatoes, and cucumbers works well. You can also pair it with a glass of chilled lemonade. The drink adds a refreshing contrast to the flavors. If you like dips, hummus or extra tzatziki on the side is a great choice! Pro Tips Use Fresh Ingredients: For the best flavor, use fresh cucumbers and herbs in your tzatziki sauce. Fresh ingredients enhance the overall taste of the pizza. Customize Your Toppings: Feel free to add additional toppings like olives, cherry tomatoes, or feta cheese for an extra burst of flavor and texture. Let the Sauce Sit: Allow the tzatziki sauce to sit for at least 15 minutes before spreading it on the pizza. This helps the flavors to develop and meld together beautifully. Check for Doneness: Keep an eye on the pizza as it bakes. Ovens can vary, so check for a golden crust and bubbling cheese to ensure it's perfectly cooked. {{image_4}} You can switch up the protein in your Tzatziki Chicken Pizza. Instead of chicken, try shredded pork or beef. Grilled shrimp also adds a nice twist. If you want to keep it light, use turkey. Each option gives new flavors while keeping the base recipe intact. For a vegetarian twist, skip the meat altogether. Use roasted vegetables like bell peppers, zucchini, and mushrooms as toppings. You can also add chickpeas for extra protein. This keeps the pizza hearty and satisfying without meat. While tzatziki is great, feel free to experiment with sauces. Try a garlic aioli or hummus for a unique taste. You can also change the cheese. Feta cheese adds a salty kick, or use goat cheese for creaminess. Each variation gives your pizza a fresh spin. To keep your Tzatziki Chicken Pizza fresh, store leftovers in an airtight container. Let the pizza cool down first. Place a piece of parchment paper between slices to avoid sticking. The pizza stays tasty for about two to three days in the fridge. Reheat your pizza for the best taste. Use an oven or toaster oven for even heating. Preheat your oven to 350°F (175°C). Place the pizza on a baking sheet and cover it with foil. Heat for about 10-15 minutes. This keeps the crust crispy. You can also microwave it, but the crust may get soggy. Heat for 1-2 minutes on medium power. You can freeze Tzatziki Chicken Pizza for longer storage. Wrap each slice in plastic wrap, then foil to prevent freezer burn. Store in a freezer-safe bag or container. It lasts up to two months in the freezer. When you’re ready to eat it, thaw in the fridge overnight. Reheat in the oven for the best taste. Tzatziki sauce is a cool and creamy dip. It comes from Greek cuisine. The main ingredients are yogurt, cucumber, garlic, and herbs. You mix these to create a refreshing flavor. This sauce adds a nice touch to the Tzatziki Chicken Pizza. It keeps the pizza moist and tasty. The Greek yogurt gives it a creamy texture. The cucumber adds crunch, while garlic gives a little kick. You can enjoy tzatziki with pita bread or veggies, too. Yes, you can use a different type of crust. You can try whole wheat crust for a healthier option. Cauliflower crust is great for a low-carb choice. If you want a gluten-free crust, look for store-bought options. You can also make your own from almond flour or chickpea flour. Just make sure the crust is sturdy enough to hold all the toppings. This flexibility lets you enjoy Tzatziki Chicken Pizza in many ways! To make Tzatziki Chicken Pizza gluten-free, simply choose a gluten-free crust. Many stores sell ready-made gluten-free pizza crusts. You can also use a DIY option with gluten-free flour. Just follow a recipe for gluten-free pizza dough. The rest of the ingredients are naturally gluten-free. This way, everyone can enjoy this delicious pizza. It’s easy to make it fit your dietary needs! This blog post covered the ingredients and steps to make Tzatziki Chicken Pizza. You learned about the key ingredients and their measurements. We discussed substitutions, oven prep, and making the tzatziki sauce. I shared tips for the perfect crust and serving ideas. Additionally, variations for proteins, sauces, and storage tips were provided. Making this pizza is fun and easy. Now you can impress your friends and family with your tasty creation! Enjoy every bite and feel proud of your cooking skills.

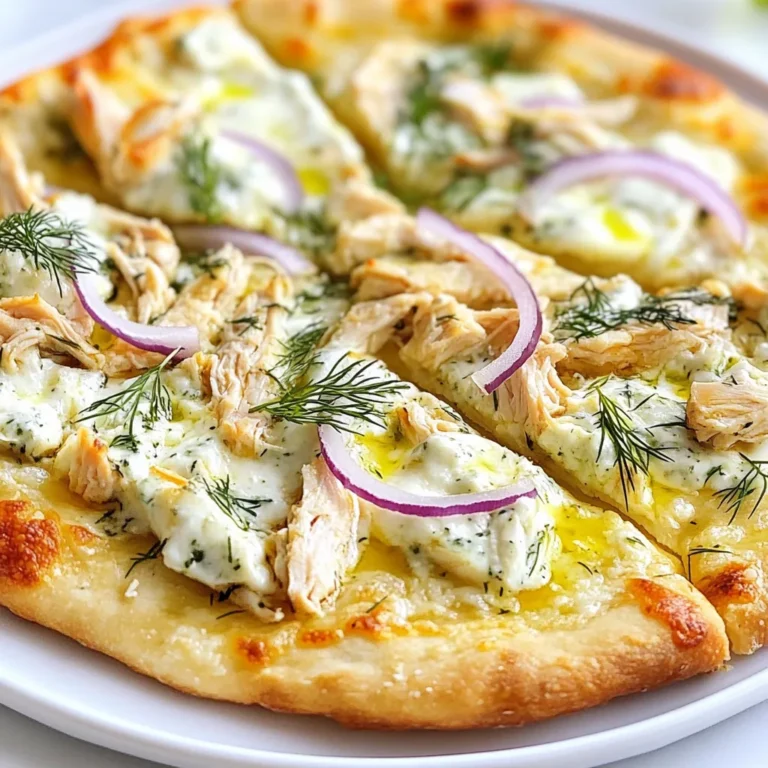
Tzatziki Chicken Pizza Flavorful and Simple Recipe

- 2 large apples (any sweet variety), peeled, cored, and diced - 1 cup all-purpose flour - 1/2 cup granulated sugar, divided - 1 teaspoon baking powder - 1 teaspoon ground cinnamon, plus more for dusting - 1/4 teaspoon salt - 1/2 cup milk - 1 large egg, beaten - 1 teaspoon vanilla extract - Vegetable oil (for frying) - Powdered sugar (for dusting) You can switch out ingredients for a healthier option. Use whole wheat flour instead of all-purpose flour. Try honey or maple syrup instead of granulated sugar. Unsweetened almond milk works well in place of regular milk. A flax egg can replace a regular egg if you want a vegan option. Just mix 1 tablespoon of ground flaxseed with 3 tablespoons of water. Let it sit for a few minutes before using. Choosing the right apple makes a difference in flavor and texture. Look for sweet apples like Fuji, Honeycrisp, or Gala. These apples hold their shape and add great taste. Make sure the apples feel firm and have a nice color. Avoid any with bruises or soft spots. Fresh apples will give your fritters the best flavor and crunch. {{ingredient_image_2}} Start by peeling and coring the apples. I like to use sweet apples, like Honeycrisp or Fuji. Dice them into small pieces. In a medium bowl, mix the diced apples with two tablespoons of granulated sugar. Stir well and let it sit for about 10 minutes. This step helps the apples release their juices, which adds great flavor. In a large bowl, sift together the all-purpose flour, the rest of the sugar, baking powder, ground cinnamon, and salt. Mixing these dry ingredients well is key. This ensures that each fritter has a balanced flavor. In another bowl, whisk together the milk, beaten egg, and vanilla extract. Mix until smooth. This wet mixture adds moisture to your fritters. It also helps bind the dry ingredients together. Heat vegetable oil in a deep skillet. Aim for about 2 inches of oil. Check if it’s hot enough by dropping a small amount of batter in. If it sizzles, you’re ready. Using a spoon or ice cream scoop, drop spoonfuls of batter into the oil. Make sure not to overcrowd the pan. Fry each fritter for about 3-4 minutes on each side until golden brown. Once cooked, remove the fritters with a slotted spoon. Place them on a paper towel to drain excess oil. Dust them with powdered sugar and a sprinkle of cinnamon. For a special touch, serve them warm on a nice platter. You can add a side of caramel sauce or a scoop of vanilla ice cream for dipping. Enjoy your delicious fritters! To make your fritters crispy, keep these tips in mind: - Use cold ingredients: Cold milk and egg help the batter stay light. - Don’t overcrowd the pan: Fry in small batches. This keeps the oil hot. - Right oil temperature: Heat the oil to 350°F. This ensures a nice golden color. - Drain well: Place fritters on paper towels to soak up extra oil. Here are some common pitfalls to watch for: - Overmixing the batter: Mix just until combined. This keeps the fritters fluffy. - Skipping the resting step: Letting apples sit with sugar adds flavor and moisture. - Wrong apple choice: Use sweet apples like Fuji or Honeycrisp for the best taste. - Not testing oil temperature: Always check if the oil sizzles before frying. Add some fun to your fritters with toppings: - Powdered sugar: A classic choice for a sweet finish. - Cinnamon sugar: Mix cinnamon with sugar for extra flavor. - Caramel sauce: Drizzle it on top for a rich taste. - Ice cream: Serve with a scoop to make it a dessert treat. Pro Tips Choose the Right Apples: Opt for sweet varieties like Fuji or Honeycrisp for the best flavor in your fritters. Don’t Overmix: Stir the batter just until combined to keep the fritters light and fluffy; overmixing can lead to dense fritters. Check Oil Temperature: Use a thermometer to ensure the oil is at 350°F (175°C) for perfectly crispy fritters; too hot can burn them. Serving Suggestions: For an extra treat, serve with a drizzle of caramel sauce or a scoop of vanilla ice cream alongside the warm fritters. {{image_4}} You can make gluten-free fritters by swapping the all-purpose flour. Use a gluten-free flour blend. This blend works well in most recipes. Follow the same steps as the original recipe. The taste stays just as good, and the texture remains delightful. For extra flavor, add nuts or raisins to the batter. Chopped walnuts or pecans give a nice crunch. If you like sweetness, add a handful of raisins. Mix them in gently with the diced apples before frying. This makes every bite more exciting and tasty. You can lighten the fritters by using applesauce. Replace half the milk with unsweetened applesauce. This adds moisture and natural sweetness. You can also cut back on sugar to make them even healthier. Make sure to still enjoy the classic apple flavor in every bite. To keep your fritters fresh, place them in an airtight container. Line the bottom with paper towels to soak up any moisture. Keep the container in the fridge. This way, they stay tasty for up to three days. If you want to enjoy them later, try freezing them instead. Reheat fritters in the oven for the best results. Preheat your oven to 350°F (175°C). Place them on a baking sheet for about 10 minutes. This warms them up and helps restore their crispness. Avoid the microwave, as it can make them soggy. To freeze fritters, let them cool completely. Place them in a single layer on a baking sheet. Freeze them for about an hour. Once frozen, transfer them to a freezer-safe bag. Squeeze out as much air as possible before sealing. They can last up to three months in the freezer. When you're ready to eat, thaw them in the fridge and reheat as mentioned above. Yes, you can make fritters without eggs. Use 1/4 cup of unsweetened applesauce instead. This will help bind the batter without eggs. The fritters will still be soft and tasty. You can check the oil's heat easily. Drop a small spoonful of batter into the oil. If it sizzles, the oil is hot enough. Use a thermometer for precise heat. Aim for 350°F (175°C) for the best results. Serve the fritters warm on a nice plate. You can dust them with powdered sugar and cinnamon. For extra flavor, try adding caramel sauce or vanilla ice cream. A scoop of whipped cream also makes a great topping! Making cinnamon apple fritters is fun and tasty. We explored key ingredients, including substitutes and how to pick the best apples. I shared step-by-step instructions for preparing, mixing, and frying. You learned tips for crispy fritters and common mistakes to avoid. We also discussed variations, storage, and answered your FAQs. Now, you can create your own delicious fritters with confidence. Enjoy your cooking adventure!

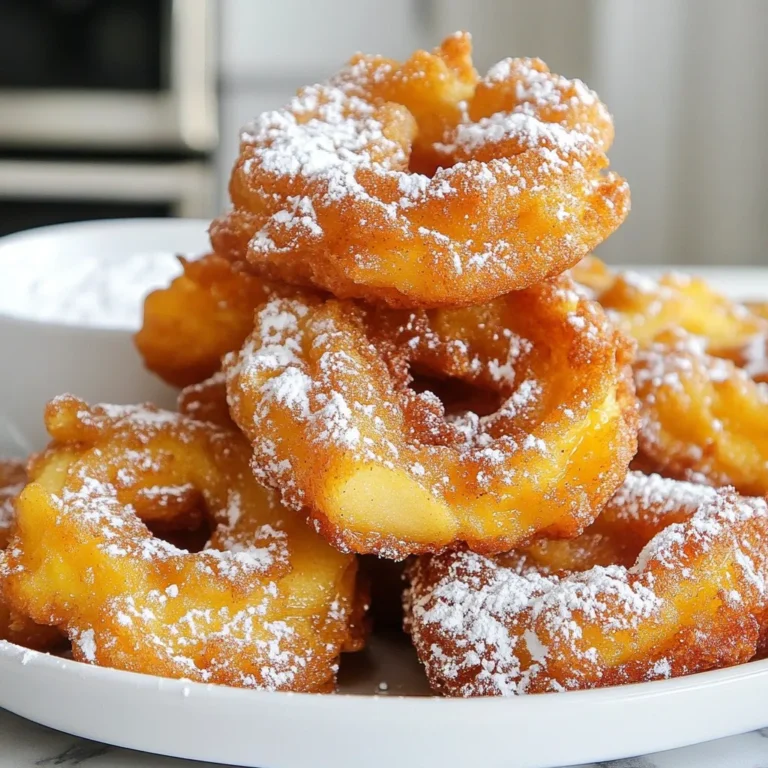
Cinnamon Apple Fritters Irresistible and Easy Recipe

- 1 lb ground beef or ground turkey - 1/2 cup Italian seasoned breadcrumbs - 1/4 cup freshly grated Parmesan cheese - 1 large egg - 2 cloves garlic, minced - 1 tablespoon Italian seasoning blend - Salt and freshly ground black pepper, to taste - 1 cup heavy cream - 1/2 cup low-sodium chicken broth - 1 cup cherry tomatoes, halved - 1 cup fresh spinach, roughly chopped - 1/2 teaspoon crushed red pepper flakes (optional) When making Creamy Tuscan Meatballs, you want to start with quality ingredients. The main ingredients include ground beef or turkey, breadcrumbs, cheese, and egg. These help bind the meatballs and add flavor. Next, flavor enhancers like garlic and Italian seasoning make the meatballs pop. A pinch of salt and pepper is key for balance. Now for the creamy sauce! Heavy cream and chicken broth create a rich base. Cherry tomatoes and fresh spinach add color and nutrients. If you like heat, crushed red pepper flakes give a nice kick. Using fresh, quality ingredients will make your dish stand out. You can easily find these items at your local store. Don't skip the Parmesan cheese; it brings a wonderful depth to the flavor. {{ingredient_image_2}} - In a large mixing bowl, combine: - 1 lb ground beef or ground turkey - 1/2 cup Italian seasoned breadcrumbs - 1/4 cup freshly grated Parmesan cheese - 1 large egg - 2 cloves garlic, minced - 1 tablespoon Italian seasoning blend - Salt and pepper to taste Mix all the ingredients well. Use your hands for a thorough blend. Don't skip this step, as it ensures every bite is tasty. Next, shape the mixture into small meatballs. Aim for about 1 inch in size. This is an easy way to make sure they cook evenly. Arrange the meatballs on a plate and set them aside for later. - Heat 2 tablespoons of extra virgin olive oil in a large skillet over medium heat. Once the oil shimmers, add the meatballs in batches. Do not overcrowd the pan; this will help them brown nicely. Cook for about 4-5 minutes, turning them occasionally. They should be golden brown on all sides. Use tongs to take them out and place them on a paper towel-lined plate to drain. In the same skillet, add 1 cup of halved cherry tomatoes. Sauté them for 3-4 minutes. Stir occasionally until they soften and release their juices. Next, add 1 cup of roughly chopped fresh spinach. Cook for 2 minutes until the spinach wilts down. Now, carefully pour in: - 1 cup of heavy cream - 1/2 cup of low-sodium chicken broth Stir everything together. Let this mix come to a gentle simmer. Return the meatballs to the skillet. Nestle them into the creamy sauce. Allow them to simmer for about 10 minutes. This helps the flavors blend well. Finally, taste the sauce. Adjust the seasoning with more salt and pepper if needed. Enjoy your creamy, flavorful dish! To get perfect meatballs, start by browning them well. This adds great flavor. Use a large skillet and heat olive oil over medium heat. Add meatballs in batches to avoid overcrowding. Crowding them will steam the meatballs instead of browning them. Brown each side for about 4–5 minutes. This step is key to getting that nice crust. After you make the creamy sauce, always taste it. You might want to add more salt or pepper. If you like some heat, sprinkle in crushed red pepper flakes. This will elevate the dish and add a nice kick. Adjusting the seasoning makes a big difference in flavor. For a great meal, pair the meatballs with pasta or serve them with crusty bread. The sauce is rich and creamy, perfect for soaking up with bread. When plating, garnish with fresh parsley and a sprinkle of Parmesan cheese. This adds color and makes your dish look beautiful. Serve in a shallow bowl to highlight the creamy sauce and meatballs. Pro Tips Choose the Right Meat: Using ground turkey makes for a lighter dish, while ground beef offers a richer flavor. Consider your dietary preferences when choosing. Don’t Overcrowd the Pan: When browning the meatballs, cook them in batches to ensure they get a nice sear and don’t steam, which keeps them juicy. Fresh Ingredients Matter: Opt for fresh spinach and ripe cherry tomatoes for the best flavor and texture. Fresh herbs can also elevate the dish significantly. Adjust the Heat: If you enjoy a bit of spice, add the crushed red pepper flakes gradually, tasting as you go to find the perfect balance for your palate. {{image_4}} You can switch up the meat in this recipe. Ground chicken or pork works great. Both add a different taste and texture. If you want a vegetarian choice, try using chickpeas or lentils. These options are packed with protein and flavor. They also help to keep the dish healthy and light. Herbs can change the taste of your meatballs. Try adding fresh basil or oregano for a twist. You can also add vegetables. Bell peppers or zucchini add color and crunch. They make the dish more exciting and nutritious. Feel free to experiment with your favorite flavors. If you need a dairy-free option, use coconut cream instead of heavy cream. This will give your sauce a rich, creamy taste without dairy. You can also use different kinds of cheese. Try feta or mozzarella for a unique flavor. Each cheese can change the dish's profile, making it fun to try new things. To store your leftover Creamy Tuscan Meatballs, let them cool first. Place them in an airtight container. They stay fresh in the fridge for up to three days. Make sure to keep the sauce with the meatballs for the best flavor. If you want to freeze your meatballs, pack them into freezer-safe bags. You can freeze them for up to three months. It’s best to freeze the meatballs and sauce separately. This way, you can reheat them without losing texture. To reheat, use a skillet over medium heat. Add a splash of chicken broth or cream to keep them moist. Stir gently until they are hot. You can also use the microwave. Heat in short bursts, stirring in between, to avoid drying them out. Enjoy your creamy meatballs just as delicious as the first time! To keep your meatballs from falling apart, you need to bind the mixture well. Here are a few tips: - Use 1 large egg. The egg helps hold the meatballs together. - Add breadcrumbs. The Italian seasoned breadcrumbs soak up moisture and help with binding. - Mix gently. Don't overmix the meat. Just combine until everything is blended. - Chill the mixture. Letting the meatball mix sit in the fridge for 30 minutes helps firm it up. Using these tips, your meatballs will stay intact during cooking. Yes, you can use jarred spaghetti sauce. However, the flavor will change. Store-bought sauce lacks the richness of the creamy sauce. You might miss the fresh taste of garlic, spinach, and tomatoes. If you go this route, consider adding some cream to the jarred sauce. This gives it a creamy touch. You can also add extra spices to boost the flavor. Creamy Tuscan meatballs pair well with many sides. Here are some delicious options: - Pasta: Serve over spaghetti or fettuccine to soak up the sauce. - Crusty bread: A great choice for dipping in the creamy sauce. - Salad: A fresh green salad makes a light side. - Wine: A glass of red wine complements the rich flavor. These pairings enhance the meal and impress your guests. This article covered how to make Creamy Tuscan Meatballs. We explored key ingredients like ground beef, garlic, and heavy cream. You learned the steps to mix, cook, and create a yummy sauce. Tips showed how to enhance flavors and perfect your meatballs. Variations offered ideas for different proteins and sauce changes. Enjoy your cooking and make this dish your own! Remember, tasty meals bring smiles.

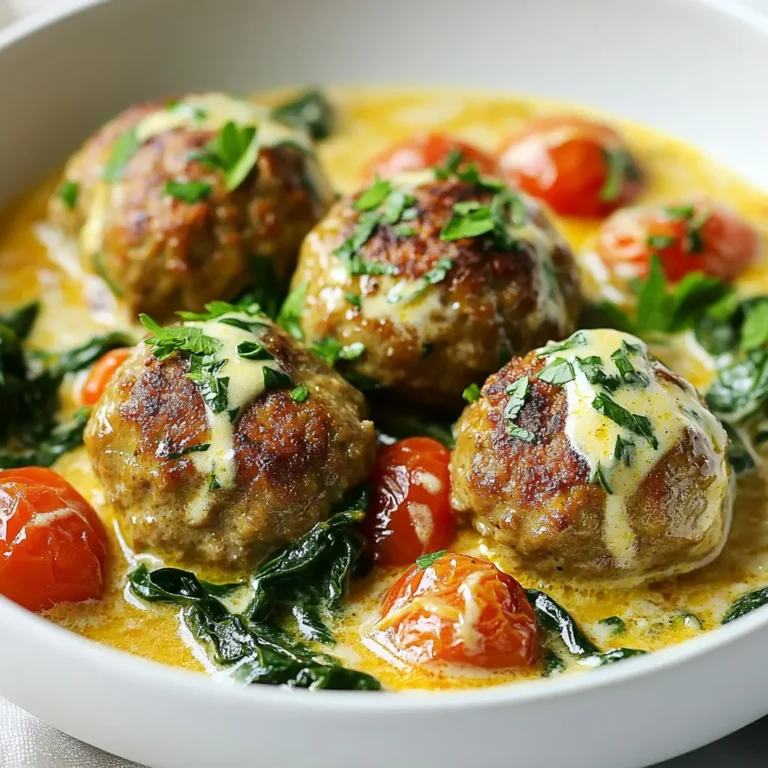
Creamy Tuscan Meatballs Tasty and Simple Recipe

- 2 cans of refrigerated crescent roll dough - 1/2 cup unsalted butter, melted - 1 cup granulated sugar - 2 tablespoons ground cinnamon - 1 teaspoon vanilla extract To make these treats, you need some basic items. The crescent roll dough serves as the base. It rolls out easily, creating a fluffy texture. Unsalted butter adds richness and flavor. The sugar and cinnamon blend gives that classic cinnamon roll taste. Vanilla extract enhances the flavor, making it even better. - 1/2 cup powdered sugar - 2 tablespoons milk For the drizzle, mix powdered sugar and milk. This mixture adds sweetness and makes the twists look fancy. Adjust the milk if the drizzle is too thick. You want it smooth and easy to pour. - Extra cinnamon for sprinkling - Decorative serving platter suggestions You can sprinkle more cinnamon on top for extra flavor. A nice platter makes the twists look great. Presentation matters when serving these treats. Keep it simple or get creative with your serving ideas. {{ingredient_image_2}} - Preheat oven to 375°F (190°C) - Prepare baking sheet with parchment paper First, we need to preheat the oven. This step is key to getting nice, golden twists. While the oven heats up, grab a large baking sheet and line it with parchment paper. This helps keep the twists from sticking. - Unroll and flatten the crescent roll dough - Combine cinnamon-sugar mixture Next, unroll one can of crescent roll dough. Use your fingers or a rolling pin to flatten it out. You want it to be a nice rectangle. In a separate bowl, mix 1 cup of granulated sugar with 2 tablespoons of ground cinnamon. Give it a good stir until the mixture is even. - Butter and sprinkle cinnamon-sugar on the dough - Slice, twist, and arrange on the baking sheet - Bake for 12-15 minutes until golden brown Now, take half of the melted butter and brush it over the dough. Then, sprinkle half of your cinnamon-sugar mixture on top. Press it in gently so it sticks. Next, slice the dough into 1-inch wide strips using a pizza cutter or a sharp knife. Take each strip and twist it several times to create a fun spiral shape. Place the twisted strips on the prepared baking sheet, leaving space between them. Repeat this with the second can of dough, using the rest of the butter and cinnamon-sugar mix. Finally, bake the twists in your preheated oven for 12-15 minutes. Watch for them to puff up and turn golden brown. The smell will be amazing! To get the best twists, you need to press the dough seams well. Take your time to make sure they stick together. This helps the twists hold their shape while baking. For fluffy twists, do not roll the dough too thin. Keep it thick enough to rise well in the oven. For the glaze, mix the powdered sugar, milk, and vanilla until smooth. You want it to be thick but still pourable. If it’s too runny, add a bit more sugar. If it’s too thick, add a touch more milk. Drizzle the glaze right after the twists cool. This keeps the glaze from soaking in too much. These twists are great with coffee or tea. The warm flavors pair well with both drinks. You can also serve them with ice cream for a sweet treat. Fresh fruit on the side adds a nice touch too. Enjoy your twists warm for the best taste! Pro Tips Use Room Temperature Butter: Allow the butter to come to room temperature before melting for an even smoother coating on the dough. Experiment with Fillings: Try adding chopped nuts, raisins, or chocolate chips to the cinnamon-sugar mixture for added texture and flavor. Don't Overbake: Keep a close eye on the twists as they bake to prevent them from becoming too dry. They should be golden brown but still soft. Cool Slightly Before Drizzling: Allow the twists to cool for a few minutes before drizzling the glaze to ensure it adheres better. {{image_4}} You can make Crescent Roll Cinnamon Twists even more fun! Try adding nuts or chocolate chips. Walnuts or pecans give a nice crunch. Chocolate chips make them extra sweet and rich. Just sprinkle them on before you roll the dough. You can also play with spices. Instead of just cinnamon, try nutmeg or pumpkin spice. These spices add a warm, cozy flavor. Mix them into the cinnamon-sugar blend for a tasty twist. If you need gluten-free options, look for gluten-free crescent roll dough. Many stores sell it now. This way, everyone can enjoy these treats! For a dairy-free version, swap the butter with coconut oil or a vegan butter. Use almond milk or oat milk in the glaze. These alternatives keep your twists creamy and delicious. Presentation makes a big impact! For parties, arrange the twists on a colorful platter. You can even stack them high for a fun look. Consider using different glazes for added flair. A maple glaze or a chocolate drizzle can elevate these treats. They not only taste good but also look beautiful! To keep your cinnamon twists fresh, place them in an airtight container. This helps maintain their softness. The twists will stay good for about three days at room temperature. You can also store them in the fridge for up to a week. To enjoy them warm again, you can reheat your twists. For best results, use the oven. Preheat the oven to 350°F (175°C). Place the twists on a baking sheet and heat for about 5 to 7 minutes. This will keep them crispy. The microwave is quicker but may make them soggy. If you use the microwave, warm them for just 15 to 20 seconds. You can freeze the cinnamon twists before or after baking. If freezing before baking, wrap each twist in plastic wrap and then place them in a freezer bag. They can stay frozen for up to two months. To bake, just thaw them in the fridge overnight, then bake as usual. If you freeze after baking, let them cool completely first. Wrap them and store in a freezer bag. To enjoy, thaw in the fridge, then reheat in the oven. You can prep these twists in advance with ease. First, you can make the dough and fill it with the cinnamon-sugar mix. Then, instead of baking, wrap each twist well in plastic wrap. Place them in the fridge for up to 24 hours. When you're ready, just take them out, unwrap, and bake as normal. This way, you have fresh, warm twists in no time! Absolutely! You can change the filling to suit your taste. Try adding chopped nuts, like pecans or walnuts, for a crunchy bite. You can also mix in chocolate chips for a sweet twist. If you want a fruity flavor, spread some jam or Nutella before adding the cinnamon-sugar. Get creative and make it your own! Yes, making a low-sugar version is simple. You can reduce the sugar in the cinnamon-sugar mix by half. Use a sugar substitute that you like, such as stevia or erythritol. For the glaze, you can skip it or use a low-sugar glaze made with sugar-free powdered sugar and a splash of milk. Enjoy a sweeter treat without all the sugar! Crescent Roll Cinnamon Twists are easy and fun to make. You learned about the key ingredients and the steps to bake them. I shared tips for perfect twists and creative variations. These treats can delight at any gathering or cozy night in. Whether you customize the filling or make them gluten-free, the options are endless. Enjoy sharing these delicious twists with friends and family, or savor them on your own! Happy baking and enjoy the sweet rewards.

Crescent Roll Cinnamon Twists Easy and Tasty Treat

PREV 1 … 28 29 30 … 47 NEXT
snack joy kitchen

explore

DessertsDinnerAppetizersDrinks

Our Policies

  • Cookie Policy
  • Copyright Policy
  • Disclaimer
  • GDPR Policy
  • Terms Of Use
Back to Top
  • About
  • Contact Us
  • Privacy Policy
© 2026 snack joy kitchen