FREE DINNER EBOOK! Get your copy!
  • Cookie Policy
  • GDPR Policy
  • Disclaimer
  • Terms Of Use
  • Visit my other site: Fun Cookie Recipes
snack joy kitchen
  • Home
  • Dinner
  • Desserts
  • Drinks
  • Appetizers
  • Contact
  • About
  • Privacy Policy
  • Home
  • Dinner
  • Desserts
  • Drinks
  • Appetizers
  • Contact
  • About
  • Privacy Policy
  • Cookie Policy
  • GDPR Policy
  • Disclaimer
  • Terms Of Use
Visit my other site: Fun Cookie Recipes

HOME / CATEGORIES /

Latest

For this recipe, you need 6 large buttery croissants. Fresh croissants work best. Their soft texture holds the filling well. You can find them at bakeries or grocery stores. Frozen croissants can also work if thawed properly. You will need 200g of cooked ham, thinly sliced. I recommend using a good-quality ham for the best flavor. Honey-baked ham adds sweetness, while smoked ham gives a nice depth. Choose what you like best. Thin slices help the ham blend with cheese. Next, use 200g of Swiss cheese, also thinly sliced. Swiss cheese melts beautifully and adds a mild taste. If you want a sharper flavor, try cheddar or Gruyère. Mixing different cheeses can create exciting flavors. Just remember to slice them thinly for easy melting. To boost flavor, add 4 tablespoons of Dijon mustard and 1 tablespoon of fresh rosemary. The mustard adds a tangy kick. Fresh rosemary gives a nice herbal note. Don’t forget salt and freshly cracked black pepper to taste. These simple seasonings enhance the overall taste. {{ingredient_image_2}} Start by preheating your oven to 375°F (190°C). This step is key to getting soft croissants. You want them golden and crisp on the outside. The oven needs to be hot before you bake. Now, let’s put these tasty croissants together. Take each croissant and slice it in half horizontally. This creates a top and bottom. Spread about 1 tablespoon of Dijon mustard on the bottom half. This adds a nice zing. Next, layer the sliced ham on the mustard. Make sure to cover all the mustard for great flavor. After that, add Swiss cheese slices on top of the ham. You want enough cheese to melt and ooze out. It’s all about that cheesy goodness! Sprinkle the finely chopped rosemary over the cheese. Add a pinch of salt and some cracked black pepper. These seasonings really boost the taste. Finally, place the top half back on each croissant. Your sandwiches are now ready to bake! Before baking, brush the tops of the croissants with melted butter. This gives them a nice, shiny look. Place the croissants on a baking sheet lined with parchment paper. This helps with cleanup and keeps them from sticking. Now, brush the tops with the beaten egg for a glossy finish. Bake them in the oven for 12-15 minutes. Watch as they turn golden brown and the cheese melts. Once done, take them out and let them cool for a few minutes. This keeps you from burning your mouth. Serve them warm, and enjoy your cheesy ham delight! To get the perfect texture, use fresh croissants. They should be soft yet flaky. When you bake them, they will become golden and crispy on the outside. Brush the tops with melted butter before baking. This step adds a nice shine and crunch. Bake them until they are golden brown. This usually takes about 12 to 15 minutes. For extra flavor, use Dijon mustard on the bottom half of the croissant. This mustard gives a nice tang. You can also add fresh rosemary. This herb adds a wonderful aroma and depth to your dish. If you want more flavor, try adding some freshly cracked black pepper. Each bite will taste even better. When serving, presentation matters! Place the croissants on a wooden board. Line it with parchment paper for a rustic feel. You can also add a small bowl of extra Dijon mustard on the side. This makes it easy for guests to dip their croissants. Arrange them neatly for a beautiful display. A well-presented dish makes everything more inviting! Pro Tips Use Fresh Croissants: For the best flavor and texture, use fresh, high-quality buttery croissants. They will provide a delightful flaky base for your filling. Customize Your Fillings: Feel free to experiment with different types of cheeses or add ingredients like sautéed onions or spinach for a unique twist on the classic recipe. Perfect Egg Wash: For an extra glossy finish, ensure your egg wash is well-mixed and applied evenly to the tops of the croissants before baking. Serving Suggestions: Pair your croissants with a light salad or fresh fruit for a well-rounded meal, making it perfect for brunch or a light lunch. {{image_4}} You can switch up the meats in these croissants. Instead of ham, try turkey or chicken. Both options add a nice twist. If you prefer something richer, use prosciutto or salami. These meats bring unique flavors. You can even use a meat substitute, like tofu or tempeh, for a vegetarian version. The cheese can change the whole taste. Swiss cheese is great, but don't stop there! Gouda or cheddar can add a sharp flavor. For a creamier touch, try brie or cream cheese. Mix and match cheeses for a fun flavor experience. You can also use a spicy cheese if you want some heat. Dijon mustard is classic, but you can explore other spreads. Try a spicy mustard for a kick. Honey mustard adds sweetness. You can even use pesto for a fresh touch. A layer of mayo or aioli can also work well. Each spread brings its own charm to the croissant. After enjoying your croissants, store any leftovers in an airtight container. This keeps them fresh. Place the croissants in the fridge if you plan to eat them within three days. If you want to keep them longer, freezing is a better choice. To reheat your croissants, preheat your oven to 350°F (175°C). Place the croissants on a baking sheet. Heat for about 10 minutes until warm. This method helps keep the croissants crispy. You can also use a microwave, but this may make them soft. Freezing is a great option if you have extra croissants. Wrap each croissant tightly in plastic wrap. Then, place them in a freezer bag. They can last for up to three months. To enjoy, just thaw them in the fridge overnight before reheating. Yes, you can use thawed croissants. Just make sure they are fully thawed before starting. This helps them bake evenly. Thawed croissants can still taste great. They may not be as flaky but will still be yummy. If you don’t have Dijon mustard, use yellow mustard. You can also try honey mustard for a sweet twist. Both options add a nice flavor to your croissants. Adjust the amount to suit your taste. Baked ham and cheese croissants last about three days in the fridge. Store them in an airtight container to keep them fresh. You can also freeze them for up to two months. Just reheat in the oven for the best taste. In this blog post, we explored delicious ham and cheese croissants. We covered the main ingredients, from croissants to meats and cheeses. Next, I shared easy step-by-step instructions for baking them. I provided tips for the best texture and flavor. Additionally, we looked at variations for personal tastes and how to store leftovers. Remember, with some creativity, you can make these croissants unique. Enjoy your cooking and impress your friends with your tasty creations!

Baked Ham and Cheese Croissants Tasty Simple Meal

To make a delicious Spiced Cranberry Holiday Punch, gather these items: - 4 cups cranberry juice - 2 cups apple cider - 1 cup freshly squeezed orange juice - 1/4 cup fresh lemon juice - 2 tablespoons honey or maple syrup - 1 cinnamon stick - 6 whole cloves - 4-5 star anise pods - 1 orange, thinly sliced (for garnish) - Handful of fresh cranberries (for garnish) - 1 liter sparkling water (optional for added fizz) These ingredients combine to create a punch that bursts with flavor. The tart cranberry juice pairs well with sweet apple cider. Fresh juices add a bright taste. The spices bring warmth. Honey or maple syrup adds just the right sweetness. You can also make it fizzy with sparkling water. Each garnish adds a festive touch. Enjoy crafting this simple, yet flavorful drink for your holiday gatherings! {{ingredient_image_2}} 1. First, grab a large saucepan. Combine 4 cups of cranberry juice, 2 cups of apple cider, 1 cup of freshly squeezed orange juice, and 1/4 cup of fresh lemon juice in it. Don't forget to add 2 tablespoons of honey or maple syrup for sweetness. 2. Place the pan over medium heat. Stir the mix well until it all blends nicely. 3. Now, introduce your spices. Add 1 cinnamon stick, 6 whole cloves, and 4-5 star anise pods. Stir again to spread the spices evenly. 4. Heat the punch until it starts to simmer gently. Lower the heat and let it steep for about 15-20 minutes. This helps the spices release their bold flavors. 1. After steeping, take the pan off the heat. Use a fine mesh strainer to remove the whole spices. Discard them as you strain. 2. If you like bubbles, let the punch cool slightly. Then, mix in 1 liter of sparkling water gently. This keeps the fizz alive. 3. Taste your punch. If you want it sweeter, add more honey or maple syrup. 4. For serving, pour the punch into festive mugs or glasses. Garnish each drink with a slice of orange and a few fresh cranberries. This adds a nice holiday touch. To make the punch just right, you can balance the sweetness. Try adding honey or maple syrup until it tastes good to you. Start with two tablespoons, then add more if needed. This helps create a flavor you love. Next, think about the spice levels. If you want more kick, add extra cinnamon, cloves, or star anise. Spices can change the whole taste. Taste your punch often while it simmers. Adjust it until it is perfect for your holiday party. Serving your punch in festive glassware makes it special. Use colorful mugs or clear glasses to show off the beautiful red hue. This adds a nice touch to your table. For garnishing, slice an orange thinly and use these slices for each glass. Add a handful of fresh cranberries on top for a bright look. You can even float some orange slices in the punch bowl. These fun details will impress your guests and brighten your holiday spirit. Pro Tips Adjust the Sweetness: Taste the punch after steeping and adjust the sweetness according to your preference. You can add more honey or maple syrup for a sweeter flavor. Chill Before Serving: If you prefer a cold punch, let the mixture cool before adding the sparkling water. This helps keep the fizz intact when serving. Use Fresh Ingredients: For the best flavor, use freshly squeezed juices and fresh spices. This will elevate the overall taste of your holiday punch. Garnish Creatively: Consider adding other garnishes such as mint leaves or pomegranate seeds for a festive touch and an extra burst of flavor. {{image_4}} You can add rum or vodka to your punch for a spirited twist. Just mix in one cup of your choice of alcohol after steeping the spices. This makes a fun drink for adult gatherings. For family events, you can keep it non-alcoholic. Simply skip the alcohol and serve it as is. Everyone can enjoy the great flavors together. Consider adding fruits like apples or pears to your punch. Just slice them thin and toss them in during the cooking step. They add a nice texture and extra flavor. You can also use herbs like mint or rosemary. Add a few sprigs for a fresh taste. This will elevate your punch and make it even more festive. To keep your Spiced Cranberry Holiday Punch fresh, pour any leftovers into a clean container. Make sure to seal it tightly. This will help keep flavors intact. Store the punch in the refrigerator. It will stay good for about three days. If you notice any odd smells or changes in color, it’s best to toss it. Yes, you can freeze this punch! To do this, use an ice cube tray or a freezer-safe container. Leave some space at the top, as liquids expand when frozen. When you want to use it again, simply take out the punch and let it thaw in the refrigerator overnight. If you need it faster, you can place it in a bowl of cold water. Avoid using a microwave, as it can change the flavor. Yes, you can make the punch a day in advance. Just follow the steps and let it cool after steeping. Store it in the fridge. Before serving, heat it gently or add sparkling water for fizz. You can use pomegranate juice or a mix of grape juice and apple juice. These options will still give you a fruity taste. Adjust the sweetness as needed since different juices vary in flavor. Absolutely! The recipe is already non-alcoholic. Just skip any alcohol and enjoy the rich flavors from the juices and spices. This punch is perfect for all ages at any gathering. To serve more guests, simply multiply the ingredients. For example, double or triple the juices and spices. Use a larger pot to heat the punch. Remember to taste and adjust sweetness as you go! This blog post covered the fun and flavorful Spiced Cranberry Holiday Punch. We explored the easy ingredients and steps, from juicing to garnishing. You have tips for adjusting flavors and making it look festive. Plus, you learned variations to suit any crowd, including non-alcoholic options. In conclusion, this punch is a treat for any gathering. Whether you serve it hot or cold, it will delight everyone. Enjoy making this recipe and sharing it with friends and family. It’s sure to become a holiday favorite.

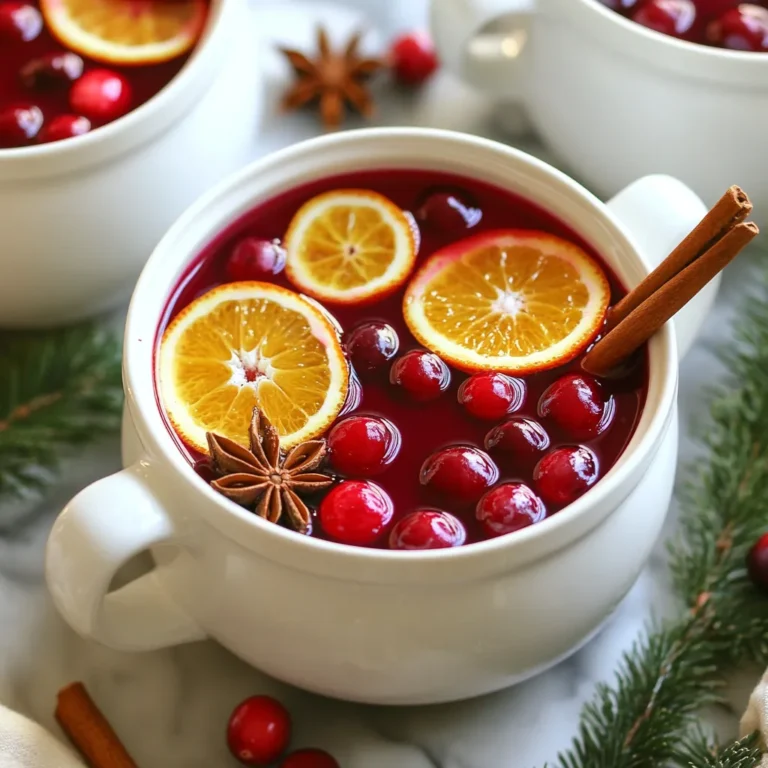
Spiced Cranberry Holiday Punch Festive and Flavorful

- 2 ½ cups all-purpose flour - ¼ cup granulated sugar - 1 packet (2 ¼ tsp) active dry yeast - ¾ cup whole milk, warmed to about 110°F (43°C) - 1 large egg, at room temperature - ¼ cup unsalted butter, melted and slightly cooled - ½ teaspoon salt - 1 teaspoon vanilla extract - ½ cup pecans, finely chopped - 1 cup brown sugar, packed tightly - ½ cup unsalted butter, softened to room temperature - 1 tablespoon ground cinnamon - ¼ teaspoon ground nutmeg - ¼ teaspoon salt - All-purpose flour: This is the main ingredient. It gives structure to the sticky buns. - Granulated sugar: This sweetens the dough and helps the yeast to activate. - Active dry yeast: This ingredient makes the dough rise by producing gas. - Whole milk: Warm milk helps to activate the yeast and adds richness. - Unsalted butter: This adds flavor and moisture to both the dough and filling. - Egg: The egg helps bind the dough and adds richness. - Pecans: These nuts provide crunch and a nutty flavor. - Brown sugar: This adds depth and caramel-like sweetness to the filling. - Ground cinnamon and nutmeg: These spices give warmth and flavor to the buns. - When choosing flour, look for a fine texture. It should be white and free from lumps. - Check the expiration date on the yeast packet. Fresh yeast works best for rising. - Use whole milk that smells fresh. Avoid any milk that is close to its sell-by date. - Select unsalted butter with a rich, creamy color. It should be firm but not hard. - Choose pecans that smell nutty and fresh. Avoid any that smell bitter or stale. - For spices like cinnamon and nutmeg, check for freshness. Older spices lose flavor quickly. {{ingredient_image_2}} To start, I mix the warmed milk and granulated sugar in a large bowl. I sprinkle the yeast over the top and let it sit for about 5-10 minutes. You will see bubbles form, which means the yeast is alive. Next, I add melted butter, the egg, vanilla extract, and salt. I stir these ingredients well. Then, I gradually add the all-purpose flour. I stir until a soft dough forms. I transfer the dough to a floured surface. Knead it for about 5-7 minutes. It should feel smooth and elastic. After that, I place the dough in a greased bowl and cover it with a damp towel. I let it rise in a warm spot for about 1 hour, or until it doubles in size. While the dough rises, I prepare the filling. In a bowl, I mix chopped pecans, brown sugar, softened butter, cinnamon, nutmeg, and salt. This creates a crumbly mixture. Once the dough has risen, I punch it down to release air. I roll out the dough on a floured surface into a rectangle, about 12x18 inches. Then, I spread the pecan mixture evenly over the dough. Starting from the long edge, I roll the dough tightly into a log. I cut the log into 12 equal pieces, about 1 ½ inches thick. Next, I prepare the baking dish. I melt ½ cup of brown sugar with ½ cup of softened butter in a small saucepan. I pour this sticky mixture into a greased 9x13 inch baking dish. Then, I sprinkle the remaining chopped pecans over the mixture. I place the cut rolls in the dish, cut-side up, leaving space between them. I cover the dish with a cloth and let the rolls rise again for 30-45 minutes. They should puff up nicely. While the rolls rise, I preheat the oven to 350°F (175°C). After the second rise, I bake the rolls for 25-30 minutes until they are golden brown. Once they are done, I let them cool for about 5-10 minutes. To serve, I carefully invert the rolls onto a plate, letting the sticky caramel drizzle over the top. Enjoy! Many home cooks face a few common pitfalls. First, do not rush the yeast. Let it sit until it becomes frothy. This step is crucial for good rise. Second, avoid adding too much flour. If your dough feels dry, it may not rise well. Lastly, don’t skip the second rise. This gives the rolls their fluffy texture. The dough should feel soft and slightly sticky. Knead it for about 5 to 7 minutes. This helps develop gluten, which gives the rolls structure. If the dough sticks to your hands, use a little more flour. But remember, too much flour will make the rolls dense. After kneading, let it rise in a warm spot. Look for it to double in size, which takes about an hour. Serve these sticky buns fresh from the oven. Warm buns allow the caramel to melt and soak in. For an extra treat, drizzle some leftover caramel over the top. Garnish with more chopped pecans for crunch. Enjoy these with a cup of coffee or tea for a delightful pairing! Pro Tips Use Fresh Yeast: Always check the expiration date on your yeast packet. Fresh yeast ensures your buns rise properly and are light and fluffy. Perfect Dough Temperature: When warming milk, make sure it’s around 110°F (43°C). Too hot can kill the yeast, while too cold will not activate it. Chill the Dough: If you have time, chill the rolled dough in the fridge for 30 minutes before cutting the rolls. This makes slicing easier and helps maintain their shape. Let Them Cool: Allow the sticky buns to cool for a few minutes in the baking dish before inverting. This helps the caramel set slightly, making for a cleaner serving. {{image_4}} You can add a twist to your caramel pecan sticky buns. Chocolate chips are a great option. They melt and add a rich taste. Dried fruits, like raisins or cranberries, can also work well. They give a sweet contrast to the caramel. You can mix and match these flavors. Just keep the overall balance. Each addition brings its own charm. If you need a gluten-free version, use a gluten-free flour blend. Many brands work well in baking. Make sure to check for one that can replace all-purpose flour. You can also add xanthan gum for better texture. This helps mimic the chewiness of the dough. It’s a simple swap that can make everyone happy. Mini sticky buns are fun and perfect for gatherings. To make them, roll the dough thinner. Cut smaller pieces, about 1 inch thick. Arrange them in a muffin tin. This gives you individual servings. They bake faster too, so keep an eye on them. Mini versions are great for sharing or for kids. Everyone loves a small, sweet treat! To keep your caramel pecan sticky buns fresh, store them in an airtight container. This helps avoid drying out. If you have leftovers, let them cool to room temperature before sealing. They will stay good for about 2 to 3 days on the counter. When you're ready to enjoy your sticky buns again, preheat your oven to 350°F (175°C). Cover the buns with foil to keep them moist. Heat for about 10-15 minutes until warm. You can also microwave them for about 15-30 seconds, but the oven gives a better texture. You can freeze your sticky buns for later. Wrap them tightly in plastic wrap and then in foil. They will last in the freezer for up to 3 months. To thaw, move them to the fridge overnight. Then, reheat them as described above for the best taste. Enjoy your gooey treat whenever you like! The dough has risen enough when it doubles in size. You can check by gently pressing your finger into the dough. If the indentation stays, it’s ready. If it springs back, give it more time. This rise shows the yeast is working well. A warm place helps the dough rise faster. I often use my oven with just the light on. Yes, you can use active dry yeast. Just remember to dissolve it in warm milk first. Let it sit for 5-10 minutes until it becomes frothy. This step helps wake up the yeast. Instant yeast can go straight into the flour mix, making it easier. Both types will work, but timing may differ slightly. Caramel pecan sticky buns go well with many drinks. A hot cup of coffee or tea is perfect. You can also serve them with fresh fruit or yogurt. For a special treat, add a scoop of vanilla ice cream. These pairings will enhance the flavors of your sticky buns. Enjoy experimenting with different sides! This article explored the key ingredients, steps, and tips to make Caramel Pecan Sticky Buns. You learned how to prepare dough, fill, roll, and bake. I shared common mistakes to avoid and how to perfect your dough. We also discussed fun variations and storage tips. In making these sticky buns, remember that fresh ingredients and practice lead to success. Enjoy the process, and serve them warm for the best experience. Happy baking!

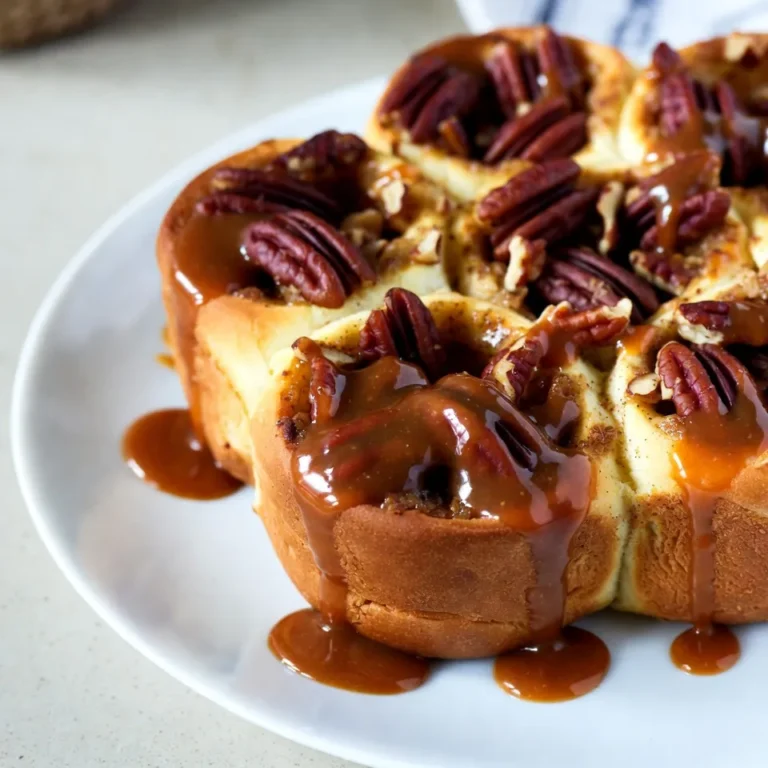
Caramel Pecan Sticky Buns Irresistible Easy Recipe

- 1 cup warm water (about 110°F) - 2 ¼ teaspoons active dry yeast - 2 tablespoons granulated sugar - 4 cups all-purpose flour - 1 teaspoon salt - ¼ cup baking soda - 1 egg, beaten (for egg wash) - ½ cup hot honey (store-bought or homemade) - Flaky sea salt, for garnish - Optional: crushed red pepper flakes for an extra kick To make hot honey pretzel bites, you need basic ingredients. Begin with warm water to activate the yeast. The yeast brings life to the dough. Sugar helps the yeast grow and gives sweetness. Next, flour and salt create the dough's body. The flour is the main element. Salt adds flavor and balances sweetness. You also need an egg for the wash. This gives the pretzel bites a shiny crust. Baking soda is key for boiling. It helps create that classic pretzel texture. For the sweet and spicy touch, use hot honey. This ingredient makes the bites special. You can use store-bought hot honey or make your own. Finally, consider garnishing with flaky sea salt. You can also add crushed red pepper flakes for heat. These optional items enhance flavor and presentation. {{ingredient_image_2}} To start, we need to activate the yeast. In a medium bowl, mix 1 cup of warm water, 2 ¼ teaspoons of active dry yeast, and 2 tablespoons of granulated sugar. Stir gently. Let it sit for about 5 minutes. You will see bubbles forming. This means the yeast is ready. Next, we make the dough. In a large bowl, whisk together 4 cups of all-purpose flour and 1 teaspoon of salt. Create a small well in the center. Pour in the yeast mixture. Use a wooden spoon or your hands to mix until a dough forms. Once it starts to come together, transfer it to a floured surface. Knead the dough for about 5 to 7 minutes until it feels smooth and elastic. After kneading, place the dough in a greased bowl. Cover it with a clean kitchen towel. Let it rise in a warm spot for about 1 hour. It should double in size. Now we are ready to boil and bake. Preheat your oven to 450°F (230°C). Line a baking sheet with parchment paper. In a large pot, bring 10 cups of water to a boil. Carefully add ¼ cup of baking soda to the boiling water. It will fizz up! Once the dough has risen, punch it down gently. Divide the dough into 24 equal pieces. Roll each piece into a small ball. Gently drop each ball into the boiling water for about 30 seconds. This step gives our pretzel bites their unique flavor. Remove them with a slotted spoon and place them on the prepared baking sheet. Next, brush each pretzel bite with a beaten egg. This will make them golden brown. Sprinkle some flaky sea salt on top. If you like it spicy, add a pinch of crushed red pepper flakes. Bake the pretzel bites for 12 to 15 minutes until they are golden and puffed. Once baked, cool them on a wire rack. Just before serving, drizzle hot honey on top for that sweet and spicy touch. Kneading the dough is key. Use your palms to push down and fold the dough. Keep it smooth and elastic. If it feels sticky, add a little flour. Aim for about 5 to 7 minutes of kneading. This helps develop gluten, giving the bites a nice chew. For dough rising, find a warm spot. A sunny window works great. Cover your bowl with a kitchen towel. This helps keep the heat in. Let it rise until it doubles in size. This usually takes about an hour. To check if your pretzel bites are done, look for a golden-brown color. They should be puffy and firm to the touch. If they look pale, give them a few more minutes in the oven. To avoid soggy bites, make sure to boil them in the baking soda solution. This step seals the dough. It helps create that classic pretzel texture. Also, let them cool on a wire rack. This keeps the bottoms crispy. There are many ways to add flavor. Try mixing in herbs like rosemary or thyme. Cheese can also be a fun addition for extra richness. If you love heat, adjust the red pepper flakes. Add more for a spicy kick or less if you prefer mild. You can even mix the hot honey with a bit of crushed red pepper before drizzling it on your bites. This will add a nice, spicy layer of flavor. Pro Tips Activate Your Yeast: Ensure the water is at the right temperature (about 110°F) to properly activate the yeast, which is crucial for the dough to rise effectively. Kneading Technique: Knead the dough until it is smooth and elastic. This process develops the gluten, which gives the pretzel bites their chewy texture. Boiling for Flavor: Don't skip the boiling step in baking soda water; it helps create the characteristic pretzel flavor and enhances the crust's texture. Customize the Heat: Feel free to adjust the amount of crushed red pepper flakes based on your heat preference, or even add them to the hot honey for an extra spicy drizzle. {{image_4}} You can easily change the flavor of your hot honey pretzel bites. One fun way is to add cheese or herbs to the dough. Try mixing in shredded cheese like cheddar or mozzarella. You can also add herbs like rosemary or thyme for a nice twist. If you want more heat, use spicy hot honey. Many brands offer this type of honey with added chili flakes. You can also make your own by mixing honey with crushed red pepper flakes. This gives your pretzel bites a bold flavor that will impress your friends. Pair your pretzel bites with tasty dips. Cheese sauce, mustard, or ranch dressing work great. You can set up a dipping station with different sauces for guests to enjoy. For gatherings, get creative with your presentation. Serve the pretzel bites on a rustic wooden board. Add a small bowl of hot honey for dipping. You can sprinkle crushed red pepper flakes on the board for extra flair and heat. To make a healthier version, try using whole wheat flour instead of all-purpose flour. This adds more fiber and nutrients to your bites. You can also make a low-sugar hot honey option. Use less honey in your drizzle or mix honey with a sugar substitute. This way, you keep the sweet flavor but reduce the sugar content. To keep your pretzel bites fresh, store them in an airtight container. This prevents them from drying out. Make sure to let them cool completely before packing. They stay good at room temperature for about two days. If you want to keep them longer, consider refrigerating. Just know that chilling may affect their texture. To reheat, preheat your oven to 350°F (175°C). Place the pretzel bites on a baking sheet. Heat them for about 5-7 minutes. This method restores their warm, soft texture. You can also use a microwave, but they may become chewy. Heat them for 15-20 seconds on medium power. Freezing pretzel bites is a great way to save them for later. After they cool, place them in a freezer-safe bag. Make sure to remove excess air before sealing. This helps prevent freezer burn. They can last in the freezer for up to three months. When you’re ready to enjoy, take them out of the freezer. Let them thaw in the fridge overnight. For a quick option, you can also thaw them at room temperature for about an hour. To reheat, follow the same steps as above. Enjoy your hot honey pretzel bites anytime! Hot honey is a sweet condiment made with honey infused with chili peppers. It adds a spicy kick to dishes. You can drizzle it on pretzel bites or pizza. You can buy it in stores or make it at home. To make hot honey, simply heat honey and add crushed red pepper flakes. Let it sit for a while to combine the flavors. Yes, you can use a bread machine! Follow these tips for best results: - Use the dough setting for mixing and rising. - Add the warm water, yeast, and sugar first, followed by flour and salt. - Monitor the dough. It should be smooth and elastic when done. - After the cycle, shape the dough into pretzel bites as usual. If you want to skip baking soda, try these methods: - Boil the pretzel bites in salted water instead. - Use a mixture of vinegar and water for boiling. This also helps with color. - You can brush the bites with a mix of egg and vinegar for a shiny crust. This blog post covered how to make delicious pretzel bites. You learned about the key ingredients, like warm water, yeast, and flour. I shared step-by-step instructions for preparing, boiling, and baking the dough. You now have tips for perfecting your dough and variations to try, like adding cheese. Remember, these bites are great fresh, stored, or frozen for later. With these easy steps, you can enjoy warm pretzel bites anytime. I hope you feel confident in making this tasty treat!

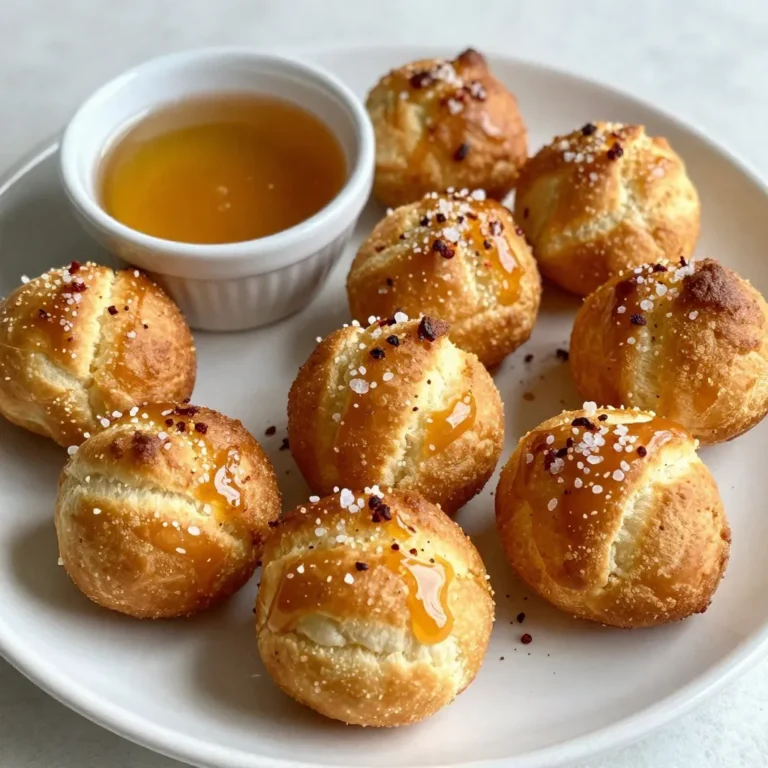
Hot Honey Pretzel Bites Tasty Snack Delight

- 1 cup ripe fresh raspberries - 2 succulent passionfruits, halved with pulp carefully scooped out - 3 tablespoons agave syrup - 1 tablespoon freshly squeezed lime juice - 1 cup freshly squeezed orange juice - 1 teaspoon pure vanilla extract - 1 ½ cups sparkling water - Fresh mint leaves, for an aromatic garnish - Ice cubes I always prefer to use cup and tablespoon measurements for precision. Fresh ingredients make a big difference. Ripe raspberries and juicy passionfruits give the best flavor. You can add extra garnishes like whole raspberries or citrus slices. If you want to swap sweeteners, try honey or maple syrup for a different taste. {{ingredient_image_2}} - Blending the ingredients Start by gathering your fresh raspberries and passionfruits. Place them in a blender along with the agave syrup, lime juice, and vanilla extract. Blend this mixture until it is smooth and vibrant. This step brings out the rich flavors of the fruits. - Straining the mixture After blending, take a fine sieve and pour the mixture through it into a clean bowl. Use a spatula to press down gently. This helps you get all the tasty juice while leaving the seeds behind. You want a smooth, colorful liquid for your drink. - Mixing raspberry-passionfruit juice with orange juice In a large pitcher, add the freshly strained raspberry-passionfruit juice. Pour in the freshly squeezed orange juice and give it a good stir. This mix of juices balances the tartness and sweetness perfectly, creating a bright and flavorful base for your cocktail. - Pouring over ice and topping with sparkling water Take your favorite glasses and fill them with ice cubes. Pour the vibrant juice mixture over the ice until the glasses are about three-quarters full. Next, gently top each glass with sparkling water. This adds a refreshing fizz that brightens the drink. - Garnishing for presentation For a lovely touch, garnish each drink with a few fresh mint leaves and a handful of whole raspberries. This not only adds color but also gives a fresh aroma. Presenting your drink beautifully makes it even more enjoyable. To make your Raspberry Passionfruit Tequila Sour just right, adjust the sweetness with agave syrup. If you like it sweeter, add a bit more. Taste as you go. You can also swap in seasonal fruits. Try strawberries or mango instead of raspberries. Each fruit brings its own flavor and fun twist. For a great look, garnish your drink with fresh mint leaves. Add a few whole raspberries on top for color. You can even use edible flowers for a fancy touch. Choose tall, clear glassware to show off the vibrant drink. This makes your cocktail stand out at any event. When blending, make sure the mixture is super smooth. This helps you get the best flavor. Strain the mixture well to remove seeds. Use a fine sieve and press down to extract all the juice. For serving, fill glasses with ice before pouring. This keeps your drink cold and refreshing. Pro Tips Use Fresh Ingredients: Always opt for fresh raspberries and passionfruits to ensure the best flavor and vibrant color in your cocktail. Strain for Smoothness: Straining the mixture removes seeds and enhances the drink's texture, making it smooth and enjoyable. Chill Your Ingredients: For a refreshing cocktail, chill your juices and glasses in advance, ensuring the drink stays cool longer. Garnish Creatively: Experiment with different garnishes like edible flowers or citrus slices for added visual appeal and flavor complexity. {{image_4}} You can easily turn this cocktail into a mocktail. Just leave out the tequila. Instead, use sparkling water or flavored soda for a fizzy kick. Here are some ideas for flavor combinations: - Coconut sparkling water pairs well with the raspberry and passionfruit. - Ginger ale adds a spicy twist. - Lemon-lime soda gives a classic taste that many love. Mix these with the raspberry and passionfruit juice for a fun drink any time. Don't stop at raspberries and passionfruits! You can try adding other seasonal fruits. Consider these options: - Strawberries bring a sweet and juicy flavor. - Mango adds a tropical touch. - Kiwi gives a tart twist to your drink. Experiment with different juice bases, like pomegranate or pineapple juice, to create new flavors. Each fruit will change the drink's taste and make it unique. You can easily adjust the flavor of your drink. If you want it more tart, add some lime or lemon juice. This will brighten the flavors and make it refreshing. Here are two more ideas to customize: - Flavored sparkling water can change the taste without adding extra sugar. Try berry or citrus flavors. - Add fresh herbs like basil or rosemary for an aromatic touch. These simple changes can make your Raspberry Passionfruit Tequila Sour just right for you! Fresh fruits need care to stay good. Keep your raspberries in their original container in the fridge. They stay fresh for about 3 days. Check for mold daily. For passionfruits, store them in a cool, dark place. They can last up to a week. Agave syrup stays fresh for a long time. Store it in a cool cupboard. It can last for years, thanks to its low water content. Vanilla extract also has a long shelf life. Keep it in a dark place, and it will last for many years too. You can prepare the juice mix in advance. Blend the fresh fruits and strain the mixture. Then, store it in a sealed jar in the fridge. It keeps fresh for up to 3 days. This helps save time when serving your Raspberry Passionfruit Tequila Sour. If you want to prepare a big batch, mix the raspberry-passionfruit juice with fresh orange juice. Keep this mix in the fridge for up to 2 days. Just remember to stir well before serving. Freezing is a great way to keep fruits. Raspberries can be frozen for up to 6 months. Spread them on a baking sheet, freeze, and then store in a bag. Passionfruits can be scooped out and frozen too. Just keep the pulp in an airtight container. You can also make and freeze the cocktail base. Blend your fruits, strain, and store in a freezer-safe jar. It will stay good for about 2 months. When you're ready to serve, just thaw and mix with your sparkling water. For the Raspberry Passionfruit Tequila Sour, I recommend using a good quality blanco tequila. Blanco tequila has a fresh and vibrant flavor that pairs well with the fruity notes. You can also use a reposado tequila if you want a richer taste. The choice of tequila affects the overall flavor profile. A good tequila enhances the sweetness of the fruit and balances the tartness of lime. Yes, you can easily scale this recipe for parties. Just multiply the ingredients by the number of servings you need. Use a large pitcher to mix the juices and keep the tequila separate until serving. This way, you maintain the fizz of the sparkling water. When serving, pour the cocktail over ice and top with sparkling water right before serving to keep them fresh. Absolutely! To create a mocktail version, simply replace the tequila with soda or more sparkling water. You can use the same fruit juices and agave syrup. This combination gives you a tasty drink without the alcohol. Feel free to add in some extra fruit or herbs like basil for added flavor. In this post, I covered fresh ingredients to make a Raspberry Passionfruit Tequila Sour. You learned how to blend and serve this drink, along with tips for presentation. You can even customize it to fit your taste. Remember, using fresh ingredients and the right techniques makes a huge difference. Enjoy your cocktail or mocktail experience!

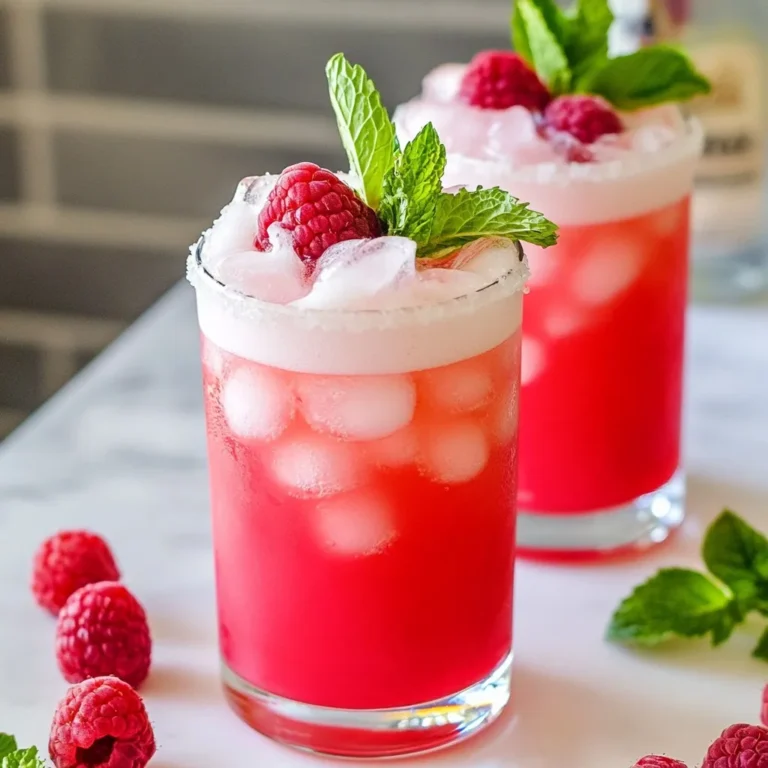
Raspberry Passionfruit Tequila Sour Bold Cocktail Bliss

- 2 ripe pear halves (Bartlett or Bosc varieties are ideal) - 100g blue cheese, crumbled into small pieces - 2 tablespoons cream cheese, softened to room temperature - 1 tablespoon honey, plus extra for drizzling - 1 tablespoon chopped walnuts or pecans, finely chopped - 1 teaspoon fresh thyme leaves (or ½ teaspoon dried thyme) - Salt and pepper to taste - A handful of mixed greens (such as arugula or spinach) for serving - Balsamic glaze for drizzling (optional but recommended) If you want a different taste, try goat cheese or feta cheese. These cheeses have a creamy texture and will blend well. You can also use ricotta for a milder flavor. Keep in mind that the taste will change. Each cheese brings its own unique flavor to the dish. Walnuts add a nice crunch and flavor. If you need a swap, use pecans, almond slivers, or even hazelnuts. Each nut offers a rich taste. For a nut-free option, try sunflower seeds or pumpkin seeds. These will still give you that crunchy texture while keeping the dish safe for those with allergies. {{ingredient_image_2}} Start by heating your oven to 375°F (190°C). This step is vital for roasting. Next, take two ripe pear halves. I like using Bartlett or Bosc pears. They are sweet and firm. Slice each pear in half from top to bottom. This gives you a nice cavity. Use a spoon to scoop out the core gently. Be careful not to break the pear. You want a good space for the cheese filling. In a mixing bowl, combine 100g of crumbled blue cheese with 2 tablespoons of softened cream cheese. This mix gives a rich flavor. Add 1 tablespoon of honey for sweetness. Next, toss in 1 tablespoon of finely chopped walnuts or pecans for crunch. Then, add 1 teaspoon of fresh thyme leaves. If you don’t have fresh thyme, ½ teaspoon of dried thyme works too. Season with a pinch of salt and pepper. Mix it all well until creamy. Now, fill each pear half with the cheese mixture. Press down slightly to pack it in. This step ensures every bite is tasty. Place the stuffed pears on a baking sheet lined with parchment paper. This keeps them from sticking. Bake them for about 15-20 minutes. You want the pears to be tender and the cheese to melt and bubble. Once they are done, take them out and let them cool for a few minutes. Serve them on a bed of mixed greens. Drizzle with balsamic glaze and some extra honey if you like. Enjoy your savory treat! For blue cheese stuffed pears, I love using Bartlett or Bosc pears. These types are sweet and juicy, which makes them perfect for this dish. Bartlett pears are soft and sweet when ripe. Bosc pears are firmer and have a nice crunch. Both hold their shape well when baked. When you prepare your pears, slice them in half and scoop out the core. Be careful, as you want the halves to stay whole. Use a spoon to create enough space for the filling. Mix blue cheese, cream cheese, honey, nuts, and thyme in a bowl. The mixture should be creamy and easy to spread. Pack the filling into each pear half, pressing down gently. This helps the cheese stick and stay in place during baking. Serve your stuffed pears on a bed of mixed greens. I suggest arugula or spinach for a fresh taste. Drizzle with balsamic glaze for added flavor. You can also drizzle extra honey on top for sweetness. For a pop of color, sprinkle chopped nuts and fresh thyme on the plate. These additions not only make the dish look beautiful but also enhance the taste. Pro Tips Choose the Right Pears: For the best flavor and texture, select ripe Bartlett or Bosc pears that are slightly soft to the touch. Mix Cheese to Perfection: Ensure the blue cheese and cream cheese are well combined for a creamy, smooth filling that is easy to scoop. Don’t Overbake: Keep an eye on the pears while baking; you want them tender but not mushy, and the cheese should be bubbly and just starting to brown. Garnish for Presentation: Enhance the visual appeal by adding extra chopped nuts and fresh thyme sprigs on top of the stuffed pears before serving. {{image_4}} You can change the flavor by using other herbs. Try fresh rosemary for a bold taste. Chives give a mild onion flavor. Basil adds a sweet touch. Each herb brings its own flair to your dish. Experiment with what you like best! If you prefer less sugar, swap honey for maple syrup. Agave nectar is another option. For a zero-calorie choice, try stevia. Each sweetener will add its own unique taste. Adjust the amount based on your sweet tooth! To make this dish vegan, use plant-based cheese. Cashew cheese blends well for a creamy texture. Replace cream cheese with a vegan version or blended tofu. Use maple syrup instead of honey. This way, you can enjoy the dish without dairy! To keep your stuffed pears fresh, place them in an airtight container. Make sure they cool completely before sealing. Store them in the fridge for up to three days. This way, you can enjoy them later without losing flavor. When you are ready to eat the leftovers, preheat your oven to 350°F (175°C). Place the stuffed pears on a baking sheet. Heat them for about 10-15 minutes. This warms them up and keeps the cheese creamy. You can also use the microwave, but the oven gives better results. You can freeze stuffed pears, but it changes their texture. To freeze, wrap each pear half tightly in plastic wrap. Then, place them in a freezer bag or container. They can last up to three months. When you're ready to eat them, thaw in the fridge overnight. Reheat as mentioned above. Yes, you can use different cheeses. Goat cheese adds a tangy taste. Cream cheese gives a smooth texture. Feta cheese brings a salty flavor. Feel free to experiment and find what you love. Ripe pears give a little when you press them gently. Check near the stem; it should feel soft. The skin color may change from green to yellow. Look for a fragrant smell too. If they are hard, wait a few days before using. Serve your stuffed pears on a bed of mixed greens. Arugula or spinach work well. Add a drizzle of balsamic glaze for extra flavor. Walnuts or pecans on top add crunch. Enjoy with a glass of white wine for a great pairing. Stuffed pears are easy and fun to make. We covered the key ingredients, step-by-step instructions, and helpful tips. You can even try different cheeses or herbs to change the flavor. Remember to store any leftovers properly for later enjoyment. With these ideas, you can impress your friends and family. Enjoy creating your tasty stuffed pears, and have fun experimenting with your own twists. Now, go and make something delicious!

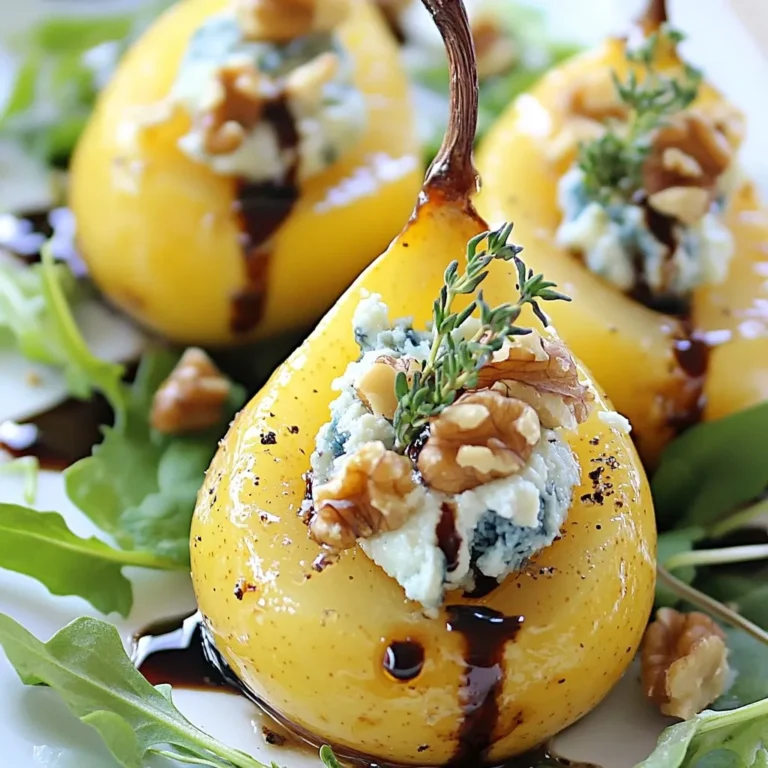
Blue Cheese Stuffed Pears Savory and Simple Treat

To make a delicious broccoli cheddar quiche, you'll need: - 1 pre-made pie crust - 2 cups broccoli florets, blanched - 1 cup shredded sharp cheddar cheese - 4 large eggs - 1 cup whole milk - 1/2 cup grated Parmesan cheese These main ingredients create a rich and creamy quiche. The cheese adds flavor, while the broccoli gives it a nice crunch. For flavor, you'll want to include: - 1/2 teaspoon garlic powder - 1/2 teaspoon onion powder - 1/4 teaspoon ground nutmeg - Salt and freshly ground black pepper to taste These spices bring out the best in your quiche. Garlic powder adds depth, while nutmeg gives it a warm touch. You can enhance your quiche by adding: - 1 tablespoon olive oil - Fresh parsley, chopped (for garnish, optional) If you want to switch things up, consider using other cheeses or vegetables. Spinach or bell peppers can be great additions. These options keep your quiche fresh and exciting. {{ingredient_image_2}} First, preheat your oven to 375°F (190°C). This step is key for a great bake. While it heats up, grab your pre-made pie crust. Place it in a pie dish, making sure it fits snugly. Next, heat 1 tablespoon of olive oil in a medium skillet over medium heat. Once the oil is warm, add 2 cups of blanched broccoli florets. Sauté for about 3-4 minutes. You want the broccoli to be tender but still bright green. This keeps it crunchy and tasty. After cooking, take it off the heat and let it cool for a few minutes. Now, grab a large mixing bowl. Crack 4 large eggs into the bowl and beat them lightly. Then, pour in 1 cup of whole milk. Add 1/2 teaspoon of garlic powder, 1/2 teaspoon of onion powder, and 1/4 teaspoon of ground nutmeg. Don’t forget a pinch of salt and black pepper. Whisk everything together until it’s well mixed and smooth. Fold in 1 cup of shredded sharp cheddar cheese and 1/2 cup of grated Parmesan cheese. Make sure the cheese is spread evenly in the egg mixture. Once the broccoli has cooled, gently fold it into your egg and cheese mix. Be careful not to break the florets. Now, pour this mixture into your pie crust. Spread it out evenly so every slice has a bit of everything. Place the quiche in your preheated oven. Bake it for 35-40 minutes. You’ll know it’s ready when the egg is set in the center and the top is golden brown. It’s okay if there’s a slight jiggle in the middle. After baking, take it out and let it cool for about 10 minutes. This step helps with slicing and makes the flavors pop. To get a perfectly set quiche, use fresh eggs. Fresh eggs help the quiche rise well. Whisk the eggs and milk until smooth. Don’t rush this step; a good mix makes a big difference. Bake at 375°F for 35-40 minutes. You want the center to jiggle slightly, but it should not be runny. If you like a firmer texture, bake it a bit longer. Let it rest for 10 minutes before slicing. This helps it hold its shape. For extra flavor, try adding fresh herbs like thyme or basil. You can also add a splash of hot sauce for a kick. Use smoked cheddar instead of sharp cheddar for a deeper taste. Adjust your spices too. If you like garlic, add more garlic powder. A pinch of cayenne pepper can add a nice warmth. Remember to taste your egg mixture before pouring it into the crust. This way, you can adjust the salt and pepper to your liking. A common mistake is overcooking the quiche. Keep an eye on it as it bakes. Another mistake is not letting it cool. Slicing too soon can make a mess. Avoid using frozen broccoli; fresh or blanched broccoli works best. Do not skip the resting time after baking. This makes slicing easy and keeps the filling together. Lastly, don’t forget to preheat your oven. Baking in a cold oven can ruin the texture. Pro Tips Choose Fresh Broccoli: Fresh broccoli will give your quiche a vibrant color and better texture compared to frozen. Look for firm, bright green florets. Let It Rest: Allowing the quiche to rest for 10 minutes after baking helps it set and makes it easier to slice cleanly without falling apart. Experiment with Cheeses: Feel free to mix different types of cheese such as Gruyère or feta for a unique flavor profile and texture in your quiche. Customize Your Veggies: Add other vegetables like spinach, bell peppers, or mushrooms to enhance the flavor and nutrition of your quiche. {{image_4}} You can boost the flavor of your quiche by adding more veggies. Spinach, bell peppers, or mushrooms work well. Just chop them small and sauté them like the broccoli. This way, they stay tender. Mix them into the egg and cheese mixture. Each veggie adds a new taste and color. For meat lovers, adding cooked bacon or ham can enhance your quiche. Cook the meat first, then chop it into small pieces. Fold it into the egg mixture with the cheese and broccoli. This adds a savory punch to your dish. You can also use cooked sausage for a spicy kick. If you need a gluten-free option, use a gluten-free crust. You can find these in stores, or make your own. For a dairy-free twist, replace the milk and cheese with almond milk and vegan cheese. This keeps the quiche creamy without the dairy. Just make sure to adjust the baking time slightly. Each variation gives you a new take on this classic dish! To keep your leftover quiche fresh, let it cool first. Wrap it well with plastic wrap or foil. You can also use an airtight container. Store it in the fridge for up to three days. Keeping it sealed helps prevent it from drying out. When you're ready to enjoy leftover quiche, preheat your oven to 350°F (175°C). Place the quiche on a baking sheet. Heat it for about 15-20 minutes. You can also microwave it. Heat each slice for 1-2 minutes. Just be careful, as the crust may get soggy in the microwave. If you want to save quiche for later, freezing is a good option. Wrap each slice in plastic wrap first. Then, place them in a freezer bag. Quiche can last up to three months in the freezer. To thaw, move the slices to the fridge overnight. Reheat as described above to enjoy a creamy, cheesy treat. A broccoli cheddar quiche lasts about 3 to 4 days in the fridge. To keep it fresh, store it in an airtight container. This helps keep moisture in while keeping other smells out. If you want to enjoy it later, just reheat it in the oven or microwave. Yes, you can use a homemade crust for your quiche. Making your own crust adds a personal touch and can taste even better. Just be sure to roll it out flat and fit it into your pie dish before filling it with the quiche mix. You can serve your quiche with a fresh side salad or some fruit. A light salad adds color and crunch, while fruit brings sweetness. Some people also enjoy serving it with a dollop of sour cream or hot sauce for extra flavor. Yes, you can make this quiche ahead of time. Prepare it the day before and store it in the fridge. When you are ready to serve, just bake it according to the instructions. This makes for an easy breakfast or brunch option when you have guests. Broccoli cheddar quiche is a simple but tasty dish. You learned about key ingredients, spices, and substitutes. We covered step-by-step cooking methods to get it right. I shared tips to avoid common mistakes and how to store leftovers well. You can even try fun variations with other veggies or meats. Enjoy this dish any time you want a warm meal. It's versatile, easy to make, and great for sharing. Happy cooking!

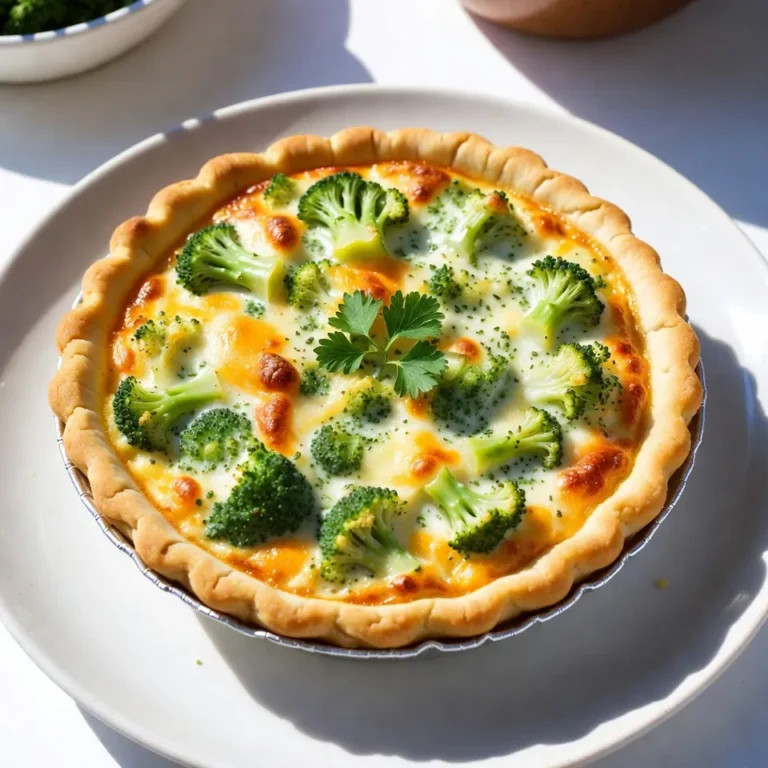
Broccoli Cheddar Quiche Tasty and Simple Recipe

- 2 boneless, skinless chicken breasts - 8 ounces cremini mushrooms - 4 cups low-sodium chicken broth - 1 tablespoon extra virgin olive oil - 1 medium yellow onion - 2 cloves garlic - 2 cups fresh baby spinach leaves - 1 medium carrot - 1 teaspoon dried thyme leaves - 1 bay leaf To make Clean Chicken Mushroom Soup, you need some key ingredients. First, you need chicken. I like to use boneless, skinless chicken breasts. They cook fast and taste great. Next, you'll want cremini mushrooms. They add a rich flavor to the soup. You also need low-sodium chicken broth. This keeps the soup light and healthy. For flavor, we use extra virgin olive oil, a yellow onion, and garlic. The oil helps cook the onion and garlic. This gives the soup a nice base. The onion should be finely chopped, and the garlic should be minced. This way, they blend well in the soup. Don’t forget the vegetables! Fresh baby spinach is a must. It adds color and nutrients. A medium carrot diced into small cubes brings sweetness. We also add dried thyme and a bay leaf. These herbs give the soup depth and aroma. Gather these ingredients, and you’re ready to start cooking! Each item plays a role in making this soup delicious and nourishing. {{ingredient_image_2}} Start by heating 1 tablespoon of extra virgin olive oil in a large pot over medium heat. Once the oil shimmers, add 1 finely chopped medium yellow onion and 2 minced garlic cloves. Sauté for about 3-4 minutes. You want the onion to turn translucent and smell great. Next, gently stir in 2 diced boneless, skinless chicken breasts. Cook them for around 5 minutes. Make sure the chicken is no longer pink. Now, it’s time to add some color and nutrition. Incorporate 8 ounces of sliced cremini mushrooms and 1 medium diced carrot into the pot. Sauté these for another 4-5 minutes. This step helps the mushrooms release moisture and wilt nicely. You will see the mushrooms start to soften. Carefully pour in 4 cups of low-sodium chicken broth. Then add 1 teaspoon of dried thyme, 1 bay leaf, and salt and freshly cracked black pepper to taste. Turn the heat up to bring the mixture to a rolling boil. Once boiling, reduce the heat and let it simmer gently for about 15 minutes. This will meld all the wonderful flavors together. After 15 minutes, fold in 2 cups of fresh baby spinach. Let it cook for 2 more minutes until it wilts and brightens. Don’t forget to remove the bay leaf before serving! Using low-sodium broth is key for this soup. It lets you control the salt levels. You can add more salt later if needed. This way, the soup stays healthy and tasty. Fresh parsley adds a bright touch to your bowl. It not only looks nice but also gives a fresh taste. Sauté chicken and vegetables for the right time. Cook chicken for about five minutes until it is not pink. This ensures it is safe to eat. Then, sauté the mushrooms and carrots for four to five minutes. Stir often to help the flavors blend. Before serving, taste the soup and adjust the seasoning. A little extra salt or pepper can make a big difference. Serve the soup with a slice of crusty bread on the side. This adds a nice touch and makes the meal more filling. Drizzle a bit of olive oil on top for added richness. It enhances the flavor and looks great. For garnishing, sprinkle fresh parsley on each bowl. This adds color and makes your soup look gourmet. Pro Tips Fresh Ingredients: Use fresh chicken and vegetables for the best flavor and nutrition. Fresh ingredients enhance the overall taste of the soup. Custom Seasoning: Don’t hesitate to adjust the herbs and spices to suit your taste. Adding a splash of lemon juice can brighten the flavors even more. Storage Tips: This soup can be stored in the refrigerator for up to 3 days. Reheat gently on the stove to preserve the texture of the ingredients. Serving Suggestions: Serve with a sprinkle of grated Parmesan or a dollop of sour cream for an extra creamy finish. A side of crusty bread complements the soup perfectly. {{image_4}} You can make this soup even more friendly for specific diets. If you need a gluten-free option, be sure to use gluten-free chicken broth. It keeps the soup tasty while meeting your needs. If you want a vegan version, swap the chicken for plant-based proteins. Tofu or chickpeas work well. Use vegetable broth instead of chicken broth. This way, you still enjoy a rich flavor without meat. Adding more veggies can boost the nutrition in your soup. Try including diced zucchini or bell peppers for extra color and crunch. You could also toss in some green beans for added texture. For whole grains, brown rice or quinoa are perfect additions. Cook them separately and stir them in right before serving. They fill you up and add fiber to the meal. Herbs can change the flavor of your soup. Instead of thyme, try rosemary or basil for a new twist. These herbs bring fresh notes to your dish. If you like heat, add some crushed red pepper or fresh jalapeños. This will give your soup a spicy kick. Adjust the amount to suit your taste, and enjoy the warmth. Store leftover soup in the fridge. Use a clean, airtight container. Glass or plastic containers work well. Make sure the soup cools before sealing. This helps keep it fresh. You can freeze this soup for later. Use freezer-safe containers or bags. Leave some space at the top for expansion. To thaw, place the soup in the fridge overnight. Reheat on the stove or in the microwave. Stir often to heat evenly. Refrigerated soup lasts about 3 to 4 days. If you see mold or smell bad, throw it out. If the soup looks different or has bubbles, it may be spoiled. Trust your senses! You can make this soup vegan by swapping chicken for plant-based proteins. Great options include tofu, tempeh, or chickpeas. These choices add protein and texture. You can also use vegetable broth instead of chicken broth. This keeps the soup hearty and flavorful without meat. Yes, you can use different mushrooms in this soup. Some tasty alternatives are shiitake, button, or oyster mushrooms. Each type brings a unique flavor. Shiitake mushrooms offer a rich, earthy taste. Button mushrooms are mild and versatile. Oyster mushrooms have a delicate, sweet flavor. Feel free to mix and match! This soup is packed with nutrients. Here’s a quick breakdown: - Chicken: High in protein and low in fat. - Mushrooms: Good source of B vitamins and antioxidants. - Spinach: Rich in iron, vitamins A and C. - Carrots: Full of beta-carotene, great for vision. - Onion and garlic: Boost immunity with their antioxidant properties. Each bowl supports your health while tasting amazing! This blog post covered how to make a tasty chicken soup. We went over the main ingredients, like chicken, mushrooms, and broth, plus how to add flavor with herbs and veggies. You learned step-by-step instructions for cooking, along with tips for the best tastes and how to present your soup nicely. We also explored variations, storage tips, and answered common questions. In closing, this soup is simple to make and easy to tweak. Enjoy cooking and sharing this warm dish!

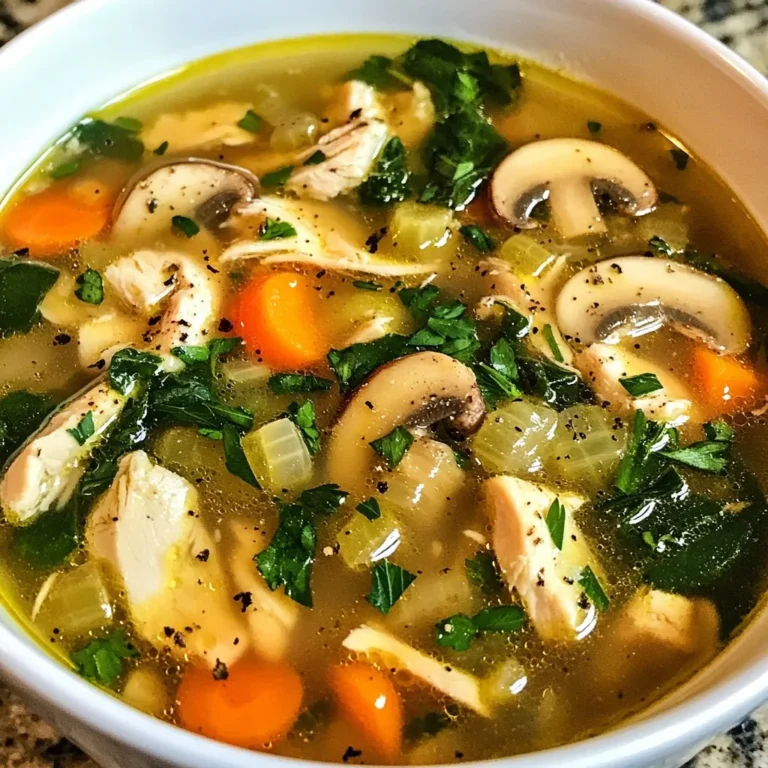
Clean Chicken Mushroom Soup Nourishing and Simple Recipe

- 4 boneless, skinless chicken breasts - 2 cups button mushrooms, sliced - 1 medium onion, diced - 4 cloves garlic, minced - 1 cup chicken broth - 1 cup heavy cream - 1 teaspoon dried thyme - 1 teaspoon dried oregano - 1 cup shredded sharp cheddar cheese - 1 cup cooked rice (white or brown) - 2 tablespoons olive oil - Salt and freshly ground black pepper to taste - Fresh parsley, chopped (for garnish) When making garlic mushroom chicken casserole, these ingredients create a rich taste. The chicken provides protein, while mushrooms add texture. Garlic brings a strong flavor, and cheese adds creaminess. The rice acts as a great base, soaking up all those delicious juices. - 1/2 cup frozen peas - 1/2 teaspoon smoked paprika - 1 cup spinach, chopped Adding frozen peas or spinach can boost nutrition. Smoked paprika gives a hint of smokiness. Experiment with these options to find your favorite mix. - Large skillet - Casserole dish - Wooden spoon - Measuring cups and spoons - Sharp knife and cutting board These tools help you prepare this dish smoothly. A large skillet is key for sautéing. The casserole dish holds your masterpiece while it bakes. Having these tools ready makes cooking fun and easy. {{ingredient_image_2}} Start by heating 2 tablespoons of olive oil in a large skillet over medium heat. Add 1 medium diced onion and sauté it for about 3-4 minutes until it turns clear. Next, stir in 4 cloves of minced garlic and 2 cups of sliced button mushrooms. Cook them for 5-7 minutes. The mushrooms will get soft and release their juices. While they cook, season 4 boneless, skinless chicken breasts with salt, black pepper, 1 teaspoon of dried thyme, and 1 teaspoon of dried oregano. Once the mushrooms are ready, push the mixture to one side. Place the seasoned chicken breasts on the other side. Sear them for about 3-4 minutes on each side until they are golden brown. Now, carefully pour in 1 cup of chicken broth and 1 cup of heavy cream. Stir the mixture well to combine all the flavors. Let it simmer gently for a moment. Then, add in 1 cup of cooked rice and half of 1 cup of shredded sharp cheddar cheese. Mix everything together until well combined and heated through. Transfer the entire mixture into a greased casserole dish, spreading it evenly. Sprinkle the remaining cheddar cheese on top. Cover the dish with aluminum foil. Bake in your preheated oven at 375°F (190°C) for 20 minutes. After this, remove the foil and bake for another 10-15 minutes. You want the cheese to be bubbly and golden brown. Once out of the oven, let it rest for a few minutes. Before serving, add some chopped fresh parsley on top for a pop of color. Enjoy your meal! To get juicy chicken, start with fresh breasts. Make sure they are about the same size. This helps them cook evenly. Season them well with salt, pepper, thyme, and oregano. Sear the chicken in a hot skillet. Cook each side for 3-4 minutes until brown. This step locks in the flavor. Don't overcrowd the pan; work in batches if needed. After cooking, let the chicken rest for a few minutes. This helps the juices stay inside. Cheese adds great flavor to your casserole. Sharp cheddar cheese works well. It melts nicely and gives a rich taste. You can also try gouda or mozzarella for a different twist. For a sharper bite, use crumbled feta or blue cheese. Mix different cheeses for a fun flavor blend. Sprinkle the cheese on top in the last few minutes of baking. This creates a bubbly, golden crust that everyone loves. To make your casserole even creamier, add more heavy cream. You can also mix in some cream cheese. This gives a rich and smooth texture. If you want a lighter option, try sour cream or Greek yogurt. These ingredients add creaminess without being too heavy. Stir them in just before baking to keep the texture. For extra flavor, consider adding a splash of white wine to the broth. This adds depth and richness to the dish. Pro Tips Choose the Right Mushrooms: Opt for cremini or shiitake mushrooms for a deeper flavor compared to button mushrooms. Perfectly Season the Chicken: Allow the chicken to marinate with spices for at least 30 minutes before cooking to enhance flavor. Add Fresh Herbs: Incorporate fresh thyme or oregano right before serving for an aromatic boost. Ensure Even Cooking: Cut chicken breasts to a uniform size for consistent cooking and tenderness throughout. {{image_4}} You can change the chicken in this dish. Try turkey breasts for a leaner option. Pork chops also work well, adding a different flavor. If you want to keep it easy, use rotisserie chicken. Just shred it and mix it in when adding the rice. This saves you time and still gives great taste. If you prefer a vegetarian dish, swap chicken for tofu. Use firm tofu for the best texture. Cut it into cubes and sauté it with the mushrooms and onions. Use vegetable broth instead of chicken broth for the sauce. This change keeps the dish hearty and flavorful while adding healthy plant protein. Want more nutrition? Add veggies! Broccoli, spinach, or bell peppers fit well. Chop them up and mix them in with the mushrooms. Carrots also add color and sweetness. This not only boosts the nutrition but also makes your dish look more appealing. Don't be shy to experiment with your favorite vegetables! Store leftover garlic mushroom chicken casserole in an airtight container. Let it cool to room temperature before sealing. This helps keep flavors fresh. Store it in the fridge for up to three days. If you want to enjoy it later, freezing is a great option. To reheat, place the casserole in an oven-safe dish. Cover it with foil to prevent it from drying out. Heat it at 350°F (175°C) for about 20-25 minutes. Stir it halfway through for even warming. You can also microwave individual portions. Heat for a minute at a time, stirring in between. To freeze the casserole, let it cool completely. Transfer it to a freezer-safe container or wrap it tightly with plastic wrap. Label the container with the date. It can last up to three months in the freezer. To enjoy, thaw it in the fridge overnight before reheating. Yes, you can use different types of cheese. Try mozzarella, gouda, or parmesan. Each cheese adds a unique flavor. Mozzarella gives a stretchy texture, while gouda adds a smoky taste. Parmesan adds a sharp finish. Feel free to mix and match your favorites! To make this dish gluten-free, choose gluten-free chicken broth. Also, use gluten-free rice. Most cheeses are gluten-free, so they work well too. Always check labels, as some processed foods may contain gluten. This way, everyone can enjoy a hearty meal! Serve this casserole with a fresh salad or steamed vegetables. A vibrant green salad offers a nice crunch. You could add a light vinaigrette for extra flavor. Garlic bread or crusty rolls also pair well. They are perfect for soaking up all the creamy sauce! This blog covered all you need for a great Garlic Mushroom Chicken Casserole. We reviewed key ingredients and cooking tools. I shared simple steps and handy tips for perfect cooking. You can even switch proteins or make it vegetarian for more options. Remember to store leftovers well for future meals. Try different cheeses or sides to mix it up. Enjoy making this tasty dish, and have fun experimenting!

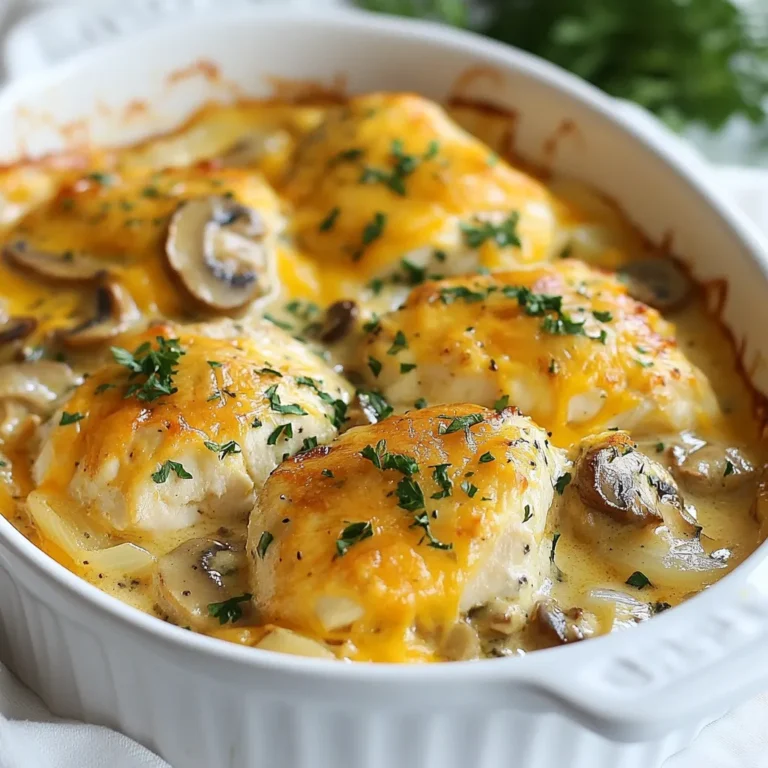
Garlic Mushroom Chicken Casserole Savory and Hearty Dish

- 4 boneless, skinless chicken breasts - 1 cup rich marinara sauce - 1 cup freshly shredded mozzarella cheese - 1 teaspoon Italian seasoning - Salt and pepper to taste - Fresh basil leaves - Extra mozzarella cheese for topping If you don’t have marinara sauce, you can use any tomato sauce. You can also try pesto for a fresh twist. Instead of mozzarella, cheddar or provolone works too. For the chicken, thighs can replace breasts if you prefer. Lastly, if you lack Italian seasoning, mix dried oregano, thyme, and basil as a substitute. {{ingredient_image_2}} First, preheat your oven to 375°F (190°C). This step is key to cooking the chicken evenly. While the oven heats, grab a medium baking dish. Place the four boneless, skinless chicken breasts in the dish. Make sure to arrange them side by side. They should not overlap to ensure perfect cooking. Next, pour 1 cup of rich marinara sauce over the chicken. Use a spatula to spread the sauce evenly. You want each chicken breast well coated with sauce. After that, sprinkle 1 teaspoon of Italian seasoning over the sauce. Add salt and pepper to taste. This will add great flavor to every bite. Now, top the chicken with 1 cup of freshly shredded mozzarella cheese. Make sure the cheese covers the sauce evenly for a nice melt. Place the baking dish in your preheated oven. Bake for 25-30 minutes. Check that the chicken reaches an internal temperature of 165°F (75°C). For an extra touch, switch your oven to broil for the last 2-3 minutes. This will give your cheese a beautiful, golden finish. Watch closely to avoid burning! Once done, take the dish out of the oven and let it rest for about 5 minutes. This helps the juices stay in the chicken. Your Italian chicken is now ready to serve! To cook chicken perfectly, use boneless, skinless breasts. They cook evenly and stay juicy. Make sure your oven is at 375°F (190°C). This heat cooks the chicken through while keeping it tender. For best results, don't crowd the chicken in the baking dish. Each piece needs space to cook well. Adding marinara sauce gives great taste. Choose a rich, flavorful sauce for the best results. Italian seasoning brings warmth and depth. Feel free to adjust the salt and pepper to your liking. If you want extra flavor, let the chicken marinate in the sauce for an hour. This will make every bite burst with flavor. Serve your Italian chicken with pasta or a fresh salad. Both pair nicely with the rich sauce. For a nice touch, sprinkle more mozzarella on top before serving. Fresh basil leaves add a pop of color and taste. This meal looks great on the table, making it perfect for guests. Pro Tips Choose Quality Chicken: Use fresh, high-quality chicken breasts for the best flavor and texture. Frozen chicken can work, but may result in a less juicy outcome. Homemade Marinara: For an extra burst of flavor, consider making your own marinara sauce. Fresh ingredients can elevate the dish significantly. Cheese Variations: Experiment with different cheeses like provolone or Parmesan for a unique twist on the traditional mozzarella topping. Resting Time: Don’t skip the resting step after baking! Allowing the chicken to rest helps retain moisture, making each bite succulent and tender. {{image_4}} You can easily add more flavor to your Italian chicken. Try adding vegetables like sliced bell peppers or onions. These ingredients bring color and taste. You might also consider adding olives for a briny kick. Experiment with sun-dried tomatoes for a sweet touch. Each of these additions will enhance the dish and make it more filling. While mozzarella is a classic choice, you can switch it up. Try using provolone for a sharper flavor. Parmesan adds a nice, rich taste, too. If you prefer something creamier, consider using burrata. Each cheese option changes the dish's profile, so feel free to mix and match based on your taste. Besides marinara, you can explore other sauces. A creamy Alfredo sauce gives a rich twist. For a spicy kick, use arrabbiata sauce. You can also try pesto for a fresh, herby flavor. Each sauce brings a new character to the dish, so don't hesitate to get creative with your choices! To keep your leftover Italian chicken fresh, place it in an airtight container. Store it in the fridge, and it will last for up to three days. Make sure the chicken cools down to room temperature before putting it away. This helps prevent moisture build-up in the container. If you want to keep it longer, consider freezing. When you're ready to eat the leftovers, preheat your oven to 350°F (175°C). Place the chicken in a baking dish and cover it with foil. This helps keep the chicken moist. Bake for about 15-20 minutes or until it's heated through. You can also reheat in the microwave. Just cover it with a damp paper towel to avoid drying it out. Heat in short bursts, checking often. If you want to freeze your Italian chicken, wrap it tightly in plastic wrap or foil. This prevents freezer burn and keeps it tasty. You can freeze it for up to three months. To defrost, place it in the fridge overnight before reheating. Avoid thawing it at room temperature to keep food safe. Enjoy warm, flavorful chicken even after some time! Yes, you can. You have options! You could use alfredo sauce or pesto. Both will give the chicken a new twist. Just remember, the flavor will change. Choose a sauce you enjoy. You should check the chicken's internal temperature. It needs to reach 165°F (75°C) to be safe to eat. If you don’t have a thermometer, cut into the thickest part. The meat should be white with no pink inside. Absolutely! You can prepare it a day ahead. Just layer the chicken and sauce in the baking dish. Cover it and store it in the fridge. When you’re ready, bake it as directed. It saves time and tastes great! To sum up, we explored the key ingredients for your dish, starting with the main components and optional garnishes. I provided step-by-step instructions for cooking, along with tips to enhance flavor. We also delved into variations and storage options to help you get the most out of your meal. I hope these insights make cooking fun and easy for you. Enjoy your dish, and don't hesitate to experiment with new flavors!

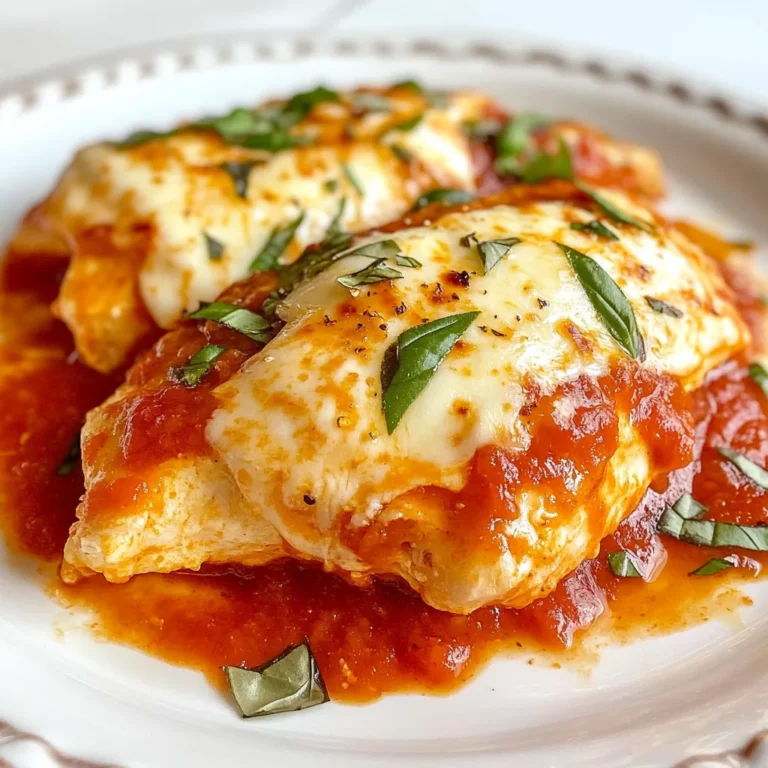
Three-Ingredient Italian Chicken Simple and Savory Meal

PREV 1 … 26 27 28 … 47 NEXT
snack joy kitchen

explore

DessertsDinnerAppetizersDrinks

Our Policies

  • Cookie Policy
  • Copyright Policy
  • Disclaimer
  • GDPR Policy
  • Terms Of Use
Back to Top
  • About
  • Contact Us
  • Privacy Policy
© 2026 snack joy kitchen