FREE DINNER EBOOK! Get your copy!
  • Cookie Policy
  • GDPR Policy
  • Disclaimer
  • Terms Of Use
  • Visit my other site: Fun Cookie Recipes
snack joy kitchen
  • Home
  • Dinner
  • Desserts
  • Drinks
  • Appetizers
  • Contact
  • About
  • Privacy Policy
  • Home
  • Dinner
  • Desserts
  • Drinks
  • Appetizers
  • Contact
  • About
  • Privacy Policy
  • Cookie Policy
  • GDPR Policy
  • Disclaimer
  • Terms Of Use
Visit my other site: Fun Cookie Recipes

HOME / CATEGORIES /

Latest

To make the perfect one-pan chicken and rice bake, you need some staples. Here’s what you will need: - 4 chicken thighs, skin-on and bone-in - 1 cup long-grain rice - 2 cups chicken broth These ingredients form the base of this dish. The chicken thighs bring juicy flavor, while the rice soaks up the broth. Next, we add flavor with aromatics and seasonings. Here’s your list: - 1 medium onion, diced - 3 cloves garlic, minced - 1 teaspoon smoked paprika - 1 teaspoon dried oregano - 1/2 teaspoon turmeric - Salt and pepper, to taste - 2 tablespoons olive oil The onion and garlic create a strong base. Smoked paprika and turmeric add warmth and color, while oregano gives it a nice herbal touch. A little garnish makes a big difference in presentation. Consider these options: - 1 cup frozen peas - 1 red bell pepper, diced - Fresh parsley, for garnish These add color and freshness to your dish. The peas and bell pepper bring sweetness and crunch. Chopped parsley on top not only looks good but adds a bright flavor too. {{ingredient_image_2}} First, set your oven to 375°F (190°C). This helps the food bake evenly. Next, take a large skillet that can go in the oven. Pour in 2 tablespoons of olive oil. Heat the oil on medium until it shimmers. This will give your dish a nice flavor. Now, it’s time to cook the chicken. Take 4 chicken thighs and season them well. Use salt, pepper, smoked paprika, dried oregano, and turmeric. Make sure both sides are coated. When the oil is hot, place the chicken skin-side down in the skillet. Sear for about 5-7 minutes. You want the skin to be golden brown. Flip the chicken and sear the other side for 5 more minutes. Then, take the chicken out and set it aside on a plate. In the same skillet, add 1 diced onion. Sauté for about 3-4 minutes until soft. Then, add 3 minced garlic cloves. Cook for another minute. This will make your kitchen smell great! Now, add 1 cup of long-grain rice to the skillet. Stir well to coat each grain with the onion and garlic. Toast the rice for about 2 minutes. This step adds more flavor. Next, pour in 2 cups of chicken broth. Stir in 1 diced red bell pepper and 1 cup of frozen peas. Stir everything together. Now it’s time to add the chicken back. Place the chicken thighs on top of the rice mixture, skin-side up. Cover the skillet with a lid or aluminum foil. This helps keep the steam in while it bakes. Transfer the skillet to your preheated oven. Bake for 35-40 minutes. Check that the rice is tender and the chicken hits at least 165°F (75°C) inside. Once done, take the skillet out and let it rest for about 5 minutes. This helps the flavors settle before serving. To get juicy chicken, use skin-on and bone-in thighs. These cuts keep the meat moist. Season them well with salt, pepper, smoked paprika, oregano, and turmeric. When you sear the chicken, let it brown for about 5-7 minutes on each side. This step locks in flavor and gives a nice crust. Always check the internal temperature; it should reach 165°F (75°C) before serving. The rice is key to this dish. Start by toasting it in the skillet with onions and garlic. This adds depth. Use chicken broth instead of water for cooking the rice. This gives it a rich flavor. You can also add vegetables like peas and red bell pepper for extra taste and color. Serve this dish right from the skillet. It looks great and keeps the food warm. Before serving, sprinkle fresh parsley on top for a pop of color. This adds freshness and makes the dish more appealing. You can also use a large spoon to mix everything before serving to blend those wonderful flavors. Pro Tips Let the Chicken Rest: After baking, allow the chicken to rest for a few minutes before serving. This helps the juices redistribute, making the meat more tender and flavorful. Use Homemade Broth: If possible, use homemade chicken broth for a richer flavor. Store-bought broth can work, but homemade adds a depth of taste that enhances the dish. Experiment with Spices: Feel free to adjust the spices to your preference. Adding a dash of cayenne pepper can give the dish a nice kick if you enjoy some heat! One-Pan Cleanup: For easier cleanup, line your baking dish with parchment paper before adding the ingredients. This will prevent sticking and make washing up a breeze. {{image_4}} You can add many vegetables to your one pan chicken and rice bake. Carrots, zucchini, or broccoli work great. Just chop them into small pieces. Add them with the bell pepper and peas. This way, they cook evenly. You can also use fresh spinach or kale. Stir them in at the end for a pop of green. This adds color and boosts nutrition. If you want to switch up the protein, you have options! Try bone-in chicken breasts or drumsticks. You can also use turkey thighs for a twist. For a meatless version, use chickpeas or tofu. If you want seafood, shrimp is a tasty choice. Adjust cooking times for different proteins. Make sure they cook through for safety. You can change the flavor of your dish with different spices. Try adding cumin or coriander for a warm taste. If you like heat, add chili powder or cayenne. For an Asian twist, use soy sauce and ginger. You can also try herbs like thyme or basil for a fresh taste. Don’t be afraid to experiment! This dish is flexible, and you can make it your own. After cooking, let the dish cool to room temperature. Store any leftovers in an airtight container. Place it in the fridge within two hours. This will help keep the chicken and rice fresh. Eat refrigerated leftovers within three days for the best taste. When you reheat, make sure it heats all the way through. If you want to save some for later, you can freeze the dish. Allow it to cool completely before freezing. Use a freezer-safe container or bag. This will prevent freezer burn. You can keep it in the freezer for up to three months. When you're ready, thaw it in the fridge overnight before reheating. To reheat, you can use an oven or microwave. If using an oven, preheat it to 350°F (175°C). Cover the dish with foil to keep it moist. Heat for about 20-25 minutes or until hot. If using a microwave, place a portion in a microwave-safe bowl. Heat in short bursts, stirring in between, until it's steaming. Enjoy your meal! Yes, you can use boneless chicken. Boneless chicken cooks faster than bone-in. If you use boneless thighs, reduce the cooking time. They will take about 25-30 minutes to cook through. You can use vegetable broth if you want a lighter taste. Water with a pinch of salt also works. If you like, try using wine for added flavor. Just remember, the broth adds richness and depth to the dish. Check the chicken's internal temperature. It should reach 165°F (75°C). The rice should be tender and fluffy. You can also check if the liquid is absorbed. If not, let it bake a little longer before serving. This blog post covered how to make a delicious chicken and rice dish. We explored key ingredients like the chicken, rice, and spices. I shared step-by-step cooking methods, tips for perfecting your dish, and fun variations to try. Don't forget the importance of proper storage for leftovers! Cooking can be simple and fun. Using fresh ingredients and following these steps lets you create meals the whole family will love. Enjoy your cooking journey!

One Pan Chicken and Rice Bake Flavorful Dinner Delight

- 3 ripe bananas, thoroughly mashed - 1/2 cup granulated sugar - 1/4 cup brown sugar, firmly packed - 1/3 cup melted coconut oil (or substitute with unsalted butter) - 2 large eggs - 1 teaspoon pure vanilla extract - 1 teaspoon baking soda - 1/2 teaspoon fine sea salt - 1 teaspoon ground cinnamon - 1 1/2 cups all-purpose flour - 1 cup semi-sweet chocolate chips - 1/2 cup chopped walnuts or pecans (optional) I love starting with ripe bananas for this recipe. They should have brown spots. These spots show they are sweet and ready to mash. Next, I grab the sugars. I use both granulated and brown sugar. The brown sugar adds a nice caramel flavor. Coconut oil is my go-to fat, but unsalted butter works too. It gives the muffins a rich taste. Eggs help bind everything together. They also add moisture. Vanilla extract adds a touch of warmth and depth. For dry ingredients, I use baking soda to help the muffins rise. Sea salt balances the sweetness. Cinnamon brings a cozy flavor to the mix. I always use all-purpose flour for the best texture. And of course, I can’t forget the star of the show: chocolate chips! They melt into gooey goodness. If I feel fancy, I add chopped nuts for a crunchy surprise. With these ingredients, you will create a delightful treat that everyone will love! {{ingredient_image_2}} - Preheat oven to 350°F (175°C). - Prepare a muffin tin with paper liners or grease it lightly. - In a large bowl, combine the mashed bananas, granulated sugar, brown sugar, and melted coconut oil. - Stir until smooth and well-mixed. - Add the eggs and vanilla extract to the banana mixture. - Whisk until the mixture is smooth and even. - In another bowl, whisk together the baking soda, sea salt, ground cinnamon, and all-purpose flour. - Gradually add the dry mix into the wet mix. - Stir gently until just blended, but don’t overmix. - Carefully fold in the semi-sweet chocolate chips. - If you like, also add the chopped walnuts or pecans. - Use a spoon or small ice cream scoop to fill the muffin tin. - Fill each cup about two-thirds full to allow for rising. - Bake for 18-20 minutes. - Check doneness by inserting a toothpick; it should come out clean or with a few crumbs. - Let the muffins cool in the tin for about 5 minutes. - Then, transfer them to a wire rack to cool completely. - Overmixing Avoidance Techniques: Overmixing makes muffins tough. Mix wet and dry ingredients gently until just combined. The batter should be lumpy, not smooth. This keeps the muffins light and airy. - Ripeness of Bananas: Use very ripe bananas for the best flavor and moisture. The darker the banana, the sweeter it is. Look for bananas with brown spots on the peel. This indicates they are perfect for baking. - Best Storage Practices: Store muffins in an airtight container. Keep them at room temperature for up to three days. For longer storage, place them in the fridge. This helps them last longer without drying out. - How to Reheat for Freshness: Reheat muffins in the microwave for about 15 seconds. This warms them up nicely. You can also use the oven at 350°F for 5 to 7 minutes. This gives them a fresh-baked taste. - Presentation Tips for Serving: Serve muffins warm for the best experience. A light dusting of powdered sugar adds a nice touch. You can also drizzle melted chocolate for extra indulgence. - Pairing Ideas (Drinks, Spreads): Enjoy these muffins with a cup of coffee or tea. They pair well with nut butter or cream cheese. A dollop of yogurt on the side adds a nice contrast. Pro Tips Choose Ripe Bananas: The riper the bananas, the sweeter and more flavorful your muffins will be. Look for bananas with brown spots for the best results. Don't Overmix: To achieve light and fluffy muffins, mix the wet and dry ingredients until just combined. Overmixing can lead to dense muffins. Adjust for Altitude: If you're baking at high altitude, you may need to increase the flour slightly and reduce the sugar to prevent muffins from overflowing. Storage Tips: Store leftover muffins in an airtight container at room temperature for up to 3 days, or freeze them for longer storage. Reheat in the microwave for a warm treat! {{image_4}} If you want to make these muffins nut-free, it's easy! Just skip the walnuts or pecans. Instead, add more chocolate chips. This keeps the muffins rich and sweet. You still get that great chocolate flavor, without any nuts. You can make some changes to make these muffins healthier. - Using Whole Wheat Flour: Swap all-purpose flour for whole wheat flour. This gives more fiber and a nuttier taste. The muffins will still be soft and tasty. - Reducing Sugar: You can cut down on the sugars. Try using 1/3 cup of granulated sugar instead of 1/2 cup. This still keeps the muffins sweet but lowers the sugar content. Make your muffins unique by adding different flavors. - Different Spices or Extracts: Try adding a teaspoon of nutmeg or almond extract. These will add depth to the flavor. - Fruit Alternatives: You can mix in other fruits too. Chopped apples or berries work well. They add freshness and a new twist to your muffins. You can keep your chocolate chip banana bread muffins at room temperature for up to three days. Make sure to store them in an airtight container. This keeps them soft and fresh. If you see any mold, toss them out right away. You should refrigerate the muffins if you want to keep them longer. They last about a week in the fridge. Place them in a sealed bag or container. Cold muffins can be a bit firmer, so let them sit at room temp for a few minutes before eating. To freeze your muffins, wrap each one in plastic wrap. Then, place them in a freezer bag. This method keeps them fresh for up to three months. Make sure to label the bag with the date. To thaw, take them out and leave them at room temperature for a few hours. You can also microwave them for about 15-20 seconds. This warms them up quickly and makes them soft again. Enjoy your muffins any time! Yes, you can use frozen bananas. They work well in muffins. When thawed, frozen bananas become soft and mushy. This makes them easy to mash. The flavor stays sweet and rich. Just be sure to drain any excess liquid before mashing. This keeps the muffins from being too wet. If you want to make these muffins vegan, there are great egg alternatives. You can use unsweetened applesauce. Use 1/4 cup for each egg. Another option is flaxseed meal. Mix 1 tablespoon of flaxseed meal with 2.5 tablespoons of water. Let it sit for 5 minutes. This will create a gel-like texture. Finally, you can try mashed banana. Use 1/4 cup for each egg. It adds flavor too! Making muffins without sugar is easy! You can use ripe bananas for natural sweetness. They add moisture and flavor. You can also use honey or maple syrup. Use 1/2 cup for the sugar in the recipe. Another option is stevia or monk fruit sweetener. These are low-calorie and sweet. Just check the package for conversion ratios. This way, you can enjoy yummy muffins without added sugar! Making these banana muffins is simple and fun. You’ve learned about the key ingredients, easy steps, and helpful tips. Don't forget the variations to try for new flavors. Remember, the right storage ensures your muffins stay fresh. Enjoy baking, and share these treats with friends and family. With this knowledge, you can create delicious muffins perfect for any time! Happy baking!

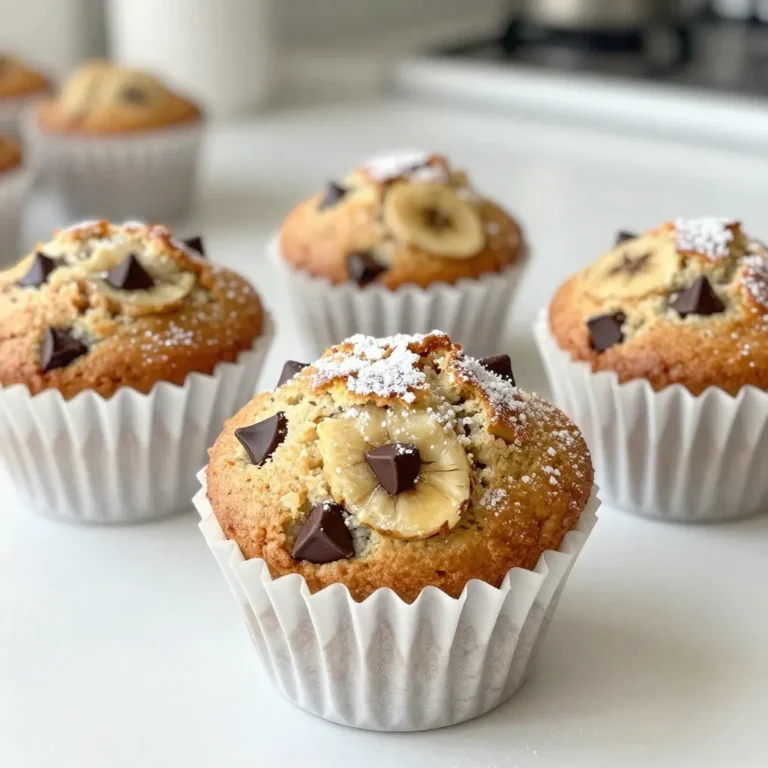
Chocolate Chip Banana Bread Muffins Delightful Treat

- 2 boneless, skinless chicken breasts - Salt and pepper, to taste - 1 cup all-purpose flour - 2 large eggs, beaten - 2 cups panko breadcrumbs The chicken breasts form the heart of this dish. You want them tender and juicy. Season the chicken with salt and pepper for a flavor boost. - 1 medium onion, finely chopped - 2 cloves garlic, minced - 1 tablespoon fresh ginger, minced - 2 medium carrots, sliced into rounds - 2 medium potatoes, peeled and diced - 2 cups chicken broth The curry sauce adds warmth and depth. Onions, garlic, and ginger build a solid flavor base. Carrots and potatoes give the sauce texture and sweetness. - 2 tablespoons curry powder - 1 tablespoon soy sauce - 1 tablespoon ketchup - 1 tablespoon cornstarch (mixed with 2 tablespoons water for thickening) - Vegetable oil, for frying Curry powder is key for that rich taste. Soy sauce adds umami, while ketchup brings a hint of sweetness. The cornstarch thickens the sauce to perfection, making it creamy. This simple mix of ingredients leads to a comforting dish. Each part plays its role in creating the layered flavors of chicken katsu curry. {{ingredient_image_2}} Begin with the chicken breasts. Season them well with salt and pepper on both sides. This step is key for good flavor. You want to ensure every bite tastes great. Let the chicken sit for a few minutes so the seasoning can soak in. Next, you’ll create a breading station. Use three shallow dishes for this. Fill the first dish with all-purpose flour. In the second dish, add two beaten eggs. The third dish should contain panko breadcrumbs. Now, take one chicken breast. First, coat it in flour, making sure it’s fully covered. Shake off any extra flour. Then, dip it into the beaten eggs. Let any excess egg drip off. Finally, press it into the panko breadcrumbs. Make sure the breadcrumbs stick well. Repeat this with the other chicken breast. Now it’s time to fry. Heat about half an inch of vegetable oil in a large skillet over medium-high heat. To check if the oil is ready, drop a breadcrumb in. If it sizzles, you’re good to go. Carefully add the breaded chicken to the hot oil. Fry each piece for about 4-5 minutes on each side. You want them golden brown and crispy. To be sure they are cooked through, use a meat thermometer. The inside should reach 165°F (75°C). Once done, remove the chicken and drain it on paper towels. This helps get rid of extra oil. To get crispy katsu, use the right oil and temperature. Heat vegetable oil in a skillet to about 350°F (175°C). A good test is to drop a piece of breading in; it should sizzle. Fry the chicken for 4-5 minutes on each side. This will give you a nice golden crust. Make sure not to overcrowd the pan. Fry in batches if needed. This keeps the oil hot and the chicken crispy. For a deeper curry taste, start with fresh spices. Adding extra garlic and ginger boosts flavor. Feel free to adjust the curry powder based on your taste. If the sauce feels too thin, mix cornstarch with water to thicken. Stir this into the curry while it simmers. Taste and add salt or soy sauce as needed. This will balance the dish perfectly. Serve your chicken katsu with jasmine or sushi rice for the best experience. These rice types pair well with curry. For garnishes, use chopped green onions and sesame seeds. They add color and crunch. You can also add pickled vegetables on the side. This gives a nice contrast to the rich curry. Enjoy your meal with family or friends! Pro Tips Perfectly Fried Chicken: Ensure the oil is hot enough before frying the chicken. You can test it by dropping in a small piece of bread; it should sizzle immediately. Flavor Boost: For added depth of flavor in the curry sauce, consider adding a splash of coconut milk or a dash of fish sauce. Veggie Variations: Feel free to customize the vegetables in the curry. Bell peppers, peas, or even spinach make great additions! Meal Prep Tip: You can prepare the chicken katsu in advance and reheat it in the oven to maintain its crispiness before serving. {{image_4}} You can swap chicken for other proteins. Pork is a great choice. It has a nice flavor and texture. Just follow the same steps as for chicken. Tofu is another option for a meatless dish. Press and drain the tofu before breading. This helps it hold its shape when cooked. For a plant-based version, use tofu or tempeh instead of chicken. You can make the curry sauce with vegetable broth. Use soy sauce and miso for added depth. You can even add coconut milk for a creamy texture. This makes the dish rich while still being vegan. Feel free to add more veggies to your curry. Bell peppers can add sweetness and color. Broccoli or green beans add crunch and nutrition. You can also use peas for a pop of green. Just add them when you add the broth, so they cook well. This makes your curry even more nutritious and tasty. To keep your Chicken Katsu Curry fresh, use proper refrigeration. After serving, let the dish cool for about 30 minutes. Then, place any leftovers in an airtight container. Store it in the fridge. It should stay good for 3 to 4 days. Make sure to label the container with the date. This helps you track how long it has been stored. You can freeze Chicken Katsu Curry for longer storage. First, let the dish cool completely. Next, transfer the curry and chicken into freezer-safe containers or bags. Remove as much air as possible before sealing. This prevents freezer burn. The curry can last up to 3 months in the freezer. When you’re ready to eat, thaw it in the fridge overnight before reheating. Reheating Chicken Katsu Curry requires care to keep it tasty. Use a saucepan on medium heat to warm the curry. Stir it gently to avoid sticking. For the chicken, reheat in the oven to maintain its crispiness. Preheat the oven to 350°F (175°C). Place the chicken on a baking sheet for about 10 minutes. This will help keep the texture and flavor just right. Chicken Katsu Curry is a popular Japanese dish. It features crispy chicken cutlets, served with a rich curry sauce. The origins of katsu come from Western cuisine. It blends perfectly with Japanese curry, creating a comforting meal. To make Katsu Curry gluten-free, you can swap a few ingredients. Use gluten-free flour instead of all-purpose flour. For the breadcrumbs, try gluten-free panko. You can also use tamari sauce instead of soy sauce. These changes keep the dish delicious and safe for gluten-free diets. Yes, you can make the curry sauce ahead of time. Store it in the fridge for up to three days. Just ensure it cools down before you put it in a container. To reheat, warm it on the stove over low heat. If it thickens too much, add a splash of chicken broth. You now have a complete guide to making Chicken Katsu Curry. We covered ingredients, step-by-step instructions, and useful tips. With this knowledge, you can enjoy the perfect crispy katsu and a delicious curry. Don't be afraid to try variations with different proteins or veggies. Store and reheat leftovers to keep every bite tasty. Now, get cooking and delight in your creation!

Japanese Chicken Katsu Curry Flavorful Comfort Dish

- 1 cup canned chickpeas, drained and rinsed - 1 large roasted red pepper, peeled and seeded - 2 tablespoons tahini (sesame paste) - 2 tablespoons extra-virgin olive oil, plus more for drizzling - 2 tablespoons freshly squeezed lemon juice - 1 garlic clove, finely minced - 1/2 teaspoon ground cumin - Salt, to taste - Water, as needed to achieve smooth consistency - Fresh parsley, finely chopped, for garnish - Paprika, for garnish Each ingredient in roasted red pepper hummus plays a key role. Canned chickpeas are easy to use and provide a creamy base. Roasted red pepper adds a sweet, smoky taste that makes this dip special. Tahini gives a rich texture and nutty flavor. Extra-virgin olive oil adds a smooth finish and depth of taste. Fresh lemon juice brings brightness and balances the flavors. Garlic adds a savory kick, while ground cumin gives warmth. Salt enhances all the tastes, ensuring a well-rounded dip. You can add water to get the desired smoothness. For garnish, fresh parsley adds color and freshness. Paprika provides a pop of color and a hint of spice. Each ingredient comes together to create a rich and flavorful dip. Enjoy this hummus with pita bread or fresh veggies for a tasty snack. {{ingredient_image_2}} First, get your food processor ready. Add one cup of drained chickpeas to the bowl. Next, include one large roasted red pepper that is peeled and seeded. Then, add two tablespoons of tahini, which is sesame paste. Pour in two tablespoons of extra-virgin olive oil and two tablespoons of freshly squeezed lemon juice. Don’t forget to add one finely minced garlic clove and half a teaspoon of ground cumin. Finally, sprinkle in a generous pinch of salt. Now, it’s time to blend! Put the lid on your food processor and blend on high speed. Keep blending until the mixture is smooth and creamy. If your hummus feels too thick, add water. Start with one tablespoon at a time and blend well after each addition. Stop when you reach your desired texture. Once you have a creamy hummus, it's time to taste it. Adjust the flavor to your liking. If you want more salt, lemon juice, or cumin, go ahead and add it. Blend again after each addition. This is your chance to make it perfect! When it tastes just right, scoop it out and put it in a serving bowl. Drizzle some olive oil on top, sprinkle paprika for color, and add chopped parsley for a fresh touch. Enjoy your roasted red pepper hummus! To get the right texture for your roasted red pepper hummus, blend well. Start with your chickpeas, roasted red pepper, tahini, olive oil, lemon juice, garlic, and cumin. Mix these until smooth. If it seems too thick, add water. Do this slowly, one tablespoon at a time. Blend after each addition until you love the creaminess. To enhance the flavor, taste your hummus before serving. You can add more salt, lemon juice, or cumin based on your liking. Don’t be shy! Adding a pinch of smoked paprika can give a nice depth. For more zest, try adding a dash of cayenne pepper for heat or some fresh herbs like basil or mint for a twist. Serve your roasted red pepper hummus in a beautiful bowl. Drizzle some olive oil on top for a fancy look. Sprinkle paprika for color and a hint of smoke. Garnish with chopped parsley. Pair it with pita bread, crunchy veggie sticks, or use it as a spread in sandwiches. This dip is perfect for any gathering or a simple snack at home. Enjoy! Pro Tips Quality Ingredients: Use high-quality tahini and extra-virgin olive oil for the best flavor in your hummus. Adjusting Consistency: If you prefer a creamier texture, blend for a longer time or add a bit more water as needed. Flavor Balancing: Taste your hummus during preparation and adjust salt, lemon juice, or cumin to achieve the perfect flavor profile. Serving Suggestions: Serve with a variety of dippers like pita, cucumber, and carrot sticks for a colorful presentation. {{image_4}} You can make your hummus spicy by adding a few jalapeños or red pepper flakes. Start with one jalapeño, chopped, and blend it in with the other ingredients. Taste and adjust the heat level to your liking. This twist adds a nice kick and makes your hummus stand out. To give your hummus a Mediterranean flair, try adding olives, sun-dried tomatoes, or feta cheese. Start by blending in 1/4 cup of chopped olives or sun-dried tomatoes. For feta, crumble about 1/4 cup into the mix. These ingredients will deepen the flavor and make your dip more unique. If you seek a lighter option, you can cut back on the tahini and olive oil. Use 1 tablespoon of tahini and 1 tablespoon of olive oil instead. You can also swap chickpeas for white beans for a different taste. This will give you a creamy texture with fewer calories while still keeping it delicious. Store your roasted red pepper hummus in an airtight container. This keeps it fresh. Make sure to smooth the top before sealing. Drizzle a little olive oil on top. This helps prevent drying. Place it in the fridge right away. You can freeze hummus for later use. Place it in a freezer-safe container. Leave some space at the top for expansion. Cover the surface with plastic wrap before sealing. To use, move it to the fridge overnight. Let it thaw slowly for the best taste. Homemade roasted red pepper hummus lasts about five days in the fridge. If you freeze it, it can last up to three months. Always check for any off smells or colors before eating. Enjoy your hummus fresh for the best flavor! Yes, you can use dried chickpeas. However, they need extra time. Soak them overnight in water. Then, cook them until soft. This process may take a few hours. Canned chickpeas save time and are ready to use. You can serve hummus with many tasty options. Here are some favorites: - Pita bread, cut into triangles - Fresh veggie sticks, like carrots and cucumbers - Crackers or chips for crunch - Spread in sandwiches for extra flavor - Use as a dip for grilled meats or fish Homemade hummus can last about a week in the fridge. Store it in an airtight container. Always check for any change in smell or texture before eating. If it looks good, it should be safe to enjoy! This blog shared how to make Roasted Red Pepper Hummus with simple steps. We covered the key ingredients, from canned chickpeas to fresh parsley. I explained how to blend and adjust the flavor for your taste. You learned tips for texture and serving ideas. Variations offer exciting twists, like spicy options. Storage info ensures you keep your hummus fresh. Experiment with flavors and enjoy this easy recipe. Your homemade hummus is sure to impress!

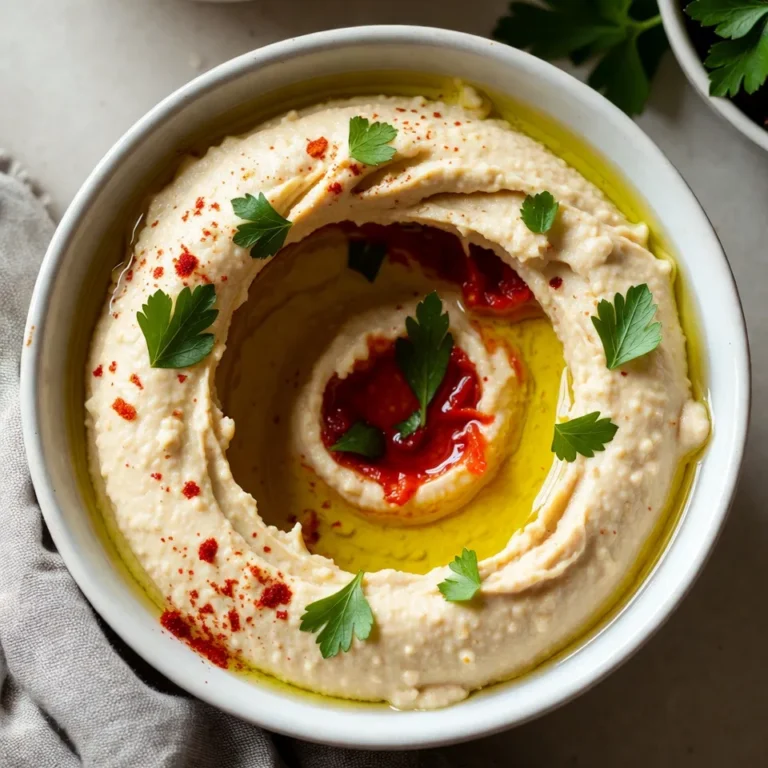
Roasted Red Pepper Hummus Rich and Flavorful Dip

- 2 cups cooked shredded chicken - 8 oz cream cheese, softened - 1 cup shredded sharp cheddar cheese, divided - ½ cup ranch dressing - ½ cup buffalo wing sauce - ½ cup crumbled blue cheese (optional) - 1 tablespoon chopped green onions (for garnish) - Tortilla chips or crunchy vegetable sticks (for serving) Creating buffalo chicken dip is easy with a few key ingredients. First, you need cooked shredded chicken. This is the main protein. You can use rotisserie chicken for speed. Next, use 8 ounces of cream cheese. Make sure it is softened. This gives the dip a creamy base. Then, prepare one cup of shredded sharp cheddar cheese. I like to divide it for a cheesy topping later. You will also need half a cup of ranch dressing. This adds creaminess and flavor. Then, grab half a cup of buffalo wing sauce. You can adjust the amount based on your heat preference. If you want extra flavor, add half a cup of crumbled blue cheese. This step is optional but highly recommended. Finally, you will need some chopped green onions for garnish. They add color and a fresh taste. For serving, have some tortilla chips or crunchy vegetable sticks ready. These make great dippers. With these ingredients, you're set to make a tasty buffalo chicken dip! {{ingredient_image_2}} Preheating your oven to 350°F (175°C) is key. It helps the dip bake evenly. If you skip this step, the dip may cook unevenly. An oven that is ready to go ensures the cheese melts nicely and the flavors meld together. Start by mixing the base. In a large bowl, blend 8 oz of softened cream cheese, ½ cup of ranch dressing, and ½ cup of buffalo wing sauce. Use a hand mixer or a spatula to create a smooth mixture. Make sure there are no lumps. A smooth base sets the stage for a creamy dip that everyone will love. Next, fold in the shredded chicken. Use 2 cups of cooked and shredded chicken breast. Add half of the 1 cup of shredded sharp cheddar cheese. Gently mix until everything is combined. This step ensures every bite is packed with flavor and protein. Now it’s time to bake. Transfer the creamy chicken mixture into a medium-sized baking dish. Spread it out evenly with a spatula. This helps it cook uniformly. Then, sprinkle the rest of the cheddar cheese generously on top. If you like blue cheese, add some crumbled blue cheese here. It will create a tasty, cheesy crust as it bakes. Place your baking dish in the preheated oven. Bake for 20-25 minutes, or until the dip is bubbly and golden brown on top. Keep an eye on it to avoid over-baking. Once done, remove the dip from the oven and let it cool for about 5 minutes. This cooling time helps set the dip for easy scooping. Before serving, garnish with chopped green onions for color and flavor. Serve warm with tortilla chips or crunchy vegetable sticks for dipping. Enjoy! To get that creamy dip, start with softened cream cheese. This helps it blend well. Mix the cream cheese, ranch, and buffalo sauce until smooth. You want no lumps here! Fold in your chicken gently. This keeps the texture light and fluffy. If the dip feels too thick, add a splash of ranch to loosen it up. Buffalo sauce can be hot! If you want a milder dip, start with less sauce. Add a little, taste, then add more if needed. You can also mix in some extra ranch dressing to cool it down. For a spicier kick, try adding a dash of cayenne pepper. This gives it more heat without changing the dip's base. Beyond tortilla chips, think outside the box! Serve with crunchy vegetable sticks like carrots or celery. These add a fresh crunch. You can also use crackers or pita bread. For a twist, try mini bell peppers filled with the dip. They make a fun and tasty bite! You can even serve it in individual ramekins for a nice touch. Pro Tips Adjust the Heat: Feel free to modify the amount of buffalo wing sauce based on your heat preference. Start with less and add more until you find your perfect balance! Cheese Choices: If blue cheese isn't your thing, try using feta or a different cheese for a unique flavor profile that still delivers creaminess. Make Ahead: This dip can be prepared a day in advance. Just store it in the fridge before baking, and pop it in the oven when you're ready to serve! Serving Suggestions: For a healthier option, pair the dip with sliced cucumbers, bell peppers, or celery sticks instead of tortilla chips for a crunchy, low-carb snack! {{image_4}} You can make this dip lighter without losing taste. Try low-fat cream cheese instead of regular. Greek yogurt works too. It adds creaminess and protein. Both options cut fat while keeping flavor. Want to kick up the flavor? Add spices like garlic powder or smoked paprika. You can also mix in extra cheese. Try pepper jack for heat or mozzarella for a mild taste. These tweaks make your dip unique and tasty. Craving a meatless version? Simply swap the chicken for canned chickpeas or cooked lentils. They add texture and protein. You can also add diced bell peppers for crunch. This way, everyone can enjoy buffalo dip! To keep your buffalo chicken dip fresh, first let it cool. Then, place it in an airtight container. Store it in the fridge for up to three days. Make sure the lid seals tightly to prevent air from getting in. This helps the flavors stay strong. If you have a lot left, divide it into smaller portions. This way, you can grab just what you need. When you're ready to enjoy the dip again, you can reheat it in several ways. The oven works best for keeping its creamy texture. Preheat your oven to 350°F (175°C). Place the dip in an oven-safe dish. Heat it for about 15 to 20 minutes or until it bubbles. You can also use the microwave for quick reheating. Heat it in short bursts of 30 seconds. Stir in between to help it heat evenly. If you want to save some dip for later, freezing is a great option. First, let the dip cool completely. Then, transfer it to a freezer-safe container. Make sure to leave some space at the top, as it may expand when frozen. Seal it well and label it with the date. You can freeze it for up to three months. When you're ready to eat it, thaw it in the fridge overnight. Then, reheat it as mentioned above for a tasty treat. Yes, you can use rotisserie chicken. It saves time and adds great flavor. Just shred the chicken and mix it in. This option is perfect for busy days when you want a quick meal. You can find rotisserie chicken at many grocery stores. It makes this dish easier and still tasty! Leftovers can last in the fridge for about 3-4 days. Make sure to store the dip in an airtight container. This keeps it fresh and safe to eat. If you notice any off smells or changes in texture, it’s best to throw it out. Enjoy it while it's still creamy and delicious! Yes, you can easily make this dip in a slow cooker. Just mix all the ingredients in the slow cooker. Set it on low for 2-3 hours. Stir occasionally to make sure it heats evenly. This method is great for parties or game days. You can keep it warm for guests to enjoy! If you don’t have ranch dressing, you have options. You can use blue cheese dressing for more flavor. Greek yogurt mixed with herbs can also work as a great homemade ranch. Just blend yogurt with garlic powder, onion powder, and some herbs. This way, you can still enjoy a tasty dip! In this blog, we explored how to make a tasty buffalo chicken dip. We covered essential ingredients like cooked chicken and cream cheese. I shared step-by-step instructions, from preheating the oven to baking the dip. We also discussed tips for perfect texture and spice levels. Remember, you can adjust ingredients to suit your taste. This dip is great for gatherings or a cozy night in. Enjoy making it your own!

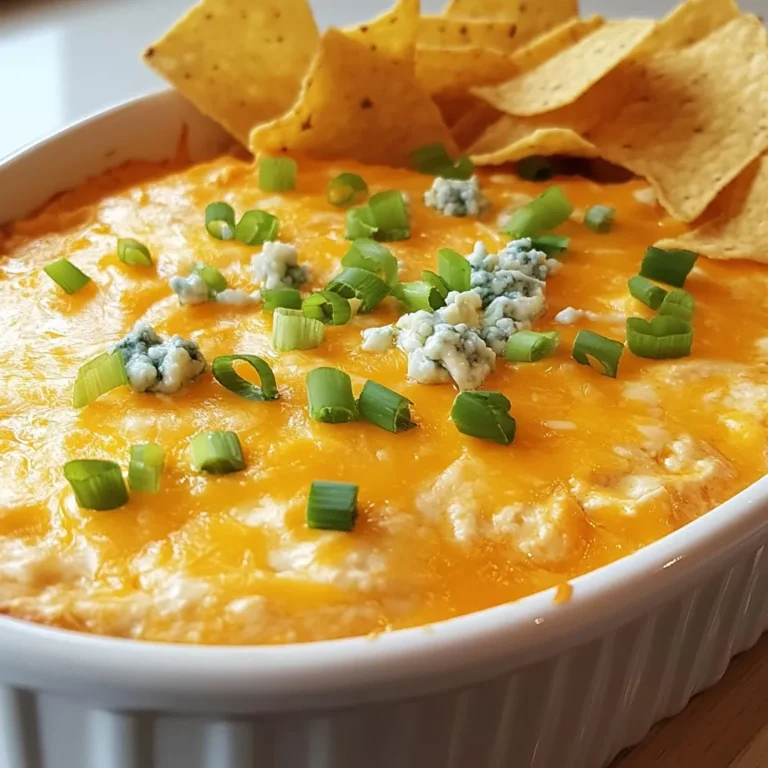
Buffalo Chicken Dip Modern Proper Simple and Tasty

Gather these simple ingredients to make your Funfetti Birthday Cake Cookies: - 1 cup unsalted butter, softened to room temperature - 1 cup granulated sugar - 1 cup packed brown sugar - 2 large eggs, at room temperature - 1 teaspoon pure vanilla extract - 3 cups all-purpose flour, sifted - 1 teaspoon baking soda - 1 teaspoon baking powder - 1/2 teaspoon salt - 1 cup rainbow sprinkles (jimmies) - 1 cup white chocolate chips These ingredients come together to create a fun and tasty cookie. The butter gives softness, while the sugars add sweetness. Eggs help bind everything, making the cookies chewy. Vanilla extract adds a warm flavor that everyone loves. The flour provides structure, and the baking soda and baking powder help the cookies rise. Salt enhances the sweetness, while the rainbow sprinkles and white chocolate chips bring joy and color. You can mix and match these ingredients as needed, but this list keeps the essence of Funfetti cookies. {{ingredient_image_2}} First, set your oven to 350°F (175°C). Line two baking sheets with parchment paper. This helps the cookies not stick. In a large bowl, mix 1 cup of softened butter with 1 cup of granulated sugar and 1 cup of brown sugar. Use a mixer on medium speed for about 3-4 minutes. The mix should look light and fluffy. Next, add 2 large eggs, one at a time. Mix well after each egg. Then, stir in 1 teaspoon of pure vanilla extract until it blends smoothly. In another bowl, whisk together 3 cups of all-purpose flour, 1 teaspoon of baking soda, 1 teaspoon of baking powder, and 1/2 teaspoon of salt. This makes sure everything mixes well later. Slowly add the dry mix to the wet mix. Use low speed on your mixer. Mix until just combined. The dough should feel slightly sticky but not too wet. Now, grab a spatula and gently fold in 1 cup of rainbow sprinkles and 1 cup of white chocolate chips. Make sure they spread evenly in the dough. Use a cookie scoop or tablespoon to drop rounded dough balls onto the lined sheets. Leave about 2 inches between each cookie. This gives them space to spread. Place the baking sheets in the oven. Bake for 10-12 minutes. Look for lightly golden edges and soft centers. Don’t overbake, or they will not be chewy. Once baked, take the cookies out and let them sit on the sheets for 5 minutes. Then, move them to a wire rack to cool completely. Enjoy the sweet smell as they cool! To make the best Funfetti cookies, start by using room-temperature butter. This helps the butter mix well with the sugars. Beat the butter and sugars for about 3-4 minutes. This step adds air and makes the cookies fluffy. When adding the dry ingredients, mix slowly. If you mix too fast, it can make the cookies tough. Fold in the sprinkles and chocolate chips gently. This keeps them whole and visible in the cookie. To keep your cookies fresh, store them in an airtight container. This prevents them from drying out. You can also place a slice of bread in the container. The bread helps keep the cookies soft and moist. If you want to keep cookies longer, freeze them. Place them in a freezer-safe bag or container. They can last up to three months in the freezer. Just let them thaw at room temperature before enjoying. Make your cookies look extra special! Use a colorful plate to display them. Add more sprinkles on top for that fun look. You can even stack the cookies high for a festive vibe. This simple detail can impress your guests and make your treats stand out. Pro Tips Chill Your Dough: For thicker cookies, chill the dough for at least 30 minutes before baking. This helps prevent excessive spreading and ensures a chewy texture. Use Fresh Ingredients: Ensure your baking soda and baking powder are fresh for optimal rise. Stale leavening agents can lead to flat cookies. Experiment with Sprinkles: For a unique twist, try using different types of sprinkles, such as chocolate or metallic ones, to enhance both flavor and appearance. Storage Tips: Store cookies in an airtight container at room temperature for up to a week. For longer storage, freeze them in a single layer and then transfer to a freezer bag. {{image_4}} To make gluten-free Funfetti cookies, swap the all-purpose flour for a gluten-free blend. Look for a mix that has xanthan gum in it. This helps the cookies hold together. Follow the same steps in the recipe. You will enjoy soft, chewy cookies that taste just like the classic version. For a rich twist, add chocolate chips to the funfetti mix. Use half a cup of chocolate chips and mix them in with the sprinkles. This adds a nice depth to the flavor. You get the sweetness of white chocolate and the richness of dark chocolate. Each bite will delight your taste buds. To make these cookies vegan, replace the eggs with flax eggs. Mix one tablespoon of flaxseed meal with three tablespoons of water for each egg. Let it sit until it thickens. Use coconut oil instead of butter and a plant-based milk to keep the dough moist. These cookies will still be colorful and tasty, perfect for any party! To keep your Funfetti birthday cake cookies fresh, place them in an airtight container. This helps prevent them from drying out. You can stack the cookies with parchment paper between layers. This keeps them from sticking together. Store the container at room temperature for easy access. You can freeze these cookies for later enjoyment. First, let the cookies cool completely. Then, place them in a single layer on a baking sheet. Freeze them for about an hour. After they are firm, transfer them to a freezer-safe bag. Label the bag with the date. You can freeze them for up to three months. When stored properly, these cookies last about one week at room temperature. If you freeze them, they stay good for three months. Just remember to let them thaw at room temperature before eating. This way, you get that fresh-baked taste every time! Funfetti birthday cake cookies are soft, chewy cookies packed with fun sprinkles. They have a sweet, buttery taste and a delightful crunch from the sprinkles. These cookies are perfect for any celebration, bringing joy with each bite. They capture the essence of a classic birthday cake in a cookie form. Yes, you can! Use any type of sprinkles you like. Try different colors or shapes to match your party theme. Mix in chocolate sprinkles or even holiday-themed ones for a festive twist. The more colorful the sprinkles, the more fun your cookies will look! To keep your cookies soft, store them in an airtight container. Add a slice of bread to the container to help retain moisture. This simple trick keeps your cookies fresh and soft for longer. Avoid leaving them out in the open air, which can dry them out. You can make these cookies without eggs by using substitutes. Try 1/4 cup of unsweetened applesauce for each egg. Another option is to use 1 tablespoon of flaxseed meal mixed with 2.5 tablespoons of water. Let it sit for a few minutes to thicken. Both methods work great and keep your cookies delicious! In this post, we covered how to make Funfetti Birthday Cake Cookies from start to finish. We walked through the needed ingredients, step-by-step instructions, and tips for perfect results. You now know how to store and even customize your cookies. Remember, baking is all about fun and creativity. Try different variations to find your favorite. Now, get your baking gear ready and enjoy making these delicious treats!

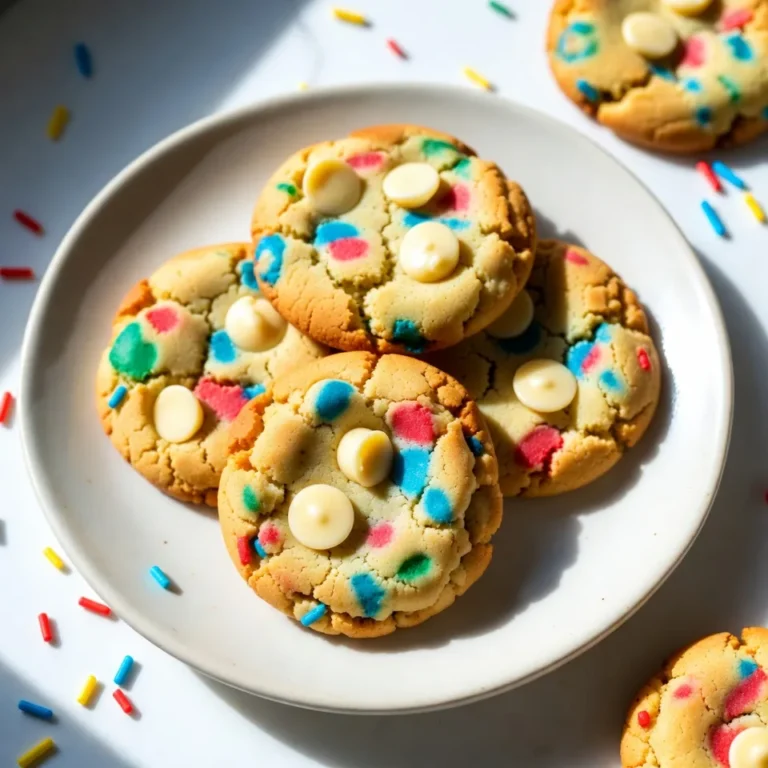
Funfetti Birthday Cake Cookies Colorful and Delicious Treat

- 2 boneless, skinless chicken breasts, thinly sliced - 8 oz fettuccine pasta - 2 tablespoons Cajun seasoning, or to taste - 1 tablespoon olive oil - 1 small onion, finely chopped - 3 cloves garlic, minced - 1 bell pepper (your choice of red or green), diced - 1 cup heavy cream - 1 cup chicken broth - 1 cup freshly grated Parmesan cheese - Salt and black pepper, to taste - Fresh parsley, chopped, for garnishing - 1 teaspoon smoked paprika - 1 teaspoon red pepper flakes - ½ cup cherry tomatoes, halved - 1 tablespoon lemon juice You can add these items to enhance the flavor. The smoked paprika gives a deeper taste. Red pepper flakes will bring heat. Cherry tomatoes add freshness. Lemon juice brightens the dish. - Large pot for boiling pasta - Large skillet for sautéing - Colander for draining pasta - Mixing bowl for chicken - Wooden spoon for stirring - Measuring cups and spoons Having the right tools makes cooking easier. Use a large skillet for even cooking. A colander helps drain pasta quickly. Keep your measuring tools handy for accuracy. {{ingredient_image_2}} Start by filling a large pot with water. Add salt to the water to enhance flavor. Bring the water to a rolling boil. Once boiling, add the fettuccine pasta. Cook it according to the package directions, usually about 8-10 minutes. Check for al dente texture. Drain the pasta in a colander and set it aside. Reserve a cup of pasta water if you want to adjust sauce thickness later. Take two boneless, skinless chicken breasts and slice them thinly. Place the chicken slices in a mixing bowl. Sprinkle Cajun seasoning over the chicken. Make sure each piece is well coated to get the best flavor. You can adjust the amount of seasoning to your taste. In a large skillet, heat one tablespoon of olive oil over medium heat. When the oil is hot, add the seasoned chicken slices. Cook them for about 5-7 minutes. Turn the chicken slices occasionally until they turn golden brown and are cooked through. Once done, transfer the chicken to a plate and set it aside. Using the same skillet, reduce the heat to medium-low. Add one finely chopped onion and one diced bell pepper. Sauté these vegetables for about 3-4 minutes until they soften. Add three minced garlic cloves and cook for another minute. Stir until the garlic becomes fragrant but does not burn. Pour one cup of chicken broth into the skillet. Bring the mixture to a gentle simmer. Then, add one cup of heavy cream. Let it bubble softly for 2-3 minutes. This will help thicken the sauce. Gradually stir in one cup of freshly grated Parmesan cheese. Keep stirring until the cheese melts completely. The sauce should now be rich and creamy. Now, return the cooked chicken to the skillet. Add the cooked fettuccine as well. Gently toss everything together to coat the pasta and chicken in the creamy Cajun sauce. If the sauce seems too thick, add some of the reserved pasta water. Taste the dish and season with salt, black pepper, or more Cajun seasoning if needed. To make a rich, creamy sauce, start with heavy cream. It gives the sauce a nice thickness. When you add the chicken broth, let it simmer gently. This helps blend the flavors well. Stir in the Parmesan cheese slowly. This keeps the cheese from clumping. If the sauce is too thick, add some pasta water. It helps make a silky finish. For juicy chicken, slice it thinly. This helps it cook fast and evenly. Sprinkle Cajun seasoning on both sides. Let it sit for a few minutes to soak up the flavor. Use a hot skillet with olive oil. Cook until golden brown, about 5-7 minutes. Always check that the chicken is cooked through. Use a meat thermometer if needed; it should reach 165°F. Want to kick up the flavor? Try adding a pinch of cayenne pepper for heat. Fresh herbs like thyme or basil can add depth. If you love garlic, add more minced garlic while sautéing the veggies. You can also toss in some spinach for color and nutrition. Taste your sauce before serving. Adjust the salt and pepper as needed for the best flavor. Pro Tips Perfect Pasta Texture: Always cook your pasta until al dente, which means it should be firm to the bite. This will prevent it from becoming mushy when mixed with the sauce. Seasoning the Chicken: Don’t be shy with the Cajun seasoning. Marinating the chicken slices for at least 30 minutes can enhance the flavor even more. Adjusting Sauce Consistency: If your sauce is too thick, gradually add some of the reserved pasta water until you reach your desired creaminess without losing flavor. Garnishing for Flavor: Fresh parsley not only adds color but also a fresh flavor to the dish. Consider using other herbs like basil or cilantro for a unique twist! {{image_4}} You can boost the health of your creamy Cajun chicken pasta by adding vegetables. I love using spinach or kale for extra greens. Just toss them in with the sautéed onions and bell peppers. You can also add tomatoes for a burst of flavor. Zucchini works well too. Slice it thin and add it to the skillet. This way, you get added color and nutrients without changing the dish too much. While fettuccine is my go-to, you can use other pasta types. Penne or rigatoni can hold the sauce well. If you prefer whole grain or gluten-free options, those work, too. Just remember to adjust the cooking time based on the pasta type you choose. This way, you can customize your dish to fit your taste and dietary needs. You can swap out chicken for shrimp or tofu if you want variety. Shrimp cooks fast and adds a nice seafood twist. Just sauté it until it turns pink, then follow the same sauce steps. For a vegetarian option, use firm tofu. Cube it and sauté until golden. This keeps all the creamy goodness while fitting different diets. Enjoy experimenting with these protein swaps! Store your leftover creamy Cajun chicken pasta in an airtight container. This keeps it fresh. Make sure to cool the pasta to room temperature before sealing it. It will stay good in the fridge for up to three days. If you want to keep it longer, consider freezing it. To reheat, you can use the microwave or stovetop. If using a microwave, place the pasta in a bowl. Add a splash of water or chicken broth to keep it moist. Heat for 1-2 minutes, stirring halfway. On the stovetop, warm over medium heat in a pan. Stir often and add liquid as needed until heated through. To freeze, portion the pasta into freezer-safe bags or containers. Remove as much air as possible to avoid freezer burn. It will last up to three months. When ready to eat, thaw it overnight in the fridge. Reheat as directed above. This way, you can enjoy your Cajun delight later! Yes, you can make this dish ahead of time. Just follow the recipe and let it cool down. Store it in an airtight container in the fridge. When you’re ready to eat, reheat it on the stove or in the microwave. You may need to add a splash of chicken broth to help it stay creamy. If you want a lighter option, you can use half-and-half or whole milk. For a dairy-free choice, coconut cream works well too. Just remember that these substitutes may change the flavor and texture a bit. To spice things up, add more Cajun seasoning. You can also include diced jalapeños or red pepper flakes. If you like heat, try using hot sauce in the creamy sauce. Adjust it to fit your taste! Yes, you can easily make this dish gluten-free. Just swap the fettuccine for gluten-free pasta. Many brands offer great options that taste good. Always check the labels to ensure they fit your needs. Creamy Cajun Chicken Pasta is simple and tasty. We covered the main ingredients and cooking steps. I shared tips for a great sauce and ways to make it unique. Remember, you can add veggies or try different proteins to mix it up. Storing leftovers is easy, and reheating is quick. This dish is fun to make and delightfully satisfying. Enjoy creating your own version!

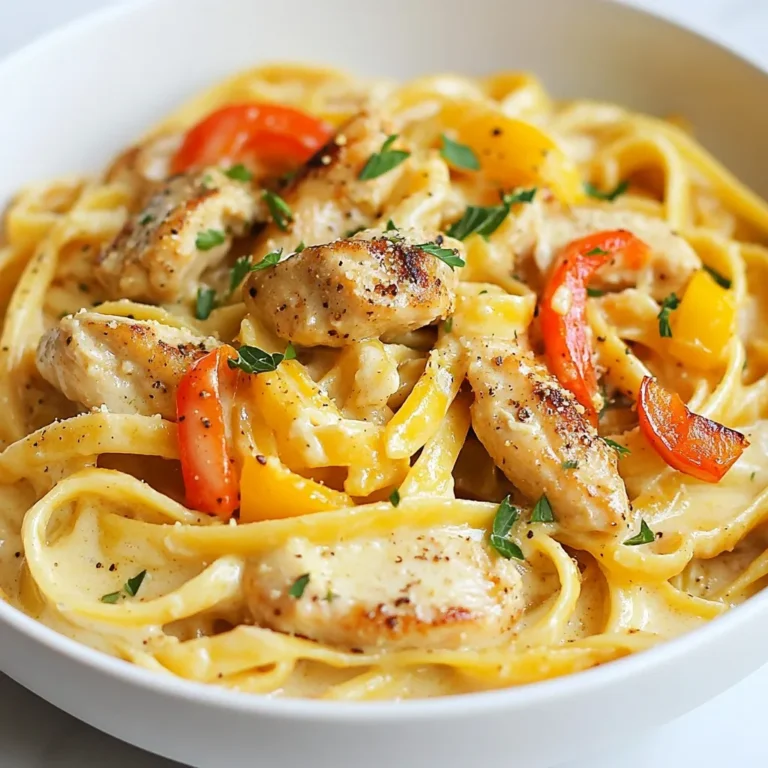
Creamy Cajun Chicken Pasta Flavorful Dinner Delight

To make delicious Peach Pie Overnight Oats, gather these ingredients: - 1 cup rolled oats - 1 cup unsweetened almond milk (or any milk of choice) - 1 ripe peach, diced (plus additional slices for garnish) - 1 tablespoon chia seeds - 1 tablespoon maple syrup (or honey for sweetness) - 1/2 teaspoon ground cinnamon - 1/4 teaspoon pure vanilla extract - A pinch of salt - Optional toppings: granola, chopped nuts, or shredded coconut You can switch several ingredients if needed: - Use coconut milk or oat milk instead of almond milk. - Try agave syrup instead of maple syrup for a different sweet taste. - Swap chia seeds with flaxseeds for added fiber. - Use any seasonal fruit instead of peaches for variety. Oats are full of fiber, which helps keep you full. They also support digestion and heart health. Chia seeds are rich in omega-3s, which boost brain health. Peaches provide vitamins A and C, which are good for your skin. The maple syrup adds natural sweetness while giving you some antioxidants. These ingredients work together to create a healthy start to your day. {{ingredient_image_2}} To start, gather your ingredients. You need rolled oats, almond milk, chia seeds, maple syrup, ground cinnamon, vanilla extract, and a pinch of salt. In a medium bowl or jar, combine the rolled oats, almond milk, chia seeds, maple syrup, ground cinnamon, and vanilla extract. Mix everything well. It is key to blend all the ingredients for a smooth texture. When mixing, be gentle but thorough. Use a spatula or spoon. This helps avoid lumps. After mixing, fold in the diced peach. Make sure the peach pieces spread evenly throughout the oats. This step is vital for flavor in every bite. Cover your bowl or jar tightly. This keeps the oats fresh while soaking. Place it in the fridge overnight. Aim for at least four hours. This allows the oats to absorb the almond milk and soften. When you wake up, stir the oats again. If they seem too thick, splash in more almond milk. This way, you get a creamy texture. To get creamy overnight oats, use the right milk. Almond milk works well, but feel free to pick your favorite milk. Mixing in the chia seeds is key. They absorb liquid and help thicken the oats. If your oats seem too thick in the morning, just add a splash of milk. Stir it well to get that perfect creaminess. Spices can boost the flavor of your oats. Ground cinnamon adds warmth and sweetness. Vanilla extract gives a lovely aroma. For toppings, think about textures and flavors. Granola adds crunch, while chopped nuts bring a nutty taste. Shredded coconut gives a tropical twist. Fresh peach slices on top also look great and taste amazing. When making overnight oats, prep is important. Use jars for easy storage and serving. Label each jar if you make different flavors. Keep them in the fridge for up to five days. To enjoy later, just grab a jar. If you want to freeze them, leave out the fresh toppings. Thaw in the fridge overnight before eating. Pro Tips Use Fresh Peaches: For the best flavor, choose ripe, juicy peaches that are in season. They will add a natural sweetness and aroma to your oats. Adjust Sweetness: Taste the mixture before refrigerating and adjust the sweetness to your preference. You can add more maple syrup or honey, or even a dash of stevia. Experiment with Milk: Feel free to use any milk of your choice, such as coconut, soy, or oat milk. Each will give a unique flavor profile to the oats. Make it Ahead: This recipe is perfect for meal prep. You can double the batch and store individual servings for a quick, nutritious breakfast during the week. {{image_4}} You can change the fruit in your overnight oats! Try adding berries like blueberries or strawberries. They add a nice pop of color and flavor. You can also mix in banana slices for extra creaminess. If you want a tropical twist, add diced mango or pineapple. The choices are endless, and each fruit brings a unique taste. Want to change things up? Add nut butters like almond or peanut butter. They add richness and protein. You can also use yogurt for creaminess and a tangy taste. Dairy or plant-based yogurt works great. For a sweet touch, try mixing in cocoa powder or a splash of coffee. These options make your oats special and fun. Using seasonal fruits keeps your oats fresh and exciting. In summer, stick with peaches and berries. In fall, use apples and pears with cinnamon. Winter offers citrus fruits like oranges or grapefruits. In spring, you can enjoy strawberries or rhubarb. Adapting your oats to the seasons makes each bowl a new adventure! To keep your peach pie overnight oats fresh, store them in airtight containers. Glass jars work great, as they seal well and let you see your tasty creation. Make sure to fill the jar close to the top to limit air exposure. This helps keep the oats moist and flavorful. You can store your overnight oats in the fridge for up to five days. They get better with time as the flavors blend. Just remember to stir them well before eating. If they seem too thick, add a splash of almond milk to loosen them up. Yes, you can freeze overnight oats! Just prepare them as usual, but leave out any fresh fruit or toppings. Store them in freezer-safe containers. When you're ready to eat, thaw them in the fridge overnight. Then, add your fresh peach slices or toppings before serving. This method gives you a quick breakfast option on busy days! You can use steel-cut oats, but the texture will change. Steel-cut oats take longer to soften. I recommend soaking them overnight for at least 12 hours. This helps them absorb liquid better. They will still taste great, but expect a chewier bite. To make this recipe vegan, simply use almond milk. You can also swap maple syrup for honey. This keeps the dish plant-based. All other ingredients are already vegan-friendly. Enjoy your peach pie overnight oats with a vegan twist! Yes, you can prepare this recipe for meal prep! Make a big batch and store it in jars. These oats will last up to five days in the fridge. Just remember to add fresh peach slices and toppings right before eating. It’s a quick and easy breakfast for busy days! In this post, we explored the world of overnight oats. We covered essential ingredients, substitutes, and health benefits. The step-by-step guide helped you prepare and perfect your oats. Tips on consistency, flavor, and meal prep provided useful insight. We shared delicious variations and important storage practices. Overnight oats are versatile and fun. Use your favorite flavors and ingredients. Enjoy this easy meal that boosts your health!

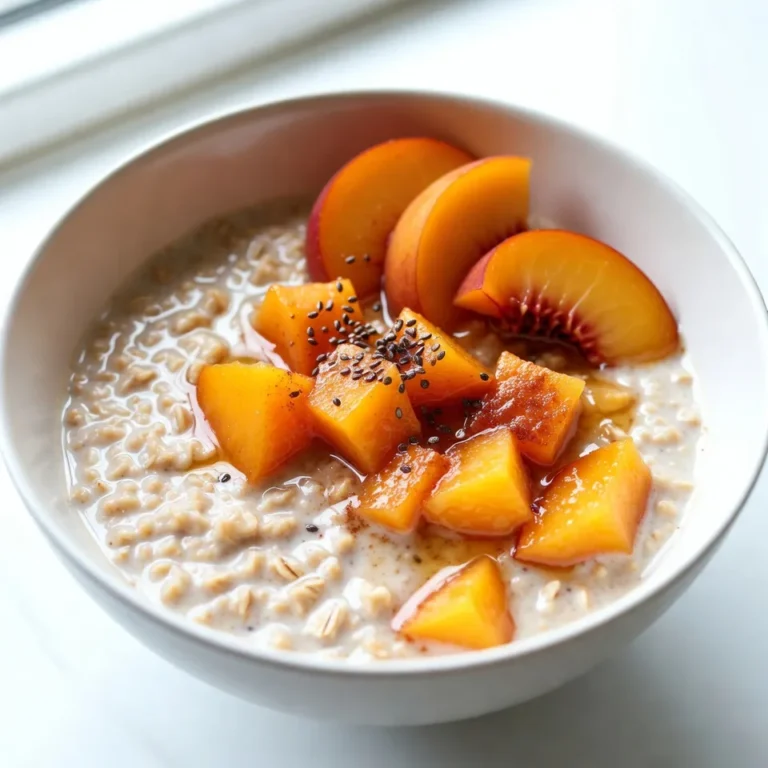
Peach Pie Overnight Oats Easy and Tasty Recipe

- Canned black beans: These beans are a secret star in this recipe. They add fiber and protein, making brownies both healthy and filling. If you don't have black beans, you can use kidney beans or white beans. Just rinse and drain them well. - Unsweetened applesauce and maple syrup: These act as our sweeteners. They are much better than sugar. Applesauce gives moisture and a hint of apple flavor. Maple syrup adds a rich sweetness. You can swap maple syrup with agave nectar if you prefer. - Cocoa powder and almond flour: Cocoa powder is key for that rich chocolate taste. It also brings antioxidants. Almond flour gives a nice texture and a nutty flavor. If you're allergic to nuts, you can use oat flour instead. - Suggestions for nuts, coconut, and extra chocolate chips: You can add chopped nuts like walnuts or pecans. Shredded coconut adds a tropical twist. Extra chocolate chips take the fudginess up a notch. Choose toppings you love! - How toppings can enhance flavor and texture: Adding nuts gives a nice crunch. Coconut adds chewiness. Extra chocolate chips create delightful bursts of chocolate. These toppings make every bite special and fun! {{ingredient_image_2}} First, preheat your oven to 350°F (175°C). This step warms up your oven. It helps the brownies bake evenly. Next, grab an 8x8-inch baking dish. Grease it lightly with coconut oil or non-stick spray. This keeps the brownies from sticking. For the base, add 1 cup of canned black beans to a food processor. Make sure to rinse and drain them first! Blend until you have a smooth and creamy puree. This black bean puree gives the brownies their fudgy texture. Now, add the following ingredients to the black bean puree: - 1/2 cup unsweetened applesauce - 1/4 cup pure maple syrup - 1/4 cup unsweetened cocoa powder - 1/4 cup almond flour - 1 teaspoon pure vanilla extract - 1/2 teaspoon baking soda - 1/4 teaspoon salt Blend again until everything is smooth. This creates a rich brownie batter. Next, take 1/2 cup of dark chocolate chips. Carefully fold them into the batter using a spatula. Make sure the chips are evenly distributed. This way, every bite is full of chocolate goodness. Pour the brownie batter into your prepared baking dish. Use your spatula to spread it out evenly. You can add optional toppings now, like chopped nuts or extra chocolate chips. Bake in the oven for 20-25 minutes. To check if they are done, insert a toothpick into the center. It should come out mostly clean with a few moist crumbs. This assures you get that perfect fudgy texture! To get that rich, fudgy texture, focus on the baking time and temperature. Set your oven to 350°F (175°C). Bake the brownies for 20-25 minutes. Check them with a toothpick. It should come out mostly clean, with a few moist crumbs. If you bake too long, they can get dry. If you want a vegan treat, use dairy-free chocolate chips. These chips melt well and keep the brownies rich. You can also swap out the unsweetened applesauce with another fruit puree, like pumpkin. Just ensure the consistency is similar. Add-ins can take your brownies up a notch. Try 1 teaspoon of cinnamon for warmth or a splash of almond extract for a nutty twist. You can also mix in some chopped nuts or shredded coconut for texture. Each of these options brings new flavors to your fudgy brownies. Pro Tips Use Fresh Ingredients: Ensure all your ingredients, especially the cocoa powder and baking soda, are fresh for the best flavor and texture in your brownies. Blend Thoroughly: When blending the black beans, make sure to achieve a completely smooth consistency to avoid any bean lumps in your brownies. Adjust Sweetness: Depending on your preference, you can adjust the amount of maple syrup to make the brownies sweeter or less sweet without compromising the fudginess. Cool Before Cutting: Allow the brownies to cool completely in the pan before slicing to ensure clean edges and prevent them from falling apart. {{image_4}} If you need a gluten-free option, you can easily swap the almond flour. Use oat flour, coconut flour, or even brown rice flour instead. Each of these flours will give your brownies a great texture. Just remember to check if the flour is certified gluten-free. This ensures your brownies are safe for those with gluten sensitivities. Want to mix things up? You can add mint extract for a fresh twist. Just a teaspoon can bring a burst of flavor. If you love coffee, stir in a bit of espresso powder. This adds rich depth without overpowering the chocolate. You can also try adding a pinch of cinnamon for warmth. Each of these ingredients can take your brownies to the next level. To lower the calories and sugar, consider using stevia or monk fruit sweetener instead of maple syrup. You can also replace half of the dark chocolate chips with unsweetened carob chips. This swap cuts down on sugar while giving a unique taste. If you want to reduce fat, use less coconut oil or omit it altogether. These simple swaps help you enjoy brownies without the guilt. To keep your fudgy brownies fresh, use an airtight container. Line it with parchment paper to avoid sticking. Place the brownies in a single layer, if possible. Store at room temperature for up to three days. If you want them to last longer, refrigerate them. In the fridge, they can stay fresh for up to a week. Freezing brownies is easy and a great way to save some for later. First, let the brownies cool completely. Cut them into squares. Wrap each square tightly in plastic wrap. Then, place the wrapped brownies in a freezer bag or container. They can last up to three months in the freezer. When you’re ready to enjoy them, take out a brownie and let it thaw at room temperature. For a warm treat, pop it in the microwave for a few seconds. Enjoy the fudgy goodness! Yes, black bean brownies are great for gluten-free diets. The main ingredient is black beans, which contain no gluten. Instead of wheat flour, we use almond flour. This flour is also gluten-free. Always check labels to ensure no gluten is present in your other ingredients. These brownies are healthier due to their unique ingredients. Instead of sugar, we use pure maple syrup and unsweetened applesauce. These ingredients add sweetness without refined sugar. Black beans provide fiber and protein, making the brownies filling. Almond flour is rich in healthy fats and low in carbs. This makes our brownies a guilt-free treat! To check if your brownies are done, use a toothpick. Insert it in the center of the brownie. If it comes out mostly clean with a few moist crumbs, they are ready. This means they are fudgy, just how we like them! If the toothpick has wet batter, bake for a few more minutes. These fudgy healthy brownies use black beans for a protein boost. We explored sweeteners like applesauce and maple syrup, making them guilt-free. By choosing cocoa powder and almond flour, you get great taste and texture. Optional toppings can elevate the flavor, adding nuts or extra chocolate. Remember, adjust baking time for that perfect fudgy texture. With vegan and gluten-free options, this recipe fits any diet. Enjoy your brownies fresh or frozen, and get creative with variations! You now have the tools to make delicious, healthy brownies that everyone will love.

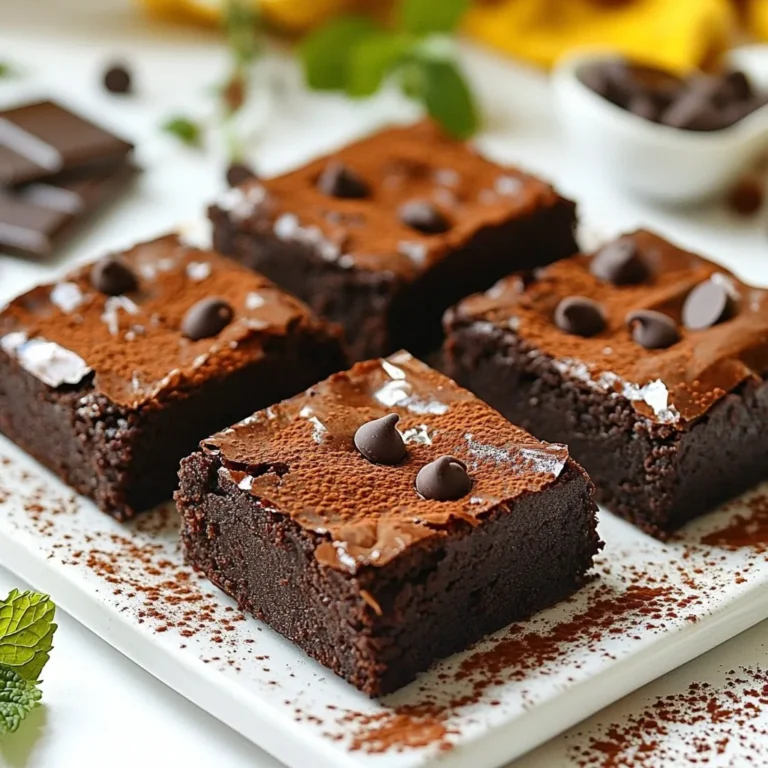
Fudgy Healthy Brownies Irresistible Guilt-Free Treats

The Zesty Black Bean Corn Salad packs a punch of flavor. Here’s what you need: - 1 can (15 oz) black beans, thoroughly rinsed and drained - 1 cup corn kernels (use fresh, or if using frozen, ensure they are fully thawed) - 1 red bell pepper, finely diced - 1/2 medium red onion, finely chopped - 1 jalapeño pepper, deseeded and finely minced - 1/4 cup fresh cilantro, coarsely chopped - 2 tablespoons freshly squeezed lime juice - 2 tablespoons extra virgin olive oil - 1 teaspoon ground cumin - 1 teaspoon chili powder - Salt and freshly ground black pepper to taste - Optional: 1 ripe avocado, diced The black beans give the salad protein, while the corn adds sweetness. The red bell pepper and red onion provide crunch and color. The jalapeño brings heat, so adjust it based on your taste. Fresh cilantro adds a burst of herbaceous flavor. Lime juice and olive oil make a bright dressing, and spices like cumin and chili powder enhance the overall taste. If you like creaminess, add the diced avocado. It makes the salad rich and delicious. Enjoy this fresh and vibrant mix! {{ingredient_image_2}} First, rinse the black beans under cold water in a colander. This step removes excess sodium and helps the beans taste fresh. Next, if you use frozen corn, place it in a bowl to thaw. This makes it sweet and crunchy. While the corn thaws, chop the red bell pepper, red onion, and jalapeño. Make sure the pieces are small for a good mix. In a small bowl, combine lime juice, olive oil, ground cumin, and chili powder. Whisk these together until they blend well. Add salt and black pepper to taste. This dressing brings a bright flavor to the salad. In a large bowl, mix the black beans, corn, diced red bell pepper, chopped red onion, minced jalapeño, and cilantro. Pour the dressing over the top, and gently toss everything together. If you want to add avocado, fold it in carefully to keep it whole. Taste the salad and adjust the seasoning as needed. Cover the bowl and let it chill in the fridge for at least 30 minutes. This helps the flavors blend. - Adjusting spice levels: You can control heat by changing the jalapeño amount. For mild flavor, use half a pepper. For more heat, add the whole pepper or even some hot sauce. Taste as you go to get it just right. - Freshness tips for ingredients: Always use fresh ingredients when possible. Fresh corn brings sweetness and crunch. If using frozen corn, make sure it’s fully thawed to keep the texture nice. Fresh cilantro adds brightness, so don’t skip it. - Presentation tips for appealing visuals: Serve your salad in a colorful bowl. The bright colors of black beans, corn, and peppers create a feast for the eyes. You can also layer the ingredients for a pretty look. - Garnishing ideas: Add lime wedges on the side for a pop of color. A few sprigs of fresh cilantro on top give a nice finish. For extra crunch, sprinkle some crushed tortilla chips just before serving. - Overmixing avocado: If you add avocado, fold it in gently. This keeps it from getting mushy. You want nice chunks for creaminess, not a green paste. - Using canned beans properly: Rinse canned black beans well to remove excess sodium. This step helps the beans blend better with other flavors and makes your salad fresher. Pro Tips Use Fresh Ingredients: For the best flavor, opt for fresh corn and ripe avocados. They add a vibrant taste and texture to your salad. Adjust Spice Level: If you prefer a milder salad, remove the seeds from the jalapeño or use a smaller amount. You can always add more spice later if desired. Chill for Flavor: Allowing the salad to chill for at least 30 minutes helps the flavors to meld, making every bite more delicious. Creative Add-ins: Feel free to customize the salad by adding other ingredients like diced cucumbers, cherry tomatoes, or even a sprinkle of feta cheese for added flair. {{image_4}} You can change the beans in this salad. Try using kidney beans or pinto beans. Each one adds a different flavor. You can also swap in other vegetables. Consider diced zucchini or chopped cucumbers for crunch. If you want a spicy kick, add more jalapeño or try a serrano pepper. For a milder taste, skip the jalapeño altogether. This salad works as a main dish or a side. For a full meal, serve it with grilled chicken or fish. You can also pair it with tacos or burritos. If you prefer a lighter option, serve it alone. The salad is filling and satisfying, perfect for any occasion. Change the salad based on what's in season. In summer, use fresh corn and colorful peppers. In fall, add roasted butternut squash for sweetness. For holidays, add cranberries for a festive touch. These seasonal changes keep the dish exciting and fresh. This salad lasts about 3 to 5 days in the fridge. To keep it fresh, store it in an airtight container. This helps to keep the flavors intact. If you want, you can cover the bowl tightly with plastic wrap. Yes, you can freeze this salad. However, some ingredients may change texture. To freeze, place it in a freezer-safe bag or container. When you're ready, take it out to thaw in the fridge overnight. Serve it cold for the best taste. You can make this salad ahead of time. It tastes even better after the flavors meld. For quick meals, portion it into smaller containers. This way, you can grab a healthy lunch or snack on the go. Zesty Black Bean Corn Salad is a vibrant and colorful dish. It combines black beans, sweet corn, and fresh veggies. The salad packs a flavor punch with lime juice and spices. It is both nutritious and filling. This dish is perfect as a main meal or a side dish. To make this salad vegan, you can focus on the ingredients. All the listed ingredients are already plant-based. Avoid adding cheese or sour cream. Instead, you can add diced avocado for creaminess. This keeps the salad rich and satisfying without animal products. Yes, you can make this salad ahead of time. Prepare it up to 24 hours in advance. Store it in the fridge in a sealed container. This allows the flavors to meld together nicely. Just remember to mix in the avocado right before serving to keep it fresh. There are many great sides to pair with this salad. Here are a few ideas: - Grilled chicken or shrimp for protein - Tortilla chips for crunch - Rice or quinoa to make it more filling - A light soup, like tomato or vegetable soup These sides complement the salad and make a complete meal. This blog post covered the vibrant Zesty Black Bean Corn Salad. We explored the fresh ingredients and easy preparation steps, like rinsing beans and chopping veggies. I shared tips to enhance flavor and avoid common mistakes. You learned about variations, storage, and even meal prep advice. In summary, this salad is flexible and delicious. It’s perfect for any meal and packs a nutritious punch. Enjoy making it your own!

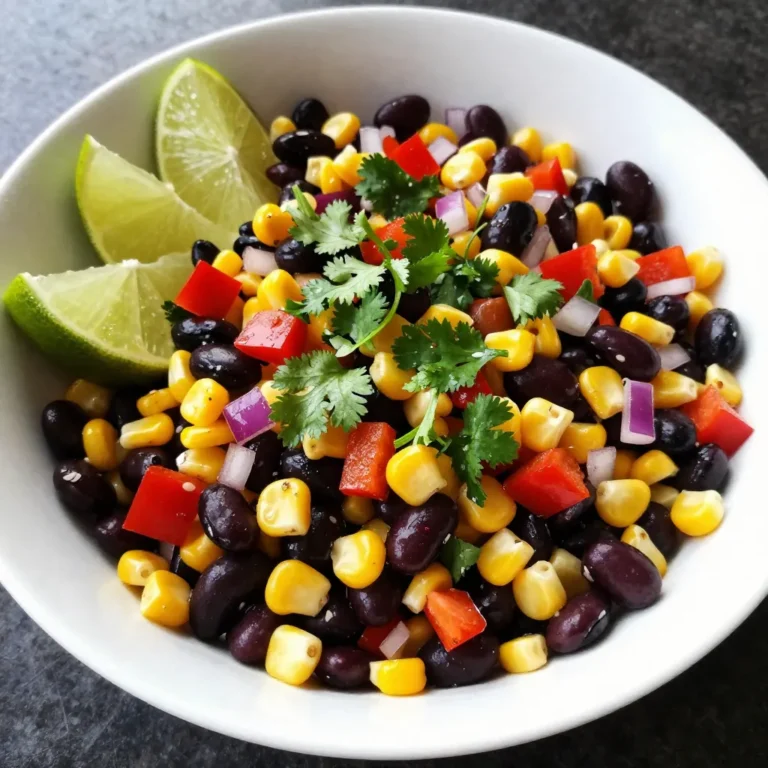
Zesty Black Bean Corn Salad Flavorful and Filling Meal

PREV 1 … 24 25 26 … 47 NEXT
snack joy kitchen

explore

DessertsDinnerAppetizersDrinks

Our Policies

  • Cookie Policy
  • Copyright Policy
  • Disclaimer
  • GDPR Policy
  • Terms Of Use
Back to Top
  • About
  • Contact Us
  • Privacy Policy
© 2026 snack joy kitchen