FREE DINNER EBOOK! Get your copy!
  • Cookie Policy
  • GDPR Policy
  • Disclaimer
  • Terms Of Use
  • Visit my other site: Fun Cookie Recipes
snack joy kitchen
  • Home
  • Dinner
  • Desserts
  • Drinks
  • Appetizers
  • Contact
  • About
  • Privacy Policy
  • Home
  • Dinner
  • Desserts
  • Drinks
  • Appetizers
  • Contact
  • About
  • Privacy Policy
  • Cookie Policy
  • GDPR Policy
  • Disclaimer
  • Terms Of Use
Visit my other site: Fun Cookie Recipes

HOME / CATEGORIES /

Latest

- 1 cup cottage cheese - 6 large eggs - 1/2 cup bell peppers, diced Cottage cheese gives these muffins a creamy texture. It adds protein and pairs well with eggs. For the best taste, I use a mix of red, yellow, and green bell peppers. This mix adds color and a slight sweetness. - 1/2 teaspoon garlic powder - 1/2 teaspoon onion powder - Salt and pepper, to taste Garlic powder and onion powder boost flavor. They make every bite taste amazing. Salt and pepper enhance the dish, so add them to your liking. - 1/2 cup shredded cheddar cheese - Cooking spray or olive oil Cheddar cheese adds creaminess and richness. Use it if you want extra flavor. Greasing your muffin tin with cooking spray or olive oil helps prevent sticking. This step is key for easy muffin removal. {{ingredient_image_2}} First, preheat your oven to 350°F (175°C). This helps the muffins bake evenly. Next, grab your standard muffin tin. Spray it lightly with cooking spray or use a brush to coat it with olive oil. This step is key to stop the muffins from sticking. In a large bowl, whisk together 1 cup of cottage cheese and 6 large eggs. Make sure the mixture is smooth. Then, fold in 1/2 cup of diced bell peppers, 1/4 cup of finely chopped green onions, and 1/2 cup of chopped fresh spinach. These veggies add color and taste. Sprinkle in 1/2 teaspoon of garlic powder, 1/2 teaspoon of onion powder, and salt and pepper to your liking. Stir everything until well mixed. If you want extra creaminess, add 1/2 cup of shredded cheddar cheese and fold it in gently. Using a ladle, pour the mixture into each muffin cup. Fill them about 3/4 full. This allows space for rising. Place the muffin tin in your preheated oven. Bake for 20 to 25 minutes. To check if they are done, insert a toothpick into the center of a muffin. If it comes out clean, they are ready. After baking, take the muffin tin out of the oven. Let the muffins cool for about 5 minutes. Run a knife around the edges to loosen them, then lift them out carefully. Enjoy your fluffy cottage cheese egg muffins! To make your cottage cheese egg muffins light and fluffy, start with good whisking. Use a large bowl and a sturdy whisk. Whisk the eggs and cottage cheese until smooth. This helps incorporate air into the mixture, which adds fluffiness. The ingredient ratio is also key. Using one cup of cottage cheese to six large eggs works great. This ratio keeps the muffins soft without being too dense. Preventing muffins from sticking is easy with the right greasing method. I prefer using cooking spray, but you can also use olive oil. Apply a light coat to each muffin cup. This keeps the muffins intact when you take them out. You might also consider using muffin liners. They help with cleanup and keep the muffins from sticking. Choose parchment paper liners for a non-stick option. Presentation makes a big difference. Arrange your muffins on a colorful platter for an eye-catching look. This makes them more appealing, especially for guests. Garnish your muffins with fresh herbs, like parsley or sliced green onions. A sprinkle adds color and a fresh taste. You can serve them warm or store them in an airtight container for easy grab-and-go breakfasts. Pro Tips Use Fresh Ingredients: Always opt for fresh vegetables and high-quality cottage cheese to enhance the flavor and nutrition of your muffins. Mixing Techniques: Whisk the eggs and cottage cheese thoroughly to ensure a light and airy texture in your muffins. Customize Your Veggies: Feel free to substitute or add your favorite vegetables, like zucchini or mushrooms, to suit your taste preferences. Storage Tips: Store leftover muffins in an airtight container in the refrigerator for up to a week, or freeze them for longer-lasting freshness. {{image_4}} You can change the veggies in these muffins to suit your taste. If you want a different flavor, try substituting bell peppers with zucchini or broccoli. They add a nice crunch and pair well with the cottage cheese. You can also add mushrooms or tomatoes. Sauté the mushrooms first to reduce moisture. For tomatoes, use sun-dried ones for a burst of flavor. Fresh herbs like basil or parsley can boost the taste too. Cheese can change the whole dish. While cheddar is great, you can use feta or mozzarella for a new twist. These cheeses melt differently and add unique flavors. If you want a dairy-free option, try vegan cheese. Look for brands that melt well. Nutritional yeast can also give a cheesy flavor without dairy. Want more protein? You can add cooked bacon or turkey for a hearty bite. Just chop them small and mix them in. If you prefer plant-based options, consider adding black beans or chickpeas. They are high in protein and add a nice texture. You can also use tofu for a soft, creamy feel. These add-ins make the muffins more filling and tasty. To keep your fluffy cottage cheese egg muffins fresh, store them in the fridge. Use an airtight container to prevent them from drying out. Layer the muffins between sheets of parchment paper if you stack them. This keeps them from sticking together. You can freeze the muffins for later use. To do this, let them cool completely. Then place them in a freezer-safe bag. Remove as much air as you can before sealing. When you're ready to eat, reheat them in the microwave or oven. For the microwave, heat for 30-60 seconds. In the oven, bake at 350°F for about 10-15 minutes. These muffins stay fresh in the fridge for up to a week. For best taste, eat them within the first few days. Check for signs of spoilage before eating. If they smell off or look dry, it's best to discard them. Keeping them in a cool place helps maintain their quality. To make these tasty muffins, follow these simple steps: 1. Preheat your oven to 350°F (175°C). 2. Grease a muffin tin using cooking spray or olive oil to stop sticking. 3. Whisk together 1 cup of cottage cheese and 6 large eggs in a bowl until smooth. 4. Fold in 1/2 cup of diced bell peppers, 1/4 cup of chopped green onions, and 1/2 cup of chopped spinach. 5. Add spices like 1/2 teaspoon garlic powder, 1/2 teaspoon onion powder, salt, and pepper. Mix well. 6. Optional: Add 1/2 cup of shredded cheddar cheese for extra creaminess. 7. Pour the mixture into muffin cups, filling them about 3/4 full. 8. Bake for 20-25 minutes until the muffins are set and lightly golden. Use a toothpick to check doneness. 9. Cool for 5 minutes in the pan before removing the muffins. Yes, you can! Some good egg substitutes are: - Flaxseed meal: Mix 1 tablespoon of flaxseed meal with 3 tablespoons of water for each egg. - Chia seeds: Use the same ratio as flaxseed meal. - Silken tofu: Blend 1/4 cup of silken tofu to replace each egg. - Applesauce: Use 1/4 cup of applesauce for each egg. These options can make your muffins just as fluffy and tasty. Fluffy cottage cheese egg muffins last about 4-5 days in the fridge. To keep them fresh: - Store them in an airtight container. - Make sure they are completely cool before sealing. This way, you can enjoy them throughout the week! Absolutely! Adding spices can make your muffins even better. Here are some ideas: - Paprika: Adds a nice color and mild heat. - Cumin: Gives a warm and earthy flavor. - Dried herbs: Such as oregano, basil, or thyme for extra aroma. - Crushed red pepper: If you like some spice. Feel free to mix and match these spices to find your perfect flavor! This blog post covered how to make tasty cottage cheese egg muffins. We explored main ingredients like cottage cheese and eggs, along with seasonings for flavor. Step-by-step, I showed you how to prepare, mix, and bake these muffins perfectly. I also shared tips for fluffiness and storage options. You can get creative with veggies, cheeses, or proteins. These muffins are quick to make and can fit any taste. Enjoy your cooking, and happy baking!

Fluffy Cottage Cheese Egg Muffins Easy Breakfast Idea

- Butternut squash and sweet potatoes: - 1 medium butternut squash, peeled and cubed - 2 medium sweet potatoes, peeled and cubed - Spices and flavorings needed: - 1 onion, finely chopped - 3 cloves garlic, minced - 2 tablespoons olive oil - 1 teaspoon ground cumin - 1 teaspoon smoked paprika - ½ teaspoon cayenne pepper (adjust for your spice level) - Salt and freshly ground black pepper to taste - Garnishing options and serving suggestions: - 1 can (13.5 oz) coconut milk - Fresh cilantro leaves for garnish - Optional: lime wedges for a zesty serving twist This soup packs a lot of flavor. The butternut squash and sweet potatoes bring a creamy texture. The spices add warmth and depth. You can adjust the cayenne pepper to fit your taste. I love the bright touch of cilantro on top. Adding a lime wedge gives it a fresh kick. When you serve it, consider pairing it with crusty bread. It makes a great meal even better. {{ingredient_image_2}} 1. Start by heating 2 tablespoons of olive oil in a large pot over medium heat. 2. Add the chopped onion and sauté for about 5 minutes. The onion should be soft and clear. 3. Next, stir in 3 cloves of minced garlic. Sauté for one more minute until the garlic smells good. 4. Now, it’s time for the fun part! Add the cubed butternut squash and sweet potatoes. Mix them with the onion and garlic. 5. Sprinkle in 1 teaspoon of ground cumin, 1 teaspoon of smoked paprika, and ½ teaspoon of cayenne pepper. Stir well to coat all the veggies with spices. 1. Pour in 4 cups of vegetable broth. Give it a good stir and bring the mix to a boil. 2. Once it bubbles, lower the heat to a gentle simmer. Cover the pot and cook for 20 to 25 minutes. The squash and sweet potatoes should be soft when you poke them with a fork. 3. After they are tender, use an immersion blender to puree the soup. If you don’t have one, carefully transfer it in batches to a regular blender. 1. After blending, stir in the rich coconut milk. Season the soup with salt and freshly ground black pepper to taste. 2. Warm the soup over low heat, stirring often until it is heated through. 3. Serve the soup hot in bowls. Garnish with fresh cilantro leaves. For a zesty twist, add a lime wedge on the side. 4. For a fancy touch, drizzle a bit of coconut milk on top of each bowl and sprinkle more cilantro. Enjoy with crusty bread! To get the best flavor in your soup, adjust the cayenne pepper. Start with a small amount, like ½ teaspoon. Taste the soup as you cook. If you like more heat, add a bit more cayenne. This way, you control the spice. Seasoning during cooking is key. Add salt and pepper at each step. This helps layer the flavors. Taste often to make sure it’s just right. A well-seasoned soup will bring out the best in the butternut squash and sweet potatoes. You need a few key tools for this recipe. A large pot is essential for cooking the soup. A wooden spoon is great for stirring the veggies and spices. For the smoothest soup, an immersion blender is best. It lets you blend right in the pot. If you don’t have one, use a regular blender. Just be careful to blend in small batches to avoid spills. You can replace coconut milk if you want a different flavor. Almond milk or cashew cream are good options. They add creaminess but change the taste a bit. You can also mix in other veggies. Carrots or parsnips work well. They add sweetness and depth. You can even try adding a few greens like spinach for extra nutrition. Just add them in during the last few minutes of cooking. Pro Tips Adjust the Spice Level: If you prefer a milder soup, reduce the cayenne pepper or omit it entirely. You can always add hot sauce at the table for those who enjoy extra heat. Use Fresh Herbs: Fresh cilantro adds vibrant flavor, but you can also experiment with other herbs like parsley or basil for a different twist. Store and Reheat Carefully: Store leftovers in an airtight container in the fridge for up to 5 days. Reheat gently on the stove over low heat to maintain the creamy texture. Garnish Creatively: Besides cilantro, consider topping the soup with roasted pumpkin seeds or a swirl of chili oil for added flavor and visual appeal. {{image_4}} You can make this soup healthier by changing a few things. Here are some ideas: - Use less oil: Cut the olive oil to one tablespoon. This helps lower the calories. - Add greens: Toss in some fresh spinach or kale while cooking. It boosts the nutrients without changing the taste much. These small changes keep the soup tasty and healthy, making it great for everyone. Want to mix things up? Here are some fun flavor twists: - Different spices: Try adding fresh ginger or turmeric. This gives the soup a warm, spicy kick. - Add protein: You can mix in cooked beans or diced chicken. This makes the soup heartier and adds more protein. These ideas help you create a soup that fits your mood and taste. Enjoy experimenting! To keep your Spicy Butternut Sweet Potato Soup fresh, follow these steps: - Refrigerating: Allow the soup to cool completely. Pour it into an airtight container. Store it in the fridge for up to 4 days. - Freezing: If you want to save it longer, freeze the soup. Use a freezer-safe container or zip-top bag. Make sure to leave space for expansion. It can last up to 3 months in the freezer. When it's time to enjoy your soup again, here’s how to reheat it properly: - Best Methods: For the best results, reheat the soup on the stove. Pour it into a pot over medium heat. Stir often until it’s hot throughout. - Microwave Option: You can also use a microwave. Place the soup in a microwave-safe bowl. Heat it in short bursts, stirring in between. - Avoiding Texture Changes: To keep the soup creamy, reheat gently. If it thickens, add a splash of broth or water. Stir well before serving. Can I use frozen butternut squash? Yes, you can use frozen butternut squash. Just thaw it first. This saves time and still gives you great flavor. How can I make the soup vegan? To make this soup vegan, use vegetable broth and coconut milk. Both ingredients are plant-based. This keeps the soup rich and creamy without any animal products. What goes well with Spicy Butternut Sweet Potato Soup? This soup pairs well with crusty bread. You can also serve it with a fresh salad. The bread soaks up the soup nicely, making each bite delicious. Ideal sides for a complete meal For a complete meal, try adding a simple green salad. A side of roasted veggies also works great. You can even add a scoop of quinoa for extra protein. Overview of calories and nutritional benefits One serving has around 250 calories. It is full of vitamins A and C from the squash and sweet potatoes. Coconut milk adds healthy fats, making it a nourishing choice. Health considerations for the ingredients used This soup is high in fiber, which aids digestion. It is also gluten-free, making it friendly for many diets. The spices can boost your metabolism and add flavor without extra calories. This blog post has guided you through making a delicious Spicy Butternut Sweet Potato Soup. You learned about key ingredients, flavors, and tips for cooking and serving. I shared ideas for healthy versions and how to store leftovers. This soup is not just tasty; it’s easy to make and perfect for any meal. Enjoy your cooking and the comfort of this warm dish. Dive into this recipe, and let each spoonful bring you joy!

Spicy Butternut Sweet Potato Soup Comforting Recipe

- 1.5 lbs boneless, skinless chicken thighs, cut into bite-sized pieces - 1/4 cup low-sodium soy sauce - 2 tablespoons rice vinegar For this dish, I always choose boneless, skinless chicken thighs. They stay juicy and tender, making each bite delightful. Low-sodium soy sauce is a must. It gives flavor without too much salt. Rice vinegar adds a nice tang. This balance of flavors is key. - 1 tablespoon hoisin sauce - 2 tablespoons sesame oil - 3 cloves garlic, finely minced - 1 inch fresh ginger, grated Hoisin sauce brings a sweet, rich taste. Sesame oil adds a nutty aroma. Fresh garlic and ginger amp up the flavor. Their brightness makes this Kung Pao Chicken pop. I love how these ingredients work together to create depth. - 1 bell pepper (choose red or green), diced - 1 cup broccoli florets - 1/2 cup roasted unsalted peanuts For veggies, I add bell pepper and broccoli. They add color and crunch. The roasted peanuts give your dish that perfect crunch. They also add healthy fats. These add-ins make the meal not only tasty but also nutritious. {{ingredient_image_2}} Whisk together the following sauce ingredients in a large bowl: - 1/4 cup low-sodium soy sauce - 2 tablespoons rice vinegar - 1 tablespoon hoisin sauce - 2 tablespoons sesame oil - 3 cloves garlic, finely minced - 1 inch fresh ginger, grated - 1/4 teaspoon red pepper flakes Mix until you have a smooth sauce. Next, add the chicken pieces to the bowl. Make sure each piece is covered in the marinade. Cover the bowl and let it rest for at least 30 minutes. To get the best flavor, marinate it overnight in the fridge. After marinating, it's time to transfer everything to the crockpot. Pour the chicken and marinade into the pot. Then, add: - 1 diced bell pepper (red or green) - 1 cup broccoli florets - 1/2 cup chopped green onions Stir gently to mix the ingredients well. Secure the lid on the crockpot. Set it to cook on low for 6-7 hours or on high for 3-4 hours. This ensures the chicken becomes tender and tasty. About 30 minutes before you plan to eat, stir in: - 1/2 cup roasted unsalted peanuts This adds a nice crunch. Taste your dish and adjust with salt and pepper if needed. Once done, serve your Kung Pao Chicken over fluffy jasmine rice. Garnish with extra chopped green onions for a fresh touch. Enjoy your meal! Marinating is key to great flavor. Start by mixing your sauce well. Use a bowl and whisk the soy sauce, rice vinegar, hoisin sauce, sesame oil, garlic, ginger, and red pepper flakes together. Make sure it is fully blended. I recommend marinating the chicken for at least 30 minutes. For the best taste, marinate overnight in the fridge. This helps the chicken soak up all those tasty flavors. The longer you marinate, the better it gets! To get tender chicken, cut it into small, bite-sized pieces. This ensures even cooking. When you cook your chicken, use low heat for a long time. This helps keep it juicy and tender. Always check for doneness. Chicken should reach 165°F inside. You can use a meat thermometer for accuracy. If you can’t find one, cut a piece open. The meat should be white with no pink. For sides, serve your Kung Pao Chicken over fluffy jasmine rice. It absorbs the sauce well. You can also add steamed veggies for more color and nutrients. Garnishing adds flair. Use chopped green onions on top for brightness. Fresh cilantro sprigs and lime wedges also work great. They give an extra burst of flavor and make your dish look beautiful! Pro Tips Marinate Longer for More Flavor: For the best taste, let the chicken marinate in the refrigerator overnight. This allows the flavors to penetrate deeply into the meat. Use Fresh Ingredients: Fresh garlic and ginger will enhance the flavor profile significantly compared to dried alternatives. Always opt for the freshest ingredients available. Adjust Spice Levels: If you prefer a milder dish, reduce the amount of red pepper flakes or omit them entirely. You can always add heat later if desired. Garnish for Presentation: A sprinkle of chopped green onions and fresh cilantro adds a pop of color and freshness, elevating both the presentation and flavor of the dish. {{image_4}} You can change the protein in this dish. Use chicken, tofu, or shrimp. Each option brings its own taste. I love using tofu for a meatless meal. For veggies, try snap peas or carrots. They add color and crunch. Feel free to mix in what you have on hand. If you love heat, add more red pepper flakes. Start with a small amount and taste. You can also use chili paste for a different kick. It gives great flavor and spice. If you prefer milder dishes, cut the flakes. Everyone's taste is different, so adjust to your liking. For gluten-free, use tamari instead of soy sauce. It tastes just as good! If you want low-carb options, skip the rice. Serve the chicken with cauliflower rice or greens. These swaps keep the dish tasty while meeting your needs. Always check labels to ensure they fit your diet. Crockpot Kung Pao Chicken stays fresh in the fridge for about 3 to 4 days. Store it in a strong container with a tight lid. Glass or plastic containers work well. Label the container with the date to keep track. You can freeze this dish for up to 3 months. Use freezer-safe bags or containers. Be sure to remove as much air as possible from bags before sealing. To thaw, place it in the fridge overnight. Reheat it in the microwave or on the stove until hot. Leftovers are great for new meals! Use them in fried rice or in wraps. You can also toss them into a salad for a tasty lunch. Mixing in some extra veggies can add freshness and crunch. Yes, you can use frozen chicken! Just be aware that it will take longer to cook. If you use frozen chicken, set your crockpot to high for around 4-5 hours. Make sure the chicken reaches 165°F for safety. This method is great if you forget to thaw your meat. If you don’t have a crockpot, no problem! You can use a large pot or a Dutch oven. Start by heating your pot over medium heat. Add the marinated chicken and other ingredients. Cover the pot and let it simmer for about 30-40 minutes. Stir occasionally to keep everything from sticking. To enhance the authentic flavor, use Sichuan peppercorns. These add a unique, spicy flavor. You can also toss in diced water chestnuts for extra crunch. For a richer taste, use dark soy sauce instead of regular soy sauce. Serve with jasmine rice for a true experience! In this blog post, I covered a simple and tasty crockpot recipe. We explored essential ingredients like chicken thighs, soy sauce, and rice vinegar. I outlined the step-by-step cooking process and offered tips for perfect flavor. You can also try variations with different proteins and veggies. Storing and using leftovers creatively can save you time. Remember, understanding these basics will help you cook delicious meals with ease. Enjoy experimenting in your kitchen!

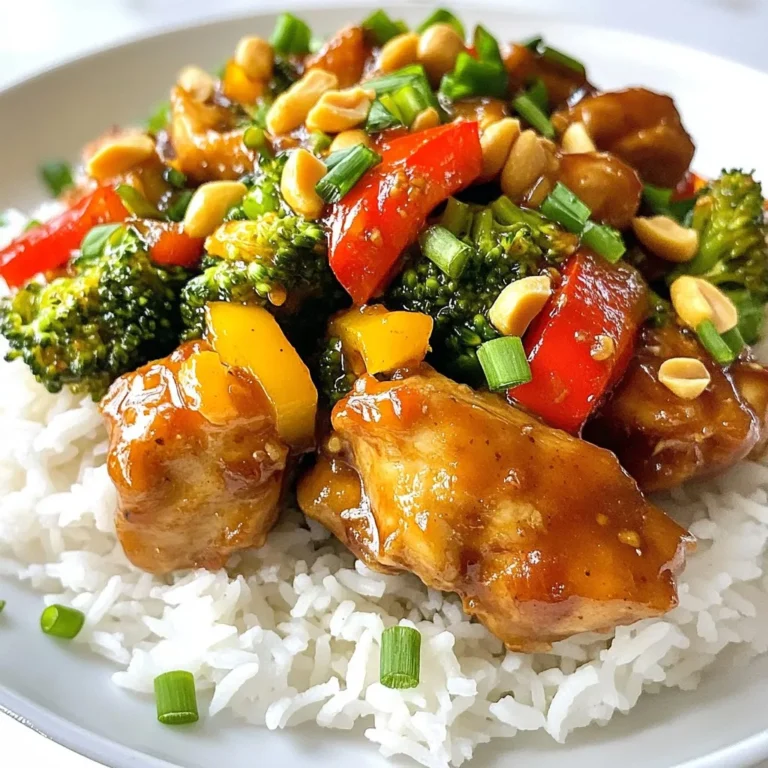
Crockpot Kung Pao Chicken Flavorful and Easy Recipe

For a perfect Lemon Blueberry Yogurt Loaf, gather the following ingredients: - 1 cup all-purpose flour - 1 teaspoon baking powder - 1/2 teaspoon baking soda - 1/4 teaspoon salt - 1/2 cup plain yogurt (Greek or regular) - 1/2 cup granulated sugar - 1/4 cup vegetable oil - 2 large eggs, at room temperature - Zest of 1 lemon (about 1 tablespoon) - 2 tablespoons freshly squeezed lemon juice - 1 cup fresh blueberries (or thawed frozen blueberries) - 1/4 teaspoon vanilla extract If you need to substitute, here are some great options: - You can use almond flour instead of all-purpose flour for a gluten-free option. - Greek yogurt can replace regular yogurt for a thicker texture. - Unsweetened applesauce can work as a substitute for oil. - You can try honey or maple syrup instead of granulated sugar. These swaps can change the flavor or texture of the loaf, so it’s worth experimenting! {{ingredient_image_2}} Start by preheating your oven to 350°F (175°C). Preheating the oven is key. It helps the loaf bake evenly. While the oven warms up, take a 9x5-inch loaf pan. Grease it well with cooking spray or butter. This step makes sure the loaf comes out easily after baking. In a medium bowl, measure 1 cup of all-purpose flour. Add 1 teaspoon of baking powder, 1/2 teaspoon of baking soda, and 1/4 teaspoon of salt. Use a whisk to mix these dry ingredients well. Whisking is important. It helps to break up any lumps and evenly mix the leavening agents. Grab a large mixing bowl. Add 1/2 cup of plain yogurt and 1/2 cup of granulated sugar. Use a whisk to blend them until smooth. Next, pour in 1/4 cup of vegetable oil, add 2 large eggs, the zest of 1 lemon, 2 tablespoons of lemon juice, and 1/4 teaspoon of vanilla extract. Whisk all these wet ingredients together until creamy. This mixture should be smooth and well-combined. Now, take the dry mixture and add it to the wet ingredients. Do this in parts, stirring gently with a spatula. Mix until just combined. Be careful not to overmix. This keeps the loaf light and fluffy. Now, gently fold in 1 cup of fresh blueberries. Use a spatula to ensure they are spread throughout the batter without breaking. Pour the batter into your greased loaf pan. Use a spatula to smooth the top. Bake in your preheated oven for 50-60 minutes. To check if it’s done, insert a toothpick in the center. If it comes out clean or with a few moist crumbs, your loaf is ready. When the loaf bakes, remove it from the oven. Let it cool in the pan for about 10 minutes. Then, carefully transfer the loaf to a wire rack. Allow it to cool completely before slicing. This helps keep the texture just right. To make a perfect Lemon Blueberry Yogurt Loaf, avoid common baking mistakes. First, always measure your flour correctly. Too much flour can make your loaf dry. Use a spoon to scoop flour into your measuring cup, then level it off with a knife. Next, mix dry ingredients well. Whisk the flour, baking powder, baking soda, and salt together. This helps create an even rise. When combining wet and dry mixes, stir gently. Overmixing can lead to a tough loaf. Check your oven temperature. An oven that's too hot can burn the edges. An oven thermometer helps ensure the right heat. Bake until a toothpick comes out clean. This means your loaf is done. For serving, slice the loaf and place the pieces on a nice plate. You can dust them lightly with powdered sugar to add a sweet touch. Garnish with whole blueberries and lemon zest. This makes your loaf look fresh and colorful. Pair your Lemon Blueberry Yogurt Loaf with drinks like tea or lemonade. The tangy flavor complements the loaf's sweetness well. Consider serving it with a dollop of whipped cream or yogurt for extra creaminess. This adds a lovely finish to your dish. Pro Tips Fresh Blueberries: Use fresh blueberries for the best flavor and texture. If using frozen, make sure to thaw and drain them well to prevent excess moisture in the batter. Room Temperature Eggs: Ensure your eggs are at room temperature before mixing them in. This helps create a smooth batter and better incorporation with the other ingredients. Don't Overmix: Mix the batter until just combined. Overmixing can lead to a dense loaf, so be gentle when folding in the dry ingredients and blueberries. Cooling Time: Allow the loaf to cool completely on a wire rack before slicing. This helps set the texture and makes for cleaner, more even slices. {{image_4}} You can easily change the yogurt in this recipe. Try using Greek yogurt for a thicker texture. If you like a creamier loaf, use whole milk yogurt. Low-fat yogurt works too, but it might change the taste slightly. Instead of granulated sugar, use honey or maple syrup. These will add a unique flavor and sweetness. You can also swap the vegetable oil for melted coconut oil or butter for a richer taste. If you want to mix things up, add different fruits. Chopped strawberries or raspberries pair well with lemon. You might also try peaches or cherries for a summer twist. To enhance the flavor, consider adding spices. A pinch of cinnamon or nutmeg can bring warmth. Cardamom can add a lovely floral note. Just remember, a little goes a long way! For a gluten-free loaf, use a gluten-free flour blend. Make sure it has a mix of starches and proteins for the best texture. You can also add a bit of xanthan gum to help with the rise. If you need a vegan option, replace the eggs with flaxseed meal. Mix 1 tablespoon of flaxseed with 3 tablespoons of water. Let it sit for about five minutes to thicken. You can also use a plant-based yogurt for a creamy texture. To keep your Lemon Blueberry Yogurt Loaf fresh, wrap it tightly in plastic wrap. Place it in an airtight container or a zip-top bag. This helps keep the moisture in and prevents it from drying out. Store it at room temperature for short-term use. If you want to keep it longer, move it to the fridge. Just make sure it’s well wrapped. If you want to freeze the loaf, first cool it completely. Then, slice it into individual pieces. Wrap each slice in plastic wrap and place them in a freezer-safe bag. This way, you can take out only what you need. To thaw, simply place a slice in the fridge overnight or leave it at room temperature for a few hours. You can also warm it in the microwave for a quick treat. At room temperature, the loaf lasts about 2 to 3 days. In the fridge, it stays fresh for about a week. If you freeze it, the loaf can last up to 3 months. Just remember to check for any signs of freezer burn before enjoying it. This way, you'll always have a slice of lemon blueberry goodness ready to go! You can use sour cream in place of yogurt. It gives a similar tangy taste. Buttermilk is another good choice. It will add moisture to the loaf. If you want a dairy-free option, try using coconut yogurt. Make sure it is plain and unsweetened for the best results. Yes, you can use frozen blueberries. Just remember to thaw them first. Drain any excess juice to avoid a wet batter. Frozen blueberries may not hold their shape as well in the loaf. However, they still add great flavor and color. Check the loaf after 50 minutes. Insert a toothpick into the center. If it comes out clean with a few crumbs, the loaf is ready. If the toothpick has wet batter, bake for a few more minutes. The top should also be golden brown. Yes, you can double the recipe easily. Just use a larger mixing bowl and pan. A 9x5-inch pan works for one loaf, but use two for the doubled batch. You may need to add a few extra minutes to the baking time. Keep an eye on the loaf as it bakes. In this post, I shared a detailed guide for making a delicious blueberry loaf. We covered ingredients, step-by-step baking instructions, tips for success, and variations. Remember, preheating your oven is key, and proper mixing is crucial for a smooth batter. Try different ingredients to make it your own, and follow my storage tips to keep it fresh. Baking is fun and allows for creativity. Enjoy baking and tasting your blueberry loaf! You’ll impress everyone with your skills.

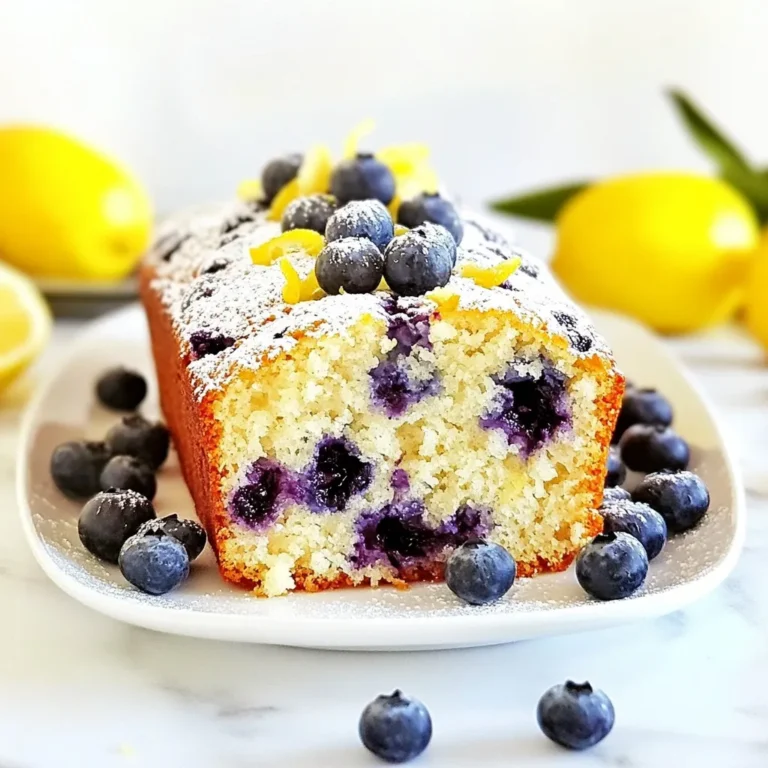
Lemon Blueberry Yogurt Loaf Fresh and Tangy Delight

- 400g spaghetti - 150g pancetta (or guanciale), diced into small pieces - 3 large eggs - 100g Parmesan cheese, finely grated - 2 cloves garlic, minced - 1 tablespoon olive oil - Salt and freshly ground black pepper, to taste - Fresh parsley, finely chopped for garnish You can switch meats in this dish. If you cannot find pancetta or guanciale, bacon works well. Bacon gives a smoky flavor but is not as rich. For cheese, you might try Pecorino Romano. It has a strong flavor and adds creaminess. If you want a dairy-free option, use nutritional yeast mixed with cashew cream for a creamy feel. If you need gluten-free options, look for spaghetti made from brown rice or chickpeas. These alternatives can give you a nice texture without the gluten. {{ingredient_image_2}} To start, bring a large pot of salted water to a rolling boil. Add the spaghetti and cook it for about 8-10 minutes. You want it to be al dente, which means it should be firm but cooked through. Check the package for specific times. When the pasta is ready, reserve one cup of that starchy pasta water. This water helps make the sauce creamy later. Drain the spaghetti, but don’t rinse it. Set it aside while you work on the sauce. In a medium bowl, whisk together three large eggs and 100g of finely grated Parmesan cheese. Add a pinch of salt and a generous amount of black pepper. You want the mixture to be smooth and well combined. This will be your creamy sauce, so mixing well is key. Seasoning is very important; it brings out the flavors in the dish. Grab a large skillet and heat one tablespoon of olive oil over medium heat. Once it shimmers, add 150g of diced pancetta. Cook it for about 5-7 minutes, stirring occasionally. You want it crispy and golden brown. After that, add two minced garlic cloves. Sauté for another minute until the garlic smells great. This step adds a lot of flavor to your dish. Now, let’s combine everything. Lower the heat to a gentle simmer. Carefully add the drained spaghetti to the skillet with the crispy pancetta and garlic. Toss them together until they mix well. Remove the skillet from the heat. This is crucial to keep the eggs from scrambling in the next step. While the spaghetti is still hot, quickly pour the egg and cheese mixture over the pasta. Toss gently to coat the spaghetti evenly. The heat from the pasta will cook the eggs gently, making a silky sauce. If the sauce is too thick, add some of that reserved pasta water a little at a time. Keep mixing until you achieve your preferred creamy consistency. To serve, divide the creamy carbonara among warmed plates. For a nice touch, twirl the pasta into nests using a fork and place them in the center. Sprinkle some extra grated Parmesan cheese on top, along with freshly cracked black pepper. Add a handful of finely chopped parsley for color. This not only looks great but also adds freshness to the dish. Enjoy your delicious carbonara! To get that smooth, creamy texture, use the heat from your pasta. When you mix the egg and cheese with the hot spaghetti, the heat will cook the eggs gently. This is key to avoiding scrambled eggs. If the sauce is too thick, add pasta water bit by bit until it looks perfect. Avoid common mistakes like adding the egg mixture while the pan is still on the heat. This can lead to clumps instead of a creamy sauce. Always turn off the heat before adding the eggs. Fresh herbs can boost the flavor of your carbonara. Parsley is a great choice, but you can also try basil or chives. Just sprinkle them on top before serving. Want to spice it up? Consider adding a pinch of red pepper flakes or a dash of nutmeg. These spices can add warmth and depth to your dish without overpowering it. Using the right tools makes cooking easier. A non-stick skillet is perfect for this recipe. It helps prevent the pancetta from sticking and makes cleanup a breeze. For mixing, a medium bowl and a whisk will work well. A pasta pot and colander are also essential for cooking and draining your spaghetti. Keep these handy for a smooth cooking process. Pro Tips Use Fresh Ingredients: Always opt for the freshest eggs and high-quality cheese to enhance the flavor of your carbonara. Temperature Matters: Make sure the pasta is hot when adding the egg mixture, as this will help create a creamy sauce without scrambling the eggs. Customize Your Meat: While traditional carbonara uses pancetta or guanciale, feel free to experiment with other cured meats like bacon for a different flavor. Don’t Skip the Pasta Water: The reserved pasta water is key to adjusting the sauce’s consistency, making it perfectly creamy without being too thick. {{image_4}} You can make a tasty vegetarian carbonara by using mushrooms or vegetables. Mushrooms, like shiitake or cremini, can add depth and umami. You can also use zucchini, asparagus, or spinach for a fresh taste. To keep it creamy without meat, use a mix of eggs and cheese. The heat from the pasta will create a rich sauce. Adding a bit of vegetable broth can also help boost flavor if you want more moisture. While spaghetti is classic, you can try other pasta shapes like fettuccine or penne. Each type gives a unique texture. Cooking times will vary by shape. For example, fettuccine takes about 10-12 minutes, while penne cooks in about 11-13 minutes. Always check the package for the best guidance. Don't be afraid to add new flavors! Try using different cheeses, such as pecorino or ricotta, for variety. Each cheese brings its own character to the dish. Adding fresh herbs like basil or thyme can brighten the taste. You can also incorporate lemon juice or zest for a zesty twist. This will give your carbonara a refreshing kick that sets it apart! To keep your carbonara fresh, store it in an airtight container. Let it cool first to avoid steaming. Place it in the fridge within two hours. This helps prevent bacteria growth. When you want to reheat, do it gently. Use a skillet over low heat. Add a splash of reserved pasta water to keep it creamy. Stir often to avoid drying out. You can freeze carbonara, but it may change the texture. First, let it cool completely. Use a freezer-safe container or zip-top bag. Remove excess air to prevent freezer burn. To thaw, move it to the fridge for a day. Reheat slowly in a skillet with a bit of water. This helps restore some creaminess. You can store carbonara in the fridge for about 3 days. After that, the flavors may dull. Watch for signs of spoilage, such as an off smell or mold. If it looks or smells strange, throw it away. Trust your senses; they are your best guide. Authentic carbonara gets its creaminess from eggs and cheese. When you mix them with hot pasta, they form a silky sauce. The key is to use fresh eggs and finely grated Parmesan. This ensures a smooth texture. Traditional recipes do not use cream. The heat from the pasta cooks the eggs gently. This method keeps the sauce light and rich. Yes, you can use bacon, but it changes the taste. Bacon is often smoky and salty. Pancetta has a more subtle flavor. It also has a different texture. Pancetta is fattier and gives a nice bite. If you use bacon, you might need to adjust the salt. Yes, reserved pasta water is very important. It helps adjust the sauce's thickness. The starch in the water makes the sauce cling to the pasta. This gives a nice creamy finish. If your sauce feels too thick, add a little pasta water. This will help achieve the right creamy consistency. To make a dairy-free carbonara, use plant-based cheese. You can also use nutritional yeast for a cheesy flavor. For creaminess, try using cashew cream or blended silken tofu. These options create a smooth texture. Enjoy the same rich taste without dairy! In this article, we explored how to make a delicious carbonara. We covered key ingredients, cooking methods, and helpful tips. You can swap ingredients for different flavors or dietary needs. Remember to reserve pasta water for a creamy sauce. The right utensils make the cooking process easier. Whether you prefer a classic or a unique twist, carbonara is a dish worth mastering. Enjoy the journey of cooking, and don't hesitate to experiment!

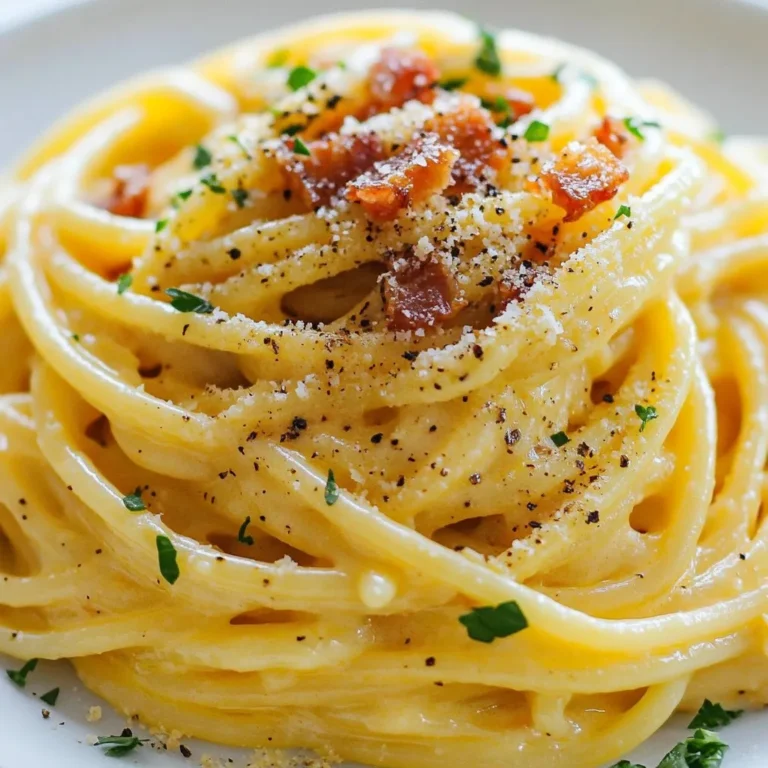
Authentic Creamy Carbonara Rich and Simple Recipe

- 2 cups cheese tortellini - 1 lb boneless, skinless chicken breast - 2 tablespoons Cajun seasoning - 1 medium onion - 1 red bell pepper - 3 cloves garlic - 1 cup heavy cream - 1 cup diced tomatoes - 1 tablespoon olive oil - Salt and pepper to taste This dish starts with three main ingredients. Cheese tortellini brings a soft and cheesy base. Boneless, skinless chicken breast adds protein and heartiness. Cajun seasoning gives a spicy kick. Next, we have vegetables and aromatics. A medium onion adds sweetness and depth. A chopped red bell pepper brings color and crunch. Minced garlic adds a strong flavor that ties it all together. For sauces and seasonings, heavy cream makes the dish rich and smooth. Diced tomatoes add freshness and acidity. Olive oil helps sauté the chicken and veggies. Finally, salt and pepper enhance all the flavors. Together, these ingredients create a tasty and filling meal. You can easily adjust them to your taste. Want more spice? Add more Cajun seasoning. Prefer more creaminess? Use extra heavy cream. Enjoy making this dish your own! {{ingredient_image_2}} First, bring a large pot of salted water to a boil. Once boiling, add 2 cups of cheese tortellini. Cook for 3-5 minutes, or until the tortellini is al dente. Drain the tortellini in a colander and set it aside. This step ensures your pasta has the perfect texture. Next, take 1 pound of boneless, skinless chicken breast and cut it into bite-sized cubes. In a mixing bowl, sprinkle 2 tablespoons of Cajun seasoning over the chicken. Toss the chicken pieces until they are evenly coated. This seasoning adds a spicy kick to your dish. In a large skillet, heat 1 tablespoon of olive oil over medium heat. Once hot, add the seasoned chicken in a single layer. Cook for about 5-7 minutes, turning occasionally, until the chicken is golden brown and cooked through. Remove the chicken from the skillet and set it aside on a plate. This step locks in the flavors and gives the chicken a nice color. Using the same skillet, add 1 medium onion, finely diced, and 1 red bell pepper, chopped. Sauté for 3-4 minutes, stirring often, until the vegetables soften. Then, add 3 cloves of minced garlic and cook for 1 more minute. This adds layers of flavor to the dish. Return the cooked chicken to the skillet with the sautéed vegetables. Pour in 1 cup of diced tomatoes and 1 cup of heavy cream. Stir everything together and let it simmer for 3-4 minutes. This step melds the flavors and creates a creamy sauce. Gently fold the cooked tortellini into the creamy chicken and vegetable mixture. Stir carefully to coat the tortellini well with the sauce. Cook for an additional 2-3 minutes, adjusting salt and freshly cracked black pepper to taste. This ensures every bite is flavorful. Finally, transfer the Cajun chicken tortellini to serving bowls or plates. Garnish with freshly chopped parsley for a bright finish. This final touch adds color and freshness to your meal. Enjoy your delicious creation! To get perfect tortellini texture, cook them in salted water. Bring the water to a boil first. Toss the tortellini in and let them cook for about 3-5 minutes. They should be tender but still firm, or al dente. Drain them well and set aside. For crispy chicken, coat your chicken pieces with Cajun seasoning. Use a hot skillet with olive oil. Spread the chicken in a single layer. This helps it brown nicely on all sides. Cook it for 5-7 minutes, turning it often. The goal is a tasty golden crust. You can add more spices to boost the flavor. Try a pinch of smoked paprika or cayenne for heat. These spices complement the Cajun seasoning well. Using fresh herbs can brighten up the dish. Parsley is a great choice for garnish. It adds color and a fresh taste. You can also use basil or cilantro, depending on your taste. Cajun chicken tortellini pairs well with a fresh salad. A simple green salad with a light vinaigrette works great. You can also serve it with garlic bread for a hearty meal. When plating, aim for a colorful presentation. Use a large bowl for serving. Pile the tortellini high and sprinkle parsley on top. This makes it look appetizing and inviting. Serve in portions of one to one and a half cups for a great meal size. Pro Tips Use Fresh Ingredients: For the best flavor, opt for fresh vegetables and herbs whenever possible. Fresh ingredients elevate the dish and enhance its overall taste. Adjust the Spice Level: If you prefer a milder dish, reduce the amount of Cajun seasoning or use a mild version. Conversely, for a spicier kick, add extra seasoning or a dash of hot sauce. Perfectly Cook Tortellini: Be careful not to overcook the tortellini; they should be al dente. This ensures they maintain their shape and texture when combined with the creamy sauce. Add Protein Variations: Feel free to substitute the chicken with shrimp or sausage for a different flavor profile. Adjust cooking times accordingly to ensure the protein is cooked through. {{image_4}} You can easily make Cajun chicken tortellini vegetarian. Simply swap the chicken for tofu or chickpeas. Tofu will soak up the Cajun seasoning well. Use firm tofu for the best texture. Just press it to remove extra water, then cut it into cubes. If you're using chickpeas, canned ones work great. Rinse and drain them before adding. Both options give a nice protein boost. You can switch up the creamy sauce too. Instead of heavy cream, try half-and-half or coconut cream for a lighter feel. Cream cheese can also add a tangy twist. If you want a cheesy finish, mix in some parmesan or mozzarella. Each option will change the flavor and richness of the dish. Choose what suits your taste best! Adjusting the spice level is simple. To make it milder, use less Cajun seasoning. You can also add a splash of cream to tone it down. If you want more heat, sprinkle in some cayenne pepper or red pepper flakes. Taste as you go, and find your perfect balance of flavors. You can enjoy it just how you like! To store leftovers safely, let the dish cool to room temperature first. Then, transfer it into an airtight container. Keep it in the fridge for up to three days. This helps maintain flavor and prevents spoilage. When you're ready to eat, you can easily reheat it. You can freeze Cajun chicken tortellini for later use. To do this, place the cooled dish in a freezer-safe container. Make sure it is sealed tightly. It can last in the freezer for up to three months. When you want to enjoy it again, let it thaw in the fridge overnight before reheating. For the best reheating, use the stovetop. Place the tortellini in a skillet over medium heat. Add a splash of water or cream to keep it moist. Stir frequently until it is heated through. You can also use the microwave, but be cautious. Heat it in short bursts, stirring often to prevent hot spots. Cajun Chicken Tortellini is a creamy pasta dish. It mixes cheese tortellini with seasoned chicken and vegetables. The dish has roots in Cajun cuisine, known for its bold flavors. Cajun cooking comes from Louisiana and blends French, African, and Spanish influences. This recipe gives a twist to classic tortellini by adding spice and warmth. Yes, you can use frozen tortellini. Frozen tortellini cooks quickly and is easy to use. Just follow the package instructions to boil them. It saves time and still tastes great. Use frozen tortellini to make this dish even easier on busy nights. To make Cajun Chicken Tortellini gluten-free, choose gluten-free tortellini. Many brands offer this option made from rice or corn. Also, check your Cajun seasoning for gluten. Most spices are safe, but it's best to verify. This way, you can enjoy the dish without worry. Yes, you can prepare Cajun Chicken Tortellini ahead of time. Cook the dish and let it cool. Store it in an airtight container in the fridge. It stays fresh for up to three days. Reheat it on the stove or in the microwave. This is a great option for meal prep. Several sides pair well with Cajun Chicken Tortellini. A simple green salad adds freshness. Garlic bread also complements the creamy sauce nicely. For a heartier option, serve it with roasted vegetables. These sides enhance the meal without overpowering the flavors. In this blog post, we explored the delicious recipe for Cajun chicken tortellini. We discussed the main ingredients, like cheese tortellini, chicken, and Cajun seasoning. You learned how to cook everything step by step, from boiling the tortellini to serving your dish. I shared handy tips, variations for dietary needs, and storage advice. Now, you have the knowledge to create this flavorful meal at home. Enjoy your cooking, and don't hesitate to experiment with your own twists!

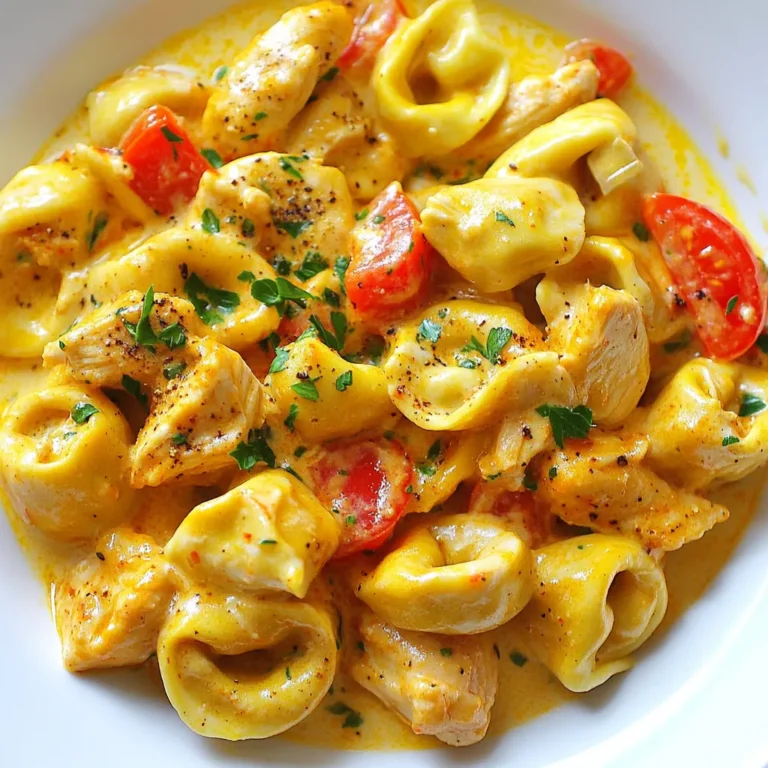
Cajun Chicken Tortellini Flavorful and Easy Dinner

- 4 boneless, skinless chicken thighs - 1 cup teriyaki sauce - 2 cups fresh broccoli florets - 1 large red bell pepper, sliced - 1 medium carrot, sliced thinly - 1 medium red onion, cut into wedges - 2 tablespoons sesame oil - 3 cloves garlic, minced - 1 teaspoon fresh ginger, grated - 1 tablespoon sesame seeds (for garnish) - 2 green onions, finely chopped (for garnish) - Salt and pepper to taste When I make this dish, I love to focus on the main components first. The chicken thighs are the star of the show. They stay juicy and tender. The teriyaki sauce adds a sweet and salty flavor that everyone loves. For a fresh crunch, I always include broccoli florets. They not only taste great but also add color to the plate. Next, I move on to the vegetables. A red bell pepper adds sweetness and bright color. I slice it into strips for easy eating. The thinly sliced carrot not only looks nice but also cooks quickly. I also add red onion, cut into wedges. It caramelizes well and adds a lovely depth of flavor. Seasoning is key for this recipe. The sesame oil gives a nutty flavor that enhances the dish. I use minced garlic and grated ginger for a tasty punch. Don’t forget salt and pepper to balance all the flavors. For garnish, sesame seeds and green onions add a beautiful finish. They make the dish look fancy. Plus, they add a nice texture. With these ingredients, you create a meal that is full of flavor and color. It’s simple yet satisfying, perfect for any night of the week. {{ingredient_image_2}} Set your oven to 400°F (200°C). This helps cook the chicken and veggies evenly. In a big bowl, add the chicken thighs. Pour in the teriyaki sauce, minced garlic, and grated ginger. Mix well to coat the chicken. Let it sit for at least 15 minutes. For a stronger flavor, chill it for up to 2 hours. While the chicken marinates, grab another bowl. Toss in the broccoli, red bell pepper, carrot, and onion. Drizzle with sesame oil. Sprinkle a bit of salt and pepper. Mix them well to coat all the veggies. Take a large baking sheet and line it with parchment paper. Place the marinated chicken thighs in the center. Arrange the veggies around the chicken in a single layer. This helps them roast nicely. Put the sheet pan in the oven. Bake for 25-30 minutes. The chicken should reach 165°F (74°C) when done. The veggies will be tender and slightly caramelized. For extra flavor, brush more teriyaki sauce on the chicken during the last 5 minutes of baking. This adds a nice glaze. Once done, take the pan out of the oven. Let it cool for a couple of minutes. Garnish with sesame seeds and finely chopped green onions. Enjoy your meal! - You can marinate chicken for 15 minutes or up to 2 hours. - Marinating adds rich flavors to the chicken. It helps tenderize the meat, making it juicy and tasty. - Always check the internal temperature of your chicken. It should reach 165°F (74°C). - If your chicken is thicker, cook it a bit longer. This ensures it cooks all the way through. - Serve the chicken and veggies right from the sheet pan for a fun look. - For a fancier touch, plate them on dishes. Add a sprinkle of sesame seeds and green onions for color. Pro Tips Marinate for Maximum Flavor: The longer you marinate the chicken, the more flavorful it will be. Aim for at least 15 minutes, but if you have time, let it sit for 2 hours in the fridge. Cut Veggies Uniformly: To ensure even cooking, cut all vegetables into similar sizes. This will help them roast uniformly and achieve that perfect tenderness. Use Parchment Paper: Lining your sheet pan with parchment paper not only makes cleanup easier but also helps prevent sticking, ensuring that your chicken and veggies come off the pan easily. Check for Doneness: Always use a meat thermometer to check the internal temperature of the chicken. It should reach 165°F (74°C) for safe consumption, ensuring it's juicy and properly cooked. {{image_4}} You can use many vegetables in this dish. Try snap peas, zucchini, or carrots for a twist. Seasonal veggies add freshness. In spring, use asparagus or baby bok choy. In the fall, replace with sweet potatoes or Brussels sprouts. These swaps keep your meal vibrant and tasty. While chicken thighs are great, you can also use chicken breasts. They cook faster and are leaner. If you want a plant-based option, try tofu. Press it first to remove extra water. For seafood lovers, shrimp works well too. Cook shrimp just until pink to keep them tender. You can make your teriyaki sauce at home. Mix soy sauce, honey, garlic, and ginger for a simple blend. If you want less sodium, use low-sodium soy sauce. For a kick, add a splash of sriracha or red pepper flakes. Adjust the sauce to fit your taste. You can store leftover sheet pan teriyaki chicken and vegetables in the fridge for up to four days. To keep everything fresh, place the leftovers in an airtight container. This will help preserve the flavors and moisture. If you want to keep the chicken juicy, avoid cutting it into pieces until you're ready to eat. For longer storage, you can freeze this dish. Wrap the chicken and veggies tightly in plastic wrap or aluminum foil. Then, put them in a freezer-safe bag or container. This method prevents freezer burn. When you’re ready to eat, thaw it overnight in the fridge before reheating. To reheat without drying out the chicken, use the oven or a microwave. If using the oven, preheat it to 350°F (175°C) and cover the dish with foil. This keeps the moisture in. If using the microwave, set it to medium power. Heat in short bursts, checking often to avoid overcooking. This way, you keep the flavors and juiciness intact. Yes, you can use frozen vegetables! They save time and are often pre-cut. However, frozen veggies can be softer after cooking. They may release extra water, which can affect the dish's texture. If you choose frozen, add them halfway through cooking. This way, they won’t get too mushy. The chicken is done when it reaches 165°F (74°C). You can check this with a meat thermometer. Look for the juices to run clear, not pink. The chicken should also feel firm to the touch. If it’s still soft, it needs more time. You can serve rice or quinoa for a filling meal. Steamed dumplings also pair well. For a light touch, try a fresh salad with a citrus dressing. These sides balance the savory teriyaki chicken and veggies. Yes, this recipe is great for meal prep! Cook it in advance and store it in airtight containers. It keeps well in the fridge for up to four days. For single servings, divide the chicken and veggies into meal-sized portions. This recipe for Sheet Pan Teriyaki Chicken is easy and delicious. You learned about the key ingredients, like chicken thighs and veggies. I provided step-by-step instructions that ensure successful baking every time. Remember the marination tips for extra flavor and the best storage methods to keep leftovers fresh. You can also customize this meal with different proteins or veggies. Enjoy trying new flavors and options. This dish is great for family meals or meal prep. Happy cooking!

Sheet Pan Teriyaki Chicken and Vegetables Delight

- 8 oz (225g) fettuccine pasta - 2 boneless, skinless chicken breasts - 4 tablespoons unsalted butter - 4 cloves garlic - 1 cup heavy cream - 1/2 cup freshly grated Parmesan cheese - 1/2 teaspoon red pepper flakes - Salt and black pepper - Fresh parsley - Zest of 1 lemon For this garlic butter chicken pasta, you need a few key items. First, you’ll want fettuccine pasta. It holds sauce well and has a nice bite. Next, pick up boneless, skinless chicken breasts. These cook quickly and stay juicy. Butter is essential for that rich, creamy sauce. Use unsalted butter for more control over flavor. Garlic adds that classic taste we all love. Fresh garlic cloves are best, so grab a few. You need heavy cream to make the sauce creamy and smooth. Parmesan cheese gives it a rich, cheesy kick. Feel free to add optional ingredients for more flavor. Red pepper flakes bring heat if you like it spicy. Fresh parsley adds color and freshness. Lemon zest brightens the dish, making it pop. With these ingredients, you’re ready to whip up a delicious meal. {{ingredient_image_2}} To cook fettuccine, start by boiling water in a large pot. Add a pinch of salt to the water. This helps flavor the pasta. Once it boils, add 8 ounces of fettuccine. Cook it until it's al dente, usually around 8-10 minutes. Drain the pasta, but save about 1/2 cup of the pasta water. This water is key for the sauce later. Next, heat a large skillet over medium heat. Melt 2 tablespoons of unsalted butter in the skillet. Once it’s hot and bubbly, add the sliced chicken. Season it with salt and pepper. Cook for about 5-7 minutes, until the chicken turns golden brown. Remove the chicken and place it on a plate. In the same skillet, add the last 2 tablespoons of butter. Let it melt before adding 4 cloves of minced garlic. If you like heat, add 1/2 teaspoon of red pepper flakes. Sauté for one minute. Be careful not to burn the garlic! Then, pour in 1 cup of heavy cream and stir. Let it simmer gently. Whisk in 1/2 cup of freshly grated Parmesan until it melts. If the sauce is thick, add a bit of the reserved pasta water. Now, add the cooked chicken back into the skillet with the sauce. Next, toss in the drained fettuccine. Stir gently to coat everything well. Finally, add the zest of one lemon for a bright flavor. Taste the dish and adjust with salt and pepper if needed. To get the best texture for fettuccine, cook it until al dente. This means it should be firm but not hard. Follow the package instructions closely. Remember to save some pasta water; it helps adjust the sauce later. When it comes to garlic, keep a close eye on it. Garlic burns quickly and can turn bitter. Sauté it just until it smells great, about one minute. Stir it often to avoid burning. For a lovely presentation, serve the garlic butter chicken pasta in individual bowls or plates. Top each serving with extra grated Parmesan. A sprinkle of fresh parsley adds color and freshness. You can also add a lemon wedge on the side. It gives a bright, zesty touch. Adjust the salt and pepper to match your taste. If you like it spicy, add more red pepper flakes. Fresh herbs like basil or thyme can add a nice twist. Try different herbs to find your favorite flavor. Pro Tips Use Fresh Ingredients: Opt for fresh garlic and high-quality Parmesan cheese to enhance the flavor of your dish significantly. Perfect Pasta Cooking: Always cook pasta al dente, as it will continue to cook slightly when tossed with the sauce, preventing it from becoming mushy. Adjust the Creaminess: If the sauce gets too thick, add a splash of the reserved pasta water gradually to achieve your desired consistency without losing flavor. Garnish with Care: A sprinkle of fresh parsley and lemon zest not only adds color but also brightens up the rich flavors of the dish. {{image_4}} You can easily make this dish healthier. Try using whole wheat or gluten-free pasta. These options give you more fiber and nutrients. For the creamy sauce, you can choose low-fat cream. This way, you cut down on calories without giving up flavor. Want to switch things up? Use shrimp or salmon instead of chicken. Both add great taste and cook quickly. If you prefer a vegetarian meal, mushrooms or tofu are excellent choices. They soak up the sauce and give you a hearty bite. Looking to boost the flavor? Add fresh spinach or sun-dried tomatoes. They bring color and taste to your plate. You can also play with different cheese types. Try feta, goat cheese, or even mozzarella for a fun twist. Each will change the dish in a tasty way. To store garlic butter chicken pasta, place it in an airtight container. Make sure it cools down first. You can keep it in the fridge for up to three days. If you want to reheat it, do so on low heat. Add a splash of water or extra cream to keep it creamy. Stir it often to avoid drying out. You can freeze garlic butter chicken pasta for up to three months. Just place it in a freezer-safe container. Make sure to leave some space for expansion. When you are ready to eat it, thaw it in the fridge overnight. To reheat, use a skillet over low heat. Add a bit of water or cream to revive the sauce. Stir until warm and enjoy! Yes, you can prepare garlic butter chicken pasta ahead of time. Cook the pasta and chicken, then store them separately. Keep the sauce in a jar or container. When you're ready to eat, just reheat everything together. This way, the flavors stay fresh. Fettuccine is the star of this dish. Its flat shape holds the sauce well. You can use other types too. Linguine or spaghetti are good alternatives. Just ensure they cook to al dente for the best bite. To make garlic butter chicken pasta dairy-free, swap the heavy cream for coconut cream. Use a dairy-free cheese or leave it out entirely. Replace butter with olive oil or a vegan butter. These changes keep the dish rich and tasty. This dish pairs well with simple sides. A fresh green salad adds crunch. Garlic bread gives a nice touch too. Roasted vegetables are great for color and flavor. Choose sides that balance the richness of the pasta. This article covered how to create garlic butter chicken pasta, from ingredients to storage. We discussed key ingredients like fettuccine and chicken and shared step-by-step instructions for perfecting the dish. You learned about cooking tips, serving ideas, and how to customize flavors. Remember, variations like using different proteins or pasta types can make this dish your own. Enjoy making it today, and share it with friends for a delightful meal everyone will love!

Garlic Butter Chicken Pasta Quick and Tasty Dish

- 12 lasagna noodles - 2 cups ricotta cheese - 3 cups shredded mozzarella cheese - 1 cup grated Parmesan cheese - 4 cups fresh spinach, tightly packed - 1 cup kale, finely chopped - 4 cloves garlic, finely minced - 2 tablespoons extra-virgin olive oil - 1 teaspoon ground nutmeg - Salt and freshly ground black pepper to taste - 3 cups béchamel sauce (store-bought or homemade) Each ingredient plays a key role in the dish. The lasagna noodles serve as the base and hold everything together. Ricotta adds creaminess and a rich texture. Mozzarella melts beautifully and provides a gooey layer of cheesy goodness. Parmesan offers a sharp taste that enhances the overall flavor. Spinach and kale bring vibrant color and nutrients. Garlic adds a fragrant punch, while olive oil enriches the dish. Nutmeg adds warmth, and salt and pepper enhance all flavors. You can customize this lasagna to suit your taste. Try adding extra vegetables like mushrooms, zucchini, or bell peppers for more flavor and nutrition. For protein, consider cooked chicken, turkey, or even shrimp. If you want to mix up the cheeses, try goat cheese or fontina. These variations can change the dish and make it your own. To make this dish, you need a few essential tools. A large pot is great for boiling the noodles. A skillet helps prepare the garlicky greens. You will also need a 9x13-inch baking dish; glass or ceramic works best for even baking. A spatula or spoon is handy for layering the ingredients. Make sure you have measuring cups and spoons for accuracy. These tools will help you create this tasty comfort dish smoothly. {{ingredient_image_2}} 1. Preheat the oven to 375°F (190°C). This step makes sure your lasagna cooks evenly. 2. Boil the noodles: Bring a large pot of salted water to a boil. Cook the lasagna noodles until they are al dente, which usually means about 8-10 minutes. Drain them and lay them flat on a clean kitchen towel. This keeps them from sticking together. 3. Prepare garlicky greens: In a large skillet, heat 2 tablespoons of extra-virgin olive oil over medium heat. Add 4 minced garlic cloves and cook for about 1 minute. Stir the garlic until it smells nice, but don’t let it burn. 4. Add 4 cups of fresh spinach and 1 cup of chopped kale to the skillet. Season with salt and freshly ground black pepper. Cook until the greens are wilted, about 3-4 minutes. Remove from heat and let them cool slightly. 1. Assemble the first layer: Take a 9x13-inch baking dish. Spread a thin layer of béchamel sauce across the bottom. This helps keep the noodles from sticking. 2. Layer the noodles: Place 4 lasagna noodles over the sauce. Lay them slightly overlapping. 3. Add the filling: Spread half of the 2 cups of ricotta cheese over the noodles. Next, add half of the garlicky greens, followed by a layer of 3 cups of shredded mozzarella cheese. 4. Repeat the layering process: Add another layer of 4 noodles. Spread the remaining ricotta cheese, the rest of the garlicky greens, and another layer of mozzarella cheese on top. 5. Finish with noodles: Place a final layer of noodles on top. Pour the remaining béchamel sauce over this layer. Make sure all noodles are well covered. 6. Top it off: Sprinkle the top with 1 cup of grated Parmesan cheese and a dash of nutmeg. This gives a nice flavor and aroma. 1. Cover and bake: Cover the baking dish with aluminum foil to keep the cheese from burning. Bake it in the preheated oven for 25 minutes. 2. Uncover and finish baking: Remove the foil and bake for another 15-20 minutes. The top should be golden and bubbly when done. 3. Check doneness: To know if the lasagna is done, look for a golden top. The cheese should be melted, and the sauce should be bubbling around the edges. To make your white lasagna look stunning, think about presentation. When you serve it, use a sharp knife to cut neat squares. This helps keep the layers intact. Place each piece on a white plate to show off the colors. You can add a sprinkle of freshly chopped parsley on top for a pop of color. A light dusting of extra Parmesan cheese also adds a nice touch. Serving it with a crisp side salad makes the dish feel complete. For added flavor, consider spices like thyme or oregano. These herbs blend well with the creamy béchamel sauce. You can also mix in a pinch of red pepper flakes for some heat. If you want a richer sauce, try adding a bit of grated nutmeg to the béchamel. This will deepen the flavor profile and enhance the overall dish. To keep your lasagna moist, cover it with foil for the first part of baking. This prevents it from drying out. Remove the foil towards the end to allow the top to become golden and bubbly. If you have leftovers, reheating can be tricky. Place the lasagna in a baking dish and cover it with foil. Heat it at a low temperature, around 325°F. This will help retain the creamy texture and prevent it from becoming dry. Pro Tips Use Fresh Ingredients: For the best flavor and texture, opt for fresh spinach and kale instead of frozen. Fresh greens will provide a vibrant taste and a lovely bite to your lasagna. Make Your Own Béchamel: While store-bought béchamel is convenient, homemade béchamel sauce is richer and more flavorful. It’s worth the extra effort for a truly luscious lasagna. Let It Rest: After baking, allow your lasagna to rest for at least 10 minutes before slicing. This will help the layers set and make serving much easier. Experiment with Cheeses: Feel free to mix in different types of cheese, such as fontina or goat cheese, for added depth of flavor. Just ensure to maintain a balance to prevent overpowering the dish. {{image_4}} You can replace cheese with different options. Try using cashew cheese for a nutty taste. You might also enjoy using a mix of vegan cream cheese and nutritional yeast. For greens, consider using Swiss chard or collard greens. Both add great flavor and texture, making your dish even more colorful. For gluten-free noodles, look for rice or corn-based options. They work well and still hold together nicely. When making béchamel sauce, use gluten-free flour like almond or coconut flour. This swap keeps the sauce creamy without gluten. Adding protein can make your lasagna heartier. Ground turkey or chicken works great. You can also add shrimp or crab meat for a seafood twist. Balance flavors by using herbs like basil or oregano. They will enhance the taste without overwhelming your dish. To store leftover lasagna, let it cool first. Then, cut it into portions. Place each piece in an airtight container. You can also wrap it tightly in plastic wrap or aluminum foil. This helps keep it fresh and prevents drying out. Make sure to store it in the fridge within two hours of baking. It will stay good for about 3 to 5 days. To freeze lasagna, first, let it cool completely. Then, cut it into portions. Wrap each piece in plastic wrap or aluminum foil. After that, place the wrapped pieces in a freezer-safe bag or container. This keeps them fresh for up to three months. When you are ready to eat, take a piece out. Thaw it in the fridge overnight. Then, reheat it in the oven at 350°F (175°C) until hot, about 20-30 minutes. In the fridge, your white lasagna will last about 3 to 5 days. In the freezer, it can stay good for up to three months. Signs of spoilage include a sour smell, mold, or a change in color. If you see any of these signs, it’s best to throw it away. Yes, you can make this lasagna ahead of time. Prepare it fully, then cover and refrigerate for up to two days. This helps the flavors blend. Just remember to bake it longer if it is cold from the fridge. Yes, you can use a few alternatives for béchamel. For a quick option, try using cream cheese mixed with a little milk. You can also use store-bought Alfredo sauce or even a simple white sauce made with butter and flour. To reheat lasagna, preheat your oven to 350°F (175°C). Cover the dish with foil to keep it moist. Bake for about 20 minutes or until hot throughout. You can also reheat individual portions in the microwave for a quicker option. Just add a few drops of water to keep it from drying out. This blog post covered how to make a great lasagna. We discussed key ingredients and how each one adds flavor. I shared optional extras and helpful tools for cooking. You also learned step-by-step instructions for preparation, layering, and baking. There are many tips to enhance taste and presentation. We explored variations like vegetarian and gluten-free options. Finally, I provided storage tips to keep your lasagna fresh. With this guide, you can create a delicious lasagna that everyone will enjoy. Get cooking and enjoy every bite!

White Lasagna with Garlicky Greens Tasty Comfort Dish

To make delicious strawberry shortcake cookies, you need the following items: - 1 cup all-purpose flour - ½ cup almond flour - 1 teaspoon baking powder - ¼ teaspoon baking soda - ¼ teaspoon salt - ½ cup unsalted butter, softened - ⅓ cup granulated sugar - 1 large egg - 1 teaspoon vanilla extract - 1 cup fresh strawberries, hulled and diced - ¼ cup powdered sugar (for dusting) These ingredients come together to create a soft and sweet cookie with juicy strawberries. You can swap some ingredients if needed: - Use whole wheat flour instead of all-purpose flour for a nuttier taste. - Coconut flour can replace almond flour for a gluten-free option. - If you don’t have unsalted butter, use salted butter. Just reduce the added salt. - Maple syrup can replace granulated sugar for a natural sweetener. - If you can’t find fresh strawberries, use frozen strawberries, but thaw and drain them first. These swaps will still give you a tasty cookie. Adding a few toppings can make your cookies even better: - Dust with more powdered sugar for a sweet touch. - Serve with whipped cream for a creamy contrast. - Add a sprinkle of crushed nuts for crunch. - Garnish with fresh whole strawberries for color. These options let you make your cookies stand out on any dessert table. {{ingredient_image_2}} Start by preheating your oven to 350°F (175°C). This step ensures your cookies bake evenly. While it heats up, line a baking sheet with parchment paper. This makes cleanup easy. In a medium bowl, combine the all-purpose flour, almond flour, baking powder, baking soda, and salt. Use a whisk to mix them well. Set this mixture aside for later. In a large bowl, place the softened unsalted butter and granulated sugar. Use an electric mixer on medium speed to cream them together. Beat until the mix is light and fluffy, about 3 to 4 minutes. Once your butter and sugar are fluffy, add the large egg and vanilla extract. Mix until these ingredients are fully combined and smooth. This adds richness to your cookies. Now it’s time for the strawberries! Gently fold the diced strawberries into the cookie dough using a spatula. Be careful not to crush them; you want nice chunks of fruit in each cookie. Use a tablespoon to scoop dough onto your prepared baking sheet. Space the scoops about 2 inches apart. Bake in the preheated oven for 10 to 12 minutes. The edges should be lightly golden. After baking, let the cookies cool on the sheet for about 5 minutes. Then, transfer them to a wire rack to cool completely. Dust with powdered sugar before serving for that perfect finish! To get the best cookie texture, follow a few key steps. First, use both all-purpose and almond flour. This mix gives a nice chew and flavor. Measure your flour accurately by spooning it into the cup and leveling it off. Overpacking can make cookies dry. Next, cream the butter and sugar until light and fluffy. This step adds air and makes the cookies soft. When adding the dry mix, stir gently. Overmixing can lead to tough cookies. Lastly, keep an eye on the baking time. Bake until the edges are light golden. This will give you a perfect balance of chewy and crispy. To keep your cookies fresh, store them in an airtight container. This will trap moisture and keep them soft. You can also add a slice of bread to the container. The bread helps maintain moisture levels. If you want to store them longer, freeze the cookies. Wrap each cookie in plastic wrap and place them in a freezer-safe bag. They last well for up to three months. Just thaw them at room temperature before enjoying. Avoid these common mistakes for the best results. First, don’t skip the softening of butter. Cold butter won’t blend well and can lead to dense cookies. Also, measure your ingredients carefully. Too much flour or sugar can ruin the texture. Another mistake is not letting the cookies cool properly. If you move them too soon, they can break apart. Always let them sit for a few minutes on the baking sheet before transferring to a wire rack. This helps them firm up and makes them easier to handle. Pro Tips Use Fresh Strawberries: Always opt for fresh, ripe strawberries for the best flavor and texture in your cookies. Frozen strawberries can make the dough soggy. Don’t Overmix: When combining the dry and wet ingredients, mix just until combined to ensure your cookies remain tender and chewy. Chill the Dough: If you have time, chill the cookie dough for 30 minutes before baking. This helps the cookies hold their shape better while baking. Experiment with Flours: For a unique twist, try substituting some of the all-purpose flour with whole wheat flour or coconut flour for added flavor and nutrition. {{image_4}} You can change the fruit in your cookies. Try blueberries, raspberries, or peaches. Each fruit brings its own fun taste. Mix in about one cup of your choice. Chop larger fruits into small pieces. This keeps the cookies soft and chewy. You can make these cookies gluten-free! Replace regular flour with a gluten-free blend. Use a one-to-one blend for best results. Almond flour adds a nice nutty flavor and texture. Always check labels for gluten-free safety. These cookies will still taste amazing! Get creative with flavors! Add lemon zest for a fresh twist. A bit of almond extract brings a warm, nutty taste. You can also mix in a pinch of cinnamon for warmth. Want more fun? Try mini chocolate chips with strawberries. The options are endless; let your taste buds guide you! To keep your strawberry shortcake cookies fresh, store them in an airtight container. This helps lock in moisture and flavor. Place parchment paper between layers to prevent sticking. Store the cookies at room temperature, away from heat and sunlight. When stored properly, these cookies last about 4 to 5 days. If you notice any changes in texture or smell, it's best to discard them. Always check for freshness before serving. Freezing is a great way to extend the life of your cookies. To freeze, let the cookies cool completely. Then, place them in a single layer on a baking sheet. Freeze for about an hour until firm. Once frozen, transfer them to a freezer-safe bag or container. They can last up to 3 months in the freezer. When ready to eat, thaw them at room temperature or warm them in the oven for a few minutes. Yes, you can use frozen strawberries. Just thaw and drain them first. Frozen strawberries can add a nice flavor. However, they may make the dough a bit wet. You might need to adjust the dry ingredients slightly. You know the cookies are done when the edges turn lightly golden. This usually takes about 10 to 12 minutes in a 350°F oven. If you gently press the center, it should feel set. They may look soft but will firm up as they cool. Yes, you can make the dough ahead of time. Cover it tightly and store it in the fridge. It will stay fresh for up to 24 hours. Just scoop and bake when you are ready. This makes a quick dessert easy for any time! Now you’re ready to bake delicious cookies with strawberries. We covered the key ingredients, helpful tips, and creative variations. I shared storage advice to keep your cookies fresh longer. Remember, you can try different fruits and flavors to suit your taste. Baking should be fun and rewarding. Enjoy the process and the tasty results!

Strawberry Shortcake Cookies Delightful and Simple Treat

PREV 1 … 23 24 25 … 47 NEXT
snack joy kitchen

explore

DessertsDinnerAppetizersDrinks

Our Policies

  • Cookie Policy
  • Copyright Policy
  • Disclaimer
  • GDPR Policy
  • Terms Of Use
Back to Top
  • About
  • Contact Us
  • Privacy Policy
© 2026 snack joy kitchen