FREE DINNER EBOOK! Get your copy!
  • Cookie Policy
  • GDPR Policy
  • Disclaimer
  • Terms Of Use
  • Visit my other site: Fun Cookie Recipes
snack joy kitchen
  • Home
  • Dinner
  • Desserts
  • Drinks
  • Appetizers
  • Contact
  • About
  • Privacy Policy
  • Home
  • Dinner
  • Desserts
  • Drinks
  • Appetizers
  • Contact
  • About
  • Privacy Policy
  • Cookie Policy
  • GDPR Policy
  • Disclaimer
  • Terms Of Use
Visit my other site: Fun Cookie Recipes

HOME / CATEGORIES /

Latest

- 2 pounds chicken wings - 1/4 cup extra virgin olive oil - 4 cloves garlic, finely minced - 1/2 cup freshly grated Parmesan cheese - 1 teaspoon garlic powder - 1 teaspoon onion powder - 1 teaspoon dried Italian seasoning - Salt and freshly cracked black pepper, to taste - Fresh parsley, finely chopped (for garnish) To make Baked Garlic Parmesan Wings, you need simple but tasty ingredients. Start with 2 pounds of chicken wings. Look for fresh wings, as they cook better and taste great. Next, grab 1/4 cup of extra virgin olive oil. This oil helps to crisp the skin and adds flavor. You will use 4 cloves of garlic, finely minced. Fresh garlic gives the wings a bold taste. For a cheesy twist, get 1/2 cup of freshly grated Parmesan cheese. This will melt on the wings and form a delicious crust. Add 1 teaspoon of garlic powder and 1 teaspoon of onion powder for more depth in flavor. Include 1 teaspoon of dried Italian seasoning for a hint of herbs. Finally, use salt and freshly cracked black pepper to taste. These help to balance the flavors. Don't forget the fresh parsley for garnish. It adds color and a fresh taste to your wings. Gather these items before you start cooking. This will make your cooking process smooth and fun! Preheat your oven to 400°F (200°C). This step is key for getting crispy wings. While the oven heats, line a large baking sheet with parchment paper. This helps with cleanup and keeps wings from sticking. Next, make the marinade. In a big mixing bowl, pour in 1/4 cup of extra virgin olive oil. Then, add 4 finely minced garlic cloves. Include 1 teaspoon of garlic powder, 1 teaspoon of onion powder, and 1 teaspoon of dried Italian seasoning. Season with salt and freshly cracked black pepper to your taste. Stir everything until it mixes well into a tasty marinade. Now it's time to marinate the wings. Take 2 pounds of chicken wings and place them into the bowl with the marinade. Make sure each wing gets a good coating. Cover the bowl with plastic wrap or a lid. Let the wings sit in the fridge for at least 30 minutes. For even better taste, marinate them for up to 2 hours. This allows the flavors to soak in. After marinating, take the wings out of the fridge. Arrange them in a single layer on the prepared baking sheet. Avoid overcrowding; give them space to crisp up while baking. Put the baking sheet in the preheated oven. Bake the wings for 40-45 minutes. Flip the wings halfway through the bake time. This helps them brown evenly and get crispy. Keep an eye on them; they should turn golden brown and smell amazing. Once they are done, remove the wings from the oven. While they are still hot, sprinkle 1/2 cup of freshly grated Parmesan cheese over them. The heat will melt the cheese, giving a tasty crust. Finally, garnish with fresh parsley for a nice touch. Enjoy this flavorful treat hot! To get wings that are crispy, start by baking them at 400°F (200°C). This is the sweet spot for cooking chicken wings. Bake them for about 40 to 45 minutes. Halfway through, flip the wings. This ensures they brown evenly. Marination is key for great flavor. Coat each wing well in the marinade. Let them sit in the fridge for at least 30 minutes. For richer flavor, let them marinate for 2 hours. You can add more spice to the marinade for a kick. Try adding some red pepper flakes or a dash of hot sauce. This gives the wings a nice heat. For garnish, fresh parsley adds color and flavor. After baking, sprinkle it over the wings. You can also serve the wings with a side of ranch or a light vinaigrette. This makes for a tasty dip and adds to the plate's look. {{image_4}} To make your wings spicy, add cayenne pepper or hot sauce to the marinade. Start with 1 teaspoon of cayenne for a mild kick. Adjust to fit your taste. You can also mix in smoked paprika for a rich flavor. Try adding other spices like chili powder or crushed red pepper. These boost flavor and heat. Mix these spices in with garlic and Parmesan. Using fresh herbs gives a new twist to your wings. Try fresh rosemary or thyme instead of dried herbs. Chop them finely and mix them into the marinade. This adds a bright and fresh taste. You can also swap the Parmesan with other cheeses. Try using Pecorino Romano for a saltier flavor. Goat cheese can add a creamy texture that pairs well with garlic. To keep your baked wings fresh, let them cool first. Place them in an airtight container. If you have more wings than space, stack them in layers. You can use parchment paper between layers to avoid sticking. This method helps keep your wings nice and tasty. Store them in the fridge. They will last for up to 3 days. To reheat your Baked Garlic Parmesan Wings, the oven is best. Preheat it to 375°F (190°C). Place the wings on a baking sheet. Heat them for about 10-15 minutes. This method keeps them crispy. You can also use an air fryer if you want. Just heat at 375°F (190°C) for 5-7 minutes. Always check to ensure they are hot throughout. Enjoy your wings just like fresh! To make wings extra crispy, start with a dry surface. Pat the wings with paper towels to remove moisture. Use a higher oven temperature, around 425°F (220°C). The hot air helps them crisp up. Flip the wings halfway through cooking for even browning. You can also bake them on a wire rack. This allows air to circulate all around. Yes, you can use frozen chicken wings! Just remember to thaw them first. Place the wings in the fridge overnight or use the microwave's defrost setting. Once thawed, follow the marinade steps as usual. Make sure to check that they are fully cooked through before serving. Several sauces go well with these wings. Here are a few favorites: - Ranch dressing - Blue cheese dressing - Honey mustard - Spicy buffalo sauce These sauces add extra flavor and make a great pairing with the garlic and cheese. When cooking larger batches, the timing may change. If you double the wings, keep an eye on them. You might need to add 5 to 10 minutes. Always check that they reach an internal temp of 165°F (74°C). Space them out well on the baking sheet to ensure they cook evenly. Yes, you can grill the wings! Preheat your grill to medium heat. Place the marinated wings on the grill. Cook for about 20-25 minutes, flipping them often. Keep the lid closed to maintain heat. Use a meat thermometer to ensure they are done. Grilled wings will have a smoky flavor and great char. In this post, we covered how to make Baked Garlic Parmesan Wings. You learned about the key ingredients, easy steps to prepare, and tips for crispiness. We also explored flavor variations and storage tips. These wings are perfect for any event or casual night in. Feel confident to try your own spin based on what you like. Enjoy creating a tasty dish that everyone will love.

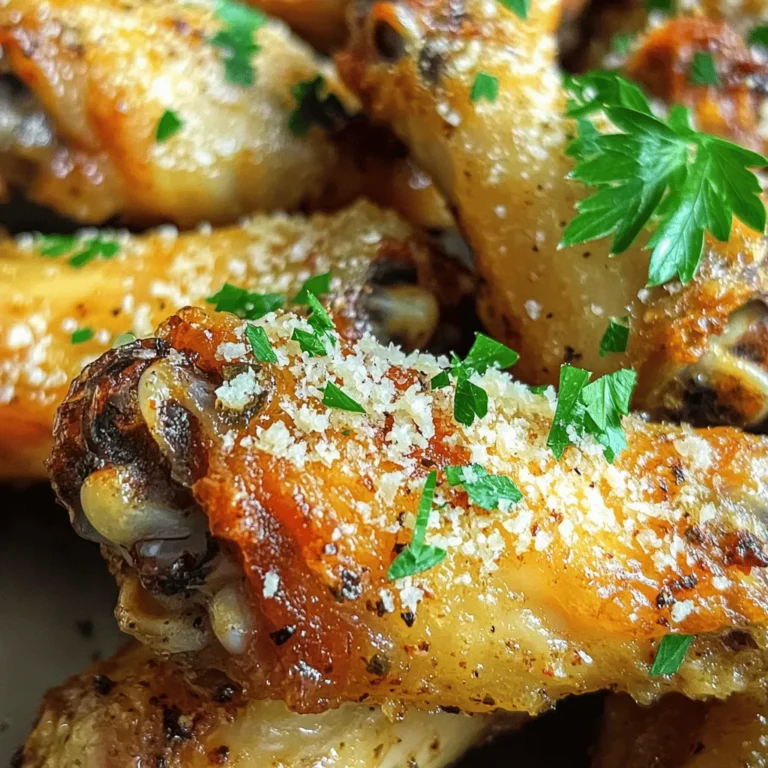
Baked Garlic Parmesan Wings Crispy and Flavorful Treat

- 1 lb large shrimp, peeled and deveined - 8 oz fettuccine pasta - 2 tablespoons extra virgin olive oil - 1 tablespoon Cajun seasoning - 3 cloves garlic, finely minced - 1 cup heavy cream - 1/2 cup freshly grated Parmesan cheese - 1/4 cup chopped green onions (scallions) - Salt and freshly ground black pepper, to taste - Fresh parsley, chopped, for garnish Choosing the best shrimp: Fresh vs. frozen Fresh shrimp taste great and have a firm texture. Look for shrimp with a slight ocean scent. If you use frozen shrimp, thaw them slowly in the fridge overnight. This keeps them juicy. Alternative pasta options for Cajun Shrimp Alfredo Fettuccine is classic, but you can use penne or linguine. Whole wheat or gluten-free pasta works too. Choose what you like best for a tasty meal. Best types of cheese for Alfredo sauce Parmesan cheese is a must for a rich flavor. You can mix in some Pecorino Romano for a salty kick. Avoid pre-grated cheese, as it may not melt well. Grate your cheese fresh for the best sauce. For the complete recipe, check out the Full Recipe section. To make Cajun Shrimp Alfredo, you will cook pasta, season shrimp, and prepare a creamy sauce. This dish combines rich flavors with a touch of spice, making it perfect for any meal. - Step 1: Preparing the pasta Start by filling a large pot with water. Add a generous amount of salt and bring it to a rolling boil. Add the fettuccine and cook it for about 8-10 minutes until it is al dente. Drain the pasta but keep ½ cup of the starchy water. Set the pasta aside in a large bowl. - Step 2: Seasoning the shrimp In a medium bowl, mix the peeled and deveined shrimp with Cajun seasoning. Toss the shrimp well to coat each piece evenly. This step gives the shrimp a bold flavor that pairs well with the creamy sauce. - Step 3: Sautéing the shrimp Heat olive oil in a large skillet over medium heat. Once hot, add the seasoned shrimp in a single layer. Sauté for 2-3 minutes on each side. Cook until the shrimp turn pink and opaque. Once done, remove the shrimp from the skillet and place them on a plate. To make the Alfredo sauce, start by adding minced garlic to the same skillet. Sauté the garlic for about 30 seconds. Stir it often until it smells fragrant, but do not let it brown. Then, pour in the heavy cream while stirring constantly. Let the cream simmer for 2-3 minutes until it thickens slightly. To get the perfect sauce consistency, lower the heat and slowly add grated Parmesan cheese. Stir continuously until the cheese melts completely. If the sauce is too thick, add a splash of the reserved pasta water. This will help you reach your desired thickness. Now you have a rich and creamy sauce ready to combine with shrimp and pasta. For the full recipe, check out the details above. To balance Cajun spices with the creamy sauce, add the seasoning slowly. Start with one tablespoon of Cajun seasoning. You can always add more if you like it spicy. The cream helps mellow out the heat. Taste as you go. This is key to a perfect blend. To tell when shrimp are cooked perfectly, watch for their color. They should turn pink and opaque. This only takes about 2-3 minutes per side. Overcooking shrimp makes them tough and chewy. Remove them from the heat as soon as they are done. One common mistake is overcooking shrimp. This makes them rubbery and less tasty. Always keep an eye on them while they cook. Another issue is sauce clumping. This happens when the heat is too high. To avoid clumps, stir the sauce often and keep it on low heat. If it gets too thick, add a splash of reserved pasta water to loosen it up. For side dishes, I love pairing Cajun Shrimp Alfredo with garlic bread or a fresh salad. The bread is great for soaking up the sauce. A light salad adds a nice crunch. For presentation, serve in a large, white bowl. Top with extra Parmesan cheese and a dash of parsley. This adds color and makes the dish look fancy. You can also place a few shrimp on top for an eye-catching finish. For the full recipe, check out the earlier section. {{image_4}} You can easily swap ingredients in Cajun Shrimp Alfredo for a lighter dish. Instead of heavy cream, try using half-and-half or coconut cream. Both options can cut calories while still providing creaminess. If you want a different flavor, add more spices or herbs. Consider using smoked paprika for a smoky taste or fresh basil for a herby touch. You can also increase the heat by adding more Cajun seasoning or a splash of hot sauce. Making Cajun Shrimp Alfredo ahead of time is simple and smart. Cook the pasta and shrimp separately. You can store them in the fridge for up to three days. When you are ready to eat, just reheat the shrimp and pasta, then mix with the sauce. Freezing is also an option. You can freeze the shrimp and sauce together in a safe container. Just remember to cool them first. The dish can last for up to three months in the freezer. For the best taste, eat it within two months. To keep your Cajun Shrimp Alfredo fresh, follow these tips: - Cool it down: Allow the dish to cool to room temperature before storing. - Use airtight containers: This helps prevent moisture loss and keeps flavors intact. - Label and date: Write the date on the container to track freshness. Cajun Shrimp Alfredo lasts about 3-4 days in the fridge. After that, the shrimp may not taste as good. When reheating, you want the dish to stay creamy. Here’s how: - Stovetop method: Heat the Alfredo in a pan over low heat. Stir it often to warm it evenly. - Microwave method: Place the dish in a microwave-safe bowl. Heat in 30-second bursts, stirring in between. To stop the sauce from separating, add a splash of cream or reserved pasta water while reheating. This will help keep it smooth and creamy. What is Cajun seasoning made of? Cajun seasoning is a mix of spices that adds great flavor. It often includes: - Paprika - Cayenne pepper - Garlic powder - Onion powder - Black pepper - Oregano - Thyme These spices give Cajun dishes their signature kick. You can adjust the mix to match your taste. Can I make Cajun Shrimp Alfredo without cream? Yes, you can make Cajun Shrimp Alfredo without cream. Use alternatives like: - Greek yogurt - Coconut milk - Cashew cream These options can make the dish lighter while still creamy. Experiment to find your favorite substitute! What to do if the sauce is too thick? If your sauce is too thick, add a splash of pasta water. This water helps thin the sauce and keeps it creamy. Stir well and adjust until you reach your desired texture. How to rescue over-seasoned shrimp? If your shrimp are too salty or spicy, try these tips: - Rinse the shrimp quickly under cold water. - Add more cooked pasta to balance the flavors. - Serve with a side of unsalted rice or bread. These tricks help tone down intense flavors while keeping your meal tasty. Caloric breakdown of Cajun Shrimp Alfredo A serving of Cajun Shrimp Alfredo has around 600-700 calories. This includes the shrimp, pasta, cream, and cheese. For a more precise breakdown, check specific brands and ingredients. Tips for making the dish healthier To make Cajun Shrimp Alfredo healthier: - Use whole grain pasta for more fiber. - Swap heavy cream for low-fat milk or yogurt. - Add more veggies like spinach or bell peppers. These changes keep the dish flavorful while making it lighter. This Cajun Shrimp Alfredo is one of my favorite dishes. It’s creamy, spicy, and full of flavor. Here’s how to make it. - 1 lb large shrimp, peeled and deveined - 8 oz fettuccine pasta - 2 tablespoons extra virgin olive oil - 1 tablespoon Cajun seasoning - 3 cloves garlic, finely minced - 1 cup heavy cream - 1/2 cup freshly grated Parmesan cheese - 1/4 cup chopped green onions (scallions) - Salt and freshly ground black pepper, to taste - Fresh parsley, chopped, for garnish 1. Prepare the Pasta: Fill a large pot with water. Add salt and boil. Cook fettuccine as per the package. Drain and save 1/2 cup of the water. Set pasta aside. 2. Season the Shrimp: In a bowl, mix shrimp with Cajun seasoning. Make sure all shrimp are coated. 3. Sauté the Shrimp: Heat olive oil in a skillet. Add shrimp in a single layer. Cook for 2-3 minutes until pink. Remove shrimp and set aside. 4. Create the Sauce: In the same skillet, add minced garlic. Sauté for about 30 seconds. Pour in heavy cream and stir. Let simmer for 2-3 minutes. 5. Incorporate the Cheese: Lower heat and add Parmesan cheese. Stir until melted. If too thick, add some reserved pasta water. 6. Combine Everything: Add fettuccine and sautéed shrimp back to the skillet. Toss well until everything is coated. 7. Final Seasoning and Garnish: Taste and add salt and pepper as needed. Top with green onions and parsley. This dish serves four. Enjoy your tasty Cajun Shrimp Alfredo! For the complete cooking details, check the Full Recipe. In this blog post, we explored the key ingredients and steps needed to make Cajun Shrimp Alfredo. From selecting the right shrimp to perfecting the creamy sauce, I shared essential tips. Remember to balance spices and avoid overcooking shrimp for the best results. Don't forget that you can adapt the recipe to suit your taste or meal prep needs. With this guide, you can create a delicious dish that impresses everyone at your table. Enjoy your cooking adventure!

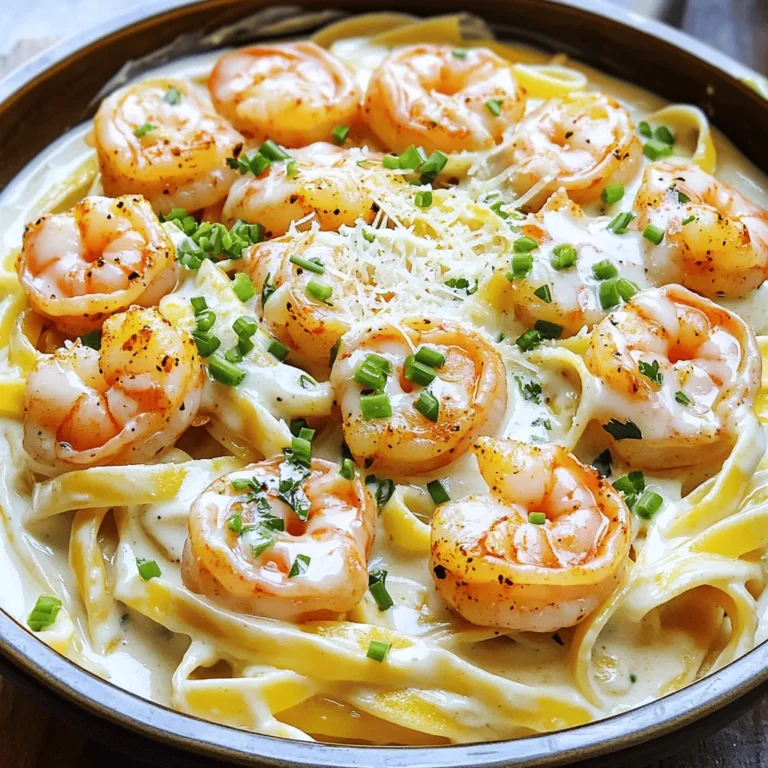
Cajun Shrimp Alfredo Creamy and Flavorful Recipe

- 1 can (15 oz) black beans, thoroughly drained and rinsed - 1 cup sweet corn (can be frozen, fresh off the cob, or canned) - 1 cup cherry tomatoes, quartered for maximum flavor - 1 small red onion, finely diced for a delightful crunch - 1 bell pepper (choose red or yellow for sweetness), diced - 1 jalapeño, seeds removed and minced for a spicy kick - 1/4 cup fresh cilantro, generously chopped - 2 tablespoons lime juice, freshly squeezed for brightness - 1 teaspoon ground cumin for an earthy depth - Salt and pepper to taste, adjusted to enhance flavor Black beans are high in protein and fiber. They help keep you full. Sweet corn adds natural sweetness and crunch. It also provides vitamins and minerals. Cherry tomatoes bring a burst of juicy flavor and antioxidants. Red onion adds a crisp bite and enhances the salsa's color. Bell peppers offer sweetness and are rich in vitamins A and C. Jalapeños give a spicy kick, boosting metabolism. Fresh cilantro adds a bright flavor and may help with digestion. Lime juice brightens the dish and adds vitamin C. Ground cumin brings warmth and depth to the salsa. If you want different beans, try pinto or kidney beans. You can use grilled corn for a smoky flavor. Roma tomatoes work instead of cherry tomatoes if you prefer. For a milder salsa, use green bell peppers instead of red or yellow. If you can’t find jalapeños, try banana peppers or omit them for less heat. You can use parsley instead of cilantro if you dislike its flavor. Lemon juice can replace lime juice in a pinch. Lastly, skip cumin if you want a lighter taste, or use taco seasoning for a different twist. To start, gather all your ingredients. You will need black beans, corn, cherry tomatoes, red onion, bell pepper, jalapeño, cilantro, lime juice, cumin, salt, and pepper. First, drain and rinse the black beans. This helps remove excess sodium and ensures a clean taste. Next, measure out one cup of sweet corn. You can use frozen, fresh, or canned corn. All options work well! Cut the cherry tomatoes into quarters. This helps release their juices and adds more flavor. Finely dice the red onion and bell pepper. The red onion adds crunch, while the bell pepper brings sweetness. For some heat, remove the seeds from the jalapeño and mince it. Always remember to wash your hands after handling spicy peppers! This salsa does not require cooking, which keeps it fresh and vibrant. Instead, you mix everything in a bowl. Once you have prepped all your ingredients, place the black beans and corn in a large mixing bowl. This bowl needs to be big enough to hold everything without spilling. Now, add the quartered cherry tomatoes, diced onion, bell pepper, and minced jalapeño. Use a spatula or large spoon to gently fold the ingredients together. This keeps everything intact and helps maintain texture. Be careful not to mash the beans! For the best salsa, focus on texture. When mixing, fold the ingredients gently. This keeps the beans whole and the tomatoes juicy. After combining, chop the cilantro and add it last. This herb adds freshness and complements the other flavors. In a small bowl, whisk together the lime juice, cumin, and a pinch of salt and pepper. Pour this dressing over your salsa. Toss everything gently once more to coat the ingredients. Taste your salsa and adjust the seasoning. Add more lime juice or salt if needed. Let your salsa sit for at least 15 minutes. This resting time allows the flavors to meld beautifully. Serve it in a colorful bowl with tortilla chips for a fun appetizer. Enjoy your fresh and zesty black bean corn salsa! For the full recipe, check the earlier section. To boost the flavor of your salsa, use fresh ingredients. Fresh lime juice adds brightness. Try adding a dash of hot sauce for extra heat. You can also mix in some mango for a sweet twist. If you like garlic, a pinch of garlic powder works well too. Taste as you go, and adjust spices to your liking. Always choose ripe tomatoes for the best taste. If you use frozen corn, let it thaw first. A bright, colorful bell pepper adds sweetness and crunch. When picking cilantro, look for vibrant green leaves. Avoid yellow or wilted ones. Fresh herbs elevate the dish. Make sure everything is clean and dry before chopping. Wash your hands before handling food. Keep raw ingredients separate from cooked ones. Use a clean cutting board for veggies. If you’re using a jalapeño, wear gloves. The oils can irritate your skin. Store your salsa in a sealed container in the fridge. Consume it within three days for the best taste. {{image_4}} If you crave heat, try adding more jalapeños or even a chopped serrano pepper. You can also mix in diced chipotle in adobo sauce. This will give your salsa a smoky, spicy twist. Another idea is to use a dash of hot sauce. Just remember to taste as you go, so it fits your spice level. You can make this salsa work for different diets. For a vegan option, all ingredients are already plant-based. If you need a low-sodium version, rinse the beans well to cut salt. You can use fresh corn instead of canned for a sweeter taste. If you want a bit of creaminess, try adding diced avocado. This will make it rich and smooth. Fresh produce can change the game. In summer, add diced peaches or mango for a sweet twist. In fall, consider chopped bell peppers and diced apples for a crunchy, sweet mix. Using seasonal items keeps your salsa fresh and fun. The key is to play with what you have on hand. Enjoy the process and make it your own! To keep your salsa fresh, place it in an airtight container. This helps prevent air from getting in and spoiling the flavors. Make sure to cover it tightly. You can store it in the fridge for up to three days. If you notice any changes in smell or color, it's best to toss it out. If you want to save your salsa for later, freezing is a great option. Use a freezer-safe container or a zip-top bag. Leave some space at the top to allow for expansion. You can freeze it for up to three months. When you're ready to enjoy it, thaw it in the fridge overnight. Choose glass or plastic containers that seal well. These materials help keep your salsa fresh. Avoid using metal containers, as they can react with the ingredients. For smaller portions, ice cube trays work well. Just fill them with salsa, freeze, and then pop them into a bag for easy use later. You can serve Zesty Black Bean Corn Salsa with many dishes. It goes well with tortilla chips, tacos, or grilled meats. You can also use it as a topping for nachos or salads. This salsa adds color and flavor to any meal. Zesty Black Bean Corn Salsa stays fresh for about three to five days. Store it in the fridge in a sealed container. After this time, the flavors may fade, and the salsa may become watery. Yes, you can make this salsa ahead of time. It tastes even better after sitting for a while. Prepare it a few hours before serving or even the night before. Just remember to keep it in the fridge. Yes, Zesty Black Bean Corn Salsa is naturally gluten-free. All the ingredients, like beans and corn, do not contain gluten. So, it’s a safe option for those with gluten sensitivities. To make Zesty Black Bean Corn Salsa, gather these ingredients: - 1 can (15 oz) black beans, thoroughly drained and rinsed - 1 cup sweet corn (can be frozen, fresh off the cob, or canned) - 1 cup cherry tomatoes, quartered for maximum flavor - 1 small red onion, finely diced for a delightful crunch - 1 bell pepper (choose red or yellow for sweetness), diced - 1 jalapeño, seeds removed and minced for a spicy kick - 1/4 cup fresh cilantro, generously chopped - 2 tablespoons lime juice, freshly squeezed for brightness - 1 teaspoon ground cumin for an earthy depth - Salt and pepper to taste, adjusted to enhance flavor You can find the complete instructions in the Full Recipe section. This salsa is quick to make and full of flavor! In this blog post, we covered how to make Zesty Black Bean Corn Salsa. I shared ingredients, their benefits, and some swaps. The step-by-step guide included prep, cooking, and assembly tips. We also discussed ways to enhance flavor and safe food handling. Variations cater to spice lovers and dietary needs. Lastly, I provided storage tips to keep your salsa fresh. With these details, you can now create your own perfect salsa. Enjoy the process and the tasty results!

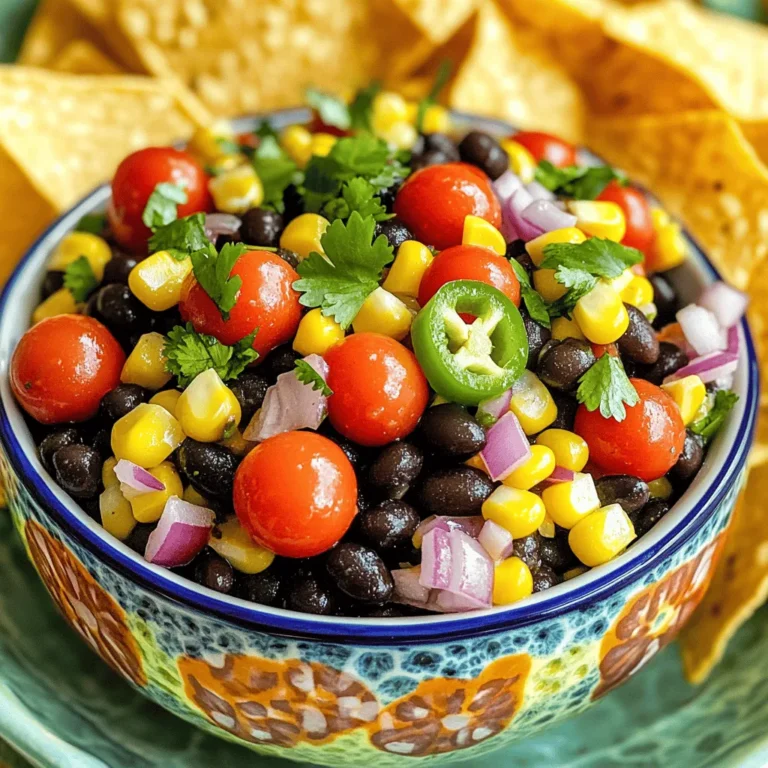
Zesty Black Bean Corn Salsa Flavorful and Fresh Recipe

- 4 cups fresh baby spinach - 2 cups fresh strawberries - 1/2 cup crumbled feta cheese - 1/4 cup red onion - 1/4 cup slivered almonds - 3 tablespoons poppy seeds - 1/4 cup extra virgin olive oil - 3 tablespoons apple cider vinegar - 2 tablespoons honey or agave syrup - Salt and pepper to taste To create this amazing salad, you need fresh and colorful ingredients. Start with baby spinach. It's tender and packed with nutrients. Next, grab some strawberries. They add a sweet and juicy pop to every bite. Feta cheese gives a creamy touch. It balances the sweetness of the strawberries. Use crumbled feta from a block for the best texture. Red onion brings a sharp flavor. Slice it thin so it doesn't overpower the salad. Slivered almonds add a delightful crunch. Toast them if you want extra flavor and crispness. For the dressing, you need extra virgin olive oil. It adds richness. Then, use apple cider vinegar for a tangy twist. Honey or agave syrup sweetens the mix. Finish off with salt and pepper. These simple ingredients work together to create a vibrant and fresh salad. Each bite will burst with flavor. {{ingredient_image_2}} Start by making the dressing. In a small bowl, whisk together 1/4 cup of extra virgin olive oil, 3 tablespoons of apple cider vinegar, and 2 tablespoons of honey or agave syrup. Add salt and pepper to taste. Whisk until smooth. Set this aside. Letting the dressing sit allows the flavors to blend well. Next, grab a large salad bowl. Place 4 cups of fresh baby spinach in the bowl. Layer in 2 cups of sliced strawberries on top of the spinach. This adds a pop of color. Next, fold in 1/4 cup of thinly sliced red onion. Then sprinkle in 1/2 cup of crumbled feta cheese. Mix these ingredients gently to ensure an even flavor. Now it’s time to dress the salad. Drizzle your prepared poppy seed dressing over the salad. Use gentle hands to toss everything together. This ensures every piece gets coated. For the final touch, sprinkle 1/4 cup of toasted slivered almonds and 3 tablespoons of poppy seeds on top. This adds a nice crunch and visual flair. Serve your salad right away for the best taste. Enjoy! To make your salad shine, start with picking ripe strawberries. Look for berries that are bright red with no white spots. They should feel firm but slightly soft when you press them. The smell is also key; ripe strawberries have a sweet aroma. When it comes to spinach, washing is vital. Rinse the baby spinach under cold water to remove dirt. Use a salad spinner or gently pat it dry with a clean cloth. This keeps the leaves crisp and fresh for your salad. If you want to mix things up, try different sweeteners in your dressing. You can use maple syrup instead of honey for a new flavor twist. Agave syrup is also a great choice. It has a mild taste that blends well. For the oil, you can swap olive oil for avocado oil. It adds a unique flavor and richness to the dressing. You might also try sesame oil for a nutty taste that pairs well with the salad. To add crunch, toast your slivered almonds. Place them in a dry pan over medium heat. Stir them often until they are golden brown. This process brings out their flavor and makes them even tastier. For variety, consider adding different toppings. You can sprinkle sunflower seeds or pumpkin seeds for more crunch. Fresh herbs like basil or mint can also add flavor and a pop of color to your salad. Pro Tips Freshness is Key: Use the freshest spinach and strawberries you can find to ensure maximum flavor and nutrient retention in your salad. Feta Cheese Tip: Crumbling the feta cheese from a block rather than using pre-crumbled cheese enhances the texture and flavor of the salad. Toasting Almonds: Lightly toasting the slivered almonds before adding them to the salad brings out their natural oils and intensifies their flavor. Let it Chill: Allow the assembled salad to sit in the refrigerator for 10 minutes before serving; this helps the flavors meld beautifully. {{image_4}} I love making this salad for everyone. For those who are vegetarian, this recipe is perfect as it uses no meat. You can enjoy the fresh taste of spinach and strawberries without any worries. If you need a gluten-free option, you can easily adapt this salad. The ingredients are already gluten-free. Just make sure any extras, like salad dressings, are also gluten-free. This way, everyone can enjoy the flavors. You can change this salad based on what fruit is fresh. In the summer, try adding blueberries or peaches. They add a nice twist to the taste. In fall or winter, you can swap spinach for kale or arugula. These greens give a different flavor while still being healthy and tasty. Adding fresh herbs can brighten the salad. Try using mint or basil for a fresh taste. They add a lovely aroma and flavor. For cheese lovers, you can switch feta for goat cheese or blue cheese. Each type brings its own rich flavor, making the salad unique. To store leftovers, place the salad in an airtight container. This keeps it fresh and tasty. For best results, eat the salad within 1-2 days. If you have dressing left, store it separately. This helps avoid soggy greens. Freezing this salad is not recommended. The spinach and strawberries will not hold up well. Instead, focus on how to store each ingredient. Keep spinach in a cool, dry place. Use a paper towel to absorb moisture. For strawberries, refrigerate them in a container. This prevents them from getting mushy. Store feta cheese in its brine for freshness. Almonds should stay in a sealed bag to keep their crunch. Poppy seeds can go in a cool, dark spot. This ensures all your ingredients stay fresh for your next salad. To make this salad vegan, swap the feta cheese for a plant-based alternative. There are many tasty vegan cheeses. You can also use avocado for creaminess. Instead of honey, use agave syrup or maple syrup for a sweet touch. These simple swaps keep the salad fresh and flavorful without any animal products. Yes, you can prepare this salad ahead of time! For best results, keep the dressing separate until serving. Store the salad without dressing in an airtight container in the fridge. It can last for 1-2 days. To keep the spinach crisp, avoid adding the dressing too early. Toss the salad with dressing just before you eat. This salad pairs well with many main dishes. Try serving it with grilled chicken or fish for a hearty meal. It also works great with roasted vegetables and quinoa for a veggie option. For a light lunch, serve it with a sandwich or wrap. The salad adds a fresh, zesty touch to any meal. This blog covered how to make a tasty Strawberry Spinach Poppy Seed Salad. You learned about fresh ingredients, step-by-step instructions, and helpful tips. Making this salad can be fun and easy. Try different fruits or dressings to find what you love most. It’s versatile for any meal, too. Keep your salad fresh and enjoy every bite. Simple adjustments let you make it your own while keeping it healthy.

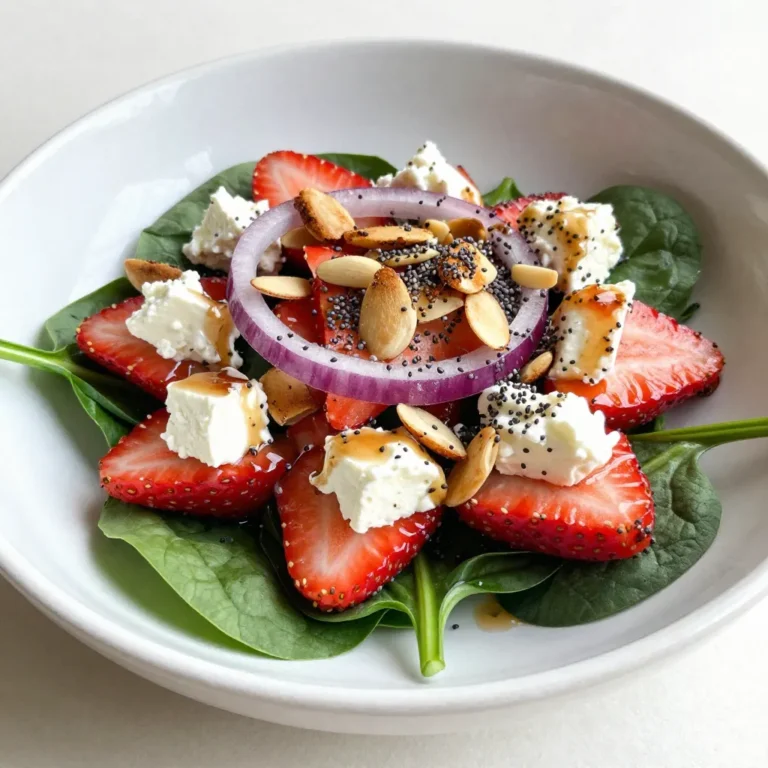
Strawberry Spinach Poppy Seed Salad Fresh and Tasty

- 2 cups all-purpose flour - 1/3 cup granulated sugar - 1 tablespoon baking powder - 1/2 teaspoon salt - 1/2 cup unsalted butter, cold and cubed - 1 cup fresh blueberries - Zest of 1 lemon - 1 tablespoon lemon juice - 1/2 cup heavy cream - 1 large egg - Additional heavy cream for brushing - Turbinado sugar for topping Using fresh ingredients is key for great scones. Fresh blueberries burst with flavor and moisture. They keep your scones juicy and delicious. Fresh lemon zest adds a bright taste. The zest gives a strong lemon flavor without extra liquid. If fresh blueberries are out of season, you can use frozen ones. Just make sure to thaw and drain them first. For a twist, try using raspberries or blackberries. They pair well with lemon, too. You can substitute heavy cream with whole milk if needed. The scones may be a bit less rich but still tasty. For a dairy-free option, use almond milk or coconut cream instead. Remember, using cold butter keeps the scones light and flaky. These tips help you make the best lemon blueberry scones. You can find the Full Recipe to get started! 1. Preheating the Oven and Preparing the Baking Sheet First, preheat your oven to 400°F (200°C). This step ensures your scones bake evenly. Next, line a baking sheet with parchment paper. This will help prevent sticking and make cleanup easy. 2. Mixing Dry Ingredients In a large mixing bowl, combine 2 cups of all-purpose flour, 1/3 cup of granulated sugar, 1 tablespoon of baking powder, and 1/2 teaspoon of salt. Whisk these dry ingredients well. This step mixes everything for a smooth dough. 3. Incorporating Butter into the Mixture Now, add 1/2 cup of cold, cubed unsalted butter to your flour mix. Use a pastry cutter or your fingertips to blend the butter. You want the mixture to resemble coarse crumbs. Leave some pea-sized bits of butter. This will add flakiness to your scones. 4. Folding in Blueberries and Lemon Zest Gently fold in 1 cup of fresh blueberries and the zest of 1 lemon. Be careful not to crush the blueberries. This keeps their shape and adds juicy bursts of flavor. 5. Preparing the Liquid Mixture In a separate bowl, whisk together 1/2 cup of heavy cream, 1 large egg, and 1 tablespoon of lemon juice. Mix until it is fully blended and frothy. This mixture will help bind your dough. 6. Combining Dry and Wet Ingredients Slowly pour the liquid mixture into your bowl of dry ingredients. Stir gently until just combined. Be cautious to avoid overmixing. The dough should feel slightly sticky, which helps keep your scones light and fluffy. 7. Kneading the Dough Lightly flour a clean surface. Turn the dough out onto it. With gentle hands, knead the dough a couple of times. Aim to form it into a ball. Do not overwork it, as this can make the scones tough. 8. Slicing and Placing on the Baking Sheet Flatten the dough into a circle about 1 inch thick. Use a sharp knife or pizza cutter to slice it into 8 wedges. Carefully place these scones on the prepared baking sheet, spacing them apart. 9. Baking Time and Techniques Brush the tops of each scone with a little extra heavy cream. This helps them brown nicely. Sprinkle turbinado sugar on top for sweetness. Bake the scones for 15-20 minutes. They are done when the edges are golden brown and a toothpick comes out clean. 10. Cooling Once baked, let the scones cool on the baking sheet for a few minutes. Then, transfer them to a wire rack to cool completely. Enjoy the delightful flavors of lemon and blueberry! - Avoiding Overmixing: When you mix the dough, gentle is key. Stir until just combined. Overmixing makes scones tough. You want a soft, tender bite. - Ensuring Cold Ingredients are Used: Keep your butter and cream cold. Cold butter creates steam during baking. This steam makes your scones light and fluffy. - Variations in Mixing Techniques: Try using a fork to mix in the butter. This method breaks it into smaller bits. You can also use a food processor for quick mixing. Just pulse a few times to avoid overmixing. - Incorporating Additional Flavorings: Want more zing? Add more lemon zest or a splash of vanilla. You could also mix in herbs like thyme for a unique taste. - Ideal Accompaniments: These scones shine with clotted cream or honey. You can also serve them with fresh jam for a sweet twist. - Presentation Tips for Keeping Scones Fresh: Store scones in an airtight container. When serving, arrange them on a pretty plate. Garnish with whole blueberries and a dusting of powdered sugar for a beautiful touch. For the complete recipe, check out the Full Recipe for Lemon Blueberry Bliss Scones. {{image_4}} Ingredient Substitutions To make gluten-free lemon blueberry scones, swap all-purpose flour for a gluten-free blend. Look for blends that include xanthan gum. This will help mimic the texture of regular flour. Adjusting Baking Time Gluten-free scones may bake faster or slower. Check them at the 12-minute mark. If they’re not golden, give them a few more minutes. Always use a toothpick to test for doneness. Key Ingredient Changes For vegan lemon blueberry scones, replace butter with coconut oil or vegan butter. Use almond milk or oat milk in place of heavy cream. A flax egg can replace the large egg. Ensuring Texture and Flavor Vegan scones can end up dense if not mixed right. Mix wet and dry ingredients gently. This keeps the scones light. Also, adding a bit of apple cider vinegar can enhance the flavor and texture. Incorporating Nuts or Spices You can add chopped nuts like walnuts or pecans to the dough for extra crunch. A pinch of cinnamon or nutmeg will add warmth and depth to the flavor. Alternative Fruit Combinations If you want to switch things up, try raspberries or strawberries instead of blueberries. Each fruit will give a unique twist while keeping the refreshing lemon flavor. To keep your lemon blueberry scones fresh, focus on moisture control. Moisture can make them soggy and stale. Wrap each scone in plastic wrap or aluminum foil. Then, place them in an airtight container. This method helps preserve their fluffiness. Recommended containers include: - Airtight plastic containers - Zip-top bags - Glass jars with tight seals Freezing your scones is a great way to enjoy them later. Start by letting them cool completely after baking. Then, wrap each scone in plastic wrap. Place them in a freezer-safe bag or container. This prevents freezer burn. For the best taste, use your frozen scones within three months. Reheating instructions are simple. Preheat your oven to 350°F (175°C). Place the scones on a baking sheet and bake for 10 to 15 minutes. They will taste fresh as if they were just baked! Lemon blueberry scones can last for about three days at room temperature. If you store them in the fridge, they can last up to a week. Signs of spoilage include: - A dry or hard texture - Unpleasant odors - Mold growth If you notice any of these signs, it's best to discard the scones. Enjoy your lemon blueberry treats while they are fresh! For the Full Recipe, refer to the previous section. Yes, you can make these scones ahead of time. I suggest preparing the dough, then chill it for about 30 minutes. Wrap the unbaked scones in plastic wrap. Place them in the fridge for up to 24 hours. When you’re ready to bake, just take them out and bake them as directed. This keeps them fresh and tasty. Dense scones often result from a few common mistakes. First, overmixing the dough can lead to toughness. Mix just until combined. Second, using too much flour can weigh them down. Measure accurately. Lastly, make sure your baking powder is fresh. Old baking powder won’t rise well. Absolutely! You can use raspberries, strawberries, or cherries instead of blueberries. Each fruit adds a unique flavor. Just make sure to adjust the quantity if the fruit is larger or smaller than blueberries. This way, your scones will still turn out delicious. To reheat scones, preheat your oven to 350°F (175°C). Place the scones on a baking sheet. Cover them loosely with foil to keep them moist. Heat for about 10 minutes. This method keeps the scones fluffy and fresh, just like when they were first baked. You can find the Full Recipe for Lemon Blueberry Bliss Scones 🫐 [here](#). This detailed guide will help you create these tasty treats easily. In this post, we explored how to make delicious lemon blueberry scones. We highlighted the importance of fresh ingredients and shared tips for preparing, shaping, and baking your scones perfectly. I offered advice on variations for gluten-free and vegan options, as well as storage tips to keep them fresh. Remember, using cold ingredients and avoiding overmixing are key for fluffy scones. With these ideas and tricks, enjoy creating and sharing your tasty treats!

Lemon Blueberry Scones Fluffy and Flavorful Treat

- 2 pounds chicken wings - 1/4 cup honey - 2 tablespoons freshly squeezed lemon juice - 1 tablespoon lemon zest The main ingredients for honey lemon pepper wings are simple yet powerful. Chicken wings are the star of this dish. They soak up the marinade well. Honey adds a sweet touch that balances the tart lemon. Fresh lemon juice gives a bright flavor. Lemon zest enhances the citrus notes, making every bite pop. - 1 teaspoon freshly ground black pepper - 1 teaspoon garlic powder - 1 teaspoon onion powder - 1/2 teaspoon smoked paprika - Salt, to taste The spices and seasonings elevate the wings. Black pepper adds heat and depth. Garlic powder gives a savory base. Onion powder complements the garlic. Smoked paprika adds a unique, smoky flavor. Salt ties everything together, enhancing the taste. - Fresh parsley, finely chopped Finishing with fresh parsley adds color and freshness. It brightens the dish and offers a mild herbal flavor. This simple touch makes your wings look even more appealing. Plus, it adds a nice contrast to the sweet and spicy flavors. {{ingredient_image_2}} First, you need to pat the chicken wings dry using paper towels. This step is very important. Drying the wings helps them get crispy when you cook them. If they are wet, they will steam instead of crisp. Next, mix the marinade in a large bowl. Combine the honey, lemon juice, lemon zest, black pepper, garlic powder, onion powder, smoked paprika, and a pinch of salt. Whisk it all until smooth. Then, add the chicken wings to the bowl. Make sure each wing gets a nice coat of the marinade. Cover the bowl with plastic wrap and let it chill in the fridge for at least 30 minutes. This time allows the flavors to blend well. Now it's time to cook. Preheat your oven to 400°F (200°C). This heat level is just right for roasting the wings. Line a baking sheet with parchment paper or aluminum foil for easy cleanup. Place a wire rack on top of the baking sheet. This step helps the wings cook evenly and get crispy. Arrange the marinated wings in a single layer on the rack, leaving space between them. Bake the wings for 30 to 35 minutes. They should turn golden and crispy. For the best texture, flip the wings halfway through the baking time. Enjoy the smell as they cook! To get crispy wings, start by drying them well with paper towels. Moisture on the wings makes them soggy. This step is key for that crunchy finish you want. Next, use a wire rack when baking. Place the wings on the rack above a lined baking sheet. This allows hot air to circulate all around, cooking them evenly. Your wings will be crispier this way. You can adjust the honey for the sweetness you like. If you want it sweeter, add more honey. If you prefer a tangy flavor, add extra lemon juice. This mix gives you a taste that suits your palate. Adding more spices can also enhance the taste. You could try cayenne pepper for heat or more garlic powder for depth. Experiment to find your perfect blend. The best dipping sauces for these wings include ranch and blue cheese. They balance the sweet and tangy flavors well. You can also try a spicy sriracha for a kick. For side dishes, consider serving celery and carrot sticks. They add a nice crunch and freshness. Another great option is a light salad to balance the meal. Pro Tips Dry the Wings: Thoroughly patting the chicken wings dry ensures they become crispy when baked, as moisture can lead to steam rather than crispness. Marinate Longer: If time allows, marinate the wings for a few hours or even overnight. This enhances the flavor depth and tenderness of the meat. Use a Wire Rack: Placing the wings on a wire rack allows hot air to circulate around the wings, promoting even cooking and preventing sogginess. Check for Doneness: To ensure the wings are fully cooked, use a meat thermometer to check that the internal temperature reaches 165°F (74°C). {{image_4}} You can change up the flavor of your honey lemon pepper wings with different marinades. - Spicy Honey Lemon Pepper: Add some heat by mixing in cayenne pepper or hot sauce. This will give your wings a nice kick. Blend it with the honey and lemon juice for a sweet and spicy taste. - Garlic Butter Lemon Wings: For a rich flavor, melt butter and mix it with minced garlic and lemon juice. Toss the wings in this garlic butter marinade for a savory twist that pairs well with the sweet honey. You have options for cooking your wings that fit your kitchen setup. - Air Fryer Option: If you want a quick and healthier option, use an air fryer. Coat the wings in your marinade, then cook them at 380°F for about 25 minutes. This method gives you crispy wings with less oil. - Grilling Method: For a smoky flavor, grill the wings. Preheat your grill to medium-high heat, then place the marinated wings on the grill. Cook for about 15-20 minutes, flipping halfway through. This will add a nice char and depth to the flavor. How you serve your wings can change the vibe of your meal. - Appetizer vs. Main Course: Serve these wings as a fun appetizer at a party or as a main dish with sides like coleslaw or fries. They fit perfectly into both roles! - Meal Prep Ideas: These wings are great for meal prep. Make a large batch and store them in the fridge for quick lunches or dinners. Just reheat and enjoy! To keep your honey lemon pepper wings fresh, follow these tips: - Refrigeration Guidelines: After cooking, let the wings cool down. Then, place them in an airtight container. Store them in the fridge for up to three days. This keeps the wings tasty and safe to eat. - Freezing Instructions: For longer storage, freeze your wings. Place them in a freezer-safe bag or container. Make sure to remove as much air as possible. They can last up to three months in the freezer. When ready to eat, thaw them in the fridge overnight. When it's time to enjoy your wings again, follow these methods: - Oven Reheating Method: Preheat your oven to 350°F (175°C). Spread the wings on a baking sheet. Heat for about 10-15 minutes, or until warm and crispy. This method helps keep the wings tasty. - Air Fryer Reheat Method: If you have an air fryer, this is a quick option. Set it to 350°F (175°C). Place the wings in the basket and heat for 5-7 minutes. Check to see if they are warm enough. This method gives you that crispy texture back. You should marinate the wings for at least 30 minutes. This time allows the flavors to soak in. If you have more time, try marinating for 2 hours or even overnight. The longer you let them sit, the more intense the flavor becomes. Just keep them in the fridge while they marinate. Yes, you can use frozen wings. Just make sure to defrost them first. The best way is to place the wings in the fridge overnight. If you need them fast, you can run them under cold water for about an hour. Once thawed, pat them dry and follow the recipe as usual. Several sauces go well with honey lemon pepper wings. Here are some popular choices: - Ranch dressing - Blue cheese dressing - Spicy buffalo sauce - Barbecue sauce - Garlic aioli Feel free to mix and match based on your taste! In this blog post, we explored how to make delicious honey lemon pepper wings. We covered important ingredients, how to prepare and cook the wings, and tips for achieving crispiness. You can also try different marinades and cooking methods for variety. Remember to store leftovers properly to keep them fresh. With these steps, you can serve tasty wings for any occasion. Enjoy cooking and impress your family or friends with this dish!

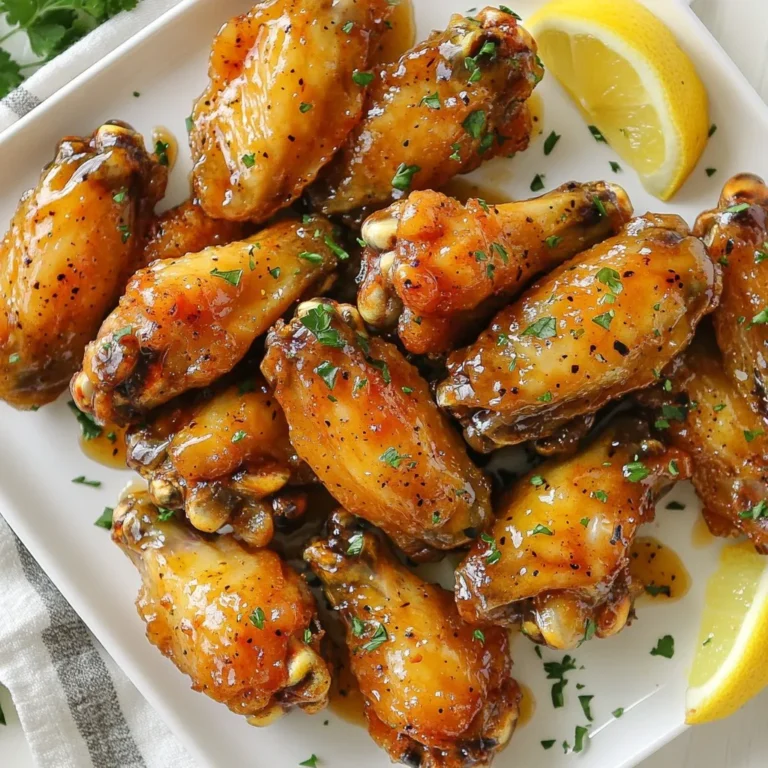
Honey Lemon Pepper Wings Irresistible Flavor Idea

For the base of our Minute Garlic Shrimp Tacos, you need: - 1 lb (450g) shrimp, peeled and deveined - 8 small corn tortillas The shrimp should be fresh or thawed if frozen. Look for plump shrimp for great taste. The corn tortillas give a nice flavor and texture to the tacos. Next, we have the seasoning that makes these tacos shine: - 4 cloves garlic, finely minced - 2 tablespoons extra virgin olive oil - 1 teaspoon chili powder - 1 teaspoon ground cumin - Sea salt and freshly ground black pepper, to taste The garlic adds a rich taste. Olive oil helps cook the shrimp and adds a nice sheen. Chili powder and cumin bring out warm, earthy flavors. Adjust the salt and pepper to fit your taste. Finally, let’s dress up our tacos: - 1 cup red cabbage, shredded - 1 ripe avocado, sliced - 1 lime, cut into wedges - Fresh cilantro leaves, for garnish Red cabbage adds a crunchy bite. Avocado gives a creamy texture. Lime juice brightens every single bite. Fresh cilantro ties all the flavors together, making your tacos even better. {{ingredient_image_2}} Start with 1 pound of shrimp. Make sure they are peeled and deveined. Pat the shrimp dry with paper towels. This step helps them sear well in the pan. In a bowl, mix the shrimp with 4 minced garlic cloves, 1 teaspoon of chili powder, 1 teaspoon of ground cumin, sea salt, and black pepper. Toss them gently until they are coated in the spices. Heat 2 tablespoons of olive oil in a large skillet over medium-high heat. When the oil is hot, add the shrimp in a single layer. Cook them for 1-2 minutes on each side. Look for the shrimp to turn pink and opaque. Remove them from the heat before they get tough. While the shrimp cooks, warm 8 small corn tortillas in another skillet. Heat each tortilla for about 30 seconds on each side. They should become soft and pliable. This step adds a nice touch to your tacos. Take a warm tortilla and place a scoop of shredded red cabbage in the center. Add a generous portion of the garlic shrimp on top. Then, slice a ripe avocado and add it to the taco. Finish with fresh cilantro leaves and a squeeze of lime juice. Serve with lime wedges for an extra burst of flavor. To get perfectly cooked shrimp, start with dry shrimp. Pat them well with paper towels. This helps them sear nicely. In a bowl, mix shrimp with garlic, chili powder, cumin, salt, and pepper. Toss until they are coated well. Heat olive oil in a skillet until it shimmers. Add shrimp in a single layer. Cook them for 1-2 minutes per side. Look for them to turn pink and opaque. Don’t let them cook too long, or they will get tough. Warming tortillas is simple and quick. Use a skillet or grill. Heat it on medium-high heat. Place a tortilla in the skillet for about 30 seconds. Flip it and warm the other side. You want them soft and pliable. Don't let them get too crispy. You can also wrap them in a damp paper towel and microwave them for about 20 seconds. Want to add more flavor? Consider these options. Squeeze fresh lime juice over the shrimp before serving. For extra spice, add diced jalapeños or hot sauce. Top with mango salsa for sweetness and zing. You can also mix in some diced tomatoes or corn for added texture. Fresh herbs like cilantro or parsley can brighten up the dish. Pro Tips Dry Your Shrimp: Patting your shrimp dry before seasoning helps them sear better, leading to a more flavorful and appealing texture. Don’t Overcrowd the Pan: Cooking shrimp in a single layer allows them to cook evenly. Overcrowding can cause steaming rather than searing. Warm Your Tortillas: Gently warming the corn tortillas makes them more pliable and enhances their flavor, ensuring they hold your delicious fillings without tearing. Garnish for Flavor: Fresh cilantro and a squeeze of lime brighten the dish. Don’t skip the garnish; it elevates the overall taste and presentation. {{image_4}} You can switch shrimp for other proteins. Chicken breast works great. Just cut it into small pieces. You can also use fish like tilapia or salmon. Simply season them like shrimp and cook until they flake easily. For a plant-based option, try tofu. Press it to remove water, then cube and season. This way, you can enjoy tacos with different flavors. Toppings can change the taste of your tacos. Instead of red cabbage, try using shredded lettuce or carrot. You can add diced tomatoes for freshness. Sliced jalapeños give a spicy kick, while pickled onions add a tangy touch. Don't forget cheese! Crumbled feta or shredded cheddar can enhance flavors. You can even add sour cream or yogurt for creaminess. If you like heat, boost the chili powder in the shrimp mix. You can also add cayenne pepper or hot sauce to the tacos. For milder tacos, reduce the chili powder. If you're unsure, start small and taste as you go. This lets you find the right spice level for your taste buds. Adjusting spice can make your tacos fit any crowd. To store leftover shrimp, let it cool first. Place it in an airtight container. This keeps the shrimp fresh and safe to eat later. You can store it in the fridge for up to two days. If you want to keep it longer, freeze the shrimp. Wrap it tightly in plastic wrap or foil, then place it in a freezer bag. Frozen shrimp can last up to three months. Tacos are best when fresh, but you can store them too. Keep the shrimp and toppings separate from the tortillas. This helps prevent sogginess. Place the tortillas in a sealed bag at room temperature. Store the shrimp and toppings in the fridge. Use them within two days for the best taste. When you’re ready to enjoy your tacos again, reheat the shrimp first. Place it in a skillet over low heat. Stir it gently until warmed through. For the tortillas, heat them in a dry skillet for about 30 seconds on each side. This makes them soft and warm. Assemble your tacos again with fresh toppings, and enjoy! Yes, you can use frozen shrimp. Just make sure to thaw them first. Place them in the fridge overnight, or run them under cold water for quick thawing. Once thawed, pat them dry with paper towels before cooking. This helps them sear nicely. If you don’t have corn tortillas, try flour tortillas or lettuce wraps. Flour tortillas are soft and easy to handle. Lettuce wraps give a fresh crunch and are low-carb. Both options work great with the shrimp. To avoid tough shrimp, don’t overcook them. Sauté them for only 1-2 minutes per side. When they turn pink and opaque, they are done. Remove them from heat right away. This keeps them juicy and tender, making your tacos delicious. Minute garlic shrimp tacos are quick and tasty. We covered the main ingredients, spices, and tasty toppings. You learned how to prep, cook, and warm everything for a perfect meal. Tips on cooking shrimp and warming tortillas will improve your skills. We also discussed fun variations and storage tips for leftovers. Try this recipe to impress your friends. With practice, you can make great tacos every time. Enjoy your cooking!

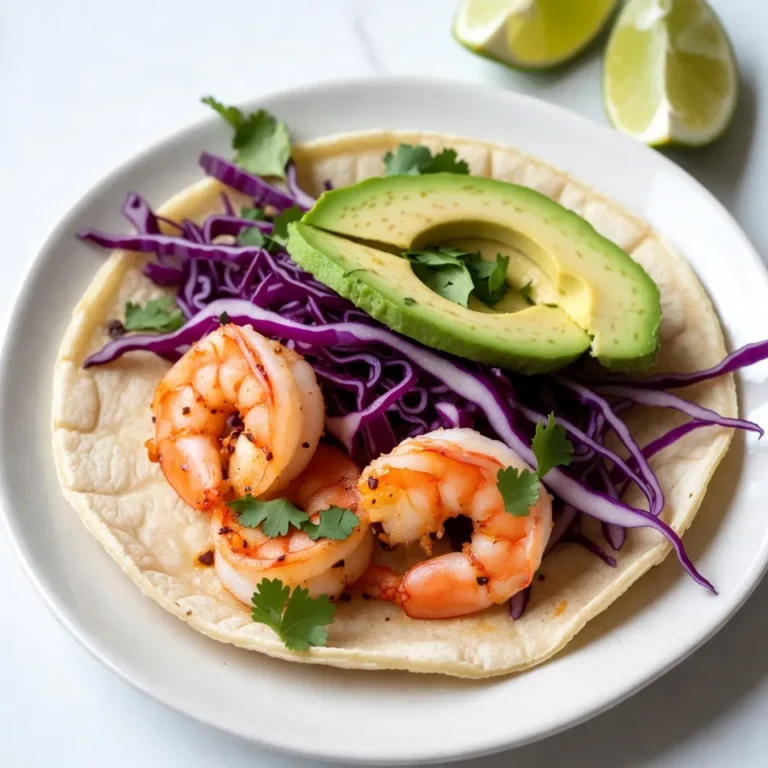
Minute Garlic Shrimp Tacos Flavorful and Quick Meal

To make delicious Pineapple Coconut Popsicles, you need a few key ingredients: - 2 cups fresh pineapple, diced into small chunks - 1 cup full-fat coconut milk - 1/2 cup sweetened shredded coconut - 1/4 cup honey or agave syrup - Juice of 1 fresh lime - A pinch of salt These ingredients bring a tropical vibe to your popsicles. The fresh pineapple gives a sweet and tangy taste. Full-fat coconut milk adds creaminess. Shredded coconut gives a fun texture, while honey or agave adds sweetness. Lime juice brightens the flavor, and salt enhances all these tastes. Feel free to get creative with your popsicles! Here are some optional ingredients you might like: - Additional fruits like mango or banana - Dairy-free alternatives, such as coconut cream - Flavored extracts, like vanilla or almond Adding other fruits can change the flavor and make it fun. Coconut cream can make the popsicles even richer. Flavored extracts can introduce new tastes, too! When it comes to nutrition, each popsicle has about: - Calories: Approximately 120 - Macronutrient breakdown: - Carbs: 18g - Fat: 5g - Protein: 1g These popsicles are a tasty treat that balances sweetness and creaminess. Enjoy them without guilt on a hot summer day! {{ingredient_image_2}} To start, place 2 cups of diced fresh pineapple into a blender. This pineapple gives a sweet and tangy base. Next, add 1 cup of full-fat coconut milk. This makes the popsicles rich and creamy. Then, squeeze in the juice of 1 fresh lime. This adds a bright flavor. Now, add 1/4 cup of honey or agave syrup. Adjust this based on how sweet your pineapple is. Finally, add a pinch of salt. This helps to bring out all the flavors. Blend on high speed until the mixture is smooth and creamy. It should look like a thick smoothie. After blending, take a moment to taste the mixture. If you want it sweeter, add more honey or agave syrup. Blend briefly to mix it in. Once you are happy with the taste, it’s time to add texture. Pour in 1/2 cup of sweetened shredded coconut. Use a spatula to stir gently. This keeps the coconut bits whole and adds a nice chew. Now, carefully pour your mixture into popsicle molds. Fill each one about three-quarters full. This gives room for the popsicles to expand as they freeze. Next, insert the popsicle sticks. Make sure they are centered in each mold. This helps them freeze evenly. Place the molds in the freezer. Let them freeze for at least 4 to 6 hours. You want them to be completely solid. For the best results, avoid opening the freezer too often. Each time you do, it can slow down the freezing process. When you are ready to enjoy your popsicles, run warm water over the molds for a few seconds. This helps loosen them. Gently pull on the popsicle sticks to release the popsicles. Enjoy your refreshing treat! To get creamy popsicles, blend the pineapple and coconut milk well. Use high speed until smooth. If you want a sweeter treat, add more honey or agave syrup and blend again. You can also adjust the coconut milk for a lighter or richer taste. When serving these popsicles, a rustic wooden board looks great. You can add fresh pineapple slices and extra shredded coconut on the board. This adds color and makes your treat even more fun. Pair these popsicles with a nice tropical drink to make it a full summer day delight. One common mistake is overfilling the molds. Fill them only three-quarters full. This gives the popsicles room to expand. Another mistake is not freezing them long enough. Let them freeze for at least 4 to 6 hours to ensure they are solid. Pro Tips Use Ripe Pineapple: For the best flavor, select a ripe pineapple that is fragrant and slightly soft to the touch. This will ensure your popsicles are naturally sweet without needing too much added sugar. Experiment with Coconut Milk: If you prefer a lighter version, you can use light coconut milk or even a non-dairy alternative like almond or oat milk, but be aware that it may alter the creaminess of the popsicles. Add Fresh Mint: For a refreshing twist, consider adding a handful of fresh mint leaves to your blender before mixing. It enhances the tropical flavor and adds a delightful aroma. Try Different Molds: Get creative with your popsicle shapes by using different molds, such as those shaped like fruits or fun characters, to make them more appealing to kids and adults alike. {{image_4}} Adding new fruits makes these popsicles even better. You can mix in mango or passion fruit. These fruits add a bright flavor and color. Try blending 1 cup of diced mango with the pineapple. For a layered look, pour pineapple mixture in first, freeze for an hour, then add mango. This gives a fun twist and a stunning visual. Try adding herbs for a fresh taste. Mint or basil works well with pineapple. Just chop a few leaves and blend them in. You can also use flavored syrups or extracts. A splash of vanilla or almond extract adds depth. These small changes can really make your popsicles shine. You can make these popsicles healthier. Reduce the sugar by cutting the honey or agave. You could even use ripe fruits for natural sweetness. Another option is to swap full-fat coconut milk for a low-fat version. This keeps the creamy texture while cutting calories. Enjoy a treat that fits your healthy lifestyle! To keep your pineapple coconut popsicles fresh, use airtight containers. Silicone molds work well too. They allow easy removal of popsicles. To prevent freezer burn, wrap popsicles in plastic wrap. Store them in a sealed bag. This keeps them tasty and protects their flavor. You can store your popsicles in the freezer for up to two months. After this time, they may lose flavor. Signs that your popsicles are spoiled include ice crystals and an off smell. If they look or smell strange, it’s best to toss them. Thaw your popsicles safely by placing them in the fridge. You can also run warm water over the molds for quick results. If you have leftover ingredients, you can use them in smoothies or yogurt bowls. Blend leftover pineapple and coconut milk for a tasty drink. They add great flavor and nutrition to any dish! Pineapple coconut popsicles need about 4 to 6 hours to freeze. This time ensures they become solid and easy to remove from molds. I suggest checking them after 4 hours. If they feel soft, leave them in longer. The longer they freeze, the better the texture will be. Yes, you can easily make these popsicles vegan. Instead of honey, use agave syrup or maple syrup. Both options add sweetness and keep the popsicles plant-based. Also, make sure the shredded coconut is unsweetened and vegan. This way, you can enjoy a delicious vegan treat. If you need a substitute for coconut milk, several options work well. Almond milk or cashew milk can give a nice flavor. You can also use oat milk for a creamier texture. Just remember, these alternatives will change the popsicle's taste. Adjust the sweetness to match your chosen milk. Making pineapple coconut popsicles is fun and easy. You learned how to blend fresh fruit with creamy coconut milk and adjust the sweetness. We explored optional flavors and variations to suit your taste. You now know tips to achieve the perfect texture and avoid common mistakes. Remember to store them properly for the best taste and longevity. Enjoy your delicious, homemade treats anytime. They bring a taste of summer to every bite.

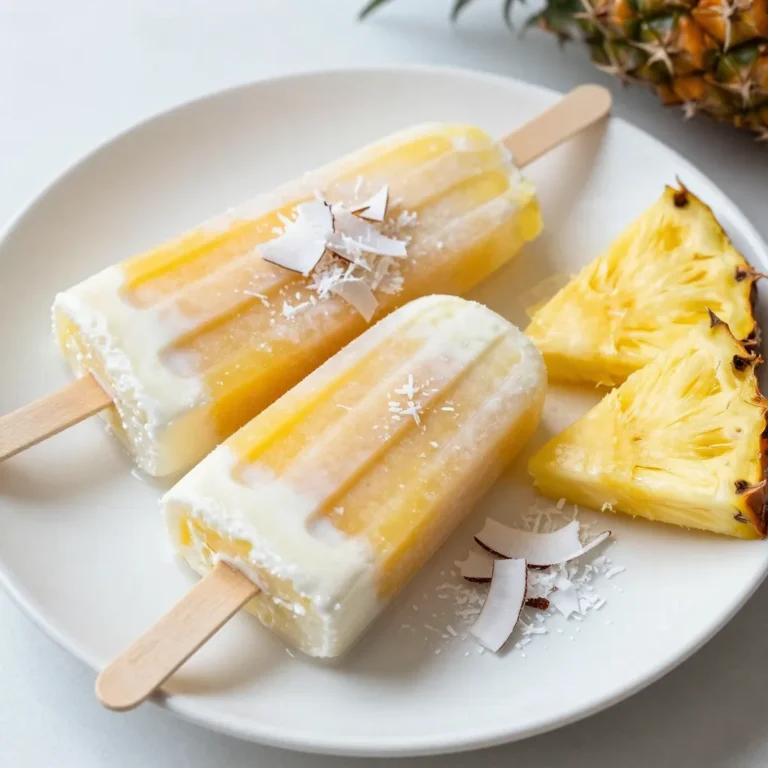
Pineapple Coconut Popsicles Refreshing Summer Treat

- 1 pound ground beef or ground turkey - 1 can (15 oz) black beans, rinsed and drained - 1 can (15 oz) diced tomatoes with green chilies - 1 tablespoon chili powder - 1 teaspoon ground cumin - 1 teaspoon smoked paprika - 1 cup corn kernels (fresh, frozen, or canned) - 1 package (8.5 oz) cornbread mix - 1 cup milk - 1 large egg - 1 cup shredded sharp cheddar cheese (plus extra for topping) - Salt and freshly ground black pepper to taste - 1/2 cup sliced jalapeños for heat - Fresh cilantro, chopped, for garnish - Large skillet - 9x13 inch casserole dish - Mixing bowl I love the blend of flavors in this dish. The ground beef or turkey gives it a hearty base. The black beans add great texture and protein. Diced tomatoes with green chilies bring a nice zing. The spices, especially chili powder and smoked paprika, create warmth and depth. Corn adds sweetness and balance to the savory notes. For an extra kick, consider adding sliced jalapeños. They spice things up and make it fun. Fresh cilantro brightens the casserole with its fresh flavor. You will need a large skillet to cook the meat and veggies. A mixing bowl helps combine the cornbread mix with milk and egg. A 9x13 inch casserole dish is perfect for baking everything together. This dish is not just filling; it’s also colorful and inviting. You can serve it straight from the oven to the table. Enjoy every bite! {{ingredient_image_2}} Set your oven to 375°F (190°C). This ensures a hot start for your casserole. In a large skillet, add 1 pound of ground beef or turkey. Cook over medium heat. Use a spatula to break the meat apart. Brown it for about 6-8 minutes. Drain any excess fat to keep it lean. Next, add 1 medium diced onion and 2 minced garlic cloves to the skillet. Sauté them for about 3-4 minutes. You want the onion to be soft and fragrant. Then stir in 1 can of black beans, 1 can of diced tomatoes with green chilies, and your spices. Use 1 tablespoon of chili powder, 1 teaspoon of cumin, 1 teaspoon of smoked paprika, and salt and pepper to taste. Cook this mixture for another 5-7 minutes. Stir occasionally until it’s heated through and well mixed. Lightly grease a 9x13 inch casserole dish. Spread the meat and bean mixture evenly on the bottom. In a mixing bowl, whisk together 1 package of cornbread mix, 1 cup of milk, and 1 large egg. Add 1 cup of shredded cheddar cheese and mix until just combined. Now, pour this cornbread batter over the meat mixture. Spread it gently to cover everything. Put the casserole in the preheated oven. Bake for 25-30 minutes. You’ll know it’s done when the cornbread is golden brown. A toothpick inserted in the center should come out clean. Let the casserole cool for about 5 minutes after baking. This helps the layers set. Garnish with chopped fresh cilantro for a burst of color and flavor. Serve directly from the dish. You might add a dollop of sour cream or some green onions for extra taste. Enjoy with tortilla chips for a crunchy side! To get the best cornbread, mix the wet and dry ingredients gently. Overmixing makes the cornbread tough. Aim for a lumpy batter; a few lumps are okay. This means you'll have a soft, fluffy texture. Also, let the batter rest for a few minutes before pouring it on the meat. This helps it rise better. You can add more spices to boost flavor. Try a pinch of cayenne for heat. You can also add oregano or thyme for a fresh twist. Consider mixing in some cornmeal for added texture. Adding a splash of lime juice brightens the dish. Fresh herbs like cilantro not only taste great but also add color. Serve Texas Tamale Pie Casserole in the dish it was baked in. This looks homey and inviting. Top each serving with sour cream or guacamole for creaminess. You can also sprinkle chopped green onions for a fresh crunch. Serve it with tortilla chips for a fun side. Enjoying a side salad adds freshness to every bite. Pro Tips Use Leftovers: This casserole is a great way to use up leftover cooked meats or vegetables. Feel free to mix in whatever you have on hand for a personalized twist! Make it Vegetarian: Substitute the ground meat with additional beans or lentils to create a hearty vegetarian version. You can also increase the amount of corn and diced vegetables. Cheese Variations: Experiment with different types of cheese for added flavor. Pepper jack cheese can give a nice kick, while Monterey Jack offers a milder taste. Freezing Instructions: This casserole freezes well! Prepare it up to the baking point, cover tightly, and freeze. When ready to bake, just thaw it overnight in the fridge and bake as directed. {{image_4}} You can make a great vegetarian tamale pie with just a few swaps. Instead of using ground beef or turkey, try using 1 pound of lentils or crumbled tofu. These options add protein and texture. You can also add more veggies like bell peppers or zucchini to boost the flavor. Be sure to sauté them with the onion and garlic for a tasty base. Want more heat? You can increase the spice level easily. Add extra chili powder or cumin to the meat mixture. If you like it hot, toss in more jalapeños or even some diced serrano peppers. You can also stir in a teaspoon of cayenne pepper for a real kick. Adjust the heat to your taste, and feel the warmth in each bite. Toppings can make your casserole special. You can use different cheeses like Monterey Jack or pepper jack for a twist. Try adding a dollop of sour cream or guacamole on top for creaminess. Fresh cilantro adds a nice touch, while sliced green onions bring a bit of crunch. Mix and match your favorite toppings for a personal touch! To store leftovers, let the casserole cool first. Cover it tightly with plastic wrap or foil. You can also use an airtight container. This keeps it fresh. Store in the fridge for up to three days. When ready to eat, check for any off smells before reheating. If you want to freeze the casserole, cool it completely first. Cut it into portions for easy thawing. Wrap each piece in plastic wrap, then foil. This helps prevent freezer burn. You can freeze it for up to three months. When ready to eat, thaw it overnight in the fridge. To reheat, the oven is best. Preheat to 350°F (175°C). Place the casserole in a baking dish. Cover it with foil to keep the moisture in. Heat for about 20-25 minutes or until warm. You can also use a microwave, but it may not heat evenly. If using a microwave, cover the dish and heat in short bursts, stirring in between. You can use several options instead of ground beef. Here are some ideas: - Ground turkey: A leaner choice that still packs flavor. - Ground chicken: Light and mild, great for a lighter dish. - Lentils: Cooked lentils offer a hearty, plant-based option. - Crumbled tempeh: This gives a nice texture and absorbs flavors well. - Black beans: Use more beans for a veggie-packed meal. To add heat, consider these tips: - Add more sliced jalapeños: Fresh or pickled, they boost heat. - Use hot chili powder: It adds a kick to your spice mix. - Stir in diced green chilies: These add flavor and spice. - Include cayenne pepper: Just a pinch can elevate the spice level. - Serve with hot sauce: Let diners choose their heat level. Yes, you can swap cheeses for different flavors: - Pepper jack: This cheese adds heat and creaminess. - Monterey Jack: A milder cheese that melts well. - Queso fresco: This crumbly cheese adds a nice texture. - Gouda: A smoky flavor that pairs well with the dish. - Vegan cheese: For a dairy-free option, try plant-based cheeses. This blog post covered how to make a delicious Texas Tamale Pie Casserole. We explored key ingredients, essential equipment, and step-by-step cooking instructions. I shared helpful tips to enhance flavor and texture, along with variations for different tastes. This easy recipe suits any occasion. Whether you want it traditional or spicy, you can customize it to fit your needs. Enjoy sharing this dish with family and friends!

Texas Tamale Pie Casserole Savory and Comforting Dish

- Flour, Spices, and Leavening Agents The base of our cookies is 2 ¾ cups all-purpose flour. This gives the cookies their structure. We add 1 teaspoon baking powder and ½ teaspoon baking soda to help them rise. The spices are important too! ½ teaspoon ground nutmeg and ½ teaspoon ground cinnamon add warmth and flavor, making these cookies truly festive. - Butter and Sugar Essentials Next, we need 1 cup of unsalted butter, softened to room temperature. This makes the cookies rich and tender. We mix it with 1 cup of granulated sugar. This combination creates a fluffy texture that melts in your mouth. - Eggnog and Icing Components The star of the show is ¾ cup of eggnog. You can use store-bought or homemade eggnog, whichever you prefer. It adds moisture and that classic eggnog flavor. For the icing, we need 1 cup of powdered sugar. We mix this with a little eggnog to create a smooth topping. Finally, we sprinkle extra nutmeg and cinnamon on top for that special touch. {{ingredient_image_2}} First, preheat your oven to 350°F (175°C). This step is key for even baking. While the oven heats, line two baking sheets with parchment paper. This helps prevent cookies from sticking and makes cleanup easy. In a medium bowl, combine 2 ¾ cups all-purpose flour, 1 teaspoon baking powder, and ½ teaspoon baking soda. Add ½ teaspoon ground nutmeg and ½ teaspoon ground cinnamon. Use a whisk to mix these dry ingredients well. Set this bowl aside for later. In a large bowl, take 1 cup of softened unsalted butter and 1 cup of granulated sugar. Use an electric mixer to beat these together. Mix on medium speed until the mixture is light and fluffy. This should take about 3-4 minutes. The fluffiness adds air, which helps your cookies rise. Next, add 1 large egg to the butter mixture. Then, add 1 teaspoon of vanilla extract and ¾ cup of eggnog. Beat everything together until it's smooth and well combined. Make sure there are no lumps. This step adds moisture and flavor to your dough. Gradually add the dry ingredients to the wet mixture. Mix carefully until the dough starts to come together. Be careful not to overmix, as this can make the cookies tough. Once mixed, use a cookie scoop or a tablespoon to drop dough onto the prepared baking sheets. Leave about 2 inches between each cookie. Place the baking sheets in the oven and bake for 10-12 minutes. The cookies should be golden around the edges but soft in the middle. Once done, cool them on the baking sheet for 5 minutes. Then, transfer them to a wire rack to cool completely. In a small bowl, mix 1 cup of powdered sugar with a few tablespoons of eggnog. Stir until you get a smooth icing. If it's too thick, add more eggnog. If too thin, add more powdered sugar. Once the cookies are cool, drizzle the icing over them. Finally, sprinkle a little ground nutmeg and cinnamon on top for a festive touch. For soft and chewy cookies, do not overmix the dough. Mix until just combined. Use room temperature butter for easy creaming with sugar. This adds air and helps cookies rise. The dough should feel soft but not sticky. If it is too wet, add a little flour. One common mistake is not measuring flour correctly. Use a spoon to scoop flour into a measuring cup and level it off. Another mistake is baking cookies too long. Keep an eye on them and take them out when edges are golden but centers are soft. Lastly, don’t skip chilling the dough if it feels too soft. Chilling helps cookies hold their shape. Serve these cookies on a festive platter. Add a sprinkle of extra nutmeg and cinnamon on top for flair. Pair them with a glass of eggnog for a fun holiday treat. You can also gift them in a decorative box. This makes a sweet present for friends and family. For a twist, try serving them with a scoop of vanilla ice cream! Pro Tips Chill the Dough: For even better flavor and texture, chill the cookie dough for at least 30 minutes before baking. This helps the cookies retain their shape and enhances the overall taste. Use Fresh Spices: For the best flavor, ensure that your ground nutmeg and cinnamon are fresh. Spices can lose their potency over time, so using fresh spices will elevate the taste of your cookies. Don’t Overbake: Keep a close eye on the cookies while they bake. They should be lightly golden around the edges but still soft in the center. Overbaking can lead to dry cookies. Decorate Creatively: Get creative with your icing! Use a piping bag for precision or experiment with different designs. You can also add festive sprinkles for an extra holiday touch. {{image_4}} Eggnog sugar cookies are wonderful, but you can switch up the flavors. Try adding a splash of rum extract for a richer taste. You can also use almond extract instead of vanilla. This gives a nutty twist that works well with the spices. For a chocolate version, mix in cocoa powder. Just reduce the flour by half a cup to balance it out. You can even add dried fruits like cranberries or raisins for a fruity bite. Each change can make your cookies fun and unique. If you need gluten-free cookies, swap all-purpose flour for a gluten-free blend. Make sure your blend has xanthan gum to help with texture. For vegan cookies, replace the butter with coconut oil. Use a flax egg instead of a chicken egg. Mix one tablespoon of flaxseed meal with two and a half tablespoons of water. Let it sit until it thickens. You can also use a plant-based eggnog to keep the flavor intact. These changes let everyone enjoy these festive treats. Icing can change how your cookies look and taste. For a spiced icing, add a pinch of cinnamon or nutmeg to your powdered sugar mix. You can also use different colors for icing to match the holidays or a party theme. Consider using royal icing for a smooth finish. If you want something simpler, just drizzle melted white chocolate over the cookies. For decorations, add sprinkles or edible glitter for extra fun. These small touches make your cookies a standout on any dessert table. Store your eggnog sugar cookies in an airtight container. This keeps them fresh and soft. You can layer parchment paper between cookies to avoid sticking. For best taste, enjoy them within a week. Keep them in a cool, dry place away from direct sunlight. To freeze cookies, let them cool completely. Place them in a single layer on a baking sheet and freeze for about an hour. After that, transfer them to a freezer-safe bag or container. Label the bag with the date. Cookies can last up to three months in the freezer. When ready to eat, just thaw them at room temperature. If your cookies become stale, do not worry! Place them in a container with a slice of bread. The bread will add moisture back into the cookies. Leave them for a few hours or overnight. This simple trick helps make them soft again. Eggnog sugar cookies blend the flavors of eggnog with classic sugar cookies. Eggnog itself has roots in medieval Europe, where it was a drink for the wealthy. Early recipes used eggs, milk, and spices. When settlers came to America, they added more spices and cream. Over time, bakers started using eggnog in cookies to celebrate the holidays. Yes, you can prepare the dough ahead of time. You can refrigerate it for up to three days. When ready to bake, scoop the dough onto sheets and bake as usual. You can also freeze the dough for up to three months. Just thaw it overnight in the fridge before baking. You can make your own eggnog at home using milk, cream, eggs, sugar, and spices. A simple mix of milk with vanilla, nutmeg, and cinnamon can work too. For a lighter option, use almond milk or coconut milk. Just ensure your substitute has a creamy texture and festive flavor. Your cookies are done when the edges turn light golden brown. The centers should still look soft. A slight touch should leave an imprint without sticking to your finger. Remember, cookies will continue baking after you remove them from the oven. Icing is a great way to decorate these cookies. Mix powdered sugar with eggnog for a smooth icing. Drizzle it over cooled cookies for a beautiful finish. You can also sprinkle extra nutmeg and cinnamon on top for a festive touch. Using colorful sprinkles can add even more fun! In this article, we explored eggnog sugar cookies and their key elements. We covered important ingredients like flour, butter, and icing. Step-by-step instructions made baking easy. Tips helped ensure a great texture, while variations offered exciting flavor options. Baking cookies can be fun and rewarding. With these instructions, anyone can create delicious treats. Enjoy the process and share your fun with friends and family. Happy baking!

Eggnog Sugar Cookies Festive and Flavorful Treats

PREV 1 … 22 23 24 … 47 NEXT
snack joy kitchen

explore

DessertsDinnerAppetizersDrinks

Our Policies

  • Cookie Policy
  • Copyright Policy
  • Disclaimer
  • GDPR Policy
  • Terms Of Use
Back to Top
  • About
  • Contact Us
  • Privacy Policy
© 2026 snack joy kitchen