FREE DINNER EBOOK! Get your copy!
  • Cookie Policy
  • GDPR Policy
  • Disclaimer
  • Terms Of Use
  • Visit my other site: Fun Cookie Recipes
snack joy kitchen
  • Home
  • Dinner
  • Desserts
  • Drinks
  • Appetizers
  • Contact
  • About
  • Privacy Policy
  • Home
  • Dinner
  • Desserts
  • Drinks
  • Appetizers
  • Contact
  • About
  • Privacy Policy
  • Cookie Policy
  • GDPR Policy
  • Disclaimer
  • Terms Of Use
Visit my other site: Fun Cookie Recipes

HOME / CATEGORIES /

Latest

For a tasty Teriyaki Shrimp Stir-Fry, you need the following items: - 1 lb large shrimp, peeled and deveined - 2 tablespoons vegetable oil - 1 cup bell peppers (red, yellow, and green), sliced into thin strips - 1 cup broccoli florets, cut into bite-sized pieces - 1 cup sugar snap peas, trimmed - 3 green onions, chopped into 1-inch pieces - 3 cloves garlic, minced finely - 1 inch fresh ginger, grated (about 1 tablespoon) - 1/4 cup low-sodium soy sauce - 2 tablespoons honey or maple syrup for a vegan option - 2 tablespoons rice vinegar - 1 teaspoon sesame oil - 1 teaspoon cornstarch mixed with 2 tablespoons cold water (for thickening) - Sesame seeds, for garnishing If you don’t have all the ingredients, here are some easy swaps: - Use frozen shrimp instead of fresh. - Swap vegetable oil for olive oil or canola oil. - If you lack bell peppers, try carrots or zucchini. - Broccoli can be replaced with cauliflower. - For a gluten-free option, use tamari instead of soy sauce. - Maple syrup works great if you want a vegan sweetener. This dish serves four people. Each serving has: - Calories: 250 - Protein: 22g - Carbohydrates: 20g - Fat: 10g - Fiber: 4g This recipe is packed with protein and colorful veggies. It’s not only tasty but also good for you! The low-sodium soy sauce helps keep the sodium levels in check. Enjoy this dish and feel good about what you eat! To start, you need to make the teriyaki sauce. In a medium bowl, mix together: - 1/4 cup low-sodium soy sauce - 2 tablespoons honey or maple syrup - 2 tablespoons rice vinegar - 1 teaspoon sesame oil - 1 teaspoon cornstarch mixed with 2 tablespoons cold water Whisk these ingredients until smooth. This sauce adds sweet and salty notes to the dish. Set it aside for later use. Next, you will cook the shrimp. Heat 2 tablespoons of vegetable oil in a large skillet or wok over medium-high heat. Once hot, add: - 3 cloves garlic, minced - 1 inch fresh ginger, grated Sauté these for about 30 seconds. You want them fragrant but not burnt. Then, add 1 pound of peeled and deveined shrimp. Cook for 2-3 minutes. Stir occasionally until the shrimp turn pink and opaque. Remove the shrimp and set them on a plate. Now, it’s time for the veggies. In the same skillet, toss in: - 1 cup bell peppers, sliced - 1 cup broccoli florets - 1 cup sugar snap peas Stir-fry these for 4-5 minutes. The goal is bright colors and tender-crisp texture. Keep stirring to cook evenly. Once done, return the cooked shrimp to the skillet. Pour the teriyaki sauce over everything. Stir well to coat. Cook for an extra 2 minutes to heat through and thicken the sauce. Finally, mix in 3 chopped green onions before serving. To cook shrimp just right, use fresh, large shrimp. Start with hot oil to sear them. Cook for only 2-3 minutes until they turn pink and opaque. If they curl tightly, you’ve overcooked them. Remove them from the pan quickly to keep them juicy. Set them aside while you cook the veggies. This keeps them tender and flavorful. For a thicker sauce, add cornstarch mixed with cold water to your teriyaki mix. Start with 1 teaspoon of cornstarch. Stir it into the sauce as it cooks. If the sauce is too thick, add a splash of water or broth. This keeps it smooth and coats your shrimp and veggies nicely. When stir-frying, cut your veggies into similar sizes. This helps them cook evenly. Start with harder veggies like broccoli, then add softer ones like bell peppers. Stir constantly to avoid burning. Cook until they are bright and tender-crisp. This keeps them vibrant and tasty. Don’t overcrowd the pan; work in batches if needed. {{image_4}} You can easily make this dish vegetarian or vegan. Swap the shrimp for tofu or tempeh. Use the same teriyaki sauce. Firm tofu works best. Cut it into cubes for a nice texture. Also, use maple syrup instead of honey. This keeps it fully vegan. Shrimp is tasty, but you can try other proteins. Chicken or beef works well. They both cook nicely with the same sauce. You can also use chickpeas for a plant-based option. Just sauté them until golden. This adds a nice crunch. Feel free to mix in more veggies. Carrots, snap peas, or mushrooms add great flavor. You can also try baby corn or bok choy. They cook fast and taste great. For extra flavor, add a splash of lime juice. You can also sprinkle in some red pepper flakes for a kick. This makes each bite exciting! To keep your teriyaki shrimp stir-fry fresh, place it in an airtight container. Make sure to cool it down first. Store it in the fridge for up to three days. This keeps the shrimp and veggies from getting too soggy or losing flavor. You can also separate the shrimp from the veggies if you prefer. When it's time to eat leftovers, there are a few ways to warm it up. You can use a microwave, stove, or oven. For the microwave, heat in short bursts, stirring in between. This helps to warm it evenly. On the stove, add a splash of water to prevent sticking and heat on medium. If you use an oven, cover it to keep moisture in. You can freeze teriyaki shrimp stir-fry if you want to save it longer. Use a freezer-safe bag or container. Remove as much air as you can to avoid freezer burn. It will stay good for up to three months. When ready to eat, thaw it in the fridge overnight before reheating. This keeps the shrimp tender and the veggies crisp. Yes, you can make Teriyaki Shrimp Stir-Fry ahead of time. Cook the shrimp and veggies, then store them in the fridge. Keep the teriyaki sauce separate. When you are ready to eat, reheat the shrimp and veggies in a skillet. Add the sauce to warm it up and mix everything again. You can serve Teriyaki Shrimp Stir-Fry with fluffy jasmine rice or steamed rice noodles. Both options soak up the sauce well. You can also add a side of steamed vegetables or a fresh salad for extra crunch and nutrition. You can adjust the spice level to your taste. Add red pepper flakes for heat. If you like it hotter, try fresh sliced chili peppers or a dash of hot sauce. Start with a little, then add more if you want. This dish is all about your preference! In this blog post, we explored how to make Teriyaki Shrimp Stir-Fry. We covered key ingredients, step-by-step instructions, useful tips, and variations you can try. You learned how to achieve the perfect shrimp and stir-fry your veggies right. Remember, cooking is all about sharing great meals. Experiment with different flavors, and enjoy your dish. Now you’re ready to make a delicious stir-fry that fits your taste!

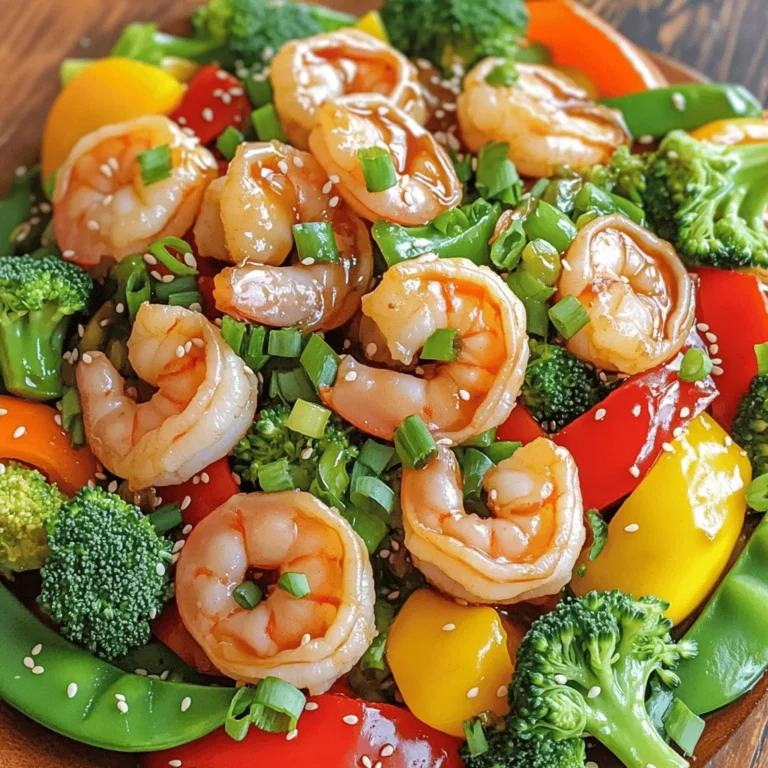
Teriyaki Shrimp Stir-Fry Flavorful and Quick Recipe

To make the meatballs, you need some basic items. Gather these for a tasty base: - 1 lb ground beef - 1/2 lb ground pork (optional; or use more beef) - 1/2 cup breadcrumbs - 1/4 cup freshly grated Parmesan cheese - 1/4 cup basil pesto (homemade is best) - 1 tsp garlic powder - 1 tsp onion powder - 1/2 tsp salt - 1/2 tsp black pepper - 1 large egg, lightly beaten These ingredients mix together to create a flavorful meatball that holds up well to baking. The heart of these meatballs is the cheese. For a gooey surprise, use: - 8 small mozzarella balls (bocconcini) These little cheese balls melt perfectly inside the meat, making each bite delightful. Seasonings bring the meatballs to life. You will need: - 1/4 cup fresh basil pesto for flavor - Marinara sauce, about 1 cup, for serving With these ingredients, you'll have a dish that's not only tasty but also comforting. The pesto adds freshness, while the marinara sauce gives a rich, warm touch. {{ingredient_image_2}} To start, set your oven to 375°F (190°C). This heat is perfect for cooking the meatballs. Next, grab a large bowl for mixing your meat. You will need 1 pound of ground beef and, if you like, a half-pound of ground pork. If you skip the pork, just use more beef. Add 1/2 cup of breadcrumbs and 1/4 cup of freshly grated Parmesan cheese. Now, stir in 1/4 cup of basil pesto. This gives the meatballs a great flavor. Add 1 teaspoon of garlic powder, 1 teaspoon of onion powder, 1/2 teaspoon of salt, and 1/2 teaspoon of black pepper. Finally, add 1 large beaten egg to help the meat hold together. Now, take a handful of the meat mixture. It should be about the size of a golf ball. Flatten it in your palm. Place an 8 small mozzarella ball in the center. Fold the meat around the cheese, sealing it inside. Make sure the cheese is fully enclosed. This will keep it from leaking. Keep forming and stuffing the meatballs until you use all the meat mixture. Line a baking sheet with parchment paper. Place the meatballs on the sheet. Make sure they are not touching, so they cook evenly. Bake in the preheated oven for 20 to 25 minutes. The meatballs should be golden brown and cooked through. Use a meat thermometer to check if they reach 160°F (70°C) inside. While the meatballs bake, heat 1 cup of marinara sauce in a small pan over low heat. Stir it often so it doesn’t stick. Once the meatballs are done, let them rest for a few minutes. This helps them set. When ready to serve, drizzle the warm marinara sauce over the meatballs. Add fresh basil leaves on top for color and flavor. Enjoy your tasty pesto mozzarella stuffed meatballs! To get meatballs that are juicy and tasty, follow these steps. First, mix your meat gently. Overworking it can make them tough. Make sure you keep the cheese inside. Always cover the mozzarella fully with meat. This helps it melt evenly. Bake the meatballs until they reach 160°F (70°C). A meat thermometer is a great tool for this. Let them rest for a few minutes after baking. This helps keep the juices inside. Homemade pesto is simple and adds great flavor. Use fresh basil, garlic, nuts, and olive oil. Here’s a quick recipe: - 2 cups fresh basil leaves - 1/2 cup extra virgin olive oil - 1/3 cup pine nuts (or walnuts) - 2 cloves garlic - 1/2 cup grated Parmesan cheese - Salt to taste Blend all the ingredients in a food processor. Adjust the salt to your taste. Homemade pesto tastes fresh and bright. You can store it for a week in the fridge. For a beautiful presentation, serve the meatballs on a rustic wooden board. This adds charm to your table. Drizzle warm marinara sauce over the meatballs. A small bowl of extra sauce is great for dipping. Garnish with fresh basil leaves. This adds a pop of color. Use a nice plate to make it look special. Enjoy your meal with friends or family! Pro Tips Use Fresh Ingredients: Opt for fresh basil and homemade pesto for a more vibrant flavor that elevates your meatballs. Don’t Overmix: When combining the meat mixture, mix just until combined to maintain a tender texture in the meatballs. Experiment with Cheese: Try different types of cheese like provolone or fontina for varied flavor profiles in your stuffed meatballs. Serve with Fresh Herbs: Garnish with not just basil but also parsley or oregano for added freshness and visual appeal. {{image_4}} You can switch ground beef for ground turkey or chicken. This change makes the meatballs lighter. Ground turkey has less fat than beef, but it still tastes great. When you use turkey or chicken, keep the spices and pesto the same. You will still enjoy the rich flavor. Just remember to check the cooking time. Leaner meats may cook a bit faster. If you want a vegetarian option, skip the meat and use a mix of grains and beans. For the cheese stuffing, you can use ricotta or a blend of cream cheese and herbs. This adds a creamy texture and is packed with flavor. You can also add spinach or sun-dried tomatoes for extra taste. Just ensure that all ingredients are well mixed. You can enhance the flavor of your meatballs with herbs. Try adding fresh parsley, oregano, or thyme to the meat mixture. Each herb brings its unique taste. You can also mix in some crushed red pepper for a bit of heat. For a fresh twist, add lemon zest to brighten up the dish. Experimenting with herbs helps you find your favorite combination. These variations give you many ways to enjoy pesto mozzarella stuffed meatballs. Each option offers a new taste while keeping the dish fun and delicious. To keep your leftover meatballs fresh, place them in an airtight container. Make sure to let them cool first. You can store them in the fridge for up to three days. If you want to enjoy them later, freezing is a great option. When you're ready to eat the leftovers, you can quickly reheat them. Place the meatballs on a baking sheet. Preheat your oven to 350°F (175°C) and bake for about 10-15 minutes. This method keeps them moist and tasty. You can also microwave them for two to three minutes. Just cover them to avoid drying out. Freezing these meatballs is simple and smart. After they cool, place them in a single layer on a baking sheet. Freeze them for about an hour or until firm. Then, transfer them to a freezer bag. Be sure to label the bag with the date. They can stay in the freezer for up to three months. When you want to eat them, thaw in the fridge overnight before reheating. This way, you have a quick meal ready anytime! Yes, you can make the meatballs ahead of time. Shape them and store them in the fridge for up to 24 hours. This saves time on busy days. You can also freeze them for later. Just place the uncooked meatballs on a baking sheet, freeze them until solid, then transfer to a bag. They last up to three months in the freezer. You can serve these meatballs with many sides. Here are some great options: - Pasta: Spaghetti or penne with marinara sauce pairs well. - Salad: A fresh green salad adds crunch. - Bread: Garlic bread or crusty rolls are perfect for dipping. - Rice: Fluffy rice absorbs the sauce nicely. - Veggies: Roasted or steamed veggies add color and nutrition. To check if the meatballs are done, use a meat thermometer. Insert it into the center of a meatball. It should read 160°F (70°C). You can also cut one open. The meat should be no longer pink inside, and the cheese should be melty. If using frozen meatballs, add a few extra minutes to the cooking time. In this blog post, I covered how to make pesto mozzarella stuffed meatballs. We talked about choosing the right meat, creating a cheesy center, and adding tasty seasonings. I walked you through each step, from oven prep to serving. I shared tips for perfect meatballs, homemade pesto, and fun presentation ideas. We also explored different variations, like turkey alternatives and vegetarian options. Finally, I gave you storage tips to keep meals fresh. Enjoy trying this recipe and making it your own! Happy cooking!

Pesto Mozzarella Stuffed Meatballs Simple and Tasty

To make Salted Caramel Pretzel Bark, you need the right ingredients. Gather these items for a sweet and salty delight: - 2 cups pretzel twists - 1 cup semi-sweet chocolate chips - 1 cup caramel candies (20-25 candies) - 2 tablespoons heavy cream - 1 teaspoon sea salt - Optional toppings: 1/4 cup chopped pecans, mini chocolate chips, or colorful sprinkles Each ingredient plays a vital role in the final flavor and texture. The pretzels give that perfect crunch. The chocolate adds rich sweetness. The caramel brings a smooth, gooey layer that ties it all together. Don't skip the sea salt! It enhances the taste and balances the sweetness. Feel free to mix in any optional toppings you like. Chopped pecans add a nutty crunch. Mini chocolate chips or sprinkles can make it look fun and festive. This recipe is flexible, so you can adjust it to your taste! {{ingredient_image_2}} - Preheat your oven to 350°F (175°C). - Line a baking sheet with parchment paper to prevent sticking. - Spread pretzel twists evenly on the baking sheet in a single layer. - Bake the pretzels for 5 minutes. - Remove them from the oven and let them cool for a few minutes. - In a microwave-safe bowl, mix caramel candies and heavy cream. - Heat in 30-second bursts, stirring in between. Wait until the caramel is smooth. - Pour the hot caramel over the cooled pretzels, spreading it evenly. - In the same bowl, melt the semi-sweet chocolate chips using the same method. - Drizzle the melted chocolate over the caramel. Spread it if needed. - Evenly sprinkle sea salt over the chocolate layer. - Add any optional toppings like chopped pecans or mini chocolate chips. - Let the bark cool at room temperature for at least 30 minutes. - For faster cooling, place it in the fridge for 15 minutes. - Once set, break the bark into pieces and enjoy your treat! - Ensure even melting of caramel and chocolate: Melt caramel candies with heavy cream in 30-second bursts. Stir well after each burst. This keeps the caramel smooth and creamy. For chocolate, use the same method. Stir until it’s silky and fully melted. - How to prevent pretzels from burning: Bake pretzel twists for just five minutes. Keep an eye on them to avoid burning. Once baked, let them cool before adding caramel. This helps keep them crunchy. - Serving suggestions with a decorative platter: For a lovely display, arrange the bark on a fun platter. Use bright colors to make it pop. This adds a nice touch for parties or gatherings. - Creative packaging ideas for gifting: Package the bark in clear bags. Tie them with ribbons for a special touch. You can also use small boxes for a more elegant gift. This makes your treat look as good as it tastes! Pro Tips Use Fresh Ingredients: For the best flavor, ensure your caramel candies and chocolate chips are fresh and within their expiration dates. Experiment with Toppings: Don't hesitate to try different toppings like crushed pretzels, sea salt caramel drizzle, or even a sprinkle of sea salt for an extra kick. Storage Matters: Store your pretzel bark in an airtight container at room temperature to maintain its crispness and flavor for longer. Customize Your Chocolate: Feel free to mix and match chocolate types; dark chocolate or white chocolate can add exciting flavors to your pretzel bark. {{image_4}} You can make this treat even more fun! Swap semi-sweet chocolate for milk or dark chocolate. Each kind gives a different taste and texture. If you want a nutty crunch, use different types of nuts. Chopped almonds or cashews work great. You can also add toppings like mini chocolate chips or colorful sprinkles. These add a pop of color and flavor, making your bark even more special. Want to make it gluten-free? Choose gluten-free pretzels. They work just as well and taste amazing. For those who follow a vegan diet, you can swap out the chocolate and caramel. Look for vegan chocolate chips and dairy-free caramel. These changes keep the treat tasty while meeting dietary needs. You can enjoy this bark without missing out! To keep your pretzel bark fresh, store it in an airtight container. Layer parchment paper between pieces to prevent sticking. This method keeps each piece nice and crunchy. You can store it at room temperature for up to two weeks. Just make sure it stays in a cool, dry place. If you want to save some for later, freezing is a great option. First, let the bark cool completely. Then, wrap it tightly in plastic wrap. After that, place it in a freezer-safe bag. This way, it can last for up to three months in the freezer. When you're ready to enjoy it, thaw the bark at room temperature for about an hour. If you're in a rush, you can also use the microwave on low power for a few seconds. Serve it once it's soft and ready. To make this treat, follow these steps: 1. Preheat your oven to 350°F (175°C). Line a baking sheet with parchment paper. 2. Spread 2 cups of pretzel twists on the sheet in a single layer. 3. Bake the pretzels for 5 minutes to crisp them up. 4. In a microwave-safe bowl, mix 1 cup of caramel candies with 2 tablespoons of heavy cream. Heat in 30-second bursts until smooth. 5. Pour the melted caramel over the cooled pretzels. 6. Melt 1 cup of semi-sweet chocolate chips in the same way and drizzle it over the caramel. 7. Sprinkle 1 teaspoon of sea salt on top. Add chopped pecans or mini chocolate chips if you like. 8. Let it cool for at least 30 minutes, or refrigerate for 15 minutes to speed up the process. 9. Once set, break into pieces and enjoy! Yes, you can use store-bought caramel. Look for caramel sauce in a squeeze bottle. Just pour it over the pretzels like the melted candy. This can save time and still taste great! If you want a twist, try using rice cakes or popcorn instead of pretzels. Both give a nice crunch and add unique flavors. Just keep an eye on the saltiness! This bark stays fresh for about a week at room temperature. Store it in an airtight container to keep it crunchy. You can also freeze it for longer storage. Absolutely! You can add crushed cookies, dried fruits, or even coconut flakes. Get creative and make it your own! Each topping adds a new flavor and texture. In this post, we explored how to make Salted Caramel Pretzel Bark. We covered ingredients, easy steps, and tips to achieve the best results. You can customize your bark with different chocolates, nuts, and toppings for fun variations. Remember to store it properly to keep it fresh. This treat is not just tasty; it’s great for sharing or gifting too. Enjoy creating this sweet and salty snack that will delight your friends and family.

Salted Caramel Pretzel Bark Irresistible Crunchy Treat

- 1 cup ricotta cheese - 1 cup all-purpose flour - 2 large eggs - 1/2 cup whole milk - 1/4 cup granulated sugar - Zest of 1 lemon (about 1 tablespoon) - 2 tablespoons freshly squeezed lemon juice - 1 teaspoon baking powder - 1/2 teaspoon baking soda - Pinch of fine sea salt - Butter or vegetable oil for cooking - Maple syrup - Fresh berries - Powdered sugar Lemon ricotta pancakes need simple and fresh ingredients. Each one adds flavor and texture. Ricotta cheese makes the pancakes soft and creamy. It gives them a rich taste. The all-purpose flour helps form the batter. Eggs add structure and help the pancakes rise. Whole milk makes them moist. Granulated sugar balances the tart lemon. Lemon zest and juice bring freshness. It lifts the flavor and gives a lovely aroma. Baking powder and baking soda help the pancakes puff up. Salt enhances all the flavors. For cooking, butter or oil keeps the pancakes from sticking. You can choose what you like best! The optional toppings add fun. Maple syrup makes them sweet. Fresh berries add color and a burst of flavor. A sprinkle of powdered sugar makes them look fancy. - Mixing wet ingredients: In a medium bowl, add ricotta cheese, eggs, milk, sugar, lemon zest, and lemon juice. Whisk until smooth. This step blends the flavors well and gives the pancakes a creamy base. - Combining dry ingredients: In another bowl, whisk together flour, baking powder, baking soda, and salt. Mixing these dry ingredients well helps to evenly distribute the leavening agents, which makes the pancakes rise nicely. - Folding the batter: Gradually add the dry mix to the wet mix. Use a spatula to fold gently. It's okay if the batter has some lumps; this keeps the pancakes fluffy. Overmixing will make them dense, and we want light, airy pancakes. - Preheating the skillet: Heat a non-stick skillet over medium heat. Grease it lightly with butter or vegetable oil. This helps prevent sticking and gives the pancakes a nice golden color. - Pouring the batter: For each pancake, pour about 1/4 cup of the batter onto the skillet. Cook for 2 to 3 minutes. Look for bubbles on the surface and set edges before flipping. - Flipping the pancakes: Carefully use a spatula to flip the pancakes. Cook for another 2 to 3 minutes until golden brown. The pancakes should be fluffy and cooked through. - Keeping pancakes warm: Once cooked, remove pancakes from the skillet. Keep them warm by covering them loosely with foil. This helps maintain their warmth while you cook the rest. - Presentation tips: Stack the pancakes on a plate. Drizzle them with maple syrup and top with fresh berries. A light dusting of powdered sugar adds an elegant touch. This makes for a beautiful and tasty breakfast. To get fluffy pancakes, avoid overmixing the batter. Mix just until the dry and wet ingredients come together. If you see some lumps, that’s okay! Lumps help keep your pancakes light and airy. The right temperature for cooking is key. Preheat your skillet over medium heat. If it's too hot, the outside will burn before the inside cooks. If it's too cool, the pancakes will turn out flat. Using fresh lemon juice and zest makes a big difference. Fresh zest adds a bright, tangy flavor. You need about 1 tablespoon of zest from one lemon. For the juice, squeeze it right before you add it to your batter. This keeps the flavor fresh. You can also add flavor with extras like vanilla extract or a pinch of cinnamon. These will round out the lemon taste nicely. Measuring the batter correctly is simple. Use a 1/4 cup to scoop the batter onto the skillet. This size helps the pancakes cook evenly. Cook each pancake for about 2-3 minutes on one side. Look for bubbles on top and edges that look set. Flip them gently with a spatula and cook for another 2-3 minutes. This gives you a golden-brown finish. {{image_4}} You can make lemon blueberry pancakes by adding fresh blueberries to the batter. Just fold in about 1 cup of blueberries after mixing your batter. This small step adds a burst of flavor and color. Blueberries pair well with lemon. They give a sweet touch to the tartness of the lemon. You get a tasty treat that feels special. For a unique twist, try adding herbs to your lemon ricotta pancakes. Fresh herbs like thyme or basil work well. Chop the herbs finely and mix them into the batter. Start with about 1 tablespoon of chopped herbs. This adds a savory note to the pancakes. The lemon and herbs create a refreshing flavor combo. It’s a fun way to surprise your family or guests. If you want a vegan version, you can easily swap some ingredients. Use almond milk instead of whole milk. Replace ricotta with silken tofu or a plant-based ricotta. You can also use flaxseed meal mixed with water as an egg substitute. To make this, mix 1 tablespoon of flaxseed meal with 2.5 tablespoons of water. Let it sit for a few minutes to thicken. This will help keep your pancakes fluffy and delicious. Enjoy these tasty pancakes that fit your diet! To keep your lemon ricotta pancakes fresh, first, let them cool. Then, place them in an airtight container. You can store them in the fridge for up to three days. Make sure to separate layers with parchment paper. This will help them from sticking together. If you want to keep pancakes longer, freezing is a great option. Stack the pancakes with parchment paper between each one. Then, wrap the whole stack in plastic wrap and place it in a freezer-safe bag. They can stay good for about two months in the freezer. When you want to enjoy those pancakes again, reheating them is quick and easy. The best method is to use a skillet. Heat the skillet over medium-low heat. Place the pancakes in the pan for about one minute on each side. This warms them through and keeps them soft. You can also use a microwave if you’re in a hurry. Place a pancake on a microwave-safe plate and cover it with a damp paper towel. Heat for 15-20 seconds. Check to see if it needs more time. Just be careful not to overheat, or they may get tough. Yes, you can make Lemon Ricotta Pancakes ahead of time. To store them, let the pancakes cool completely. Then, place them in a single layer in an airtight container. You can also use parchment paper between layers to prevent sticking. Store them in the fridge for up to three days. For longer storage, freeze them for up to two months. When ready to eat, simply reheat them in a toaster or microwave. You can use several alternatives for ricotta cheese. Cottage cheese is a great choice. Just blend it until smooth. Cream cheese can work too, but it may change the taste a bit. Greek yogurt is another option that adds protein. Each option will give a slightly different flavor and texture, but they will still make tasty pancakes. To make these pancakes gluten-free, use a gluten-free all-purpose flour blend. Brands like Bob's Red Mill or King Arthur Flour offer good mixes. You may need to add a bit more liquid to your batter. This helps keep the pancakes moist. Make sure to check that all other ingredients are gluten-free, like baking powder. Enjoy a delicious stack without the gluten! You learned how to make tasty lemon ricotta pancakes. We covered the main ingredients, step-by-step instructions, and tips for fluffiness. You can also try fun variations like lemon blueberry pancakes or a vegan version. Storing and reheating leftovers is easy too. These pancakes are bright and delicious, perfect for any meal. Try making them, and enjoy a lovely breakfast or snack!

Lemon Ricotta Pancakes Fluffy and Delicious Breakfast

- 2 salmon fillets (approximately 6 oz each) - 1 cup jasmine rice - 1 cup broccoli florets - 1 medium carrot, julienned - 1 bell pepper (any color), thinly sliced - 3 green onions, finely chopped - ½ cup teriyaki sauce (store-bought or homemade) - 1 tablespoon sesame oil - 1 tablespoon olive oil - 1 teaspoon sesame seeds (for garnish) - Optional lemon wedges These ingredients make a simple yet tasty teriyaki salmon rice bowl. I love using salmon for its rich flavor and healthy fats. The jasmine rice adds a nice touch. It is fragrant and fluffy, perfect for soaking up the teriyaki sauce. Fresh vegetables bring color and crunch. Broccoli, carrots, and bell peppers not only taste great together but also add nutrients. They are key to a balanced meal. The teriyaki sauce is the star here. It adds a sweet and savory note. You can use store-bought sauce or make your own. Sesame oil and olive oil help cook the salmon and vegetables. They bring out the best flavors. For garnishes, green onions and sesame seeds add a lovely finish. They give a fresh taste and a nice look to your bowl. If you like a citrus touch, lemon wedges are a great option. They round out the flavors perfectly. To cook the rice, start with the right ratio. Use 1 cup of jasmine rice and 2 cups of water. Bring this to a boil in a medium saucepan over medium-high heat. Once it bubbles, cover the pot with a lid. Then, reduce the heat to low. Let it simmer for 15-18 minutes until the rice is soft and the water is gone. After cooking, remove the pot from heat, but keep it covered for 5 more minutes. This step helps the rice steam and become fluffy. While the rice cooks, you can prepare the vegetables. I like to use broccoli, carrots, and bell peppers. Cut the broccoli into florets, julienne the carrot, and slice the bell pepper thinly. Heat 1 tablespoon of olive oil in a large skillet over medium heat. Add the vegetables and sauté them for 5-7 minutes. Stir often to keep them from burning. They should be tender but still crisp. Season with salt and pepper to taste, then set them aside. Next, let’s cook the salmon. In the same skillet, add 1 tablespoon of sesame oil. Turn the heat to medium-high. Season the salmon fillets with salt and pepper on both sides. Place the salmon skin-side down in the skillet. Cook for about 4-5 minutes until a golden crust forms. Flip the fillets over and brush them with teriyaki sauce. Cook for another 3-4 minutes or until the salmon flakes easily with a fork. Once the rice is ready, fluff it with a fork to separate the grains. Divide the fluffy rice into serving bowls. Top each bowl with sautéed vegetables and a salmon fillet. If you want, drizzle more teriyaki sauce over the top for extra taste. Finally, add the finishing touches. Sprinkle chopped green onions and sesame seeds over each bowl. This step enhances both the flavor and the look of the dish. You can also serve the bowls with lemon wedges on the side for a fresh burst. Arrange each ingredient neatly for a beautiful presentation that will impress anyone who sees it. - Ensuring perfect salmon: Start with fresh salmon fillets. Season them with salt and pepper. Cook skin-side down for a crispy texture. Flip carefully to keep the fillet intact. You want it golden brown and flaky. - Vegetable variations and cooking methods: You can use any veggies you like. Broccoli, carrots, and bell peppers are great. Try snap peas or zucchini for a twist. Sauté them until they are tender but still bright. - Making homemade teriyaki sauce: Mix soy sauce, brown sugar, garlic, and ginger. Heat it until it thickens. This sauce adds a personal touch to your dish. - Additional sauces or spices to try: If you want more flavor, try adding hoisin sauce or a drizzle of ponzu. Both add depth to your salmon. - Adding heat with chili flakes or sriracha: Spice things up with chili flakes or sriracha. Start with a small amount, then add more if you like it hot. - Ways to incorporate herbs: Fresh herbs can brighten your dish. Try cilantro, basil, or parsley. They add freshness and can change the flavor profile. - Time-saving tips when making ahead: Cook rice and veggies in bulk. Store them in the fridge, so they’re ready for quick meals. - Freezing and reheating salmon: Cooked salmon can be frozen for up to three months. Thaw it overnight in the fridge before reheating. - Preparing vegetables in advance: Chop veggies ahead of time. Store them in airtight containers to keep them fresh. When you're ready to cook, just toss them in the pan. {{image_4}} You can swap salmon for other proteins like chicken or tofu. Chicken needs a little longer to cook. Tofu cooks faster and absorbs flavors well. Each protein brings its own taste. Chicken offers a mild flavor, while tofu is light and fluffy. Both options make this dish versatile. Besides jasmine rice, try quinoa, brown rice, or cauliflower rice. Quinoa cooks like rice but has more protein. Brown rice takes longer but adds fiber. Cauliflower rice is low-carb and cooks quickly. Adjust cooking times based on the grain for best results. Each choice brings unique nutrients to your meal. Use seasonal vegetables for freshness. Broccoli, carrots, and bell peppers are great, but feel free to mix in snap peas or zucchini. Fresh vegetables taste better, but frozen ones are handy too. They are pre-cut and keep well. Combine different veggies to add colors and flavors to your bowl. To keep your teriyaki salmon rice bowls fresh, store them in the fridge. Use airtight containers to stop air from getting in. This keeps the flavors nice and bold. The leftovers will stay good for about three days. Make sure to cool everything before you put it in the fridge. This helps keep the rice fluffy. When reheating, you want to keep the salmon and rice yummy. The best way is to use a microwave. Place a damp paper towel over the bowl. This helps keep the moisture in. Heat in short bursts, around 30 seconds. If you prefer, you can also grill or pan-fry the salmon. This can help it stay crispy. Just heat it on medium for a few minutes. If you want to save some for later, freezing is a great option. Freeze the salmon and rice in separate containers. This keeps everything fresh. When you want to eat it, thaw it in the fridge overnight. To cook, add a little water and cover it. This will help prevent dryness when you heat it up. To make teriyaki salmon rice bowls, start by making the sauce. Combine soy sauce, mirin, and sugar in a pot. Heat until the sugar dissolves. Let it cool and thicken. For cooking, first, make the rice. Boil jasmine rice in water, then simmer until tender. Sauté your favorite veggies like broccoli and carrots in olive oil. Cook the salmon in sesame oil for a crispy skin. Brush the salmon with teriyaki sauce while it cooks. Finally, assemble the bowls with rice, veggies, and salmon. Yes, you can use frozen salmon. Just adjust your cooking time. Cook the salmon longer to ensure it is done. Always thaw salmon safely. Place it in the fridge overnight or submerge it in cold water for quick thawing. Avoid thawing at room temperature as it may lead to bacteria growth. For sides, try steamed edamame or a fresh salad. Pickled ginger adds a nice touch. Miso soup is another great option. Complementary flavors include sesame seeds or lemon wedges. These pair well with the rich teriyaki sauce. A typical bowl has around 500 calories. The main ingredients include salmon, rice, and veggies. To reduce calories, you can use brown rice instead of jasmine rice. Opt for less teriyaki sauce or add more veggies for a lighter meal. We explored how to make teriyaki salmon rice bowls packed with flavor. You learned the key ingredients, from salmon to jasmine rice, and the importance of fresh veggies. I provided step-by-step cooking instructions, along with tips for perfecting each element. With variations for proteins and grains, you can customize the dish to your taste. Remember, storing and reheating properly keeps your meal fresh. Try these tips, and enjoy a delicious, satisfying bowl right at home. Your kitchen is now ready for some tasty adventures!

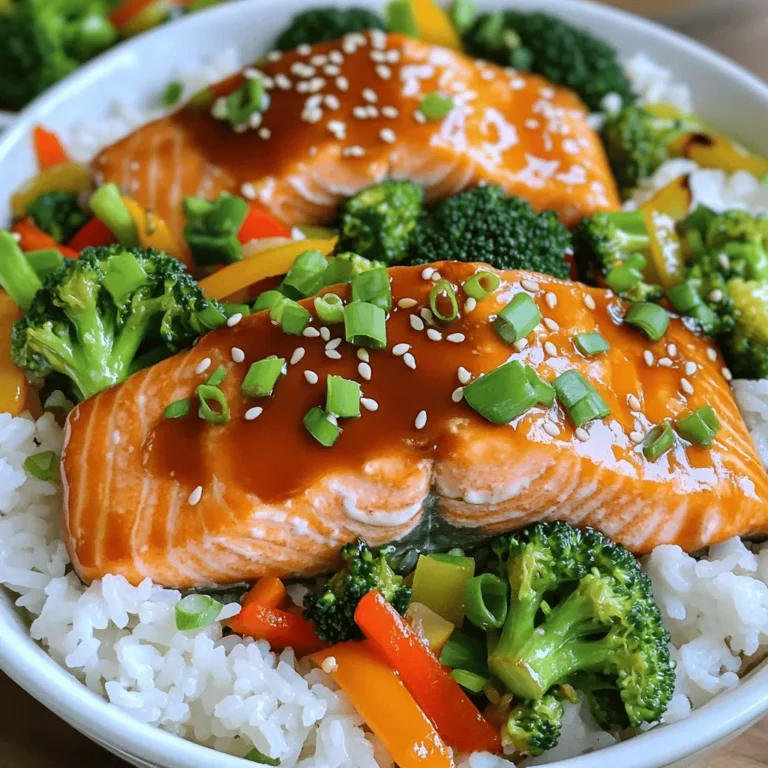
Teriyaki Salmon Rice Bowls Flavorful and Easy Recipe

- 1 pound ground chicken (or turkey) - 1/2 cup panko breadcrumbs - 1/4 cup fresh cilantro, finely chopped - 2 green onions, thinly sliced - 2 cloves garlic, minced - 1 tablespoon fish sauce - 1 teaspoon fresh ginger, grated - Salt and freshly ground black pepper to taste - 1 can (400 ml) coconut milk - 2 tablespoons red curry paste - 1 tablespoon fresh lime juice - 1 tablespoon brown sugar - 1 cup vegetable broth - 1 bell pepper, sliced - 1 cup snap peas, trimmed - Fresh basil - Extra cilantro To start, grab a large mixing bowl. Add 1 pound of ground chicken or turkey. This is your base. Next, toss in 1/2 cup of panko breadcrumbs for crunch. Now, add 1/4 cup of finely chopped fresh cilantro. This will add a great flavor. Then, include 2 thinly sliced green onions for a fresh taste. After that, add 2 minced cloves of garlic for that lovely aroma. Don’t forget 1 tablespoon of fish sauce for depth. Also, mix in 1 teaspoon of freshly grated ginger. Finally, season with salt and black pepper. Mix gently until everything is combined. Be careful not to overwork it. Now, it’s time to shape your meatballs. Using clean hands, take small portions of the mixture. Roll them into balls about 1 to 1.5 inches wide. Place these on a baking sheet lined with parchment paper. This helps with sticking. Next, heat 1 tablespoon of olive oil in a large skillet over medium heat. When it’s hot, add the meatballs. Don’t overcrowd the skillet. Cook them for about 5-7 minutes. Turn them occasionally so they brown nicely. Once they look great, remove them from the skillet and set them aside. In the same skillet, add 2 tablespoons of red curry paste. Sauté it for 1-2 minutes until it smells good. Then, stir in 1 can of coconut milk and 1 cup of vegetable broth. Mix them well to blend the flavors. After that, add 1 sliced bell pepper and 1 cup of trimmed snap peas. Stir these into the sauce. Let it gently simmer for about 5-7 minutes. You want the veggies to be tender but still bright. Now, return the browned meatballs to the skillet. Add 1 tablespoon of fresh lime juice and 1 tablespoon of brown sugar. Stir to coat the meatballs in the sauce. Let it simmer for another 8-10 minutes. The meatballs will soak up all the good flavors. To get the perfect meatball texture, mix your ingredients gently. Overmixing can make them tough. The panko breadcrumbs give a nice crunch. You want the meatballs to be moist but firm. If your mixture feels too wet, add a bit more panko. For the sauce, make sure to stir the coconut milk well. This helps blend all the flavors smoothly. To boost the flavor, consider adding a splash of soy sauce. It adds depth to the meatballs. Fresh herbs like basil and cilantro bring brightness. Squeeze extra lime juice before serving. This adds a zesty kick. You can also experiment with different curry pastes. Green or yellow curry pastes can change the taste nicely. One common mistake is overcrowding the skillet when cooking meatballs. This can lead to uneven cooking. Ensure you leave space between each meatball. Another error is not letting the sauce simmer long enough. This step helps meld the flavors. Lastly, do not skip the brown sugar. It balances the heat from the curry paste and enhances the overall taste. {{image_4}} You can switch the ground chicken for other meats. Ground turkey works well here too. If you want a richer flavor, try ground beef. For a lighter option, ground pork is great. You can even use plant-based meat for a veggie twist. Feel free to mix in various vegetables. Broccoli and zucchini add nice texture. Carrots offer sweetness and color. You can also add mushrooms for an earthy taste. The goal is to keep it vibrant and fresh. If you love heat, add more red curry paste. For a milder dish, use less or substitute with sweet chili sauce. You can also serve sliced jalapeños on the side for those who want extra spice. Adjusting heat is easy and can make this dish fit your taste perfectly. After enjoying Thai coconut curry meatballs, store leftovers in an airtight container. Make sure to let them cool first. This helps keep the meatballs fresh. Place them in the fridge for up to three days. If you want to keep them longer, freezing is a great option. To reheat the meatballs, use a microwave or stovetop. If using the microwave, place the meatballs in a bowl and cover with a damp paper towel. Heat them for about one to two minutes. If using the stovetop, warm them in a skillet over medium heat. Add a splash of vegetable broth to keep them moist. Stir gently until they're heated through. For freezing, pack the meatballs in a single layer on a baking sheet. Freeze them for about one hour until firm. Once frozen, transfer them to a freezer bag. Be sure to label the bag with the date. They can stay in the freezer for up to three months. When ready to eat, thaw them in the fridge overnight. Reheat as described above for a quick meal. Yes, you can use other meats. Ground turkey or beef works well. You can also try pork for a richer flavor. Just keep in mind that cooking times may change. Always check the meat's doneness before serving. To make this dish vegan, use plant-based meat. You can use lentils or chickpeas as a base. Replace fish sauce with soy sauce or tamari. Use coconut milk for creaminess and keep all veggies. The taste will still be amazing! Serve these meatballs with fluffy jasmine rice. This rice soaks up the curry sauce perfectly. You can also add fresh veggies like cucumber or a side salad for crunch. Noodles are another great option for a filling meal. Enjoy the mix of flavors! You now have all you need to make delicious Thai Coconut Curry Meatballs. We covered the ingredients, from meatballs to curry sauce and garnishes. I shared clear steps to prepare and cook them, plus tips for perfecting flavor and avoiding common mistakes. Feel free to try various proteins and veggies to customize this dish. Store leftovers with ease and enjoy tasty meals anytime. Use this guide to impress your friends and family with great meals that bring smiles. Happy cooking!

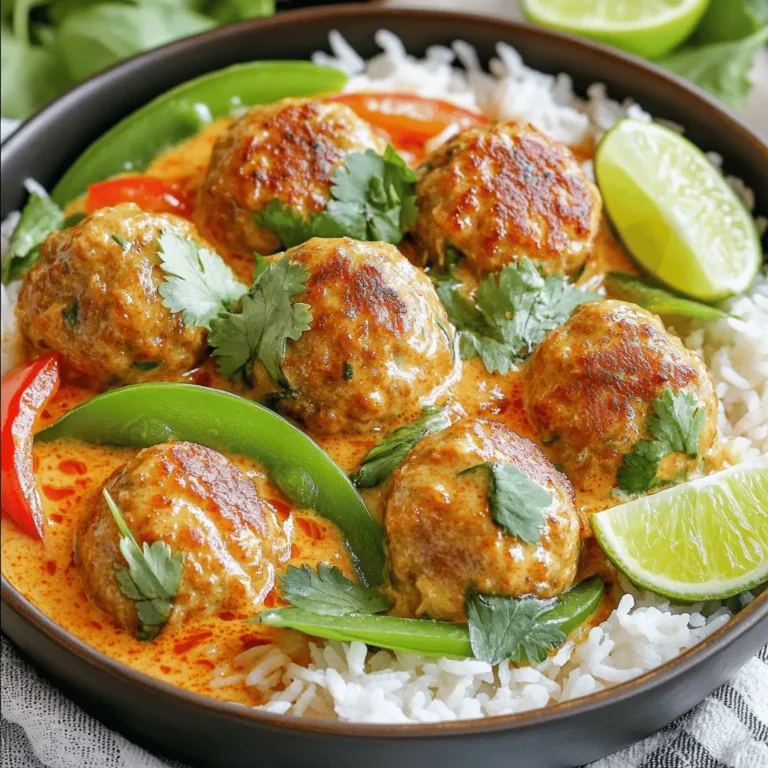
Thai Coconut Curry Meatballs Delightful and Flavorful

- 1 pound large shrimp, peeled and deveined - 4 tablespoons unsalted butter, divided - 3 cloves garlic, finely minced - 1 teaspoon red pepper flakes - 1 tablespoon fresh lemon juice - Zest of 1 lemon - 8 ounces linguine or spaghetti - 2 tablespoons fresh parsley, finely chopped - 1/4 cup grated Parmesan cheese (optional) - Salt and black pepper - Reserved pasta water Gather these fresh ingredients before you start cooking. Large shrimp are key for this dish. They bring a sweet flavor and juicy texture. Unsalted butter gives richness, while garlic adds a strong taste. Red pepper flakes give a nice kick but you can adjust it to your liking. Fresh lemon juice and zest brighten the dish. They add a zesty flavor that pairs well with seafood. Linguine or spaghetti is perfect for holding the sauce. Fresh parsley adds a pop of color and freshness. If you love cheese, sprinkle grated Parmesan on top for creaminess. Make sure to have salt and black pepper ready. They enhance all the flavors in this dish. Lastly, reserve some pasta water. It helps adjust the sauce and makes everything creamy. With these ingredients, you can create a quick and delicious garlic butter shrimp scampi. To start, fill a large pot with water. Add a generous amount of salt. Bring the water to a boil. Once boiling, add the linguine or spaghetti. Cook the pasta until it is al dente. This usually takes about 8-10 minutes. After cooking, save 1 cup of pasta water. Drain the pasta and set it aside. Now, take a large skillet and set it over medium heat. Melt 2 tablespoons of unsalted butter in the skillet. When the butter starts to bubble, add the shrimp in a single layer. Season them with salt and pepper. Cook the shrimp for 2-3 minutes without moving them. They should turn pink on one side. Carefully flip each shrimp over. Cook for another 1-2 minutes until they are fully cooked. Remove the shrimp from the skillet and place them on a plate. In the same skillet, add the other 2 tablespoons of butter. Let it melt fully. Once melted, add the minced garlic and red pepper flakes. Sauté for about 1 minute. Stir often but be careful not to burn the garlic. It should smell great! Next, stir in the fresh lemon juice and zest. Mix everything well. Now, add the cooked pasta to the skillet. Pour in some of the reserved pasta water, starting with about 1/2 cup. Toss everything together. Ensure the pasta is well coated with the sauce. If the sauce seems too thick, add more pasta water until you reach the desired consistency. Choosing the right shrimp Use large shrimp for the best results. Look for shrimp that are fresh and firm. The size helps with even cooking and makes a nice presentation. Avoiding overcooked shrimp Cook the shrimp just until they turn pink and opaque. This usually takes about 2-5 minutes. If you cook them too long, they become tough and rubbery. Adjusting with pasta water After cooking the pasta, save some of the water. If your sauce is too thick, add a little pasta water. This water helps the sauce cling to the pasta better. Flavor enhancements Add more garlic or lemon juice if you want to boost the taste. A pinch of salt or pepper can also help bring out the flavors. Taste as you go to find your perfect balance. Garnishing for visual appeal Use fresh parsley to add color to your dish. Sprinkle it on top just before serving. For extra flair, add a twist of lemon zest. Serving dish recommendations A shallow bowl is ideal for serving shrimp scampi. It allows the sauce to pool nicely. You can also add some garlic bread on the side for a complete meal. {{image_4}} - Substituting whole grain or gluten-free pasta: Whole grain pasta adds fiber. It gives a nutty flavor. Gluten-free pasta works well for those with gluten issues. Both options keep the dish tasty. - Using olive oil instead of butter: Olive oil is a great substitute for butter. It has healthy fats. This swap makes the dish lighter. It also adds a slight fruity taste. - Adding cherry tomatoes or spinach: Cherry tomatoes bring sweetness and color. They burst with flavor when cooked. Spinach adds a nice green touch. It also gives a boost of nutrients. - Using different herbs like basil or thyme: Fresh herbs can change the dish's taste. Basil adds a sweet, aromatic touch. Thyme brings a warm, earthy flavor. Both are great choices to try. - Making it dairy-free: To keep it dairy-free, skip the butter and cheese. Use a dairy-free butter substitute. This way, you keep the creamy feel without dairy. - Low-carb adaptations: You can make this dish low-carb by using zucchini noodles. They are light and full of flavor. Another option is to use shirataki noodles. They are low in calories and carbs. To keep your garlic butter shrimp scampi fresh, store it in the fridge. Place the leftovers in an airtight container. This will help keep the shrimp and pasta from drying out. The scampi will stay good for 2 to 3 days. When you are ready to eat, reheat it gently. For reheating, you can use a skillet over low heat. Add a splash of water or a little butter to prevent sticking. Stir often until it's warm. You can also use a microwave. Just cover the dish with a microwave-safe lid or wrap. Heat for 1-2 minutes, stirring halfway through. You can make this meal ahead of time. Start by prepping your ingredients. Peel and devein the shrimp a day before. Store them in a sealed bag in the fridge. You can also chop the garlic and parsley in advance. For freezing, you can freeze the cooked shrimp scampi. Place it in a container or freezer bag. It will stay good for about one month. When ready to eat, thaw it in the fridge overnight. Reheat as mentioned above. This way, you can enjoy a quick and tasty meal whenever you want! For scampi, large shrimp work best. I recommend using U.S. wild-caught shrimp. They have great flavor and texture. Look for shrimp that are peeled and deveined to save time. If you prefer, fresh shrimp is also a good choice. But always check for quality; they should smell fresh, not fishy. Yes, frozen shrimp is a great option. To use frozen shrimp, first, thaw them. You can do this by placing them in the fridge overnight. If short on time, place them in cold water for about 15-20 minutes. Once thawed, pat them dry before cooking. This helps them sear better in the pan. You can enjoy shrimp scampi without pasta. Try serving it over zucchini noodles or cauliflower rice. Both options are healthy and delicious. You can also serve it with a fresh salad or on a bed of sautéed veggies. This keeps the dish light and full of flavor. You learned how to make shrimp scampi in a few simple steps. From cooking the pasta to sautéing the shrimp, each part matters. Remember to adjust your sauce with reserved pasta water for the right texture. Try fresh herbs or different pastas for a unique twist. This dish is easy to store and perfect for meal prep. Enjoy creating your own tasty shrimp scampi! You now have the tools to impress anyone at your next meal.

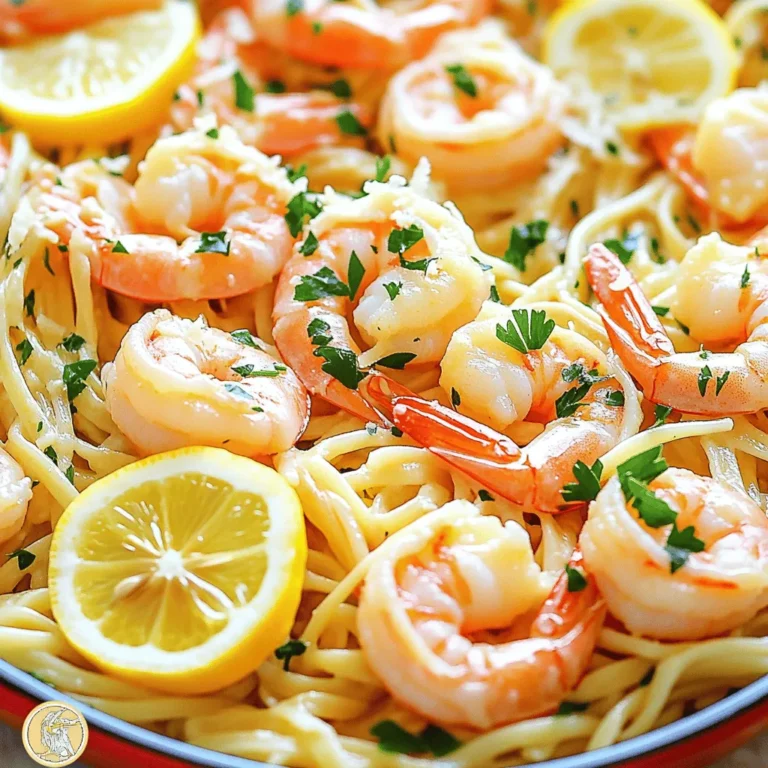
Garlic Butter Shrimp Scampi Quick and Delicious Meal

To make a creamy vegan eggnog, you need: - 1 can (400ml) full-fat coconut milk - 1 cup almond milk (or any preferred plant-based milk) - 1/4 cup pure maple syrup - 1 teaspoon vanilla extract - 1 teaspoon ground nutmeg - 1 teaspoon ground cinnamon - 1/4 teaspoon ground cloves - A pinch of sea salt - 1/4 cup raw cashews, soaked You can make your eggnog even prettier with: - Cinnamon sticks - Freshly grated nutmeg If almond milk isn't your favorite, try these: - Soy milk - Oat milk - Cashew milk - Rice milk These choices will give you a tasty base for your drink. Each type of milk adds a unique flavor and texture. {{ingredient_image_2}} Start by soaking the cashews. Use water and let them sit for at least 2 hours. If you can, soak them overnight for best results. Once they are soft, drain and rinse the cashews. This step makes them creamy and smooth in the eggnog. Next, gather your blender and all your ingredients. Add the soaked cashews to the blender. Pour in the full-fat coconut milk and almond milk. Then, add the maple syrup, vanilla extract, ground nutmeg, ground cinnamon, ground cloves, and a pinch of sea salt. Blend on high for 1-2 minutes. You want a smooth and creamy mix. If you like it thicker, add more cashews or less almond milk. Taste it and feel free to adjust the sweetness or spices to your liking. After blending, pour the eggnog into a pitcher. Place it in the fridge for at least 1 hour. This lets all the flavors mix well. When you are ready to serve, pour the eggnog into glasses. For a festive touch, add a cinnamon stick and sprinkle some freshly grated nutmeg on top. Enjoy your creamy vegan eggnog! To achieve the best creaminess in your vegan eggnog, always use a high-speed blender. The power helps blend all ingredients smoothly. Start with the liquid ingredients first, like coconut milk and almond milk. Then add the soaked cashews. This layering helps everything mix well. Blend for 1-2 minutes until smooth. If you need a thicker eggnog, add more soaked cashews. You can also reduce almond milk to get the right texture. Taste your eggnog during blending. You can always add more maple syrup for sweetness. If you want it spicier, add extra nutmeg, cinnamon, or cloves. Remember, everyone has different taste buds. Start with the original amounts, then tweak as needed. You can always add but cannot take away. This way, your eggnog suits your preference perfectly. If you have leftover eggnog, store it in an airtight container. Place it in the fridge for up to 4 days. The flavors get better as it sits! Before serving, give it a good shake or stir. It may separate slightly, which is normal. You can also freeze it for longer storage. Just make sure to leave some space in the container for expansion. Pro Tips Soak Cashews Properly: Make sure to soak the cashews for at least 2 hours to achieve that ultra-creamy texture. For best results, soak them overnight. Adjust Sweetness: Taste your eggnog before chilling and tweak the sweetness by adding more maple syrup if you prefer a sweeter flavor profile. Chill for Flavor: Allow the eggnog to chill in the refrigerator for at least an hour. This helps the flavors meld together for a more delicious drink. Experiment with Spices: Feel free to adjust the spices to your liking. Adding a bit more nutmeg or cinnamon can enhance the festive flavor of your eggnog. {{image_4}} You can add fun flavors to your vegan eggnog. Try adding pumpkin spice for a fall twist. For a winter vibe, infuse it with peppermint extract. You can also mix in some vanilla bean for a richer taste. Each addition brings a new layer to your drink. Experimenting with flavors can make your eggnog stand out. Vegan eggnog can be enjoyed with or without alcohol. For a festive touch, add a splash of rum or bourbon. This warms up the drink and gives it a holiday feel. If you prefer a non-alcoholic version, skip the spirits. The creamy base and spices still make it festive and delightful. Both options are sure to please your guests. If you have nut allergies, there are easy swaps. Use oat milk or rice milk instead of almond milk. For the cashews, try sunflower seeds. Soak and blend them just like cashews. This keeps your eggnog creamy without nuts. Always check labels to make sure your ingredients are safe. With these substitutions, everyone can enjoy this creamy drink. Vegan eggnog has many health benefits. It uses plant-based milk, which is lower in calories than dairy milk. Coconut milk adds healthy fats, giving you energy. Cashews provide protein and vitamins. Maple syrup is a natural sweetener. This drink is free from cholesterol and lactose, making it good for many diets. Choosing vegan eggnog helps the planet. Plant-based ingredients need less water and land than dairy. This drink has a smaller carbon footprint. When you choose vegan options, you support animal welfare. By picking vegan eggnog, you make a choice for a better world. Traditional eggnog uses eggs and cream, which can be heavy. Vegan eggnog tastes just as rich and creamy. It offers similar flavors without the animal products. You can enjoy the festive taste while being kind to your body and the planet. Vegan eggnog is lighter and easier to digest, making it a great choice for everyone. Yes, you can make Vegan Eggnog ahead of time. It tastes even better after resting. I suggest making it a day before your gathering. This gives the flavors time to blend. Just store it in the fridge until you are ready to serve. Vegan Eggnog lasts about 4 to 5 days in the fridge. Make sure to store it in an airtight container. If you notice any separation, just shake or stir it well before serving. If you want a nut-free option, use silken tofu. It adds creaminess without nuts. You can also try sunflower seeds, soaked and blended. They give a rich texture too. Another choice is coconut cream, which gives a nice thickness. Vegan eggnog is a great treat for everyone. We explored essential ingredients and optional garnishes. You learned how to prepare and blend the ingredients for the best texture. I shared tips for sweetness and storage, and you saw fun variations. Vegan eggnog offers health benefits and a kinder choice for the planet. Try it this season; you won’t regret it! Enjoy the creamy taste, and get creative with flavors.

Vegan Eggnog Delight Creamy and Festive Drink

To make a tasty blackberry cobbler skillet, you'll need: - 2 cups fresh blackberries (or thawed frozen blackberries) - 1 tablespoon fresh lemon juice - 1/2 cup granulated sugar, divided - 1 cup all-purpose flour - 1 teaspoon baking powder - 1/4 teaspoon salt - 1/2 cup milk - 1/4 cup unsalted butter, melted - 1 teaspoon pure vanilla extract - 1/2 teaspoon ground cinnamon - Optional: Vanilla ice cream or whipped cream for serving You can use fresh or frozen blackberries for this recipe. Fresh blackberries taste bright and sweet. They add a lovely texture. Frozen blackberries are great when fresh ones are out of season. Just make sure to thaw them first and drain any excess juice. This keeps your cobbler from being too soggy. Both options work well, so choose what you like best! If you want to cut back on sugar, you have options. You can use honey or maple syrup instead of granulated sugar. These natural sweeteners add unique flavors. You can also try coconut sugar or stevia for a lower-calorie choice. Just remember that each sweetener has a different sweetness level, so adjust accordingly. Enjoy finding the right balance for your taste! Start by preheating your oven to 350°F (175°C). Grab a 10-inch cast-iron skillet or any oven-safe skillet. Lightly grease it with butter or a non-stick spray. This helps the cobbler not to stick later. In a medium bowl, add 2 cups of fresh blackberries. If you use frozen blackberries, make sure they are thawed first. Pour in 1 tablespoon of fresh lemon juice and 1/4 cup of granulated sugar. Gently toss the berries to coat them. Let this mixture sit for 10 minutes. This will help the berries release their juices and blend the flavors. In another bowl, whisk together the remaining 1/4 cup of sugar, 1 cup of all-purpose flour, 1 teaspoon of baking powder, 1/4 teaspoon of salt, and 1/2 teaspoon of ground cinnamon. Mix until there are no lumps. In a separate bowl, combine 1/2 cup of milk, 1/4 cup of melted unsalted butter, and 1 teaspoon of pure vanilla extract. Whisk these wet ingredients well. Pour the wet mix into the dry ingredients. Stir gently until just combined. It’s okay if the batter is lumpy; avoid overmixing. Carefully pour the batter into the preheated skillet. Spread it evenly across the bottom. Spoon the blackberry mixture over the batter, making sure to distribute the berries evenly. Place the skillet in the oven and bake for 30-35 minutes. The cobbler is done when the top turns golden brown. Check with a toothpick; it should come out clean. Once baked, let the skillet cool for a few minutes before serving. Enjoy the warm cobbler with a scoop of vanilla ice cream or whipped cream for an extra treat! When choosing blackberries, look for ones that are deep black in color. They should be plump and firm, with no signs of mold. If you can, smell them. Ripe blackberries have a sweet and fruity aroma. If you use frozen blackberries, thaw them first and drain excess juice. This keeps your cobbler from becoming too soggy. To avoid sticking, grease your skillet well with unsalted butter or cooking spray. Use a 10-inch cast-iron skillet for best results. If you don’t have one, any oven-safe skillet will do. Make sure you spread the batter evenly across the bottom. This helps create a nice crust that won’t cling to the pan. You can tweak the sweetness to match your taste. If you prefer a less sweet cobbler, cut back on the sugar. You can also add a bit more lemon juice for a tart kick. Ground cinnamon adds warmth, but feel free to experiment with nutmeg or ginger for a unique twist. Just remember to taste as you go! {{image_4}} You can enhance the flavor with spices. Nutmeg gives a warm, cozy taste. Ginger adds a bit of spice and freshness. Just add 1/4 teaspoon of either spice to your batter. This small change can make a big difference in taste. Each bite will surprise your taste buds and bring new life to your cobbler. Blackberry cobbler is great, but you can mix in other fruits too! Try adding peaches, apples, or raspberries. Use about 1 cup of your chosen fruit. If you use juicy fruits, reduce the blackberries a little. This way, you keep a good balance of flavors. Each fruit brings its own unique twist, making your dessert even more exciting. If you need a gluten-free option, it’s easy! Substitute all-purpose flour with a gluten-free flour blend. Make sure it works for baking. You can also try almond flour for a nutty flavor. Just use the same amount as regular flour. Your cobbler will still be delicious and perfectly fluffy. Enjoy the same great taste without the gluten! To store leftover blackberry cobbler, first let it cool. Cover the skillet with plastic wrap or foil. You can also transfer it to an airtight container. Store it in the fridge for up to three days. Make sure it’s tightly sealed to keep the flavors fresh. When you are ready to enjoy the leftovers, reheat the cobbler. Preheat your oven to 350°F (175°C). Place the cobbler in the oven for about 15-20 minutes. This warms it through and keeps the topping crisp. You can also microwave individual servings for 30 seconds, but the oven keeps the best texture. If you want to save some cobbler for later, freezing works well. Cut the cobbler into portions and wrap each piece in plastic wrap. Place them in a freezer-safe bag or container. You can freeze for up to three months. To thaw, take the cobbler out of the freezer and place it in the fridge overnight. Once thawed, reheat using the oven for the best results. You’ll have a tasty dessert ready to enjoy anytime! Yes, you can! Feel free to use blueberries, raspberries, or strawberries. Each berry brings its own flavor. Mixing berries adds a fun twist to this recipe. Just keep the total amount the same, around 2 cups. The cobbler is done when the top turns golden brown. A toothpick should come out clean from the center. If it’s still wet, bake it a little longer. Keep an eye on it! I love serving blackberry cobbler warm. Top it with vanilla ice cream or whipped cream. A drizzle of the blackberry juices makes it even better. You can also add fresh mint for a pop of color. Yes, you can prepare the filling and batter in advance. Store them separately in the fridge. Just bake the cobbler when you’re ready to serve. This way, you can enjoy fresh, warm cobbler anytime! This blog post covered all you need to know about making blackberry cobbler. We explored ingredients, from fresh blackberries to alternative sweeteners. You learned step-by-step how to prepare, mix, and bake your cobbler. I shared tips on choosing the best berries and how to adjust flavors. I also offered fun variations and storage methods to keep your cobbler fresh. Making this dessert can be easy and rewarding. Now, it’s time for you to enjoy the delicious results!

Blackberry Cobbler Skillet Irresistible Dessert Recipe

- 2 packs of instant ramen noodles (discard the seasoning packets) - 3 tablespoons sesame oil - 4 cloves garlic, finely minced - 1 inch fresh ginger, finely grated - 1/2 cup green onions, finely sliced - 1/2 cup snap peas, trimmed and halved - 1/2 cup bell peppers, cut into thin strips - 3 tablespoons soy sauce - 1 tablespoon rice vinegar - 1 tablespoon brown sugar - Toasted sesame seeds for garnish - Sriracha sauce for added heat The main ingredients here are instant ramen noodles, garlic, and ginger. They create a rich base. The sesame oil adds a nice nutty flavor. Green onions and vegetables like snap peas and bell peppers bring freshness. For the sauce, soy sauce, rice vinegar, and brown sugar balance salty and sweet notes. Optional add-ins like toasted sesame seeds and Sriracha give a tasty finish and heat. You can mix and match these ingredients based on what you have. This recipe is flexible, making it fun to try new flavors! To start, fill a large pot with water. Bring it to a full boil. Add the instant ramen noodles and cook them as the package says. You want them al dente, so check them often. Once cooked, drain the noodles. Make sure they do not stick together. Set them aside for later. Next, grab a small mixing bowl. In it, mix together the soy sauce, rice vinegar, and brown sugar. Use a whisk to blend these items well. Make sure the brown sugar dissolves fully. This sauce adds a tasty kick to your noodles. Now, heat the sesame oil in a large skillet or wok on medium heat. When it’s hot, add the minced garlic and grated ginger. Sauté them for about one minute. Stir them often so they smell great but do not turn brown. Browning can make them taste bitter. After the garlic and ginger smell good, add the snap peas and bell peppers to the skillet. Stir-fry for two to three minutes. You want them to stay bright and crunchy. Then, add the drained ramen noodles to the skillet. Pour the sauce over everything. Gently toss all the ingredients to coat the noodles evenly. Cook for another two to three minutes until everything is hot. Finally, stir in the sliced green onions. If you want a spicy kick, add some Sriracha sauce. Mix everything well. Now, portion the sesame garlic ramen noodles into bowls. Top each bowl with toasted sesame seeds for a nice finish. Enjoy your delicious meal! To elevate your sesame garlic ramen, focus on fresh aromatics. I use garlic and ginger for a strong base. Mince the garlic finely and grate the ginger well. This ensures they release their flavor quickly. Sauté them gently in sesame oil to unlock their fragrance. Avoid browning them as it can turn bitter. The key is to stir often and enjoy that savory aroma. For the best noodle texture, cook the ramen until al dente. This means they should be firm when bitten. Follow the package instructions closely for timing. After cooking, drain the noodles and rinse them briefly in cold water. This helps stop the cooking process and keeps them from sticking. Toss them gently with a bit of sesame oil for added richness. Presentation matters! Serve the noodles in deep bowls for a cozy look. Scatter toasted sesame seeds on top for crunch. Add extra green onions for vibrant color. For a glossy finish, drizzle a little sesame oil just before serving. You can also arrange some snap peas neatly for a pop of green. It’s all about making your dish as inviting as it is delicious! {{image_4}} You can boost this dish by adding proteins. Chicken, tofu, or shrimp work well. If you choose chicken, use cooked and shredded pieces. For tofu, press it to remove water, then cut it into cubes. Sauté the protein before adding the veggies. Shrimp cooks quickly, so add it to the pan last. Cook until pink and firm. This adds flavor and makes the meal heartier. Feel free to swap in your favorite veggies. Broccoli, carrots, or mushrooms are great options. You can also use bok choy for a nice crunch. Just chop them into small pieces. Add them to the skillet with the other veggies. This way, they cook evenly and blend nicely. The colors will make your dish pop and taste fresh. If you like heat, add Sriracha or chili flakes. Start with a small amount and taste as you go. This lets you control the spice level. You can also use spicy sesame oil for extra flavor. Another option is to add fresh chopped chili peppers. They add a nice kick and look great on the plate. Enjoy experimenting with the heat to find your perfect balance! After enjoying your ramen, let it cool. Place any leftovers in an airtight container. Store them in the fridge for up to three days. Keeping the noodles and veggies together maintains flavor. If you can, separate the noodles from the sauce to keep them from getting soggy. When you're ready to eat, reheat the noodles on the stove. Add a splash of water to keep them moist. Heat over low to medium heat, stirring often. If you prefer the microwave, place the noodles in a bowl, cover with a damp paper towel, and heat in short bursts. Stir in between to ensure even heat. If you want to freeze your ramen, do so without the veggies. Cooked noodles can freeze well for up to a month. Place them in a freezer-safe bag. When ready to enjoy, thaw them in the fridge overnight. Reheat and add fresh veggies for the best taste. This method saves time and keeps your meals fresh! Yes, you can use other noodles. Try udon, soba, or rice noodles. Just cook them as directed. Each type gives a new taste and texture. To make this dish vegan, skip the brown sugar if it’s not vegan. Use maple syrup instead. Replace the soy sauce with tamari for a gluten-free option. If you don’t have sesame oil, use olive oil or canola oil. These oils will work well, but you may miss the nutty flavor. Toasted sesame oil gives the best taste. Sriracha has a medium spice level. If you want less heat, use less. You can also add more sugar to balance the spice. For more heat, add more Sriracha. You can add more vegetables easily! Try carrots, broccoli, or zucchini. Just chop them small and stir-fry them with the other veggies. This makes your dish colorful and healthy. This blog post covered the essential ingredients and steps for making ramen. You learned about key ingredients, sauces, and optional add-ins that pack flavor. The step-by-step guide helps you cook noodles, prepare sauces, and combine everything for a delicious bowl. I shared tips for perfect texture and creative presentations. Variations allow you to customize with proteins and veggies. Plus, I included storage and reheating tips. Enjoy making ramen your way! Experiment and find your favorite mix. Happy cooking!

Savory Sesame Garlic Ramen Noodles Quick and Easy Recipe

PREV 1 … 17 18 19 … 47 NEXT
snack joy kitchen

explore

DessertsDinnerAppetizersDrinks

Our Policies

  • Cookie Policy
  • Copyright Policy
  • Disclaimer
  • GDPR Policy
  • Terms Of Use
Back to Top
  • About
  • Contact Us
  • Privacy Policy
© 2026 snack joy kitchen