FREE DINNER EBOOK! Get your copy!
  • Cookie Policy
  • GDPR Policy
  • Disclaimer
  • Terms Of Use
  • Visit my other site: Fun Cookie Recipes
snack joy kitchen
  • Home
  • Dinner
  • Desserts
  • Drinks
  • Appetizers
  • Contact
  • About
  • Privacy Policy
  • Home
  • Dinner
  • Desserts
  • Drinks
  • Appetizers
  • Contact
  • About
  • Privacy Policy
  • Cookie Policy
  • GDPR Policy
  • Disclaimer
  • Terms Of Use
Visit my other site: Fun Cookie Recipes

HOME / CATEGORIES /

Latest

For these tasty meatballs, gather the following items: - 1 pound ground beef or ground turkey - 1/2 cup seasoned breadcrumbs - 1/4 cup grated Parmesan cheese - 1/4 cup finely chopped fresh parsley - 1 large egg, beaten - 2 cloves garlic, minced - 1/2 teaspoon kosher salt - 1/4 teaspoon freshly ground black pepper - 1 cup honey - 1/2 cup low-sodium soy sauce - 1 tablespoon apple cider vinegar - 1 teaspoon ground ginger - 1 tablespoon cornstarch (optional, for thickening) - 1 tablespoon cold water (if thickening sauce) You can swap some ingredients for different flavors or dietary needs: - Use ground turkey instead of ground beef for a leaner option. - Replace Parmesan cheese with nutritional yeast for a dairy-free choice. - Use gluten-free breadcrumbs if you need a gluten-free meal. For extra flavor, consider adding these ingredients: - A pinch of red pepper flakes for heat. - Chopped green onions for a fresh bite. - Pineapple chunks for a sweet twist. These simple changes can make this dish feel new each time you make it. Enjoy the process of experimenting! To start, grab a big mixing bowl. Add 1 pound of ground beef or turkey to the bowl. Next, toss in 1/2 cup of seasoned breadcrumbs. Then, sprinkle in 1/4 cup of grated Parmesan cheese. Add 1/4 cup of finely chopped fresh parsley and 1 large beaten egg. Now, include 2 minced garlic cloves, 1/2 teaspoon of kosher salt, and 1/4 teaspoon of black pepper. Mix everything well with your hands or a spatula until it's all combined. Once mixed, shape the meat into small balls, about 1 inch wide. Place these meatballs on a baking sheet. This will make it easy to transfer them later. Now, let’s make the sauce. In a medium bowl, whisk together 1 cup of honey, 1/2 cup of low-sodium soy sauce, 1 tablespoon of apple cider vinegar, and 1 teaspoon of ground ginger. Make sure it’s smooth. Next, carefully drop the meatballs into the slow cooker. Pour the honey garlic sauce over the meatballs, covering each one well. Put the lid on the slow cooker. Set it to cook on low for 5-6 hours or on high for 2-3 hours. Check to make sure the meatballs are cooked and tender. If you want a thicker sauce, you can thicken it up. Mix 1 tablespoon of cornstarch with 1 tablespoon of cold water in a small bowl. Stir this mix into the slow cooker in the last 30 minutes of cooking. When they are done, serve the warm meatballs. You can drizzle extra sauce over them for added flavor. For a nice touch, arrange the meatballs on a pretty platter. Garnish with chopped parsley for color. Enjoy! To make great meatballs, start with quality meat. You can use ground beef or turkey. Both work well. I love mixing in seasoned breadcrumbs for texture. They help keep the meatballs moist. Adding grated Parmesan cheese gives a nice flavor boost. Don’t forget the parsley for freshness. Keep the garlic minced and even. This way, it spreads evenly for a great taste. Slow cooking is key for juicy meatballs. Cook them on low for 5-6 hours for the best results. This allows the flavors to blend perfectly. If you are short on time, you can cook on high for 2-3 hours. Make sure the meatballs are fully cooked and tender. To thicken the sauce, use cornstarch mixed with cold water. Stir in this mixture the last 30 minutes. It makes the sauce rich and hearty. These meatballs shine on their own, but you can enhance the meal. Serve them on a big platter, garnished with fresh parsley. This adds color and flair. For a full meal, place them over a bed of fluffy rice. You can also use toothpicks for fun finger food at parties. Pair with steamed veggies or a fresh salad for balance. Enjoying these meatballs is easy, and they are sure to please everyone! {{image_4}} You can easily add spice to your honey garlic meatballs. To make spicy meatballs, mix in 1 to 2 teaspoons of red chili flakes or sriracha sauce. This heat pairs well with the sweet honey taste. If you like it hotter, try adding diced jalapeños to the meatball mix. The spiciness will balance the sweetness nicely. If you want a meatless choice, use plant-based protein. You can substitute ground beef or turkey with lentils, quinoa, or chickpeas. Just mash them up and mix with breadcrumbs and spices. You can also try using store-bought vegetarian meatballs. These options keep the flavor while being good for you. You can switch up the sauce for different tastes. Instead of honey, try using maple syrup for a unique flavor. A teriyaki sauce can create a fun twist, giving the meatballs an Asian flair. For a tangy note, add some barbecue sauce. Each sauce will change the dish while keeping it tasty and fun. You can store leftover meatballs in an airtight container. Keep them in the fridge for up to three days. Make sure they cool down before sealing. This helps to avoid condensation, which can make them soggy. To reheat meatballs, use a microwave or stovetop. If using a microwave, heat them in short bursts to avoid overcooking. For the stovetop, place them in a pan with a splash of water or sauce. Cover and heat on low until warm. This keeps them juicy and flavorful. You can freeze meatballs for longer storage. Pack them in a single layer on a baking sheet and freeze for about two hours. Then, transfer them to a freezer-safe bag. Label the bag with the date. They can last up to three months in the freezer. When ready to eat, thaw in the fridge overnight before reheating. You should cook these meatballs for 5-6 hours on low or 2-3 hours on high. The longer you cook them, the more tender they become. This slow method lets the flavors blend well. You can check for doneness by cutting one open. The meat should be fully cooked and no longer pink. Yes, you can use frozen meatballs! Just add them straight to the slow cooker without thawing. This makes meal prep easy and quick. If using frozen meatballs, you may need to increase the cooking time by about an hour. These meatballs pair well with many sides. You can serve them over rice or noodles for a filling meal. They also taste great with steamed veggies or a fresh salad. For a fun touch, serve them with toothpicks as appetizers at a party. You learned how to make Slow Cooker Honey Garlic Meatballs. We covered ingredients, step-by-step cooking, and tips for success. Feel free to try different meats or sauces for unique flavors. Storing and reheating tips help you enjoy leftovers too. Now, you’re ready to impress at your next meal. Enjoy your cooking adventure!

Slow Cooker Honey Garlic Meatballs Quick and Tasty Meal

- 1 lb (450g) beef sirloin, thinly sliced against the grain - 2 tablespoons extra virgin olive oil - 1 medium onion, finely diced - 3 cloves garlic, minced - 8 oz (225g) cremini or button mushrooms, sliced - 1 teaspoon dried thyme - 1 teaspoon smoked paprika - Salt and freshly cracked black pepper to taste - 4 cups rich beef broth (low-sodium preferred) - 2 cups wide egg noodles - 1 tablespoon smooth Dijon mustard - 1 cup full-fat sour cream - Fresh parsley, finely chopped To make this dish, you will need: - A large pot or Dutch oven - A sharp knife for slicing - A cutting board - A wooden spoon for stirring - Measuring cups and spoons For added flavor and color, consider these garnishes: - Fresh parsley, finely chopped - A sprinkle of black pepper - A dollop of sour cream on top Start by heating 2 tablespoons of extra virgin olive oil in a large pot. Use medium-high heat. Once the oil is hot, add 1 lb of thinly sliced beef sirloin. Cook the beef for about 3-4 minutes. Stir occasionally until it is well browned on all sides. Remove the beef and set it aside on a plate. In the same pot, add 1 medium diced onion. Sauté for 2-3 minutes. Wait until the onion softens and becomes translucent. Next, stir in 3 cloves of minced garlic. Cook it for an additional 30 seconds. You want the garlic to be fragrant and slightly golden. Now it’s time to add the mushrooms. Toss in 8 oz of sliced cremini or button mushrooms. Cook them for about 5 minutes. Stir frequently until they become tender, and their moisture evaporates. Sprinkle in 1 teaspoon of dried thyme and 1 teaspoon of smoked paprika. Add salt and cracked black pepper to taste. Mix well and let it cook for another minute to bloom the spices. Carefully pour in 4 cups of beef broth. Stir to combine everything. Raise the heat to bring the mixture to a gentle boil. When it starts boiling, add 2 cups of wide egg noodles. Lower the heat to a simmer and cover the pot. Let the mixture simmer for 10-12 minutes. Stir occasionally to keep the noodles from sticking. Cook until the noodles are tender and absorb some broth. After the noodles are cooked, remove the pot from the heat. Stir in 1 tablespoon of Dijon mustard and 1 cup of full-fat sour cream. Mix until you create a creamy sauce. Gently add the beef back into the pot. Stir to combine and heat through for 1-2 minutes. Taste the stroganoff and adjust the seasoning if needed. To make your beef stroganoff rich, start by searing the beef. Use a hot pot with olive oil. This step adds a nice crust and deep flavor. After browning, remove the beef and let the pot stay hot. Next, sauté the onions until soft. Cook the garlic just until it smells good. This brings out their flavors. When you add mushrooms, let them cook until they are tender. This helps to release their moisture and flavor. If you don’t have sirloin, you can use other cuts of beef. Flank steak or chuck roast works well too. For a lighter option, try chicken or turkey. If you want a vegetarian dish, use mushrooms or tofu. For the broth, low-sodium options are best, but any beef broth works. You can also use vegetable broth for a meat-free version. Instead of sour cream, plain Greek yogurt can give a creamy texture with less fat. To boost the flavor, add more herbs. Fresh thyme or parsley can brighten your dish. A splash of Worcestershire sauce can add depth. If you like spice, a pinch of cayenne pepper can give it a kick. For more umami, consider adding a bit of soy sauce. Remember, tasting your dish as you cook is key. Adjust salt and pepper to suit your taste. {{image_4}} You can switch out beef for other proteins. Chicken works great and cooks quickly. Use thinly sliced chicken breast for the best results. Pork is another option; it gives a nice flavor. Just remember to adjust cooking times to keep everything tender. For seafood lovers, shrimp can add a fun twist to this dish. Cook the shrimp until they turn pink, about 3-4 minutes, for a tasty change. If you want a meatless meal, try mushrooms as the star. Use a mix of cremini and portobello mushrooms for rich flavor. You can also add lentils for protein. They soak up the sauce well and add a hearty touch. For creaminess, use plant-based sour cream or cashew cream. This keeps the dish rich and satisfying without meat. To make this stroganoff gluten-free, swap the egg noodles. You can use gluten-free pasta or rice. Both options work well and soak up the sauce nicely. Be sure to check the beef broth too; some brands contain gluten. Use a certified gluten-free broth to keep it safe. Enjoy this comforting meal without worry! To keep your beef stroganoff fresh, let it cool first. Transfer it to an airtight container. Seal it tightly to keep air out. You can also divide it into smaller portions for easy meals later. If you prefer, use freezer bags, removing as much air as possible. When you're ready to eat, reheat your stroganoff on the stove. Use medium heat and stir often. You can add a splash of beef broth or water if it seems too thick. If you use a microwave, heat it in short bursts. Stir in between to ensure even warming. You can store beef stroganoff in the fridge for up to 3 days. If you freeze it, it can last for about 2 to 3 months. Always check for any off smells or changes in color before eating. For best flavor, eat it sooner rather than later. You can serve One-Pot Beef Stroganoff with several sides. Here are my favorites: - Steamed vegetables like broccoli or green beans add a nice crunch. - Garlic bread is great for soaking up the creamy sauce. - A simple salad with fresh greens and a light vinaigrette complements the meal well. - Mashed potatoes are a classic choice that pairs perfectly with stroganoff. Yes, you can make this dish ahead of time. Cook the stroganoff and let it cool. Store it in an airtight container in the fridge for up to three days. When ready to eat, reheat it gently on the stove. You may need to add a splash of broth or water to restore creaminess. Yes, there are simple swaps to make it healthier. Here are some ideas: - Use lean beef like flank steak or sirloin for less fat. - Swap sour cream for Greek yogurt for fewer calories and more protein. - Add more veggies like spinach or bell peppers for extra nutrients. - Choose whole-grain noodles instead of regular egg noodles for more fiber. Beef sirloin works best for stroganoff. It cooks quickly and stays tender. You can also use flank steak or tenderloin for a leaner option. Yes, a slow cooker is great for stroganoff! Brown the beef and sauté the onions and mushrooms first. Then, place everything in the slow cooker with broth and noodles. Cook on low for 6-8 hours for a rich and flavorful meal. In this post, we explored making a delicious One-Pot Beef Stroganoff. We covered ingredients, step-by-step cooking, and helpful tips. I shared variations for different diets and detailed storage methods for leftovers. Remember, cooking is fun and allows for creativity. Don’t hesitate to try new things. Enjoy your meal and feel proud of your tasty creation!

One-Pot Beef Stroganoff Easy and Creamy Meal

- 4 large russet potatoes - 1 pound ground beef or turkey (or vegetarian alternative) - 1 cup shredded cheddar cheese - 1 cup canned black beans - 1 cup diced tomatoes - 1/2 cup sour cream - 1/4 cup sliced green onions - 1/2 cup sliced jalapeños - Fresh cilantro for garnish Loaded Taco Potato Skins start with simple yet hearty ingredients. You need four large russet potatoes. They have a great texture for baking. Next, choose one pound of ground beef or turkey. If you want a meat-free option, lentils work well too. Don’t forget the cheese! You’ll need one cup of shredded cheddar cheese. This cheese melts beautifully and adds rich flavor. For the extra kick, get one cup of canned black beans. Rinse and drain them first. Add one cup of diced tomatoes for freshness. You’ll also want half a cup of sour cream. This creamy touch balances the spices. If you like toppings, consider optional ingredients. Sliced green onions add a nice crunch. Jalapeños give heat, so use them if you want spice. Finally, fresh cilantro brightens the dish and adds color. With these ingredients, you can create a delicious and fun meal. Get ready for the tasty flavors of Loaded Taco Potato Skins! Preheat your oven to 400°F (200°C). Scrub the russet potatoes well under running water. This step clears away dirt and makes them clean. Pierce each potato several times with a fork. This allows steam to escape while they bake. Rub each potato with olive oil and sprinkle it with salt. This gives them flavor and helps them crisp up nicely in the oven. Next, heat a skillet over medium heat. Add your ground beef or turkey into the pan. Cook it while stirring often until it turns brown. This takes about 5-7 minutes. Once browned, drain any extra fat. Sprinkle the taco seasoning over the meat. Add water as the packet says, and let it simmer for about 5 minutes. Stir occasionally to mix the flavors. After the potatoes cool a bit, cut each one in half lengthwise. Use a spoon to scoop out the middle, but leave a bit of flesh for strength. Brush the empty potato skins with olive oil. Season them with salt and pepper. Place the skins cut side up on a baking sheet and bake them for about 10 minutes. This step makes them crispy. Once crispy, fill each potato skin with the taco meat mixture. Layer in black beans and diced tomatoes next. Top everything with shredded cheddar cheese. Return the loaded skins to the oven for 5-7 minutes. Watch for the cheese to melt and bubble. When done, take them out carefully. Top each skin with sour cream, sliced green onions, jalapeños if you like heat, and fresh cilantro for a burst of color. Enjoy this tasty dish! To ensure crispy potato skins, follow these steps: - Choose large russet potatoes. They have the right starch content. - Scrub the potatoes well. This removes dirt and helps with skin crispiness. - Pierce each potato with a fork. This allows steam to escape while baking. - Rub the skins with olive oil. This adds flavor and helps them crisp up. - Bake the potatoes directly on the oven rack. This promotes even cooking. For cooking ground meat, here’s what I recommend: - Use medium heat to brown the meat. This keeps it juicy and flavorful. - Stir often to avoid burning. You want even cooking. - Drain excess fat after cooking. This keeps the filling light and tasty. Here are some great ideas for additional toppings: - Fresh avocado slices add creaminess. - Salsa brings a fresh, zesty flavor. - Corn adds sweetness and crunch. - Guacamole pairs well with the taco theme. For spice adjustments, consider these ideas: - Add chili powder for more heat. - Try a sprinkle of cayenne pepper if you love spice. - Use diced bell peppers for a mild kick. - Adjust taco seasoning based on your taste. Experiment with these tips to make your loaded taco potato skins even more delicious! {{image_4}} For a tasty vegetarian version, try substituting meat with lentils or mushrooms. Lentils pack a protein punch and add a nice texture. Cook lentils until soft, and mix them with taco seasoning for flavor. If you choose mushrooms, sauté them until they are tender and mix in the seasoning as well. Using plant-based cheese alternatives can make this dish even better for vegetarians. Look for cheeses made from nuts or soy. They melt well and can give you that creamy topping you crave. Want to change things up? Adding different spices can elevate your loaded taco potato skins. Try cumin, chili powder, or smoked paprika for extra depth. A splash of hot sauce can also bring a fun kick. Incorporating other vegetables can add color and flavor. Diced bell peppers, corn, or even roasted zucchini work well. Just sauté them first to bring out their flavors. The more veggies, the better! To keep your loaded taco potato skins fresh, store them properly. First, let them cool completely. Then, place the skins in an airtight container. If you have leftovers, put them in the refrigerator. They will stay good for about three days. If you want to store them longer, consider freezing. Wrap each potato skin tightly in plastic wrap. Then, place them in a freezer-safe bag. They can last for up to three months in the freezer. When you're ready to eat, just thaw them in the fridge overnight. To enjoy your loaded taco potato skins again, reheating properly is key. I recommend using the oven for the best texture. Preheat your oven to 350°F (175°C). Place the skins on a baking sheet and heat for about 10-15 minutes. This keeps them crispy. If you're short on time, you can use the microwave. Place the skins on a microwave-safe plate. Heat them for about 1-2 minutes. The skin may not be as crispy, but they will still taste great. You can use different types of potatoes. Here are some good options: - Yukon Gold potatoes: They are creamy and rich in flavor. - Red potatoes: They hold their shape well and have a nice texture. - Sweet potatoes: These add a sweet twist to your skins. These alternatives can change the taste and texture. Choose what you like best! Yes! You can make them ahead. Here’s how: - Bake the potatoes and scoop them out. Store them in the fridge. - Prepare the taco filling and keep it separate. - When ready, fill the skins and bake them. This way, you save time. Just heat and serve for a fun meal! Dipping sauces can make your potato skins even better. Here are some tasty ideas: - Sour cream: A classic choice that cools the heat. - Salsa: Fresh and zesty, it adds great flavor. - Guacamole: Creamy and rich, it pairs well with tacos. - Cheese sauce: For extra cheese lovers, this is a hit. Try different sauces to find your favorite combo! You learned how to make loaded taco potato skins. We covered the main and additional ingredients, step-by-step prep, and cooking tips. I shared variations for vegetarians and flavor twists. Plus, I provided storage methods and answers to common questions. These tasty snacks are easy to make and fun to share. Enjoy trying new toppings and spices. Your kitchen will be the best place for delicious meals!

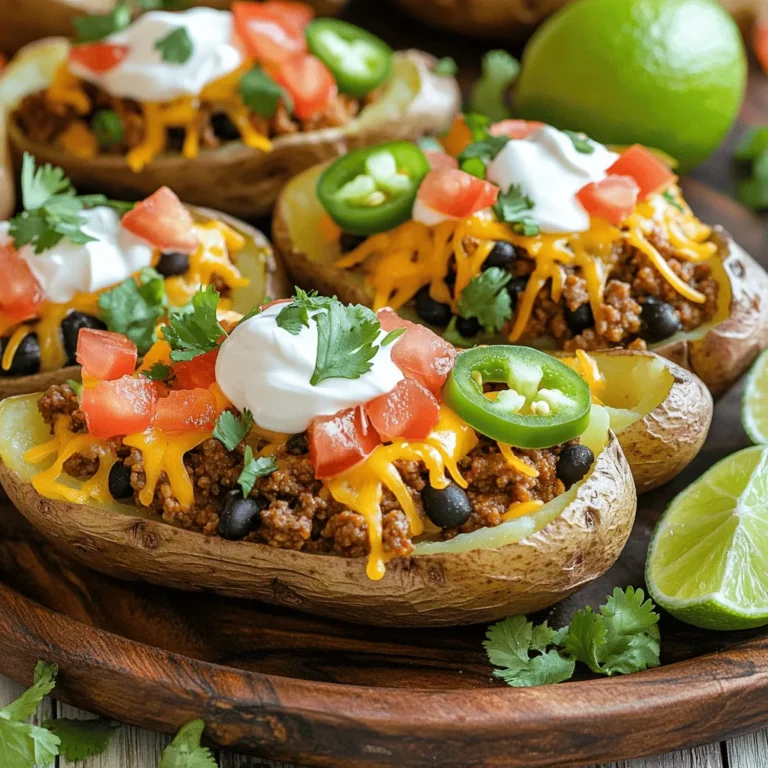
Loaded Taco Potato Skins Flavorful and Easy Recipe

- 2 cups rolled oats - 2 cups almond milk (or preferred milk) - 2 large apples (peeled, cored, and diced) - 1/2 cup raisins (for added sweetness) - 1/2 cup chopped walnuts or pecans (for crunch) - 1/2 cup brown sugar (or maple syrup for a healthier option) - 1 teaspoon ground cinnamon - 1/2 teaspoon ground nutmeg - 1/4 cup unsweetened applesauce When I make my hearty apple cinnamon oatmeal bake, I love to gather the ingredients first. Rolled oats form the base of this dish. They soak up the milk and add a nice texture. I prefer almond milk, but use any kind you enjoy. Next, I add fresh apples. They should be peeled, cored, and diced. This step is key. It gives the bake a sweet and fruity flavor. For a little extra sweetness, I sometimes toss in raisins. They add a chewy texture. If you like a crunchy bite, consider adding chopped walnuts or pecans. They really enhance the overall flavor. Now, let's talk about sweeteners. I often use brown sugar, but maple syrup works too. It gives a nice depth of flavor. The spices are important as well. Ground cinnamon and nutmeg add warmth and comfort. I also mix in unsweetened applesauce. It helps keep the oatmeal moist. Using these ingredients, you can create a warm and filling breakfast that everyone will love. - Preheat the oven to 350°F (175°C). - Prepare the baking dish by greasing it. Start by getting your oven nice and warm. Preheating helps the oatmeal bake evenly. Use butter or cooking spray to grease your 9x9-inch baking dish. This will keep your bake from sticking. - Combine oats and almond milk. - Add in other ingredients and mix well. In a large bowl, mix rolled oats with almond milk. Stir until the oats soak up the milk. Next, add your diced apples, brown sugar or maple syrup, applesauce, vanilla, cinnamon, nutmeg, and salt. Mix everything well. This blend of flavors makes the bake delicious. If you want some added sweetness, fold in raisins. For crunch, add walnuts or pecans. - Pour mixture into the dish. - Bake for 30-35 minutes. Carefully pour your mixture into the greased dish. Spread it evenly with a spatula. Place it in the preheated oven. Bake for 30-35 minutes. You want the top to turn golden brown. To check if it’s done, insert a toothpick in the center. If it comes out clean, it’s ready. Let it cool for 5-10 minutes before cutting into squares. Enjoy your warm Apple Cinnamon Oatmeal Bake! To get the best texture, soak your oats well. Mix the rolled oats with almond milk and let them sit for about 10 minutes. This helps them absorb the liquid and become soft. For baking, keep your oven at 350°F (175°C). Bake for 30 to 35 minutes. Check the doneness by inserting a toothpick in the center. If it comes out clean, your bake is ready. Add more spice to your dish. Try mixing in nutmeg or a pinch of ginger. You can also swap brown sugar for maple syrup. This change can add a nice touch of flavor and sweetness. Feel free to play with spices until you find your favorite mix! Serving this oatmeal bake is fun and easy. Drizzle honey or maple syrup over the warm squares for added sweetness. Top with a dollop of yogurt for creaminess. You can even sprinkle extra cinnamon on top for a beautiful finish. Try cutting the bake into squares and serving them on a nice plate. It looks great and tastes even better! {{image_4}} You can switch out apples for other fruits. Pears add a sweet and juicy twist. Berries, such as blueberries or raspberries, can brighten the flavor. Try using seasonal fruits for festive occasions. For example, cranberries work great in fall and winter. To make this dish gluten-free, use gluten-free oats. Make sure to check the label for certification. If you want dairy-free options, almond milk works perfectly. Coconut milk or soy milk are also good choices. These swaps keep the dish tasty and suitable for all diets. Enjoy this bake as a hearty breakfast or a sweet dessert. Serve it warm with a drizzle of honey or maple syrup. You can also cut it into squares for easy sharing. For a fun twist, bake individual portions in muffin tins. This makes it perfect for a family-style brunch or a quick grab-and-go snack. To store your leftover apple cinnamon oatmeal bake, place it in an airtight container. Make sure to let it cool before sealing. You can keep it in the fridge for easy access. For longer storage, you can freeze it. Cut the bake into squares and wrap each piece in plastic wrap. Then, place them in a freezer-safe bag. This way, your breakfast is ready when you are! When it’s time to enjoy your leftovers, the best way to reheat is in the oven. Preheat your oven to 350°F (175°C) and place the squares in a baking dish. Heat for about 10-15 minutes. If you want a quick option, use the microwave. Heat each piece for 30-60 seconds, checking to avoid overheating. To keep the texture, add a splash of almond milk before reheating. This keeps it moist and flavorful. In the fridge, your oatmeal bake lasts about 4-5 days. Always check for any changes in smell or color. If it looks dry or has a strange smell, it’s best to toss it. If frozen, it can last for up to 3 months. Just remember to label the bag with the date so you can keep track. To make this dish vegan, you can easily swap out the dairy ingredients. Use almond milk instead of cow's milk. You can also replace the eggs with a flaxseed mixture. Combine one tablespoon of ground flaxseed with three tablespoons of water. Let it sit for a few minutes until it thickens. This works great as a binding agent. For the sweetener, maple syrup is a good choice. It keeps the flavor rich without using any animal products. Yes, you can prepare this oatmeal bake ahead of time. Mix all the ingredients the night before. Then, cover the bowl and place it in the fridge. This will let the oats soak up the flavors. In the morning, just pour the mixture into your baking dish and bake. It saves time and gives you a warm breakfast ready to go. Toppings can really enhance your oatmeal bake. Here are a few tasty options: - A drizzle of honey or maple syrup - A dollop of yogurt for creaminess - Fresh fruit like sliced bananas or berries - A sprinkle of chopped nuts for crunch - A dusting of cinnamon for extra flavor Feel free to mix and match these toppings to suit your taste! This Apple Cinnamon Oatmeal Bake is a simple and tasty recipe. We covered the main ingredients like rolled oats, almond milk, and apples. You learned how to mix and bake your dish perfectly. We also explored tips for flavor and texture, plus fun variations. In the end, this dish is versatile and easy to adapt. Enjoy crafting your own version of this classic treat!

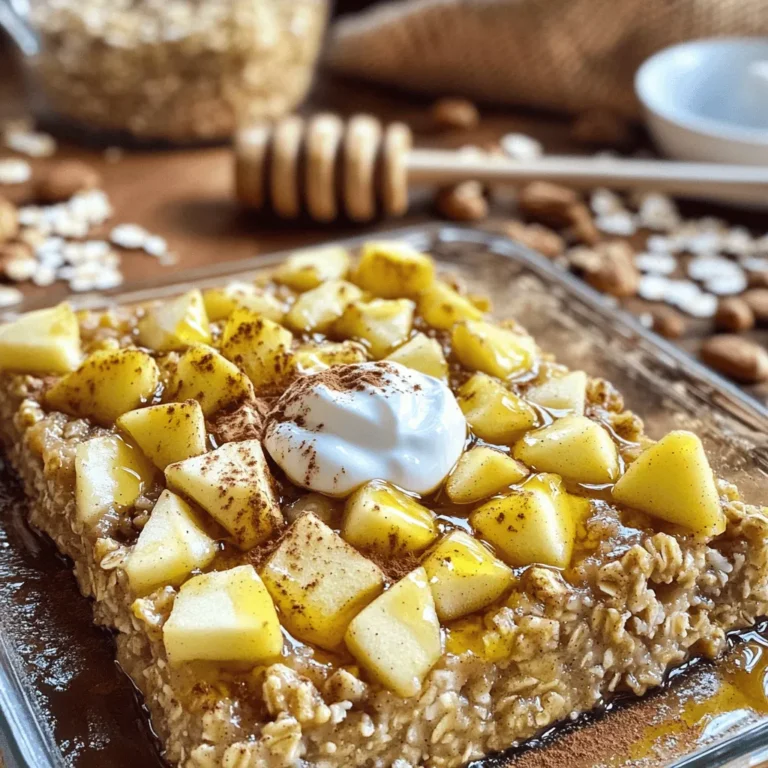
Hearty Apple Cinnamon Oatmeal Bake for Breakfast

In this recipe for Key Lime Pie Bars, you will need the following ingredients: - 1 cup graham cracker crumbs - 1/4 cup granulated sugar - 1/2 cup unsalted butter, melted - 2 large eggs - 1 can (14 oz) sweetened condensed milk - 1/2 cup freshly squeezed key lime juice - Zest of 2 key limes - 1/4 teaspoon salt - Whipped cream (for topping) - Lime slices and additional zest (for garnish) These ingredients come together to create a sweet and tart treat that everyone will love. The graham cracker crumbs form the crust, while the sweetened condensed milk and key lime juice make the filling rich and tangy. Using fresh key lime juice will give your bars the best flavor. You'll top the finished bars with whipped cream and a sprinkle of zest for a beautiful finish. Each bite offers a burst of zesty goodness that brightens any day. Set the temperature to 350°F (175°C). This step is key for even baking. Combine graham cracker crumbs, sugar, and melted butter in a bowl. Mix until it looks like wet sand. Press this mixture into the bottom of an 8x8-inch baking dish. Bake for 8-10 minutes, until the crust is light golden. Take it out and let it cool. In another bowl, whisk together the eggs, sweetened condensed milk, freshly squeezed key lime juice, lime zest, and salt. Whisk until smooth. Pour this creamy filling over the cooled crust. Bake for 15-20 minutes. The filling should not jiggle when you shake the dish gently. Let it cool at room temperature, then chill in the fridge for at least 2 hours. Cut into squares and serve with whipped cream, lime zest, and a slice of lime on top. Enjoy the sweet and tart flavors! To make a great crust, press the crumb mixture down firmly. This helps form an even base. Aim for a smooth and flat layer. Bake it until it turns lightly golden. This gives your bars a nice crunch and flavor. For the best taste, always use fresh key lime juice. The flavor really shines through. After baking the filling, gently shake the dish to check for doneness. If it jiggles in the center, it needs more time. You want it to be set but not overcooked. To make your bars look amazing, serve them with whipped cream on top. Add some fresh lime zest for a pop of color. Mint leaves also work great as a garnish. They add a nice touch and make your dessert even more inviting. {{image_4}} You can make these bars gluten-free. Just swap regular graham cracker crumbs for gluten-free ones. This simple change keeps the taste and texture just right. Many brands offer tasty gluten-free options. Look for crumbs made from rice or almond flour. To make a vegan version, use aquafaba instead of eggs. Aquafaba is the liquid from canned chickpeas. It works great for baking! You also want to use coconut cream instead of sweetened condensed milk. This gives the bars a creamy texture without any dairy. Want to add a twist to your key lime pie bars? Try mixing in some coconut or strawberry puree. Coconut adds a tropical flair, while strawberry gives a sweet touch. Just fold in the puree after mixing the filling. This will create a fun surprise in every bite. You can store these Key Lime Pie Bars in the fridge. Use an airtight container. They will stay fresh for up to a week. This keeps them tasty and safe to eat. If you want longer storage, freeze the cut bars. Wrap each bar in plastic wrap. Place them in a zip-top bag. This way, they will stay fresh for up to three months. To serve after freezing, thaw the bars in the fridge. This keeps them cool and creamy. Add fresh whipped cream on top before serving. You can also add a sprinkle of zest for extra flavor. Enjoy the tartness! Yes, these bars can be made in advance and stored. I often prepare them the day before a gathering. This way, they chill overnight. Chilling helps the flavors mix and deepen. Just keep them in the fridge in an airtight container. They stay fresh and tasty for several days. Yes, regular lime juice can be used if key limes are unavailable. Key limes have a unique tartness. However, regular limes work well too. I recommend using fresh juice for the best taste. The flavor may be a bit different, but still delicious. Use a hot knife for clean, even cuts to avoid crumbling. Run the knife under hot water, then dry it. This simple trick helps you slice through the bars smoothly. Clean cuts make for a nice presentation. Plus, it keeps the filling intact. To wrap up, you’ve learned how to make delicious Key Lime Pie Bars. We covered the ingredients needed, like graham cracker crumbs and sweetened condensed milk. I shared the step-by-step instructions for a perfect crust and filling. Remember, you can customize these bars to fit your taste. Store leftovers carefully for later enjoyment. With these tips, you can impress anyone with your baking skills. Enjoy your tasty creation!

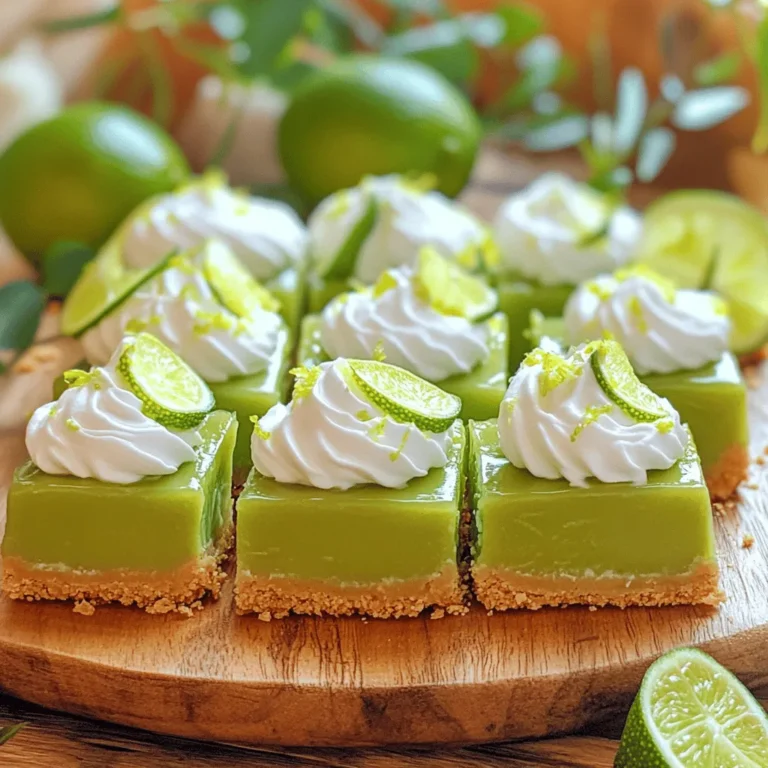
Key Lime Pie Bars Simple and Tart Delight

- 1 lb large shrimp, peeled and deveined - 2 tablespoons unsalted butter - 3 tablespoons honey - 4 cloves of garlic, finely minced - 1 tablespoon soy sauce - 1 teaspoon smoked paprika - 1/2 teaspoon red pepper flakes (optional) - Salt and pepper to taste - 2 green onions, finely sliced (for garnish) - Fresh parsley, finely chopped (for garnish) - Skillet (preferably heavy-bottomed) - Measuring spoons and cups - Spatula or cooking spoon The key to making Honey Butter Garlic Shrimp Skillet is having the right ingredients and tools. Start with fresh shrimp. Look for large ones that are peeled and deveined. This saves you time and lets you get right to cooking. Butter adds a rich flavor. Using unsalted butter helps you control the saltiness. Honey provides sweetness and helps balance the garlic. Minced garlic adds depth. Soy sauce adds a savory kick. Smoked paprika gives a nice warmth, and red pepper flakes can spice things up if you like heat. Don’t forget the garnishes! Green onions and parsley add a fresh touch. They make your dish look vibrant and appealing. For cooking, a heavy-bottomed skillet works best. It distributes heat evenly, helping your shrimp cook perfectly. Measuring spoons and a spatula or cooking spoon are also essential. These tools help you measure and stir with ease. With these ingredients and tools ready, you’re set to create a delicious dish! First, rinse the shrimp under cold running water. This step helps clean them well. After rinsing, pat them dry with a paper towel. This removes excess moisture, which prevents steaming when you cook them. Next, season the shrimp with a sprinkle of salt and pepper. This simple step enhances their natural taste. Now, grab a large, heavy-bottomed skillet. Place it on the stove over medium-high heat. Add the unsalted butter to the skillet. As the butter melts, watch for it to bubble lightly. This means it's ready for the next step. Carefully add the minced garlic to the skillet. Sauté the garlic for about one minute. Stir it often to keep it from burning. Burnt garlic can ruin the dish by adding a bitter flavor. After the garlic is fragrant, it’s time for the shrimp. Place them in the skillet in a single layer. Sprinkle the smoked paprika and red pepper flakes on top. Cook the shrimp for two to three minutes without stirring. This allows them to sear nicely. Flip the shrimp and cook the other side for another two to three minutes. They should turn a lovely pink color when done. Once the shrimp are cooked through, drizzle the honey and soy sauce over them. Gently stir to coat each shrimp evenly. Let the mixture cook for another two to three minutes. This allows the sauce to thicken and cling to the shrimp, making every bite delicious. To get the best shrimp, cook them for just 2-3 minutes per side. They turn pink and opaque when done. To check doneness, cut one shrimp in half. If it’s white inside, it’s ready! Adding herbs and spices makes a big difference. I recommend using fresh parsley for a pop of color and flavor. To balance sweetness and saltiness, adjust the honey and soy sauce. Start with less honey, then taste and add more if needed. Garlic can burn quickly, so keep an eye on it while cooking. Stir it often and remove it from heat if it starts to brown. When cooking shrimp, don’t overcrowd the skillet. This helps them sear nicely without steaming. {{image_4}} You can easily adapt this dish to fit different diets. For gluten-free options, use gluten-free soy sauce. This swaps out regular soy sauce while keeping the flavor strong. If you want a sweet twist, try using maple syrup in place of honey. This change works well and keeps the dish sticky and tasty. To add a bright note, mix in some citrus zest. Lemon or lime zest adds a fresh pop. You can also include different veggies. Broccoli, bell peppers, or snap peas work great. Just toss them in the skillet when you cook the shrimp for added color and nutrition. Adjusting the spice level is simple. If you want it milder, skip the red pepper flakes. For more heat, add extra flakes or a dash of hot sauce. You can also explore spice blends. Try Cajun seasoning or chili powder for a unique twist. Each change gives the dish a whole new vibe. To store any leftover honey butter garlic shrimp, place them in an airtight container. This method keeps them fresh and tasty. Make sure the shrimp cool down before sealing. You can keep them in the fridge for up to two days. If you can, eat them sooner for the best flavor. When you reheat shrimp, use low heat to keep them tender. The best way is to use a skillet. Add a splash of water or broth to help keep them moist. Heat for just a few minutes until warm. Avoid cooking them too long; otherwise, they will become rubbery and tough. If you want to freeze the shrimp, place them in a freezer-safe bag. Squeeze out extra air before sealing the bag. You can freeze them for up to three months. When you are ready to use them, thaw shrimp in the fridge overnight. This method is safe and helps keep their texture. You can tell shrimp is cooked by its color and texture. Cooked shrimp turns pink and opaque. If the shrimp curls into a "C" shape, it is ready. Avoid overcooking, as this makes the shrimp tough and rubbery. Yes, you can use frozen shrimp! Start by thawing them in the fridge overnight or under cold water. Pat them dry well before seasoning. This helps the shrimp cook evenly and prevents excess water in the skillet. This dish pairs well with rice or noodles. A fresh salad also adds a nice crunch. You can serve it with steamed veggies for a colorful plate. Consider adding crusty bread to soak up the sweet sauce, too. You can easily adjust the recipe! To double it, simply double all the ingredients. Cooking time stays about the same, but check for doneness. If you halve the recipe, cut the ingredients in half and watch the cooking time closely, as it may be shorter. You can create a delicious Honey Butter Garlic Shrimp with simple steps. We covered the ingredients, essential tools, and cooking process. Remember to avoid burning the garlic and check shrimp doneness. Feel free to customize the recipe with your favorite flavors or adjust cooking times. Store leftovers correctly to enjoy another meal later. With these tips and tricks, you'll impress anyone with your cooking. Enjoy making this shrimp dish for a tasty treat!

Honey Butter Garlic Shrimp Skillet Savory Delight

To make spiced carrot cake muffins, you will need: - 2 cups all-purpose flour - 1 teaspoon baking powder - 1/2 teaspoon baking soda - 1 teaspoon ground cinnamon - 1/2 teaspoon ground nutmeg - 1/4 teaspoon ground ginger - 1/4 teaspoon salt - 1 cup granulated sugar - 1/2 cup packed brown sugar - 3 large eggs - 1/2 cup vegetable oil - 1 teaspoon pure vanilla extract - 2 cups freshly grated carrots (about 4 medium carrots) - 1/2 cup crushed pineapple, well-drained - 1/2 cup walnuts or pecans, roughly chopped (optional) - 1/2 cup raisins (optional) Each muffin offers a balance of flavors and nutrients. A single muffin contains: - Calories: 220 - Protein: 3g - Carbohydrates: 30g - Fat: 10g - Fiber: 1g This is a tasty treat that gives energy and joy. You can swap some ingredients for different flavors or diets: - Use whole wheat flour for added fiber. - Replace granulated sugar with coconut sugar for a lower glycemic index. - Substitute applesauce for some oil to cut calories. - Choose flax eggs instead of regular eggs for a vegan option. Experiment with these choices to fit your taste and needs. First, set your oven to 350°F (175°C). This ensures even baking. Next, get your muffin tin ready. You can use paper liners or lightly grease each cup with oil or butter. This helps the muffins come out easily. In a medium bowl, mix the dry ingredients. Add 2 cups of all-purpose flour, 1 teaspoon of baking powder, 1/2 teaspoon of baking soda, 1 teaspoon of ground cinnamon, 1/2 teaspoon of ground nutmeg, 1/4 teaspoon of ground ginger, and 1/4 teaspoon of salt. Use a whisk to blend them well. This step builds the base flavor. In a larger bowl, combine the sugars and eggs. Use 1 cup of granulated sugar and 1/2 cup of packed brown sugar. Add 3 large eggs. Whisk or use an electric mixer until smooth and creamy. Slowly pour in 1/2 cup of vegetable oil and add 1 teaspoon of pure vanilla extract. Stir until the mixture is well combined. This creates a rich, sweet base. Now, it's time to bring in the fun! Gently fold in 2 cups of freshly grated carrots. If you want, add 1/2 cup of well-drained crushed pineapple, 1/2 cup of roughly chopped walnuts or pecans, and 1/2 cup of raisins. Make sure everything is mixed evenly without overdoing it. This adds moisture and flavor. Using a spoon or ice cream scoop, fill each muffin cup about 3/4 full. This gives them room to rise. Place the muffin tin in your preheated oven. Bake for 18 to 22 minutes. To check if they are done, insert a toothpick into the center of a muffin. If it comes out clean, they are ready! Once baked, let the muffins cool in the tin for about 5 minutes. Then, gently move them to a wire rack to cool fully. Enjoy them warm, perhaps with a light dusting of powdered sugar. You can also add a dollop of cream cheese frosting for a sweet treat. To get the best texture in your muffins, mix gently. Overmixing can make them tough. When you add the dry mix to the wet mix, stir just until you see no flour. This keeps them light and fluffy. Using freshly grated carrots gives moisture and flavor. You can also add crushed pineapple for extra moisture and sweetness. One big mistake is not preheating your oven. Always set it to 350°F (175°C) before you start mixing. Another mistake is not measuring the flour correctly. Use a spoon to scoop the flour into the measuring cup. Don’t pack it down. Too much flour can lead to dry muffins. Lastly, remember to check the muffins with a toothpick. If it comes out clean, they are ready! To keep your muffins fresh, store them in an airtight container. They will last for about three days at room temperature. If you want to keep them longer, freeze them. Place muffins in a freezer-safe bag. They can last up to three months in the freezer. When you’re ready to eat, just thaw them at room temperature or warm them in the oven at 350°F (175°C) for a few minutes. This warms them up nicely! {{image_4}} You can easily make these muffins gluten-free. Use a gluten-free flour blend in place of all-purpose flour. Look for one that has xanthan gum for better texture. This swap keeps the muffins light and fluffy, just like the original recipe. To make these muffins vegan-friendly, replace the eggs with flax eggs. Mix 1 tablespoon of flaxseed meal with 2.5 tablespoons of water for each egg. Let it sit for a few minutes to thicken. Also, use a plant-based oil instead of vegetable oil. This way, you can enjoy tasty muffins without animal products. I love to play with flavors in these muffins. Here are some ideas: - Spices: Add a pinch of allspice or cardamom. These spices give a warm and cozy taste. - Fruits: Toss in some dried cranberries or chopped apples for extra sweetness. They add a nice texture too. - Nuts: If you enjoy a crunch, add a mix of walnuts and pecans. They pair well with the soft muffin base. Experiment with these variations to find your favorite combination! To keep your spiced carrot cake muffins fresh, place them in an airtight container. You can store them at room temperature for up to three days. If you live in a warmer area, you might want to refrigerate them. Just remember, refrigeration can change the texture a bit, making them denser. If you want to save some muffins for later, freezing is a great option. First, let the muffins cool completely. Then, wrap each muffin in plastic wrap or aluminum foil. Place them in a freezer-safe bag or container. They can last in the freezer for up to three months. When you’re ready to enjoy them, simply thaw them overnight in the fridge or at room temperature for a few hours. When stored properly, these muffins can stay fresh for about three days at room temperature. In the fridge, they last about a week. If frozen, as mentioned, you can keep them for three months. Enjoying them fresh is best, but the freezer gives you flexibility! Yes, you can use shredded carrots. Shredded carrots have a similar texture and will work well. The flavor remains the same, so don't worry about taste. Just make sure they are finely shredded. This ensures they mix well in the batter. To check if muffins are done, use a toothpick. Insert it into the center of a muffin. If it comes out clean, your muffins are ready. If you see batter on the toothpick, bake them a little longer. Usually, it takes about 18 to 22 minutes. If you want to skip the eggs, try using applesauce. Use 1/4 cup of unsweetened applesauce per egg. You could also use mashed bananas or a flaxseed mixture. To make a flaxseed egg, mix one tablespoon of flaxseed meal with three tablespoons of water. Let it sit for a few minutes until it thickens. To reduce the sweetness, cut back on the sugars. You can lower granulated sugar by 1/4 cup. You may also use less brown sugar. Another option is to add more spices for flavor. This way, you keep the taste without the extra sweetness. You learned how to make delicious spiced carrot cake muffins. We covered key ingredients and their nutrition. You now know how to mix, bake, and store these treats. I shared helpful tips to avoid common mistakes, plus variations for different diets. Remember, you can customize these muffins with spices, fruits, or nuts. Enjoy your baking adventure, and taste the joy in every bite. Happy baking!

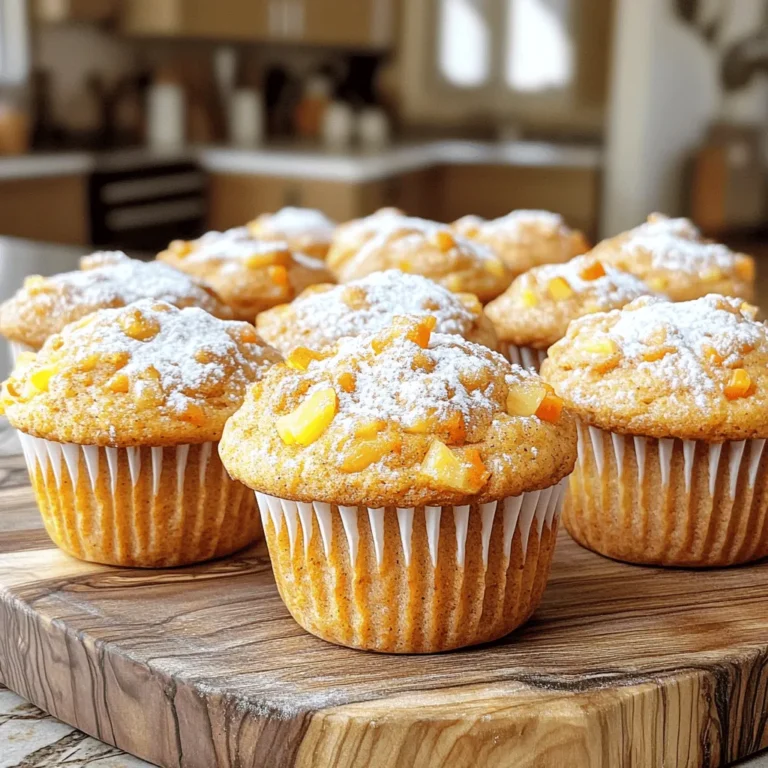
Spiced Carrot Cake Muffins Delicious and Easy Recipe

- 1 cup pumpkin puree - 1/2 cup unsalted butter, softened - 1 cup brown sugar, packed - 1/2 cup granulated sugar - 1 large egg - 1 teaspoon vanilla extract - 2 1/2 cups all-purpose flour - 1 teaspoon baking soda - 1 teaspoon baking powder - 1 teaspoon ground cinnamon - 1/2 teaspoon ground ginger - 1/4 teaspoon ground nutmeg - 1/2 teaspoon salt - 1 cup salted caramel sauce - Sea salt flakes for garnish When I make these salted caramel pumpkin cookies, I always start with the ingredients. Each one plays a key role in the cookie's flavor and texture. First, I grab 1 cup of pumpkin puree. It gives the cookies that warm, autumn flavor. Next, I use 1/2 cup of unsalted butter. I let it soften at room temperature for easy mixing. The sweetness comes from 1 cup of brown sugar, packed tightly, and 1/2 cup of granulated sugar. Together, they create a lovely sweetness. I add 1 large egg for binding and richness, plus 1 teaspoon of vanilla extract for a hint of warmth. For the dry mix, I use 2 1/2 cups of all-purpose flour, which is vital for structure. I also add 1 teaspoon of baking soda and 1 teaspoon of baking powder to help the cookies rise. Spices are important, too. I use 1 teaspoon of ground cinnamon, 1/2 teaspoon of ground ginger, and 1/4 teaspoon of ground nutmeg. These spices add depth to the flavor. Lastly, I mix in 1/2 teaspoon of salt to balance the sweetness. The showstopper is 1 cup of salted caramel sauce, which I fold into the dough. Finally, I sprinkle some sea salt flakes on top for that perfect finishing touch. Using fresh ingredients makes a big difference. Quality butter and pure vanilla extract elevate the taste. I recommend grabbing your favorite brands. Enjoy the process and get ready for some delicious cookies! - Preheat the oven to 350°F (175°C). - Cream together butter and sugars until fluffy. Start by getting your oven nice and warm. Preheating it to 350°F (175°C) helps your cookies bake perfectly. While that heats up, take a large mixing bowl. Add the softened butter, brown sugar, and granulated sugar. Use an electric mixer on medium speed. Mix for about 2-3 minutes until it looks light and fluffy. This step is key. It adds air and makes your cookies soft. - Incorporate pumpkin puree, egg, and vanilla extract. - Whisk together dry ingredients in a separate bowl. Next, add the pumpkin puree, egg, and vanilla extract to your fluffy mix. Stir well until everything blends smoothly. The pumpkin gives the cookies a lovely flavor. In another bowl, whisk together the dry ingredients. This includes flour, baking soda, baking powder, cinnamon, ginger, nutmeg, and salt. Whisking ensures even mixing. - Gradually add dry ingredients to wet ingredients. - Fold in salted caramel sauce gently. Now, it’s time to bring both mixtures together. Gradually add the dry mix to the wet mix. Stir gently until just combined. Be careful not to over-mix; this keeps your cookies tender. Finally, fold in the salted caramel sauce. Gently mix it in so every bite has a sweet surprise. For perfect cookies, keep the dough about 1 inch thick. This thickness helps them bake evenly. If the dough is too thin, the cookies may spread too much and become flat. Do not over-mix the dough. Mix just until the ingredients combine. Over-mixing can lead to tough cookies instead of soft ones. A gentle stir is all you need when adding flour and caramel. Using homemade caramel sauce can boost the taste of your cookies. It offers a richer flavor than store-bought. However, store-bought caramel is still a great choice when time is short. You can also add spices to enhance the flavor. A pinch of cloves or allspice gives warmth. Try adding a bit more cinnamon for extra fall flavor. Bake your cookies at 350°F (175°C) for 10 to 12 minutes. The edges should turn golden brown. The centers may look a bit soft; this is fine, as they will firm up as they cool. To check if cookies are done, look for a slight puffiness. If the edges are set and the middle looks slightly wet, they are ready. Remove them from the oven and let them cool on the baking sheet for a few minutes before transferring them to a rack. {{image_4}} You can change some ingredients for a new twist. Use maple syrup instead of brown and granulated sugars. This swap adds a rich flavor while keeping the cookies sweet. You can also try different spices. For example, cloves or allspice give a warm, festive taste. These small swaps can make your cookies stand out. If you need gluten-free cookies, swap all-purpose flour with a gluten-free blend. Many brands offer great options that work well in baking. For those who want vegan cookies, replace the butter with coconut oil and the egg with flaxseed meal. Mix one tablespoon of flaxseed meal with three tablespoons of water. Let it sit for a few minutes until it thickens. These adjustments keep the flavor and texture just right. Let your imagination run wild with fun additions! Stir in chocolate chips for a sweet surprise in every bite. Nuts like pecans or walnuts add a nice crunch. You can also mix in dried fruit, like cranberries, for a chewy texture. Each option gives your cookies a unique twist, making them even more enjoyable. Store your salted caramel pumpkin cookies at room temperature. They stay fresh and tasty this way. If you live in a warm place, use the fridge. Always keep cookies in airtight containers. This helps them stay soft and avoids drying out. These cookies last about a week at room temperature. For longer storage, freeze them. Wrap each cookie in plastic wrap. Then, place them in a freezer bag. They can stay fresh for up to three months. To enjoy, thaw them at room temperature or warm them in the oven for a few minutes. To keep cookies looking great, stack them in a single layer. This avoids sticking and keeps them pretty. If you see any moisture, add a piece of bread to the container. It helps absorb extra moisture, keeping your cookies soft and fresh. To make your cookies chewier, focus on a few key changes. Start by reducing the baking time by one or two minutes. This helps keep the centers soft. Also, use more brown sugar than granulated sugar. Brown sugar has more moisture, adding to that chewy texture. You can also try adding an extra egg yolk, which adds richness and moisture. Yes, you can freeze cookie dough! To do this, scoop the dough into balls and place them on a baking sheet. Freeze them until solid. Then, transfer the balls to a freezer bag. When you're ready to bake, take out the dough and let it thaw in the fridge overnight. Bake as usual, adding a minute or two to the baking time if baking from frozen. If you're out of pumpkin puree, you have options. You can use applesauce for moisture and sweetness. Mashed banana can also work, though it changes the flavor. Another option is to use butternut squash puree. Whichever you choose, ensure it has a similar texture to pumpkin puree for the best results. In this blog post, we explored how to make delicious pumpkin cookies. We covered the key ingredients, offered step-by-step instructions, and shared helpful tips for perfecting your cookies. You learned about flavor variations and how to store your treats to keep them fresh. With these tips, you can enjoy baking pumpkin cookies that everyone will love. Now, it’s time to gather your ingredients and get started! Happy baking!

Salted Caramel Pumpkin Cookies Irresistible Treat

- 2 pounds chicken wings - 4 tablespoons extra virgin olive oil - 6 cloves fresh garlic, minced - 1 teaspoon onion powder - 1 teaspoon smoked paprika - 1 teaspoon fine sea salt - 1/2 teaspoon freshly ground black pepper - 1/2 cup finely grated Parmesan cheese - 2 tablespoons fresh parsley, chopped - Optional: your favorite hot sauce for serving This dish starts with juicy chicken wings. I prefer using fresh wings since they have great texture. The olive oil helps them crisp up while baking. Fresh garlic gives a strong, rich flavor that I love. You can adjust the amount if you want a milder taste. For seasoning, I use onion powder and smoked paprika. They add depth and a hint of smokiness. Sea salt enhances all the flavors, while black pepper gives a bit of heat. The star is the Parmesan cheese, which melts just right when the wings come out of the oven. Garnishing with parsley adds a pop of color. It also brings freshness to the wings. If you're a fan of spice, a hot sauce on the side adds a nice kick. This recipe is all about balance and bold flavors, making it perfect for any occasion. - Preheat oven to 425°F (220°C). - Line a baking sheet with parchment paper. Start by heating your oven. This step is key to a crispy texture. The parchment paper will help keep the wings from sticking and make cleanup easy. - Combine chicken wings with olive oil and seasonings. - Ensure wings are evenly coated. In a large bowl, mix the chicken wings with olive oil, minced garlic, onion powder, smoked paprika, salt, and pepper. Use your hands to toss the wings until every piece is coated with the mix. This stage adds great flavor! - Bake wings for 30 minutes, flip, then bake for an additional 15-20 minutes. - Monitor for golden-brown crispness. After the first 30 minutes, take the wings out to flip them. This ensures they cook evenly. Then, place them back in the oven for 15-20 more minutes. Watch them closely. You want that perfect golden-brown color to show they are crispy and ready to enjoy! To get crispy wings, bake them in a single layer. This allows hot air to flow around each wing. If they touch, they will steam instead of crisp. For the best results, follow these cooking times: - Bake wings for 30 minutes at 425°F (220°C). - After flipping, bake for another 15-20 minutes. Check for a golden-brown color. To boost flavor, try adding extra spices or herbs. Here are some great options: - Cayenne pepper for heat. - Dried oregano for a nice touch. - Italian seasoning for a blend of herbs. You can also mix in different cheeses. Parmesan is great, but consider using: - Asiago for a sharp taste. - Mozzarella for a gooey texture. Dipping sauces make wings even better. Here are some top choices: - Ranch dressing for creaminess. - Buffalo sauce for a spicy kick. - Blue cheese dressing for a rich flavor. Pair your wings with sides like: - Celery sticks for crunch. - Carrot sticks to add sweetness. - French fries for a classic combo. {{image_4}} You can add a kick to your wings by mixing in some hot sauce. This makes the dish spicy and tasty. Just blend a few tablespoons of your favorite hot sauce into the olive oil and spice mix. If you want even more heat, try adding cayenne pepper or red pepper flakes. These options will bring a nice balance to the garlic and cheese flavor. You can cook these wings either in the oven or an air fryer. If you choose the air fryer, set it to 400°F (200°C) and cook for about 25 minutes. Flip them halfway through for even cooking. Both methods can yield crispy wings, but the air fryer often cooks them faster. The oven gives a more traditional roasted flavor. While chicken wings are classic, you can also use drumsticks or boneless chicken. If you use drumsticks, the cooking time may increase by about 10 minutes due to their size. For boneless chicken, reduce the cooking time to about 20 minutes, as they cook faster. Each type offers a unique texture and flavor, so feel free to experiment! After enjoying your wings, let them cool down. This step is key. If you store them hot, they can get soggy. Once cooled, place the wings in airtight containers. This helps keep them fresh and tasty. Make sure to seal the containers well to prevent air from getting in. When it's time to eat leftovers, you want them crispy again. The oven is the best choice. Preheat your oven to 375°F (190°C). Spread the wings out on a baking sheet and heat for about 10-15 minutes. Keep an eye on them to ensure they don’t burn. The microwave is quick but can make them soft. If you use the microwave, heat in short bursts, checking often. You can freeze cooked wings for later use. First, let them cool completely. Place the wings in a freezer-safe bag or container. Remove as much air as you can before sealing. They can last up to three months in the freezer. When ready to eat, thaw them in the fridge overnight. Reheat in the oven for the best texture. Enjoy your tasty wings anytime! To make your wings crispy, bake them at 425°F (220°C). Use a baking sheet lined with parchment paper. Spread the wings in a single layer. This helps air circulate around each wing. Flip the wings halfway through baking. This step ensures even browning. For the best results, keep an eye on them late in the cooking time. Yes, you can use frozen chicken wings. Just make sure to thaw them first. To thaw, place the wings in the fridge overnight. If you’re short on time, submerge them in cold water for about an hour. After thawing, pat the wings dry. This helps them crisp up better in the oven. Several sauces go great with baked garlic Parmesan wings. Here are some popular choices: - Ranch Dressing: Creamy and cool, it balances the heat from the wings. - Blue Cheese Dressing: Strong flavor that pairs well with garlic. - Buffalo Sauce: Adds a spicy kick for those who love heat. - Honey Mustard: Sweet and tangy, it offers a nice contrast to savory wings. Each sauce brings a unique flavor to the party, so feel free to mix and match! You now have a solid recipe for baked garlic Parmesan wings. You've learned about the key ingredients, the step-by-step process, and tips for the best flavor and crispiness. Whether you choose to add spice or try different wing cuts, these wings will impress. Remember to store leftovers properly to enjoy later. I hope you feel confident trying this recipe and making it your own. Enjoy your cooking!

Baked Garlic Parmesan Wings Crispy and Flavorful Dish

- 1 cup pumpkin puree - 1/2 cup unsalted butter, softened - 1 cup brown sugar, packed - 1/2 cup granulated sugar - 1 large egg - 1 teaspoon vanilla extract - 2 cups all-purpose flour - 1 teaspoon baking soda - 1/2 teaspoon baking powder - 1 teaspoon ground cinnamon - 1/2 teaspoon ground ginger - 1/4 teaspoon nutmeg - 1/4 teaspoon salt - 1 cup salted caramel sauce (store-bought or homemade) - Sea salt flakes for topping - Chocolate chips - Nuts (e.g., pecans or walnuts) - Vegan alternatives for butter and egg - Gluten-free flour options These ingredients make Salted Caramel Pumpkin Cookies a delight. The pumpkin puree gives them a moist texture and rich flavor. You can use chocolate chips or nuts for extra fun. If you need vegan options, swap the butter and egg for plant-based versions. You can also use gluten-free flour if you prefer. This recipe is flexible, so feel free to make it your own! - Preheat oven to 350°F (175°C). - Prepare baking sheet with parchment paper. - Cream the butter and sugars together in a large bowl. - Incorporate pumpkin, egg, and vanilla extract into the mixture. - Mix dry ingredients in a separate bowl. - Gradually combine wet and dry mixtures until just mixed. - Fold in salted caramel sauce gently. - Scoop dough onto prepared baking sheet, leaving space between each scoop. - Bake for 12-15 minutes until edges are golden. - Check cookie doneness by looking for set centers that are soft. - Cool cookies on baking sheet for a few minutes. - Transfer to wire rack to cool completely. - Drizzle cookies with caramel and sprinkle sea salt on top. To make the best salted caramel pumpkin cookies, avoid overmixing the dough. Mix until just combined. This keeps your cookies soft and chewy. Let your cookies cool for at least 10 minutes on the baking sheet. This helps them firm up and enhance their flavor. After that, move them to a wire rack to cool completely. You can serve these cookies in fun ways. Place them on a decorative platter. Add a small bowl of extra salted caramel for dipping. This adds a nice touch. These cookies pair well with coffee or milk. The sweet and salty flavors balance perfectly with a warm drink. Watch your baking temperature! If your oven runs hot, the cookies may burn. Always check with an oven thermometer. Also, measure your ingredients carefully. Too much flour can make the cookies dry. Use the spoon and level method for accuracy. This ensures your cookies turn out great every time. {{image_4}} You can take these cookies to a new level by adding spices. Try a pinch of cloves or allspice for extra warmth. These spices blend well with pumpkin and caramel. They add depth and complexity to each bite. You can also play with the type of caramel you use. Swap store-bought caramel for homemade. This adds a personal touch and can enhance the flavor. You might even try using flavored caramel, like vanilla or sea salt. Each option gives a new twist to your cookies. If you need a gluten-free option, use almond or coconut flour instead of all-purpose flour. Both flours work well and keep the cookies soft. They also maintain the rich flavor we love. For those watching sugar intake, consider low-sugar or sugar-free options. Substitute the sugars with a sweetener like stevia or erythritol. This way, you can enjoy these cookies without the extra sugar. Mix-ins can change the game for these cookies. You can add chocolate chips for a rich taste. Dark or milk chocolate pairs well with pumpkin and caramel. Dried fruit like cranberries or raisins can also enhance flavor. They add chewiness and a bit of tartness. You can even experiment with different nut butters in the dough. Peanut butter or almond butter adds a nutty taste. Each mix-in can create a unique cookie experience. To keep your salted caramel pumpkin cookies fresh, store them in an airtight container. This helps to keep the cookies soft and moist. If you want to enjoy them later, freezing is a great option. Place the cookies in a single layer on a baking sheet. Freeze until firm, then transfer to a freezer-safe bag or container. This method keeps them from sticking together. At room temperature, these cookies stay fresh for about five days. If you refrigerate them, they can last up to a week. Frozen cookies can be kept for about three months. Just remember to label your container with the date, so you know when to enjoy them. If you freeze your cookies, you can soften them easily. Let them sit at room temperature for about 10-15 minutes before eating. For best results, reheat them in a microwave for just 10-15 seconds. This warms them without drying them out. Enjoy your cookies warm, with a touch of extra salted caramel on top! Pumpkin adds moisture and flavor to the cookies. It keeps them soft and chewy. The warm taste of pumpkin pairs well with spices like cinnamon and ginger. This makes every bite comforting and rich. Yes, you can use fresh pumpkin. First, you need to cook the pumpkin. Cut it in half and remove the seeds. Roast it in the oven at 350°F (175°C) for about 45 minutes. Once soft, scoop the flesh out and blend it until smooth. This will give you fresh pumpkin puree. Making salted caramel sauce is simple. You need: - 1 cup sugar - 6 tablespoons butter, cut into pieces - 1/2 cup heavy cream - 1 teaspoon sea salt 1. In a pan, heat the sugar over medium heat. Stir until it melts and turns amber. 2. Add the butter and stir until melted. 3. Slowly add the cream and stir until smooth. 4. Remove from heat and mix in the salt. Let it cool before using. Yes, you can adapt them. For vegan cookies, use a plant-based butter and a flax egg instead of a real egg. For gluten-free, swap all-purpose flour with almond flour or a blend of gluten-free flours. You can also reduce the sugar or use sugar substitutes for a low-sugar option. Look for a golden edge on the cookies. The center should look set but soft. You can press lightly on the top; it should spring back. If it leaves a mark, they need more time. Keep an eye on them after 12 minutes to avoid overbaking. These Salted Caramel Pumpkin Cookies combine warmth and sweetness in every bite. You learned about key ingredients, step-by-step instructions, and tips to perfect your baking. Don't forget the fun variations and storage tricks to keep cookies fresh. Experiment with flavors and dietary needs to make these cookies your own. With these methods, you can impress friends and family. Baking can be simple and enjoyable. Start your baking adventure today and create delicious memories!

Salted Caramel Pumpkin Cookies Irresistible Fall Treat

PREV 1 … 11 12 13 … 17 NEXT
snack joy kitchen

explore

DessertsDinnerAppetizersDrinks

Our Policies

  • Cookie Policy
  • Copyright Policy
  • Disclaimer
  • GDPR Policy
  • Terms Of Use
Back to Top
  • About
  • Contact Us
  • Privacy Policy
© 2025 snack joy kitchen