Honey Butter Garlic Shrimp Skillet Savory Delight

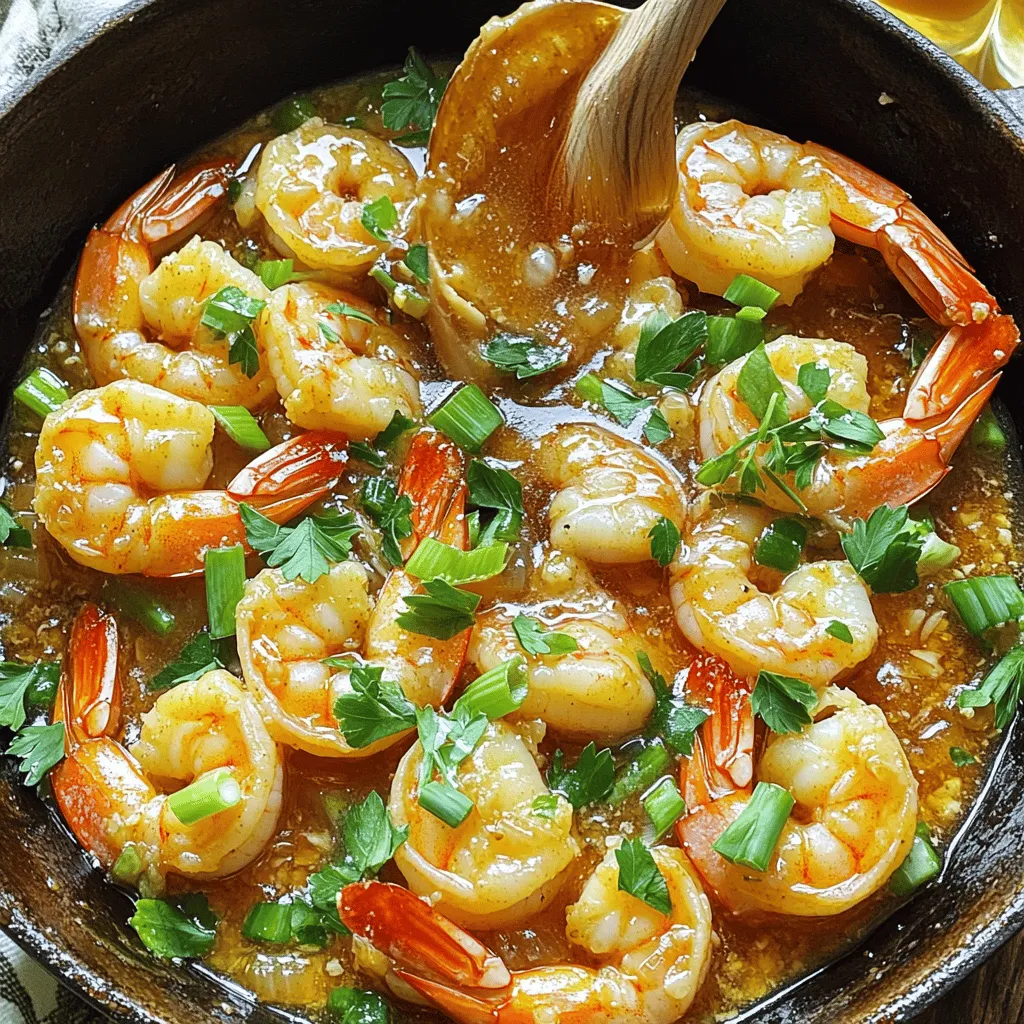
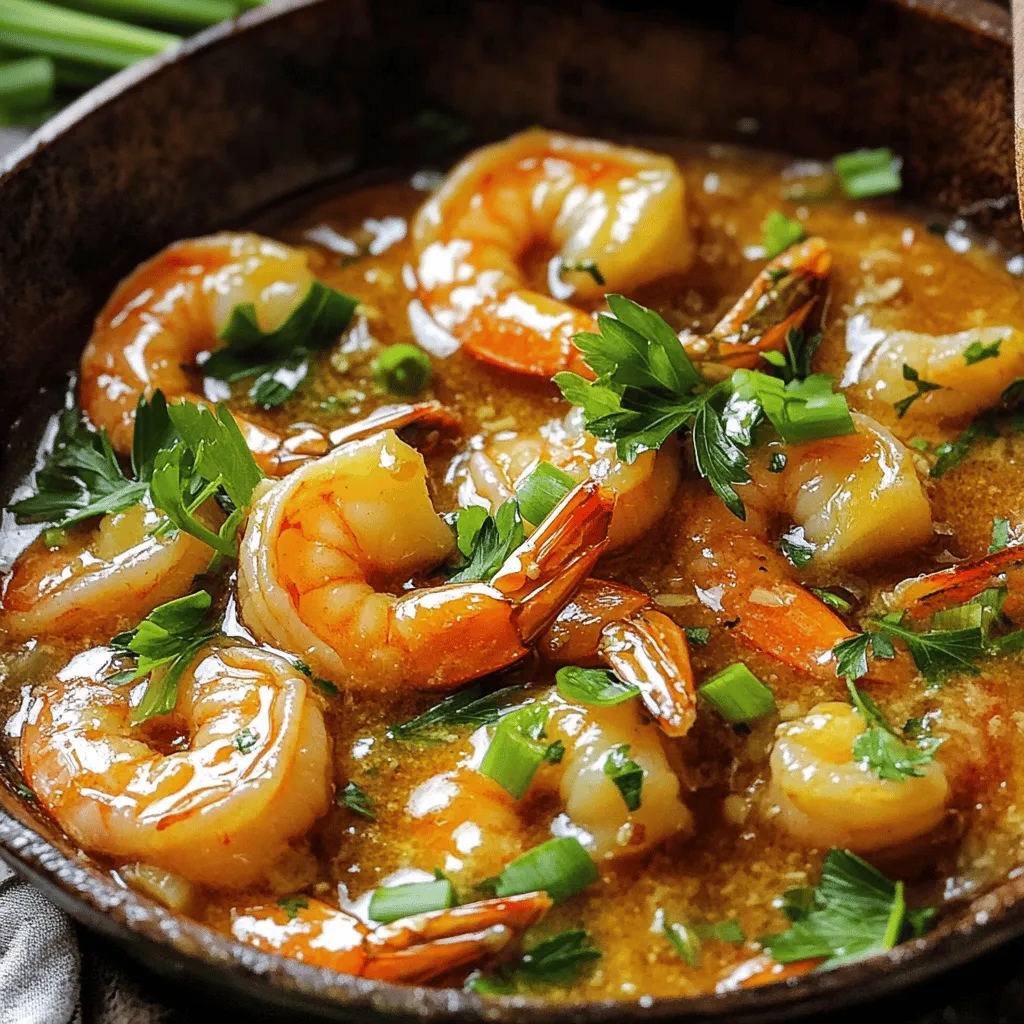
If you’re craving a quick, flavorful meal, look no further! My Honey Butter Garlic Shrimp Skillet brings together succulent shrimp, rich butter, and sweet honey for an easy dish bursting with flavor. Perfect for busy weeknights or special occasions, this recipe is sure to impress. Join me as we explore just how simple and satisfying cooking can be—let’s get started on this savory delight!

- 1 lb large shrimp, peeled and deveined - 2 tablespoons unsalted butter - 3 tablespoons honey - 4 cloves of garlic, finely minced - 1 tablespoon soy sauce - 1 teaspoon smoked paprika - 1/2 teaspoon red pepper flakes (optional) - Salt and pepper to taste - 2 green onions, finely sliced (for garnish) - Fresh parsley, finely chopped (for garnish) - Skillet (preferably heavy-bottomed) - Measuring spoons and cups - Spatula or cooking spoon The key to making Honey Butter Garlic Shrimp Skillet is having the right ingredients and tools. Start with fresh shrimp. Look for large ones that are peeled and deveined. This saves you time and lets you get right to cooking. Butter adds a rich flavor. Using unsalted butter helps you control the saltiness. Honey provides sweetness and helps balance the garlic. Minced garlic adds depth. Soy sauce adds a savory kick. Smoked paprika gives a nice warmth, and red pepper flakes can spice things up if you like heat. Don’t forget the garnishes! Green onions and parsley add a fresh touch. They make your dish look vibrant and appealing. For cooking, a heavy-bottomed skillet works best. It distributes heat evenly, helping your shrimp cook perfectly. Measuring spoons and a spatula or cooking spoon are also essential. These tools help you measure and stir with ease. With these ingredients and tools ready, you’re set to create a delicious dish! First, rinse the shrimp under cold running water. This step helps clean them well. After rinsing, pat them dry with a paper towel. This removes excess moisture, which prevents steaming when you cook them. Next, season the shrimp with a sprinkle of salt and pepper. This simple step enhances their natural taste. Now, grab a large, heavy-bottomed skillet. Place it on the stove over medium-high heat. Add the unsalted butter to the skillet. As the butter melts, watch for it to bubble lightly. This means it's ready for the next step. Carefully add the minced garlic to the skillet. Sauté the garlic for about one minute. Stir it often to keep it from burning. Burnt garlic can ruin the dish by adding a bitter flavor. After the garlic is fragrant, it’s time for the shrimp. Place them in the skillet in a single layer. Sprinkle the smoked paprika and red pepper flakes on top. Cook the shrimp for two to three minutes without stirring. This allows them to sear nicely. Flip the shrimp and cook the other side for another two to three minutes. They should turn a lovely pink color when done. Once the shrimp are cooked through, drizzle the honey and soy sauce over them. Gently stir to coat each shrimp evenly. Let the mixture cook for another two to three minutes. This allows the sauce to thicken and cling to the shrimp, making every bite delicious. To get the best shrimp, cook them for just 2-3 minutes per side. They turn pink and opaque when done. To check doneness, cut one shrimp in half. If it’s white inside, it’s ready! Adding herbs and spices makes a big difference. I recommend using fresh parsley for a pop of color and flavor. To balance sweetness and saltiness, adjust the honey and soy sauce. Start with less honey, then taste and add more if needed. Garlic can burn quickly, so keep an eye on it while cooking. Stir it often and remove it from heat if it starts to brown. When cooking shrimp, don’t overcrowd the skillet. This helps them sear nicely without steaming. {{image_4}} You can easily adapt this dish to fit different diets. For gluten-free options, use gluten-free soy sauce. This swaps out regular soy sauce while keeping the flavor strong. If you want a sweet twist, try using maple syrup in place of honey. This change works well and keeps the dish sticky and tasty. To add a bright note, mix in some citrus zest. Lemon or lime zest adds a fresh pop. You can also include different veggies. Broccoli, bell peppers, or snap peas work great. Just toss them in the skillet when you cook the shrimp for added color and nutrition. Adjusting the spice level is simple. If you want it milder, skip the red pepper flakes. For more heat, add extra flakes or a dash of hot sauce. You can also explore spice blends. Try Cajun seasoning or chili powder for a unique twist. Each change gives the dish a whole new vibe. To store any leftover honey butter garlic shrimp, place them in an airtight container. This method keeps them fresh and tasty. Make sure the shrimp cool down before sealing. You can keep them in the fridge for up to two days. If you can, eat them sooner for the best flavor. When you reheat shrimp, use low heat to keep them tender. The best way is to use a skillet. Add a splash of water or broth to help keep them moist. Heat for just a few minutes until warm. Avoid cooking them too long; otherwise, they will become rubbery and tough. If you want to freeze the shrimp, place them in a freezer-safe bag. Squeeze out extra air before sealing the bag. You can freeze them for up to three months. When you are ready to use them, thaw shrimp in the fridge overnight. This method is safe and helps keep their texture. You can tell shrimp is cooked by its color and texture. Cooked shrimp turns pink and opaque. If the shrimp curls into a "C" shape, it is ready. Avoid overcooking, as this makes the shrimp tough and rubbery. Yes, you can use frozen shrimp! Start by thawing them in the fridge overnight or under cold water. Pat them dry well before seasoning. This helps the shrimp cook evenly and prevents excess water in the skillet. This dish pairs well with rice or noodles. A fresh salad also adds a nice crunch. You can serve it with steamed veggies for a colorful plate. Consider adding crusty bread to soak up the sweet sauce, too. You can easily adjust the recipe! To double it, simply double all the ingredients. Cooking time stays about the same, but check for doneness. If you halve the recipe, cut the ingredients in half and watch the cooking time closely, as it may be shorter. You can create a delicious Honey Butter Garlic Shrimp with simple steps. We covered the ingredients, essential tools, and cooking process. Remember to avoid burning the garlic and check shrimp doneness. Feel free to customize the recipe with your favorite flavors or adjust cooking times. Store leftovers correctly to enjoy another meal later. With these tips and tricks, you'll impress anyone with your cooking. Enjoy making this shrimp dish for a tasty treat!

Ingredients

Complete List of Ingredients

– 1 lb large shrimp, peeled and deveined

– 2 tablespoons unsalted butter

– 3 tablespoons honey

– 4 cloves of garlic, finely minced

– 1 tablespoon soy sauce

– 1 teaspoon smoked paprika

– 1/2 teaspoon red pepper flakes (optional)

– Salt and pepper to taste

– 2 green onions, finely sliced (for garnish)

– Fresh parsley, finely chopped (for garnish)

Essential Cooking Equipment

– Skillet (preferably heavy-bottomed)

– Measuring spoons and cups

– Spatula or cooking spoon

The key to making Honey Butter Garlic Shrimp Skillet is having the right ingredients and tools. Start with fresh shrimp. Look for large ones that are peeled and deveined. This saves you time and lets you get right to cooking.

Butter adds a rich flavor. Using unsalted butter helps you control the saltiness. Honey provides sweetness and helps balance the garlic. Minced garlic adds depth. Soy sauce adds a savory kick. Smoked paprika gives a nice warmth, and red pepper flakes can spice things up if you like heat.

Don’t forget the garnishes! Green onions and parsley add a fresh touch. They make your dish look vibrant and appealing.

For cooking, a heavy-bottomed skillet works best. It distributes heat evenly, helping your shrimp cook perfectly. Measuring spoons and a spatula or cooking spoon are also essential. These tools help you measure and stir with ease.

With these ingredients and tools ready, you’re set to create a delicious dish!

Step-by-Step Instructions

Preparing the Shrimp

First, rinse the shrimp under cold running water. This step helps clean them well. After rinsing, pat them dry with a paper towel. This removes excess moisture, which prevents steaming when you cook them. Next, season the shrimp with a sprinkle of salt and pepper. This simple step enhances their natural taste.

Cooking Process Explained

Now, grab a large, heavy-bottomed skillet. Place it on the stove over medium-high heat. Add the unsalted butter to the skillet. As the butter melts, watch for it to bubble lightly. This means it’s ready for the next step. Carefully add the minced garlic to the skillet. Sauté the garlic for about one minute. Stir it often to keep it from burning. Burnt garlic can ruin the dish by adding a bitter flavor.

Adding and Cooking the Shrimp

After the garlic is fragrant, it’s time for the shrimp. Place them in the skillet in a single layer. Sprinkle the smoked paprika and red pepper flakes on top. Cook the shrimp for two to three minutes without stirring. This allows them to sear nicely. Flip the shrimp and cook the other side for another two to three minutes. They should turn a lovely pink color when done.

Once the shrimp are cooked through, drizzle the honey and soy sauce over them. Gently stir to coat each shrimp evenly. Let the mixture cook for another two to three minutes. This allows the sauce to thicken and cling to the shrimp, making every bite delicious.

Tips & Tricks

Perfecting Your Shrimp

To get the best shrimp, cook them for just 2-3 minutes per side. They turn pink and opaque when done. To check doneness, cut one shrimp in half. If it’s white inside, it’s ready!

Enhancing Flavor and Texture

Adding herbs and spices makes a big difference. I recommend using fresh parsley for a pop of color and flavor. To balance sweetness and saltiness, adjust the honey and soy sauce. Start with less honey, then taste and add more if needed.

Avoiding Common Mistakes

Garlic can burn quickly, so keep an eye on it while cooking. Stir it often and remove it from heat if it starts to brown. When cooking shrimp, don’t overcrowd the skillet. This helps them sear nicely without steaming.

Variations

Dietary Substitutions

You can easily adapt this dish to fit different diets. For gluten-free options, use gluten-free soy sauce. This swaps out regular soy sauce while keeping the flavor strong. If you want a sweet twist, try using maple syrup in place of honey. This change works well and keeps the dish sticky and tasty.

Flavor Enhancements

To add a bright note, mix in some citrus zest. Lemon or lime zest adds a fresh pop. You can also include different veggies. Broccoli, bell peppers, or snap peas work great. Just toss them in the skillet when you cook the shrimp for added color and nutrition.

Customizing Heat Levels

Adjusting the spice level is simple. If you want it milder, skip the red pepper flakes. For more heat, add extra flakes or a dash of hot sauce. You can also explore spice blends. Try Cajun seasoning or chili powder for a unique twist. Each change gives the dish a whole new vibe.

Storage Info

Leftover Storage Guidelines

To store any leftover honey butter garlic shrimp, place them in an airtight container. This method keeps them fresh and tasty. Make sure the shrimp cool down before sealing. You can keep them in the fridge for up to two days. If you can, eat them sooner for the best flavor.

Reheating Tips

When you reheat shrimp, use low heat to keep them tender. The best way is to use a skillet. Add a splash of water or broth to help keep them moist. Heat for just a few minutes until warm. Avoid cooking them too long; otherwise, they will become rubbery and tough.

Freezing Instructions

If you want to freeze the shrimp, place them in a freezer-safe bag. Squeeze out extra air before sealing the bag. You can freeze them for up to three months. When you are ready to use them, thaw shrimp in the fridge overnight. This method is safe and helps keep their texture.

FAQs

How do I know when shrimp is cooked?

You can tell shrimp is cooked by its color and texture. Cooked shrimp turns pink and opaque. If the shrimp curls into a “C” shape, it is ready. Avoid overcooking, as this makes the shrimp tough and rubbery.

Can I use frozen shrimp for this recipe?

Yes, you can use frozen shrimp! Start by thawing them in the fridge overnight or under cold water. Pat them dry well before seasoning. This helps the shrimp cook evenly and prevents excess water in the skillet.

What to serve with Honey Butter Garlic Shrimp Skillet?

This dish pairs well with rice or noodles. A fresh salad also adds a nice crunch. You can serve it with steamed veggies for a colorful plate. Consider adding crusty bread to soak up the sweet sauce, too.

Can I double or halve the recipe?

You can easily adjust the recipe! To double it, simply double all the ingredients. Cooking time stays about the same, but check for doneness. If you halve the recipe, cut the ingredients in half and watch the cooking time closely, as it may be shorter.

You can create a delicious Honey Butter Garlic Shrimp with simple steps. We covered the ingredients, essential tools, and cooking process. Remember to avoid burning the garlic and check shrimp doneness. Feel free to customize the recipe with your favorite flavors or adjust cooking times. Store leftovers correctly to enjoy another meal later. With these tips and tricks, you’ll impress anyone with your cooking. Enjoy making this shrimp dish for a tasty treat!

- 1 lb large shrimp, peeled and deveined - 2 tablespoons unsalted butter - 3 tablespoons honey - 4 cloves of garlic, finely minced - 1 tablespoon soy sauce - 1 teaspoon smoked paprika - 1/2 teaspoon red pepper flakes (optional) - Salt and pepper to taste - 2 green onions, finely sliced (for garnish) - Fresh parsley, finely chopped (for garnish) - Skillet (preferably heavy-bottomed) - Measuring spoons and cups - Spatula or cooking spoon The key to making Honey Butter Garlic Shrimp Skillet is having the right ingredients and tools. Start with fresh shrimp. Look for large ones that are peeled and deveined. This saves you time and lets you get right to cooking. Butter adds a rich flavor. Using unsalted butter helps you control the saltiness. Honey provides sweetness and helps balance the garlic. Minced garlic adds depth. Soy sauce adds a savory kick. Smoked paprika gives a nice warmth, and red pepper flakes can spice things up if you like heat. Don’t forget the garnishes! Green onions and parsley add a fresh touch. They make your dish look vibrant and appealing. For cooking, a heavy-bottomed skillet works best. It distributes heat evenly, helping your shrimp cook perfectly. Measuring spoons and a spatula or cooking spoon are also essential. These tools help you measure and stir with ease. With these ingredients and tools ready, you’re set to create a delicious dish! First, rinse the shrimp under cold running water. This step helps clean them well. After rinsing, pat them dry with a paper towel. This removes excess moisture, which prevents steaming when you cook them. Next, season the shrimp with a sprinkle of salt and pepper. This simple step enhances their natural taste. Now, grab a large, heavy-bottomed skillet. Place it on the stove over medium-high heat. Add the unsalted butter to the skillet. As the butter melts, watch for it to bubble lightly. This means it's ready for the next step. Carefully add the minced garlic to the skillet. Sauté the garlic for about one minute. Stir it often to keep it from burning. Burnt garlic can ruin the dish by adding a bitter flavor. After the garlic is fragrant, it’s time for the shrimp. Place them in the skillet in a single layer. Sprinkle the smoked paprika and red pepper flakes on top. Cook the shrimp for two to three minutes without stirring. This allows them to sear nicely. Flip the shrimp and cook the other side for another two to three minutes. They should turn a lovely pink color when done. Once the shrimp are cooked through, drizzle the honey and soy sauce over them. Gently stir to coat each shrimp evenly. Let the mixture cook for another two to three minutes. This allows the sauce to thicken and cling to the shrimp, making every bite delicious. To get the best shrimp, cook them for just 2-3 minutes per side. They turn pink and opaque when done. To check doneness, cut one shrimp in half. If it’s white inside, it’s ready! Adding herbs and spices makes a big difference. I recommend using fresh parsley for a pop of color and flavor. To balance sweetness and saltiness, adjust the honey and soy sauce. Start with less honey, then taste and add more if needed. Garlic can burn quickly, so keep an eye on it while cooking. Stir it often and remove it from heat if it starts to brown. When cooking shrimp, don’t overcrowd the skillet. This helps them sear nicely without steaming. {{image_4}} You can easily adapt this dish to fit different diets. For gluten-free options, use gluten-free soy sauce. This swaps out regular soy sauce while keeping the flavor strong. If you want a sweet twist, try using maple syrup in place of honey. This change works well and keeps the dish sticky and tasty. To add a bright note, mix in some citrus zest. Lemon or lime zest adds a fresh pop. You can also include different veggies. Broccoli, bell peppers, or snap peas work great. Just toss them in the skillet when you cook the shrimp for added color and nutrition. Adjusting the spice level is simple. If you want it milder, skip the red pepper flakes. For more heat, add extra flakes or a dash of hot sauce. You can also explore spice blends. Try Cajun seasoning or chili powder for a unique twist. Each change gives the dish a whole new vibe. To store any leftover honey butter garlic shrimp, place them in an airtight container. This method keeps them fresh and tasty. Make sure the shrimp cool down before sealing. You can keep them in the fridge for up to two days. If you can, eat them sooner for the best flavor. When you reheat shrimp, use low heat to keep them tender. The best way is to use a skillet. Add a splash of water or broth to help keep them moist. Heat for just a few minutes until warm. Avoid cooking them too long; otherwise, they will become rubbery and tough. If you want to freeze the shrimp, place them in a freezer-safe bag. Squeeze out extra air before sealing the bag. You can freeze them for up to three months. When you are ready to use them, thaw shrimp in the fridge overnight. This method is safe and helps keep their texture. You can tell shrimp is cooked by its color and texture. Cooked shrimp turns pink and opaque. If the shrimp curls into a "C" shape, it is ready. Avoid overcooking, as this makes the shrimp tough and rubbery. Yes, you can use frozen shrimp! Start by thawing them in the fridge overnight or under cold water. Pat them dry well before seasoning. This helps the shrimp cook evenly and prevents excess water in the skillet. This dish pairs well with rice or noodles. A fresh salad also adds a nice crunch. You can serve it with steamed veggies for a colorful plate. Consider adding crusty bread to soak up the sweet sauce, too. You can easily adjust the recipe! To double it, simply double all the ingredients. Cooking time stays about the same, but check for doneness. If you halve the recipe, cut the ingredients in half and watch the cooking time closely, as it may be shorter. You can create a delicious Honey Butter Garlic Shrimp with simple steps. We covered the ingredients, essential tools, and cooking process. Remember to avoid burning the garlic and check shrimp doneness. Feel free to customize the recipe with your favorite flavors or adjust cooking times. Store leftovers correctly to enjoy another meal later. With these tips and tricks, you'll impress anyone with your cooking. Enjoy making this shrimp dish for a tasty treat!

Honey Butter Garlic Shrimp Skillet

Discover the deliciousness of honey butter garlic shrimp skillet! This quick and easy recipe combines succulent shrimp with a sweet and savory honey garlic sauce in just 15 minutes. Perfect for weeknight dinners or impressing guests. Enjoy a burst of flavor with every bite. Ready to make a mouthwatering dish that everyone will love? Click through to explore this irresistible recipe and elevate your cooking game!

Ingredients
  

1 lb large shrimp, peeled and deveined

2 tablespoons unsalted butter

3 tablespoons honey

4 cloves of garlic, finely minced

1 tablespoon soy sauce

1 teaspoon smoked paprika

1/2 teaspoon red pepper flakes (optional, for added heat)

Salt and pepper to taste

2 green onions, finely sliced (for garnish)

Fresh parsley, finely chopped (for garnish)

Instructions
 

Prep the Shrimp: Begin by rinsing the shrimp under cold running water. Once rinsed, gently pat them dry with a paper towel to remove excess moisture. Season the shrimp with a sprinkle of salt and pepper to enhance their natural flavor.

    Heat the Skillet: In a large, heavy-bottomed skillet, add the butter and heat over medium-high heat. Allow the butter to melt completely until it begins to bubble lightly.

      Add Garlic: With the butter bubbling, carefully add the minced garlic to the skillet. Sauté the garlic for approximately 1 minute, stirring frequently until it becomes fragrant. Be cautious not to let it brown, as burnt garlic can impart a bitter flavor.

        Cook the Shrimp: Place the seasoned shrimp in the skillet in a single, even layer. To the shrimp, sprinkle the smoked paprika and red pepper flakes (if using). Cook for 2-3 minutes without stirring, letting the shrimp sear until they turn a lovely shade of pink. Flip the shrimp over to cook the other side for another 2-3 minutes until fully cooked through and opaque.

          Make the Sauce: Drizzle the honey and soy sauce over the shrimp in the skillet. Gently stir the mixture to coat each shrimp evenly with the honey and soy sauce. Allow it to cook for an additional 2-3 minutes, letting the sauce reduce slightly until it thickens and clings to the shrimp.

            Garnish and Serve: Once cooked, remove the skillet from the heat. Garnish the dish with freshly sliced green onions and a generous sprinkle of chopped parsley for a vibrant finish.

              - Prep Time: 10 minutes | Total Time: 15 minutes | Servings: 4

                - Presentation Tips: Serve the vibrant honey butter garlic shrimp directly in the skillet for a rustic look, or transfer it to a decorative serving platter. Drizzle a little extra honey over the top for added sweetness and serve with lemon or lime wedges on the side to provide a refreshing burst of acidity that complements the dish beautifully.